2. Align the groove on the backside of the clean water tank with the handle and drop straight down.
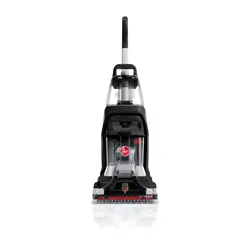
OPERATION
CAUTION: DO NOT USE THIS EXTRACTOR ON HARD FLOORS. USING THIS PRODUCT ON HARD FLOORS MAY SCRATCH OR DAMAGE YOUR FLOOR.
CAUTION: Use extra care when cleaning on stairs. To avoid personal injury or damage, and to prevent the cleaner from falling, always place cleaner at the bottom of stairs or on floor. Do not place cleaner on stairs or furniture, as it may result in injury or damage.
WARNING: To reduce the risk of personal injury, unplug before cleaning or servicing.
FILL THE CLEAN WATER TANK
1.Lift up to remove the Clean Water Tank, then remove the cap and add warm water to the fill line. Add 3oz. of Hoover Solution. Secure cap.
2. Align the tank and firmly press it into place.
NOTE: Test for colorfastness in a small, hidden area. Gently rub surface with a dampened white cloth. Wait ten minutes and check for color removal or bleed with a white paper towel.
NOTE: For the best results, vacuum carpet and upholstery thoroughly with a HOOVER® vacuum before use.
QUICK CLEAN MODE
NOTE: Feature included with select models only
1.To engage Quick Clean Mode, turn knob counterclockwise until engaged.
2. Return to Deep Clean mode by turning knob clockwise.
HOW TO USE
1.Plug the cord into an electrical outlet.
2. Turn unit ON/OFF with side pedal.
3. Recline unit with the middle pedal.
4. Squeeze trigger to apply water and cleaning solution.
5. Slowly push forward with trigger pressed to wash, then slowly pull backwards with trigger released to dry.
NOTE: For Best Results, rinse the carpet after deep cleaning with clean water only. This will remove residual carpet cleaning solution from your carpets. To rinse with clean water only, remove the solution tank from the unit and then repeat steps 4 and 5.
EMPTY THE RECOVERY TANK
NOTE: To maintain proper suction, empty Tank when Red Bobber is visible.
Turn the cleaner off and unplug from electrical outlet.
Grab the Recovery Water Tank handle and lift up and outward to remove it. A second handle is provided on the back of the Recovery tank for carrying the tank.
Unlatch the tank lid and empty it. Rinse and allow to air dry
USING THE HOSE
CAUTION: Always turn off appliance before connecting or disconnecting hose.
CAUTION: Not to be used for grooming a pet.
Attach hose by opening the Hose Connection Port on the nozzle.
Hold open the Hose Solution Port door. Plug the Hose Solution Tube connector firmly into the Hose Solution Port.
To drain the hose, run the unit and do not press the spray button on the hose/ tool end.
REMOVING THE HOSE
Press the button and firmly pull up to remove the Hose Solution Tube from the Solution Port.
The Hose port Door is spring loaded to close automatically. Ensure the Hose Port Door is fully shut for the best performance.
NOTE: To ensure maximum performance and to protect your carpet, be sure to place the handle in the upright position while using the hose.
HOW TO USE TOOLS
CAUTION: To reduce the risk of injury from moving parts - Unplug before connecting SpinScrub® Hand Tool. Not to be used for grooming pets.
Place the handle in the upright position. This will shut off the SpinScrub® brushes.
Connect tool to hose by sliding it onto the connector until it locks into place.
Using your thumb, push forward and up on the latch to remove tool. NOTE: The Antimicrobial pet tool included with select models only has a button to release the tool from the hose.
Turn cleaner ON.
Pre-spray the carpeted stair by holding the tool about one inch above the carpet and push it forward while pressing the trigger.
Position tool against the riser and slightly press it into carpet pile. Press the trigger and pull the tool slowly over the carpet. Release trigger at end of stroke.
Lift tool, and position it against riser. Pull tool slowly over carpet without pressing trigger.
NOTE: Overlap strokes by 1/2 inch to help prevent streaking.
MAINTENANCE
WARNING:To reduce the risk of personal injury, unplug before cleaning or servicing.
IMPORTANT: To prevent possible leaking, remove Clean Water Tank and Dirty Water Tank.
This product contains no serviceable parts. If appliance is not working as it should, has been dropped, damaged, left outdoors, or dropped into water, call customer service at 1.800.944.9200 prior to continuing use.
LUBRICATION: The motor is equipped with bearings which contain sufficient lubrication for their lifetime. The addition of lubricant could cause damage. Do not add lubricant to motor bearings.
CORD STORAGE: Wrap the power cord around the cord hooks for convenient storage. Attach the plug end to the cord.
NOZZLE CARE
1.First turn off and unplug the carpet cleaner. Remove Recovery Tank.
2. Pull up on the Nozzle slightly to unsnap, then pull the Nozzle forward to remove it from carpet cleaner. Rinse with water and allow to air dry.
3. To replace it, position Nozzle onto the front end while making sure to align the tabs at the bottom of the Nozzle with the notches on the foot.
4. Snap Nozzle to foot and rotate the latch into the lock position.
IMPORTANT: The nozzle must be in the proper position for the Dirty Water Tank to go on properly and for the unit to have proper suction.
BRUSH CARE
1.Remove the tanks and place the handle in the upright position, tilt the cleaner back until handle rests on the floor.
2. Push the latches out on the side of the foot until they lock open.
3. The Brush assembly should be free to pull out.
4. Rinse the brushes under running water.
5. Replace them by aligning the center drive post and note the arrows indicating the front of the machine. Push firmly until the latches lock into place.
TROUBLESHOOTING
WARNING: To reduce the risk of personal injury, unplug before cleaning or servicing.
CAUTION:To reduce the risk of injury from moving parts - Unplug before servicing. Do not use cleaner without brushes in place.
THIS PRODUCT CONTAINS NO SERVICEABLE PARTS.
IF APPLIANCE IS NOT WORKING AS IT SHOULD, HAS BEEN DROPPED, DAMAGED, LEFT OUTDOORS, OR DROPPED INTO WATER, CALL CUSTOMER SERVICE AT 1-800-944-9200 PRIOR TO CONTINUING USE.
IMPORTANT SAFETY INSTRUCTIONS
WARNING: When using an electrical product, basic precautions should always be followed to avoid electric shock, fire, and/or serious injury, including the following:
• Fully assemble product prior to use.
• Operate cleaner only at voltage specified on data plate on lower back of cleaner.
• Do not leave appliance when plugged in. Unplug from outlet when not in use and before cleaning or servicing.
• Use indoors only. Do not immerse. Use only on surfaces moistened by the cleaning process.
• To Reduce the Risk of Fire and Electric Shock due to internal component damage, use only Hoover® Cleaning Fluids intended for use with this appliance.
• Do not allow to be used as a toy. Not intended for use by children age 12 and under. Close supervision is necessary when used by or near children. To avoid injury or damage, keep children away from product, and do not allow children to place fingers or other objects into any openings.
• Use only as described in this user’s manual. Use only HOOVER® recommended attachments.
• Do not use product with damaged cord or plug. If product is not working as it should, has been dropped, damaged, left outdoors, or dropped into water, call customer service at 1-800-944-9200 prior to continuing use.
• Do not pull or carry by cord, use cord as a handle, close a door on cord, or pull cord around sharp edges or corners. Do not place product on cord. Do not run appliance over cord. Keep cord away from heated surfaces.
• Do not unplug by pulling on cord. To unplug, grasp the plug, not the cord.
• Do not handle plug or appliance with wet hands.
• Do not put any object into openings. Do not use with any opening blocked; keep free of dust, lint, hair, and anything that may reduce airflow.
• Keep hair, loose clothing, fingers, and all parts of body away from openings and moving parts.
• Turn off all controls before unplugging.
• Use extra care when cleaning on stairs. To avoid personal injury or damage, and to prevent the cleaner from falling, always place cleaner at bottom of stairs or on floor. Do not place cleaner on stairs or furniture, as it may result in injury or damage. • Do not use to pick up flammable or combustible liquids, such as gasoline, or fine wood sandings, or use in areas where they may be present.
• Connect to a properly grounded outlet only. See Grounding Instructions.
• Do not pick up anything that is burning or smoking, such as cigarettes, matches, or hot ashes.
• Do not use without filters and tanks in place. • Do not clean over floor electrical outlets.
CAUTION: TO REDUCE THE RISK OF DAMAGE:
• Avoid picking up hard, sharp objects with this product, as they may cause damage.
• Store appropriately indoors in a dry place. Do not expose machine to freezing temperatures.
• Do not use sharp objects to clean out hose as they can cause damage.
• To assist in reducing drying time, be certain the area is well ventilated when using detergents and other cleaners with this machine.
• To help prevent matting and resoiling, avoid contact with carpets until they are dry. Keep children and pets away from carpets until they are completely dry.
• Do not store extractor with solution in tanks.
• With brushes on, do not allow cleaner to sit in one location for an extended period of time, as damage to floor can result.
• Do not use this extractor on hard floors. Using this product on hard floors may scratch or damage your floor.
• Water will drip from the brushes and underside of the product after use and may puddle. To avoid damage to wood and laminate flooring and to avoid potential slip hazard, after use (a) do not leave the product on wood and laminate surfaces and remove to a hard surface and (b) place unit on absorbent material (such as a towel) to soak up drips.
GROUNDING INSTRUCTIONS
This appliance must be grounded. If it should malfunction or breakdown, grounding provides a path of least resistance for electric current to reduce the risk of electric shock. This appliance is equipped with a cord having an equipment-grounding conductor (C) and grounding plug (A). The plug must be inserted into an appropriate outlet (B) that is properly installed and grounded in accordance with all local codes and ordinances.
WARNING: Improper connection of the equipment-grounding conduc- tor can result in the risk of electric shock. Check with a qualified electrician or service person if you are in doubt as to whether the outlet is properly grounded. Do not modify the plug provided with the appliance - if it will not fit the outlet, have a proper outlet installed by a qualified electrician. This appliance is for use on a nominal 120-volt circuit and has a grounding plug that looks like the plug (A) illustrated in Fig. 1.
A temporary adapter (D) may be used to connect this plug to a 2-pole receptacle (E) if a properly grounded outlet is not available (Fig. 2). The temporary adapter should be used only until a properly grounded outlet (B) can be installed by a qualified electrician (Fig. 1). The green colored rigid ear, lug, or the like (F) extending from the adapter must be connected to a permanent ground (G) such as a properly grounded outlet box cover (Fig. 2). Whenever the adapter is used, it must be held in place by a metal screw. NOTE: In Canada, the use of a temporary adapter is not permitted by the Canadian Electrical Code.
#1 What is the maximum pile length that the cleaner can handle on an area rug?
This unit can be used on low pile up to high pile carpeting. We recommend checking the care instructions on the area rug to ensure it is not "dry clean only"
Please make sure you are rotating the hose clockwise to lock it into position with the hose suction port on your unit. Please also ensure there is no blockage in the hose or the tool you are using and that the lid is securely on the dirty water tank.
#3 Can I take this machine apart to clean it like the Hoover Smartwash?
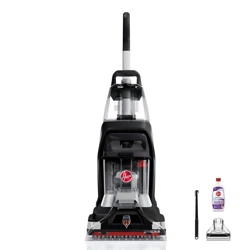
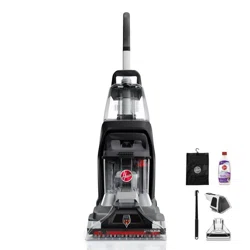
Yes, you are able to remove both tanks, the nozzle, and the brushes from the Hoover Power Scrub Deluxe in order to clean the unit.
#4 My very first time using it today, and the water and solution tank is leaking down the back of the machine. wtf! any fix here?
Ensure that the water/solution tank is attached properly and locked into place. Reference your user manual for more information on the water/solution tank assembly.