Loading ...
Loading ...
Loading ...
28 49-1000585 Rev. 1
Installation Instructions
INSTALLING THE REFRIGERATOR
REFRIGERATOR LOCATION
Ŷ'RQRWLQVWDOOWKHUHIULJHUDWRUZKHUHWKH
WHPSHUDWXUHZLOOJREHORZ)&EHFDXVH
it will not run often enough to maintain proper
temperatures.
Ŷ'RQRWLQVWDOOWKHUHIULJHUDWRUZKHUHWKH
WHPSHUDWXUHZLOOJRDERYH)&EHFDXVH
it will not perform properly.
Ŷ 'RQRWLQVWDOOWKHUHIULJHUDWRULQDORFDWLRQH[SRVHG
WRZDWHUUDLQHWFRUGLUHFWVXQOLJKW
Ŷ,QVWDOOLWRQDIORRUVWURQJHQRXJKWRVXSSRUWLWIXOO\
loaded.
CLEARANCES
Allow the following clearances for ease of
installation, proper air circulation and plumbing and
electrical connections.
6LGHV ´PP
7RS ´PP&DELQHW+LQJH&RYHU
%DFN ´PP
REMOVING THE REFRIGERATOR
DOORS
Ŷ IMPORTANT NOTE:7KLVUHIULJHUDWRULV´
GHHSZLWKRXWKDQGOHV´IRU&'PRGHOV
'RRUVDQGSDVVDJHZD\VOHDGLQJWRWKHLQVWDOODWLRQ
ORFDWLRQPXVWEHDWOHDVW´ZLGH´IRU
&'PRGHOVLQRUGHUWROHDYHWKHGRRUVDWWDFKHG
to the refrigerator while transporting it into the
LQVWDOODWLRQORFDWLRQ,ISDVVDJHZD\VDUHOHVV
WKDQ´ZLGH´IRU&'PRGHOVWKH
refrigerator doors can easily be scratched and
damaged. The top cap and doors can be removed
to allow the refrigerator to be safely moved indoors.
,ISDVVDJHZD\VDUHOHVVWKDQ´ZLGH´
IRU&'PRGHOVVWDUWZLWK6WHS
Ŷ,ILWLVQRWQHFHVVDU\WRUHPRYHGRRUVVNLSWR6WHS
11. Leave tape and all packaging on doors until the
refrigerator is in the final location.
Ŷ NOTE:8VHDSDGGHGKDQGWUXFNWRPRYHWKLV
refrigerator. Place the refrigerator on the hand
truck with a side against the truck. We strongly
recommend that TWO PEOPLE move and complete
this installation.
INSTALLATION INSTRUCTIONS
1
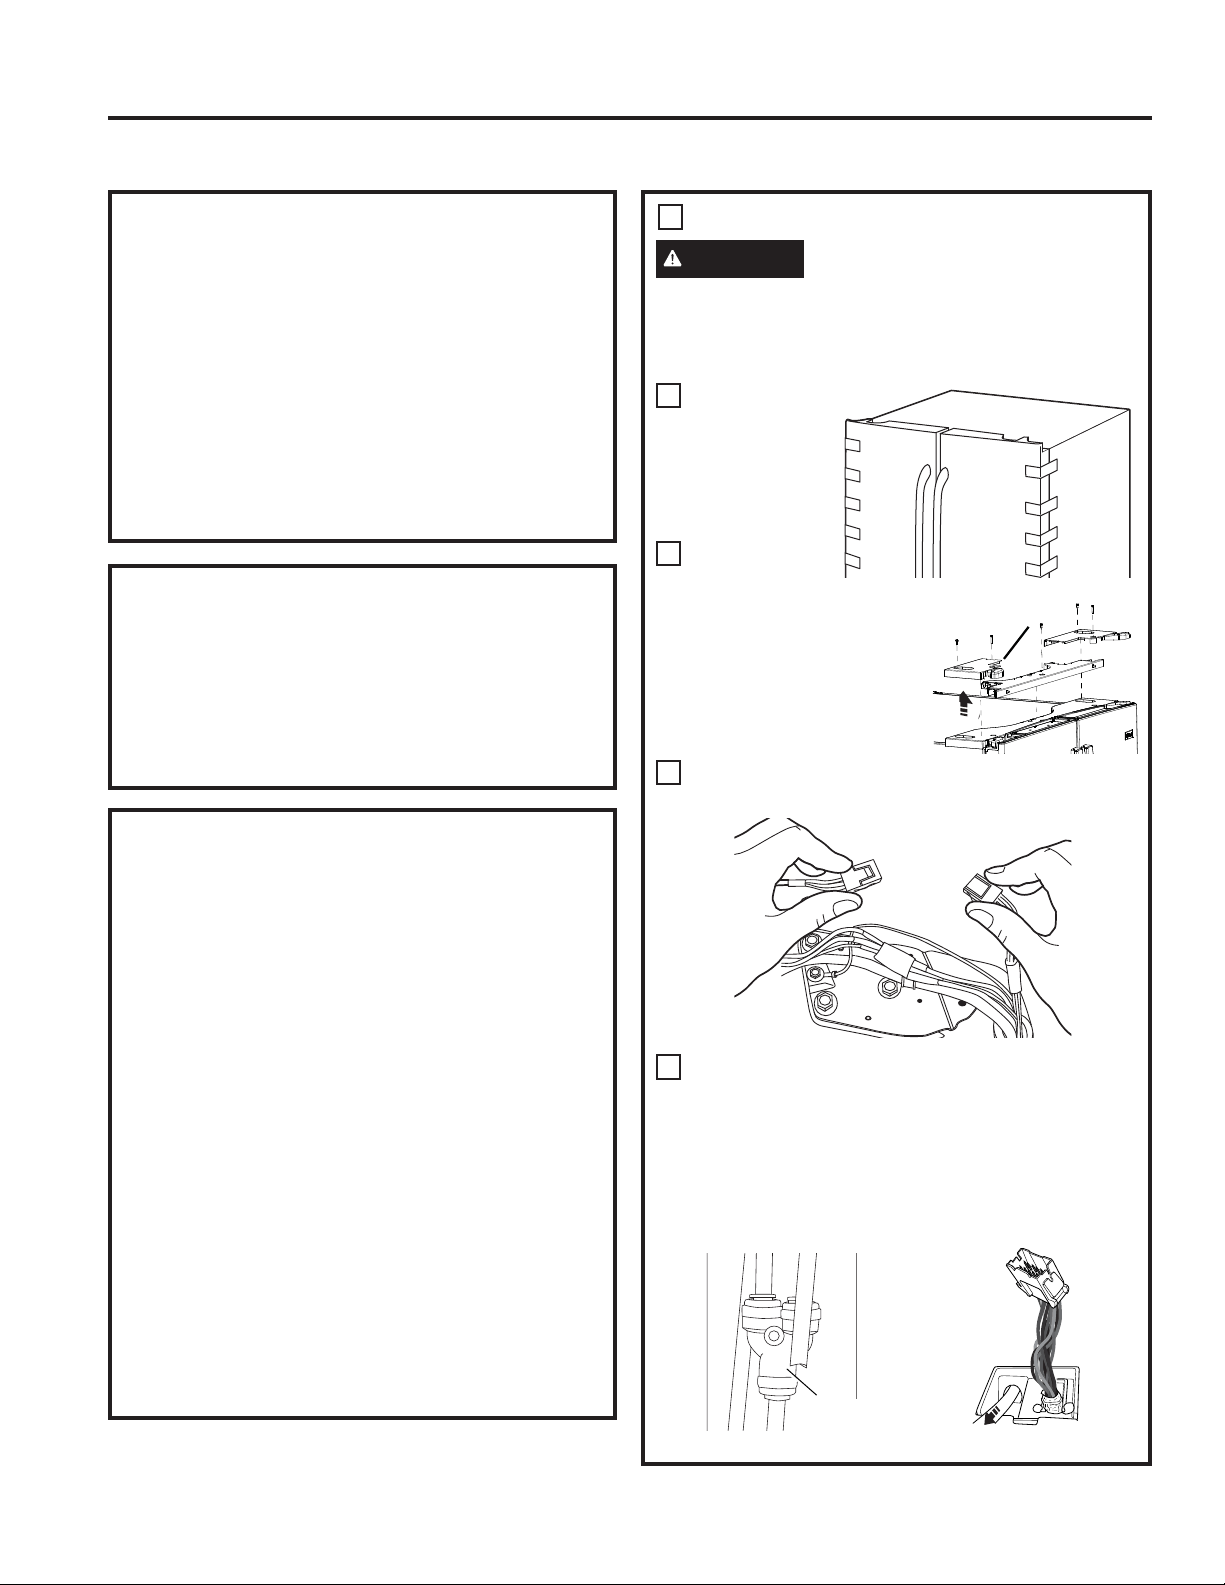
REMOVE REFRIGERATOR DOORS
WARNING
)ROORZDOOVWHSVIRUUHPRYLQJ
DQGUHLQVWDOOLQJWKHGRRU)DLOXUHWRIROORZWKHVH
instructions, leaving off parts, or overtightening screws,
can lead to the door falling off and result in injury and
property damage.
A
Securely tape the
door shut with
masking tape or
have a second
person support
the door.
B
Start with
left-hand door
first: Remove the hinge
cover on top of the left
refrigerator door by
removing all hex screws
DQGSXOOLQJLWXS'RWKH
same for the right-hand
door and the middle cover.
C
'LVFRQQHFWHOHFWULFDOFRQQHFWRUVFRPLQJIURPHDFK
door located under the hinge covers.
'
On some models, disconnect the water line from the
back of the unit by pressing down on the dark grey
collar while pulling up on the water line. Pull water
line through case conduit from the top to free the
line for door removal. The water line is more than 4’
ORQJDQGPD\QHHGWREHWDSHGWR'RRUIRU
accessibility when reinstalling.
Hinge
Cover
Y or Straight
Connector
Loading ...
Loading ...
Loading ...