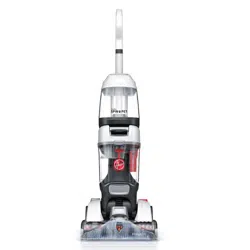
Owner Manual Vacuum Cleaner
GETTING STARTED
ASSEMBLY
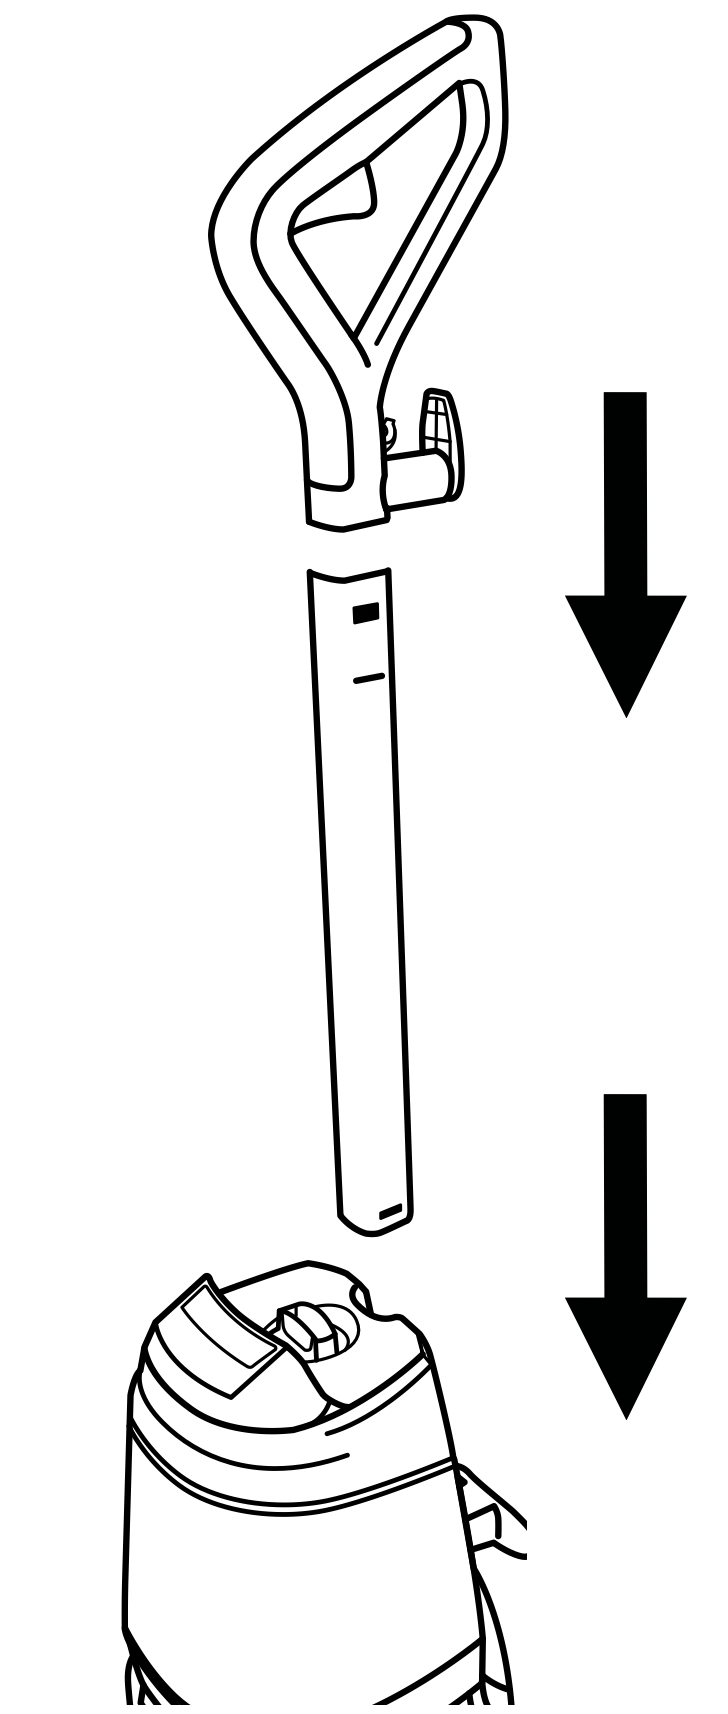
Fully assemble product prior to use.
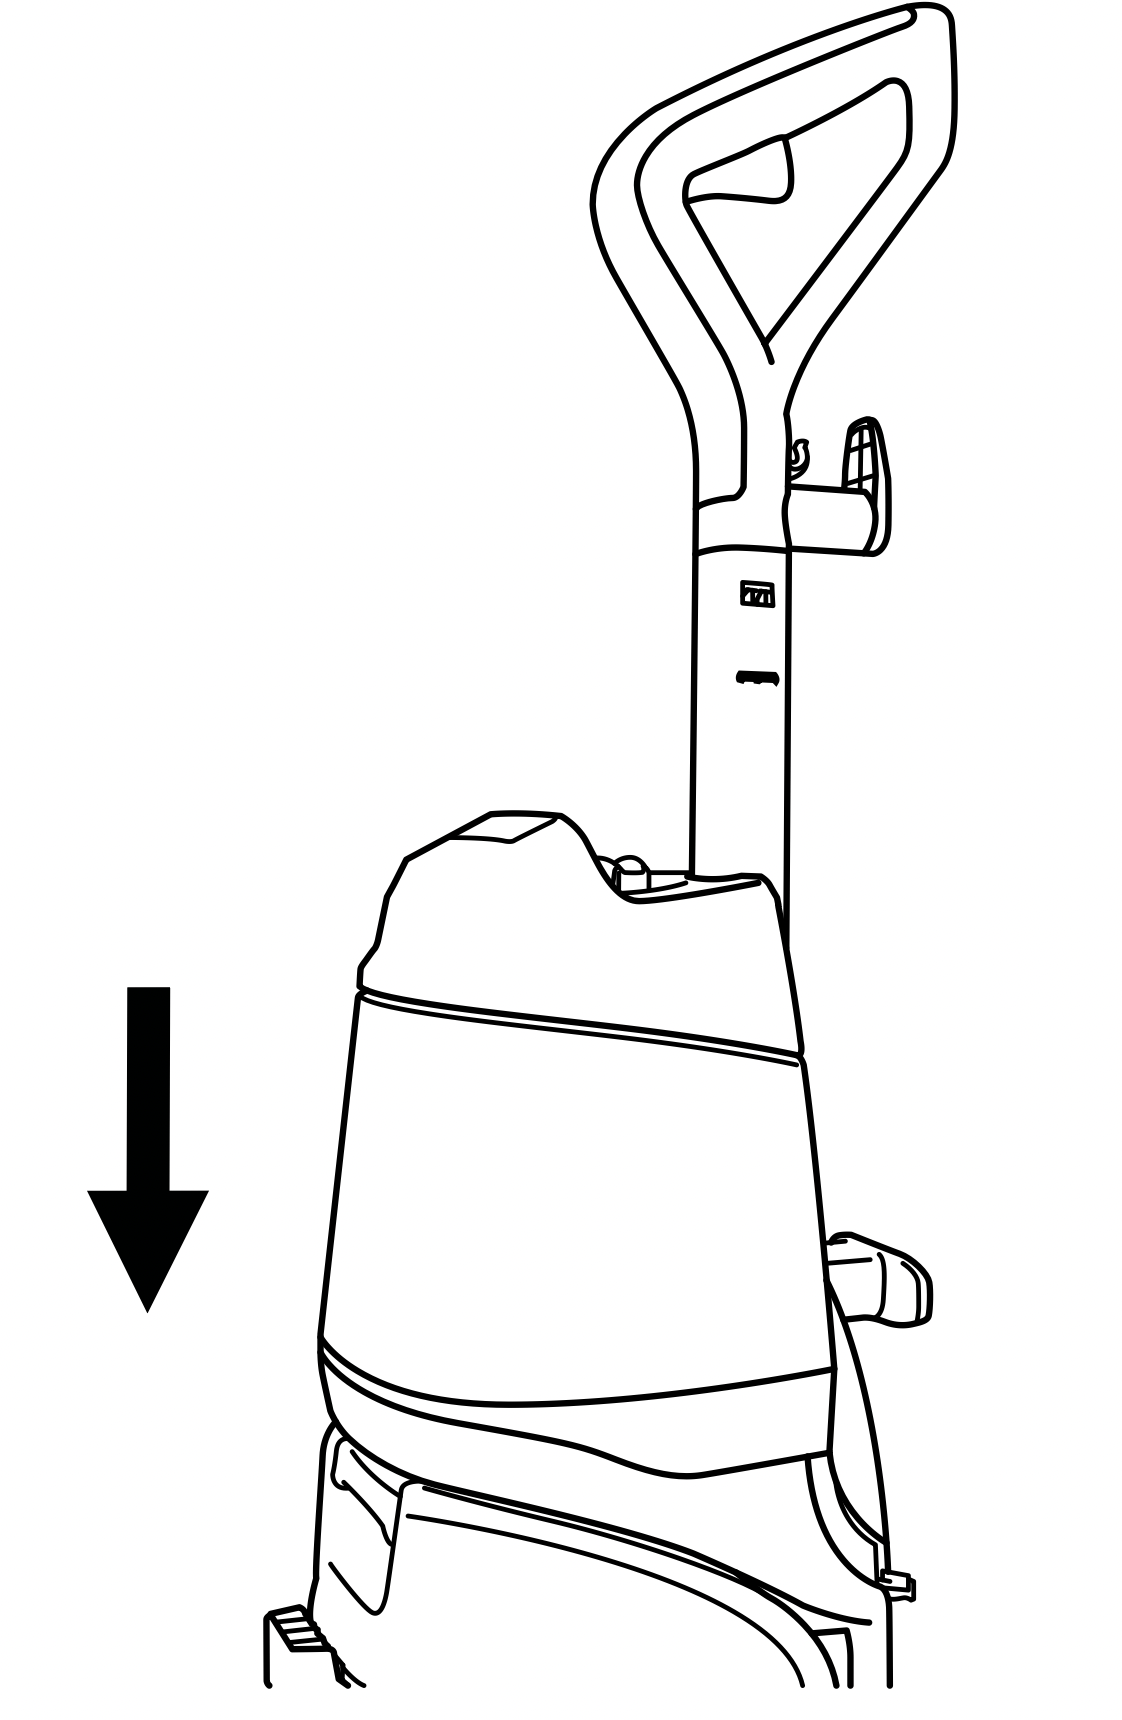
- Insert the handle into the base until you hear a “CLICK”.
OPERATION
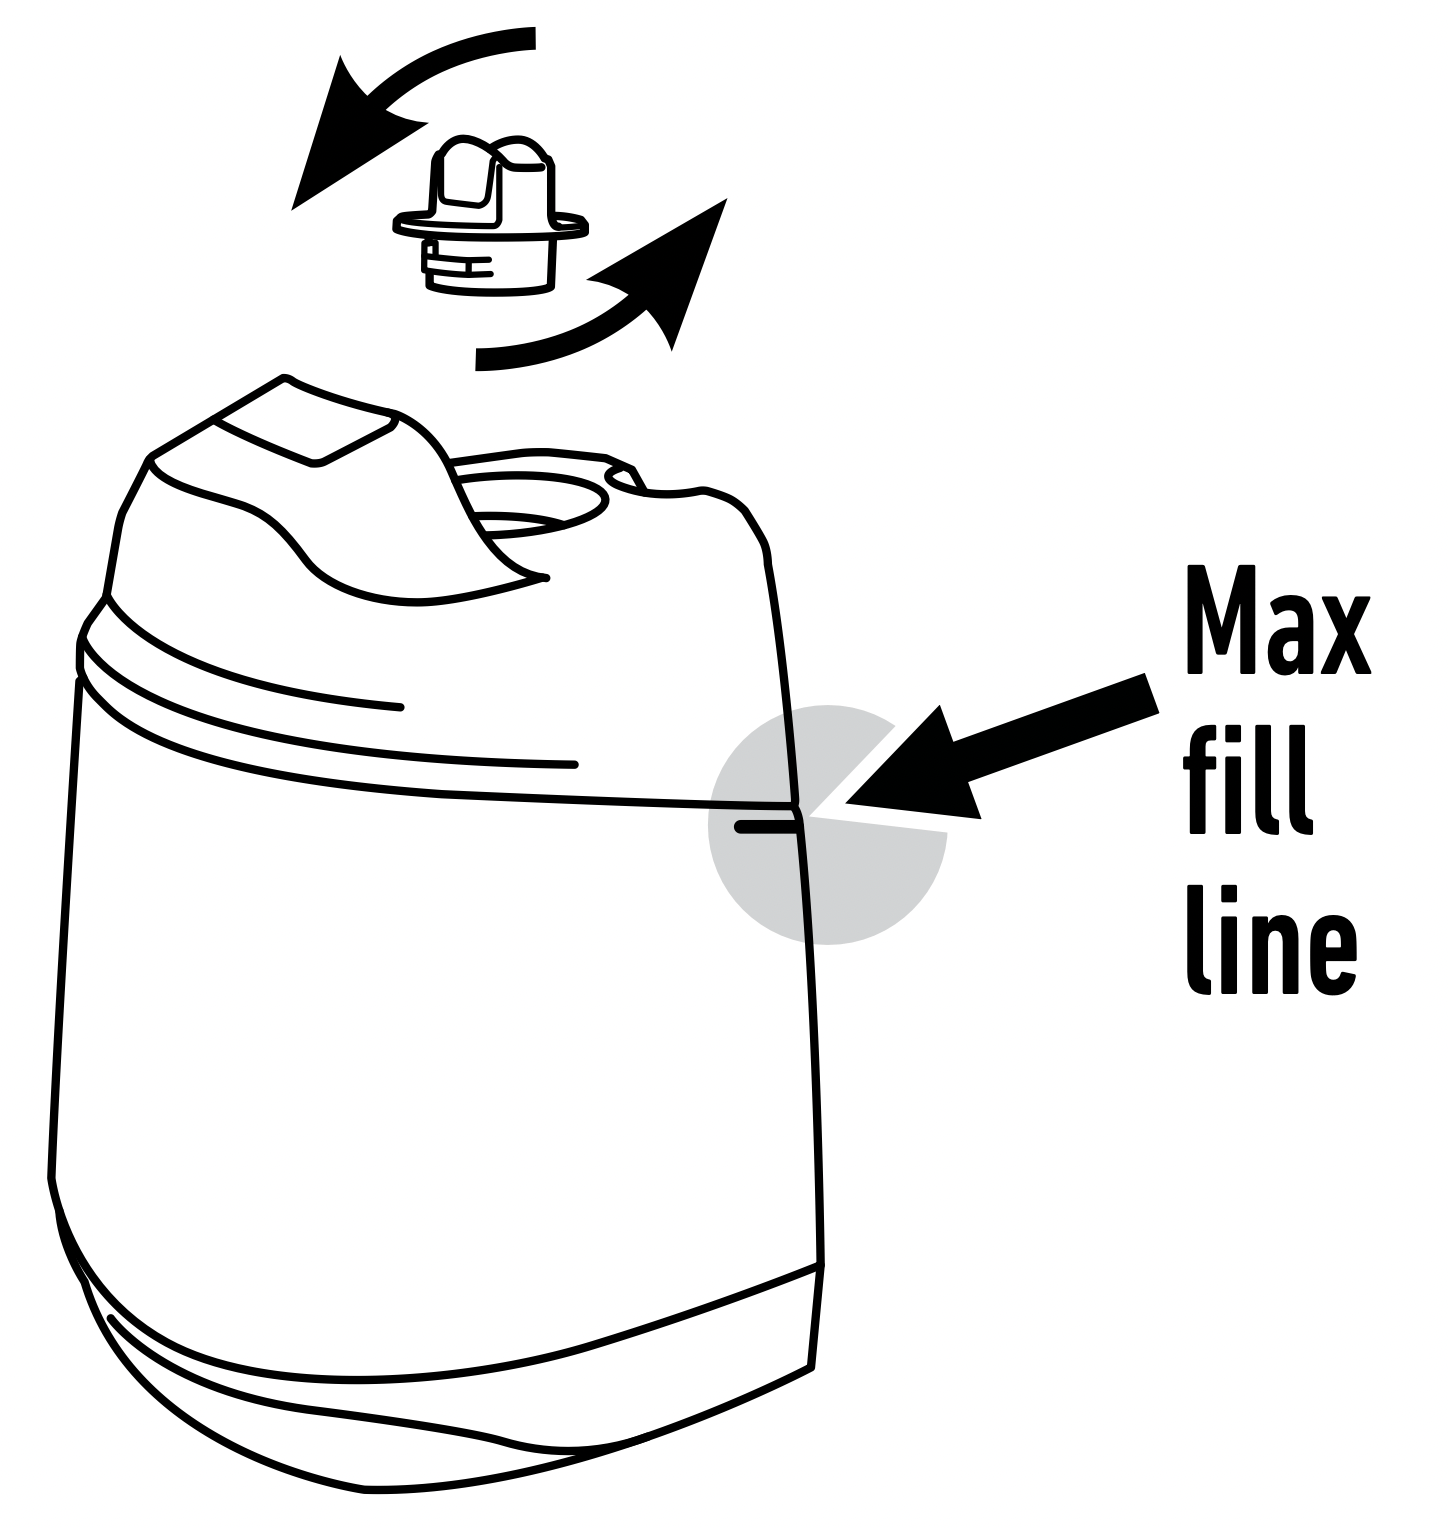
FILL THE CLEAN WATER TANK
- Lift up to remove the Clean Water Tank, then remove the cap and add warm water to the fill line. Add 3oz. of Hoover Solution. Secure cap.
CLEANING FLUID SEE THE HOOVER’S SOLUTION GUIDE insert or visit Hoover.com/cleaning-solutions.
- Align the tank and firmly press it into place.
HOW TO CLEAN CARPETS
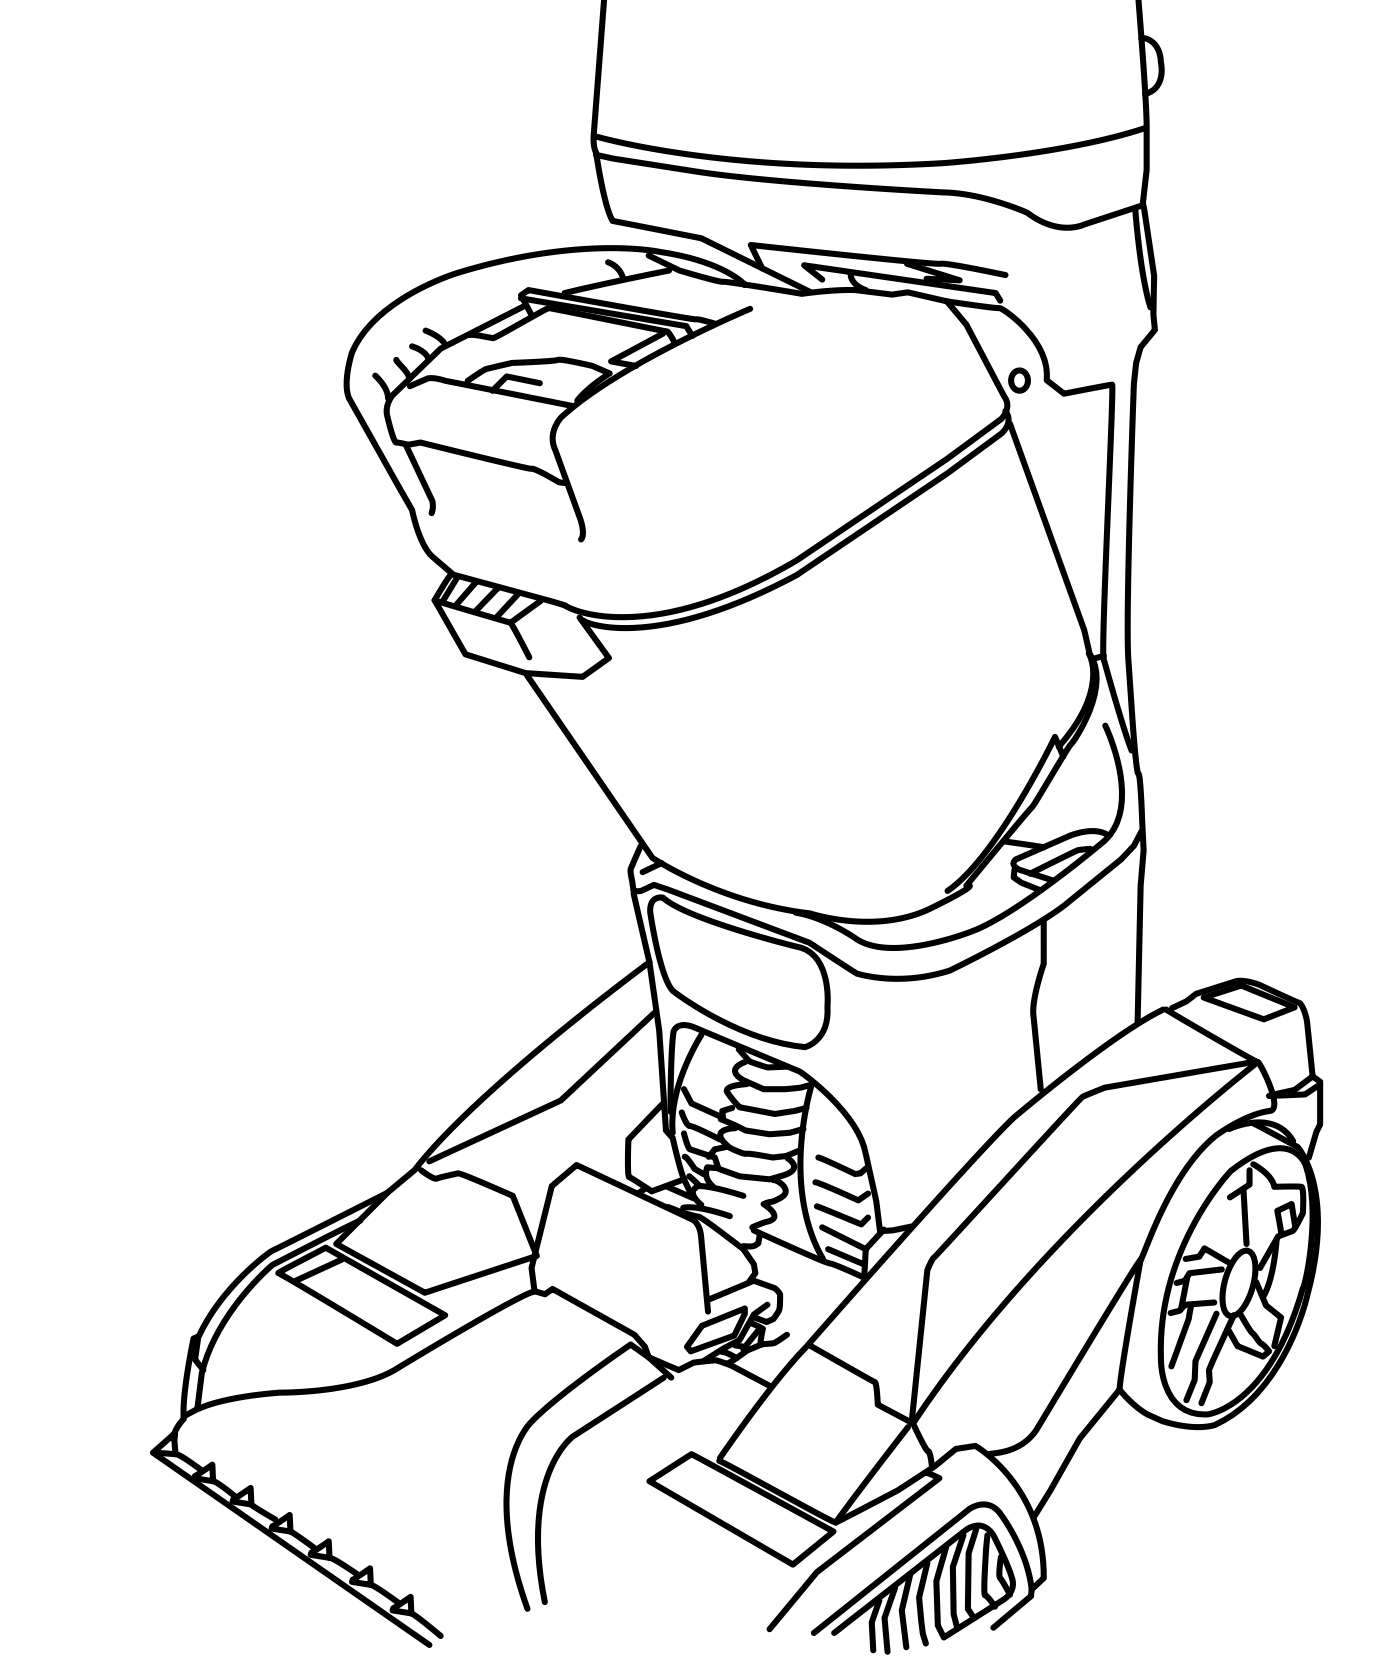
- Step on the Handle Release Pedal to recline the cleaner for cleaning position.
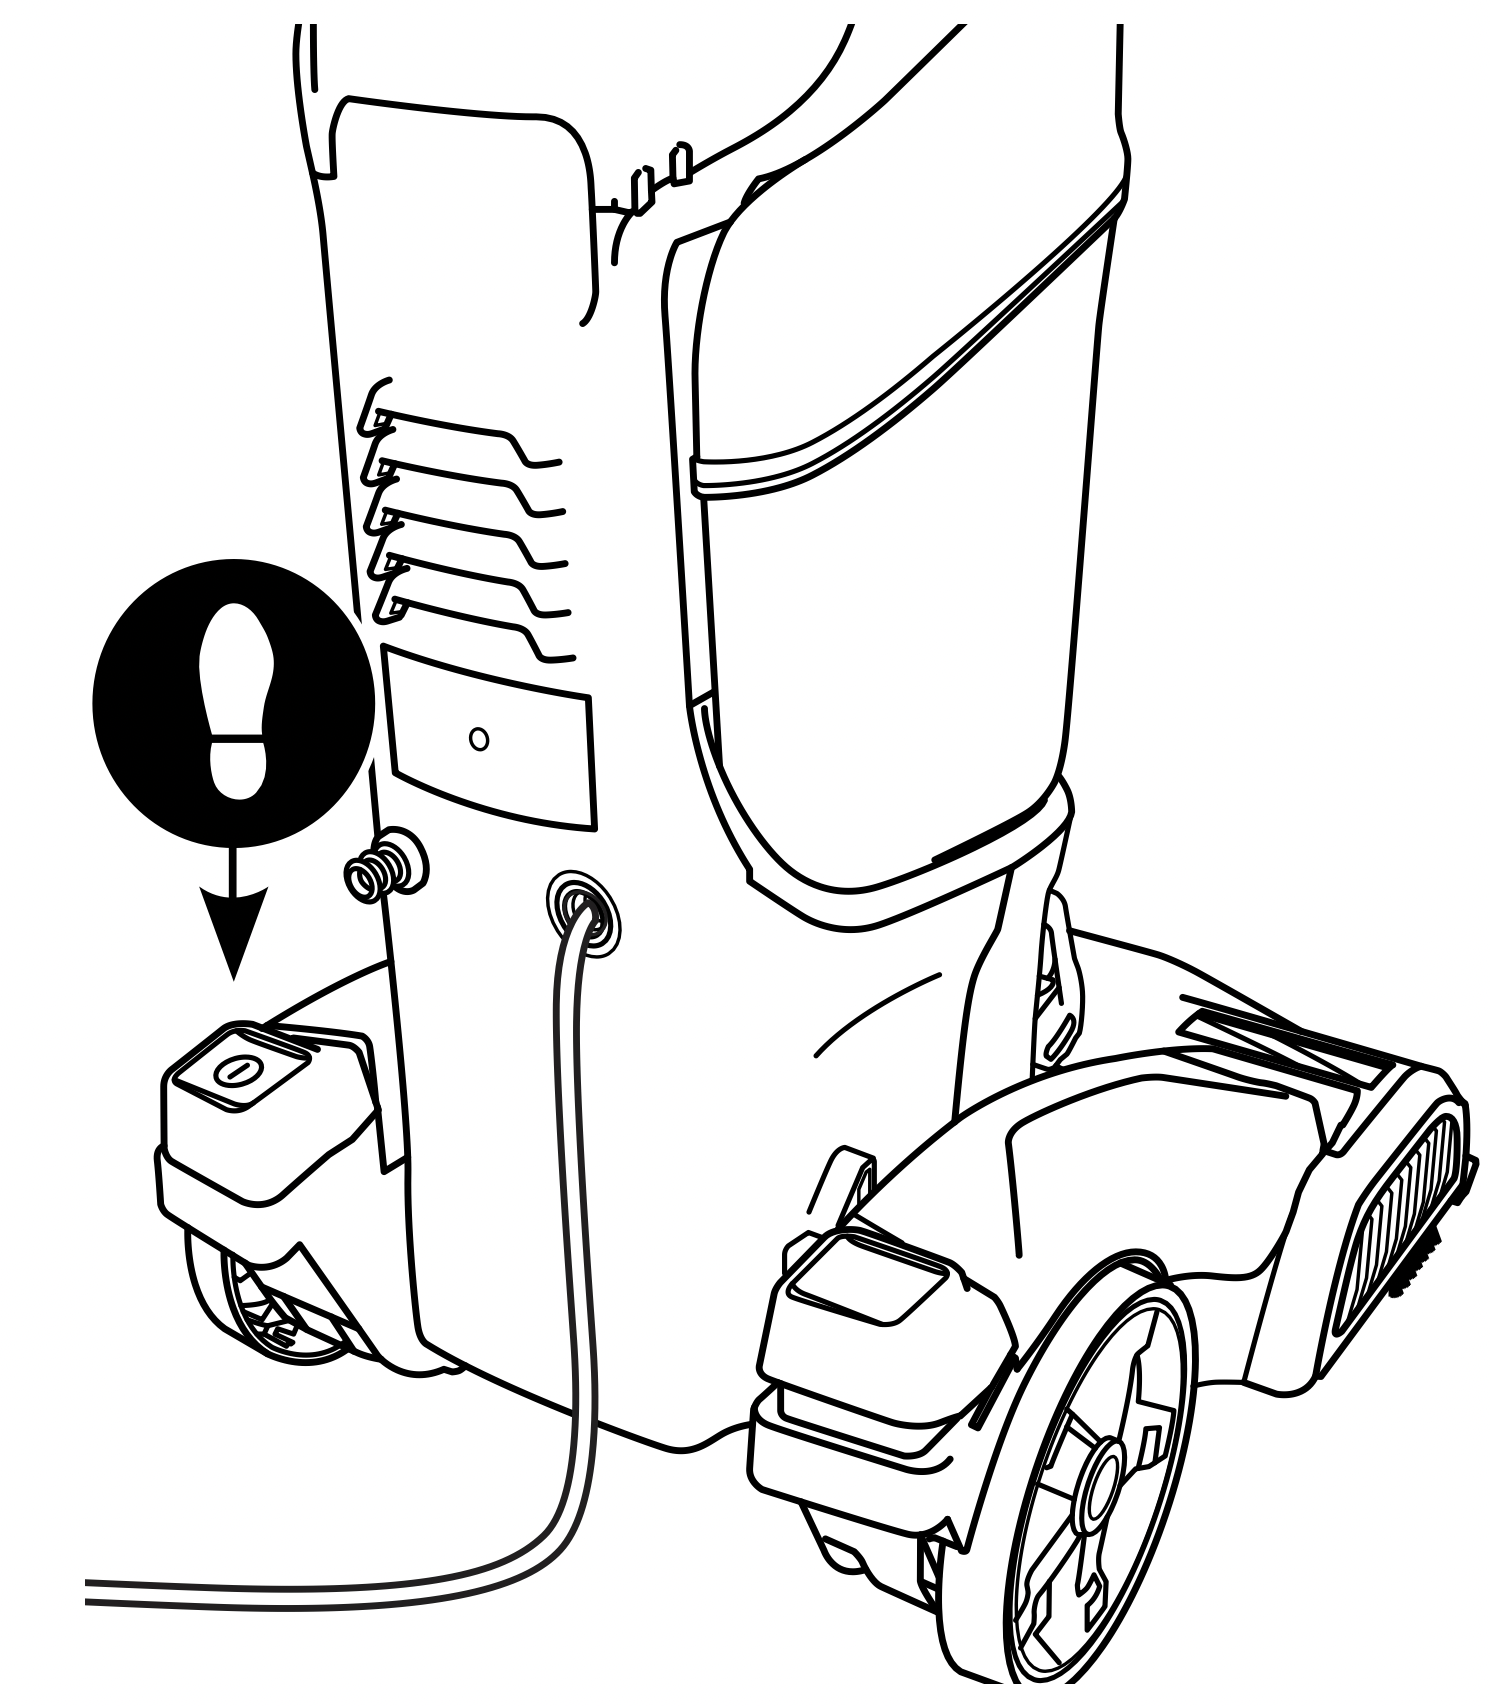
- Step on the Power Pedal to turn ON.
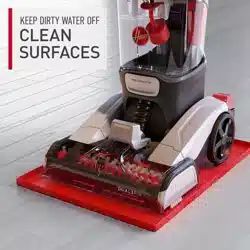
IMPORTANT: Empty Dirty Water Tank when you hear an audible change.
- Squeeze trigger for a slow forward and backward wet stroke.
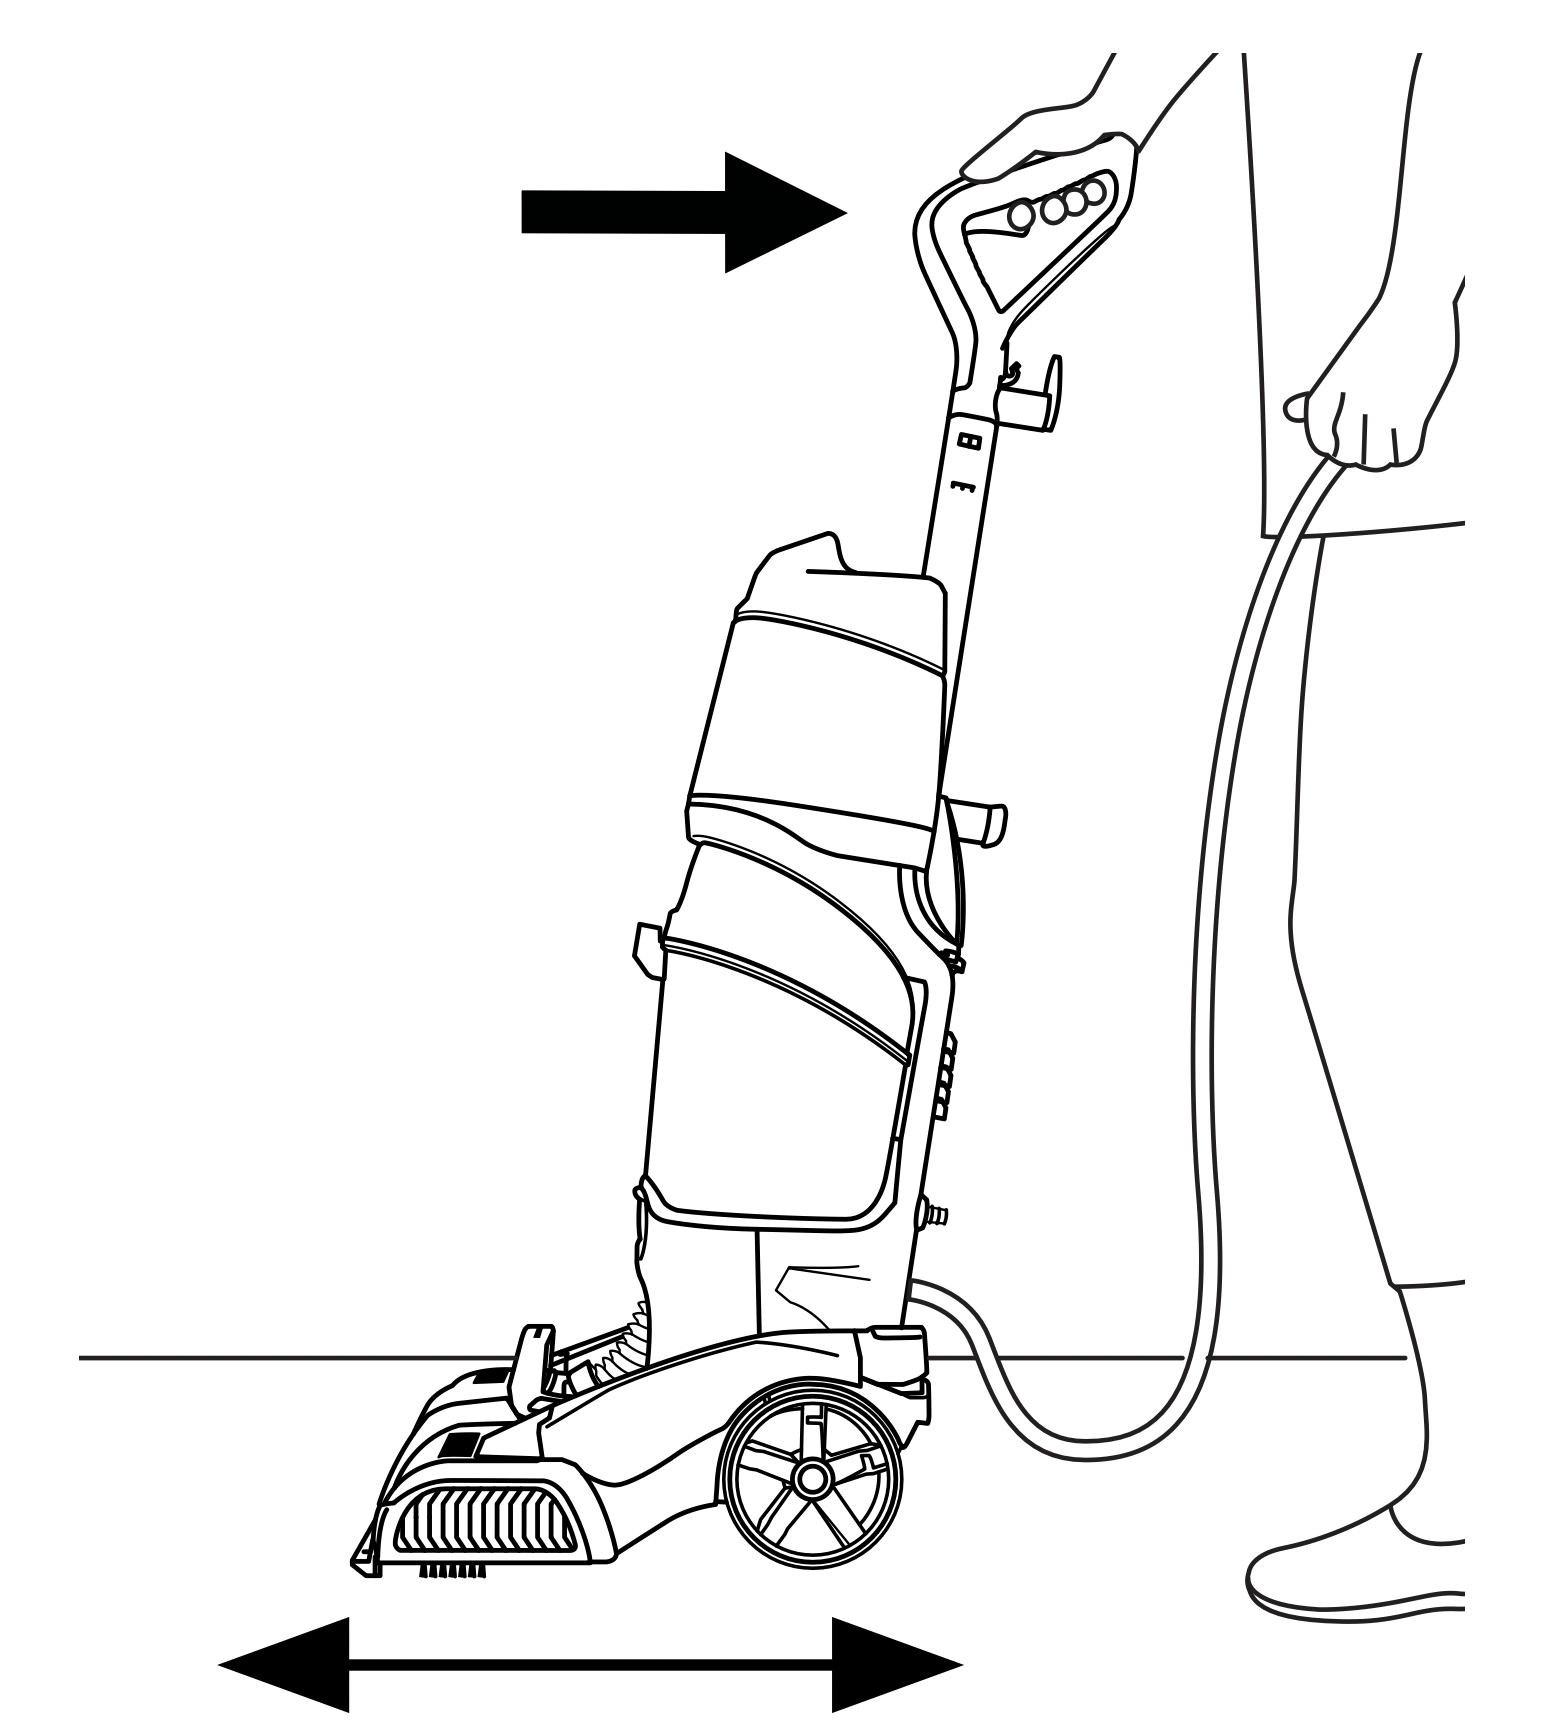
- Release trigger for a slow forward and backward dry stroke.
CAUTION: Not to be used for grooming a pet.
CAUTION: DO NOT USE THIS HARDONEXTRACTOR FLOORS. USING THIS PRODUCT ON HARD FLOORS MAY SCRATCH OR DAMAGE YOUR FLOOR.
HOW TO CLEAN THE DIRTY WATER TANK
WARNING: Risk of personal injury – Brush roll may suddenly restart – unplug before cleaning or servicing.
This product contains no serviceable parts.
If appliance is not working as it should, has been dropped, damaged, left outdoors, or dropped into water, call customer service at 1.800.944.9200 prior to continuing use.
- Turn power OFF and unplug the power cord.
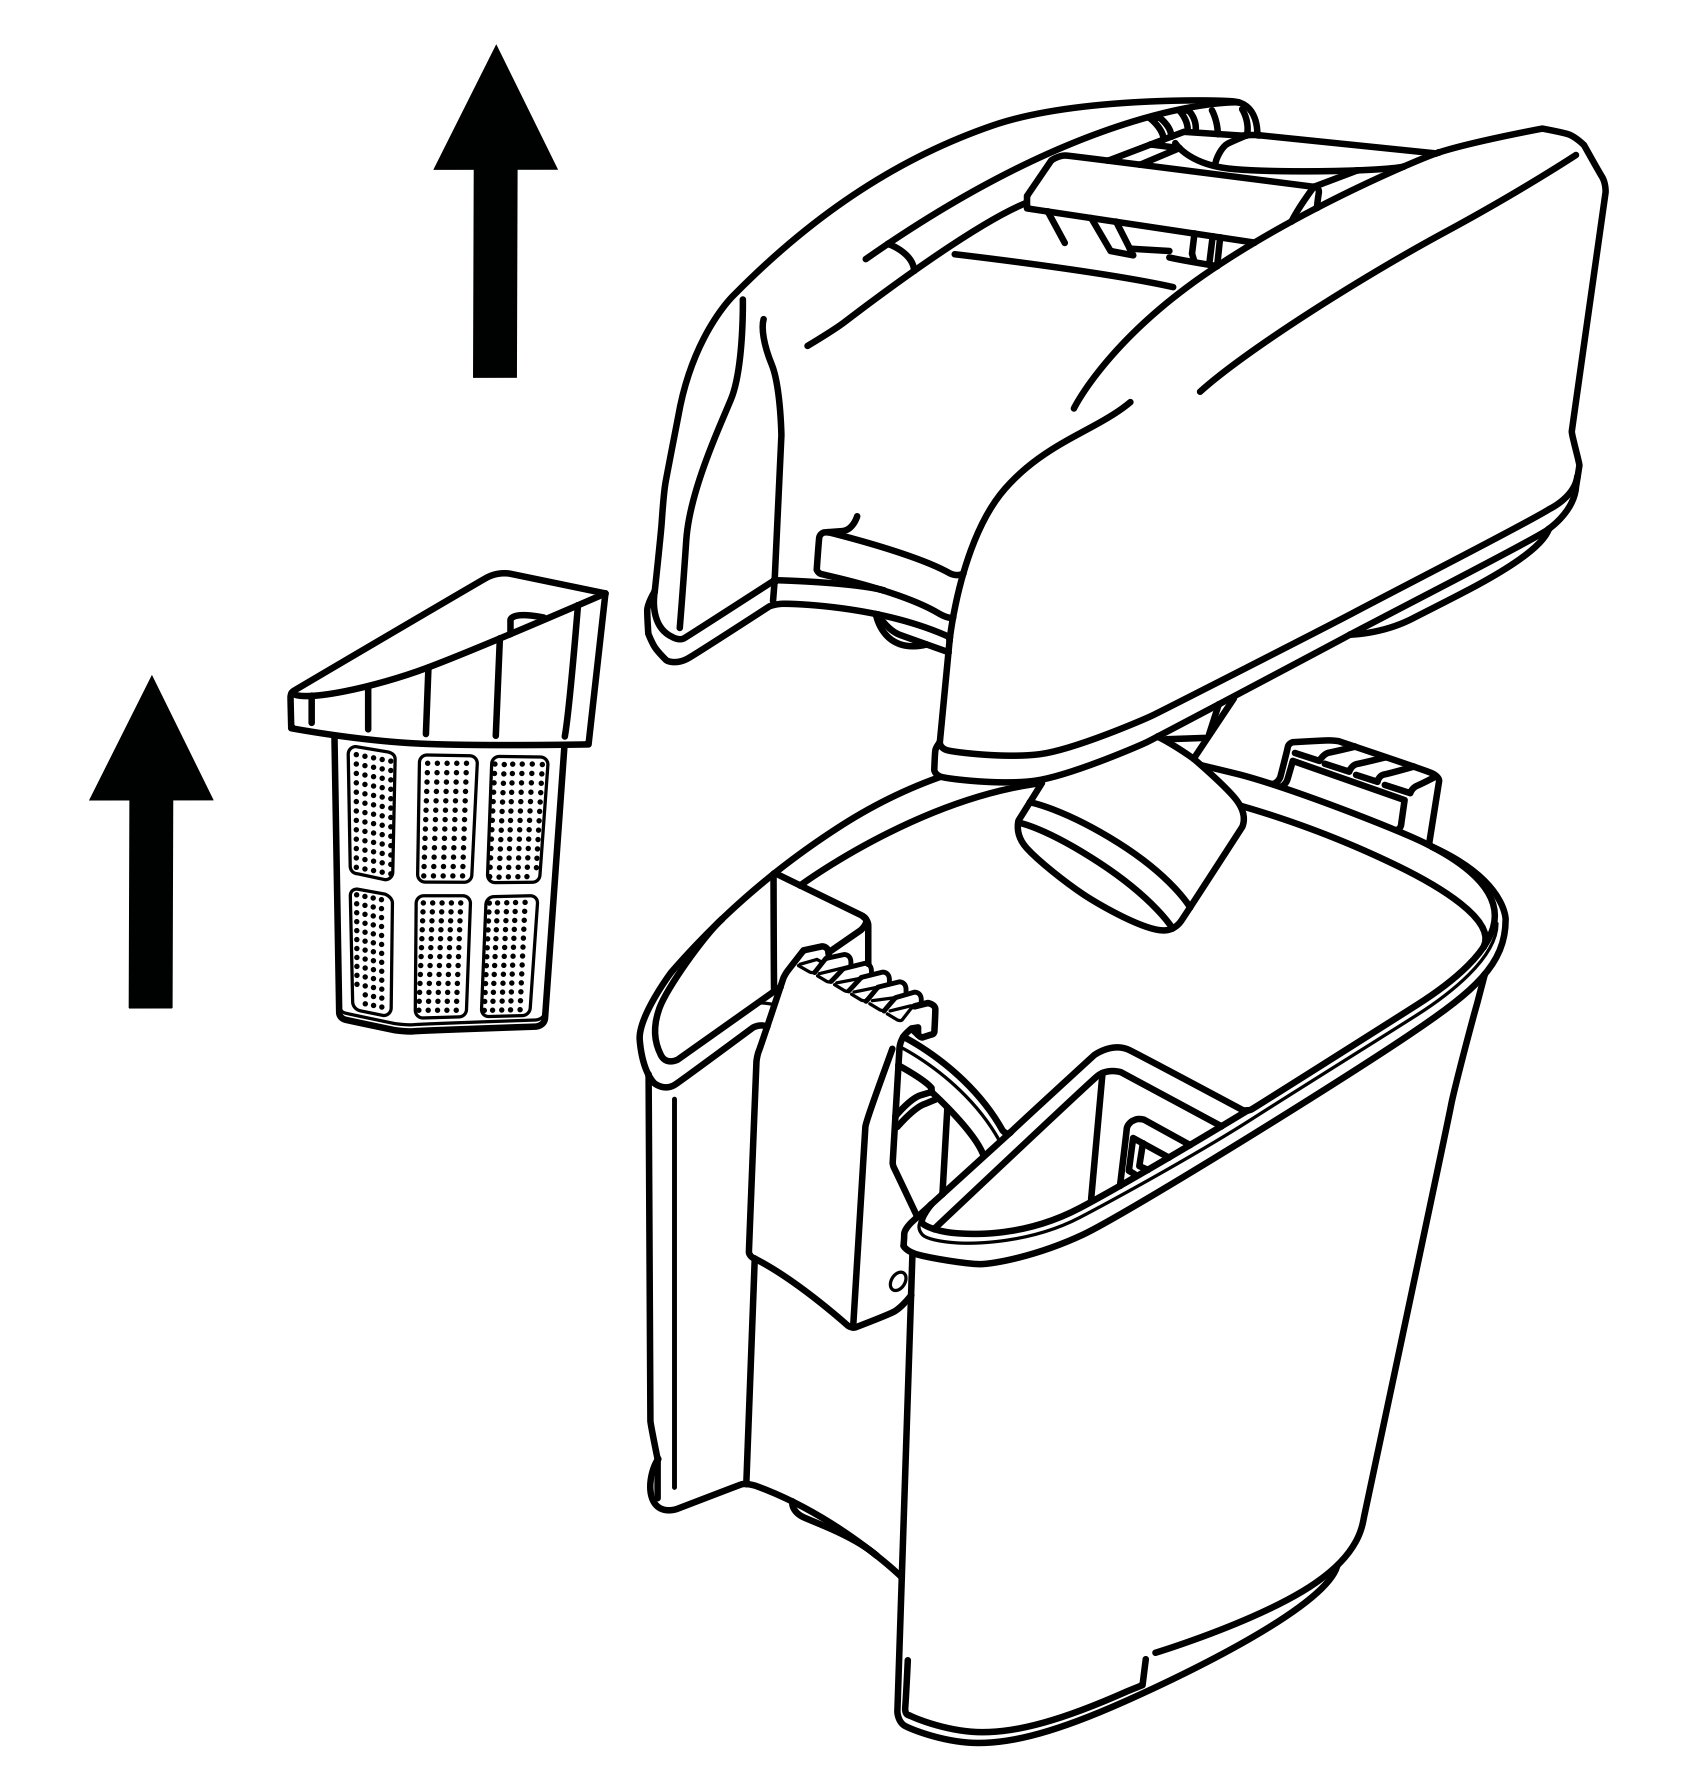
- Grab the Dirty Water Tank handle and pull up to remove.
- Unlatch the lid to remove the top. Remove the filter basket and clear any debris. Empty the tank, rinse, and allow to air dry.
AUTO SHUT OFF FLOAT: Your carpet cleaner is equipped with a shut off float within your Dirty Water Tank. When the Dirty Water Tank becomes full, the float will rise, shutting off the air flow through the nozzle. Once the air flow is shut off, empty the Dirty Water Tank.
MAINTENANCE
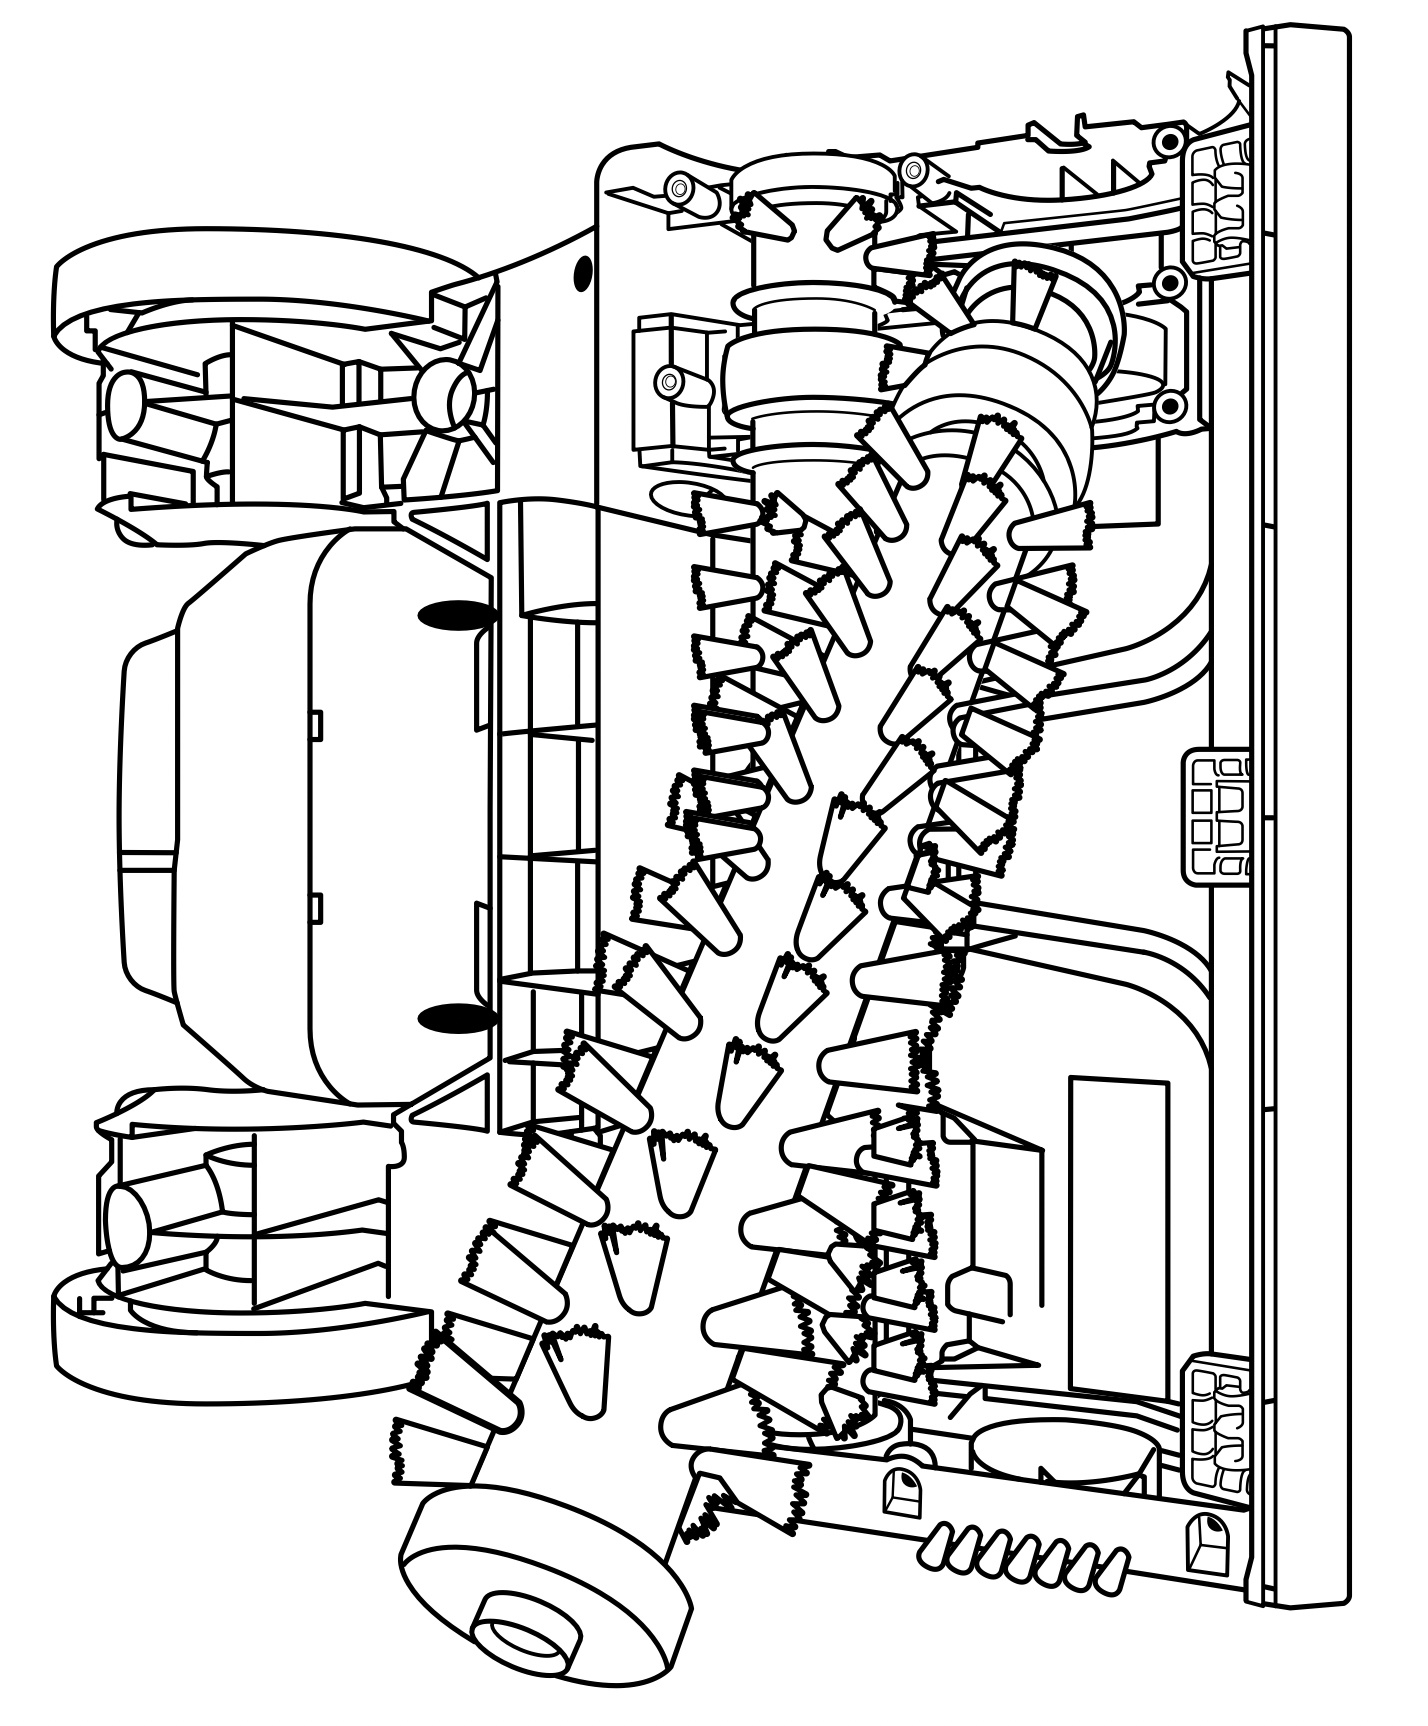
HOW TO REMOVE & CLEAN THE BRUSH ROLL
CAUTION: To reduce the risk of injury from moving parts, unplug before servicing.
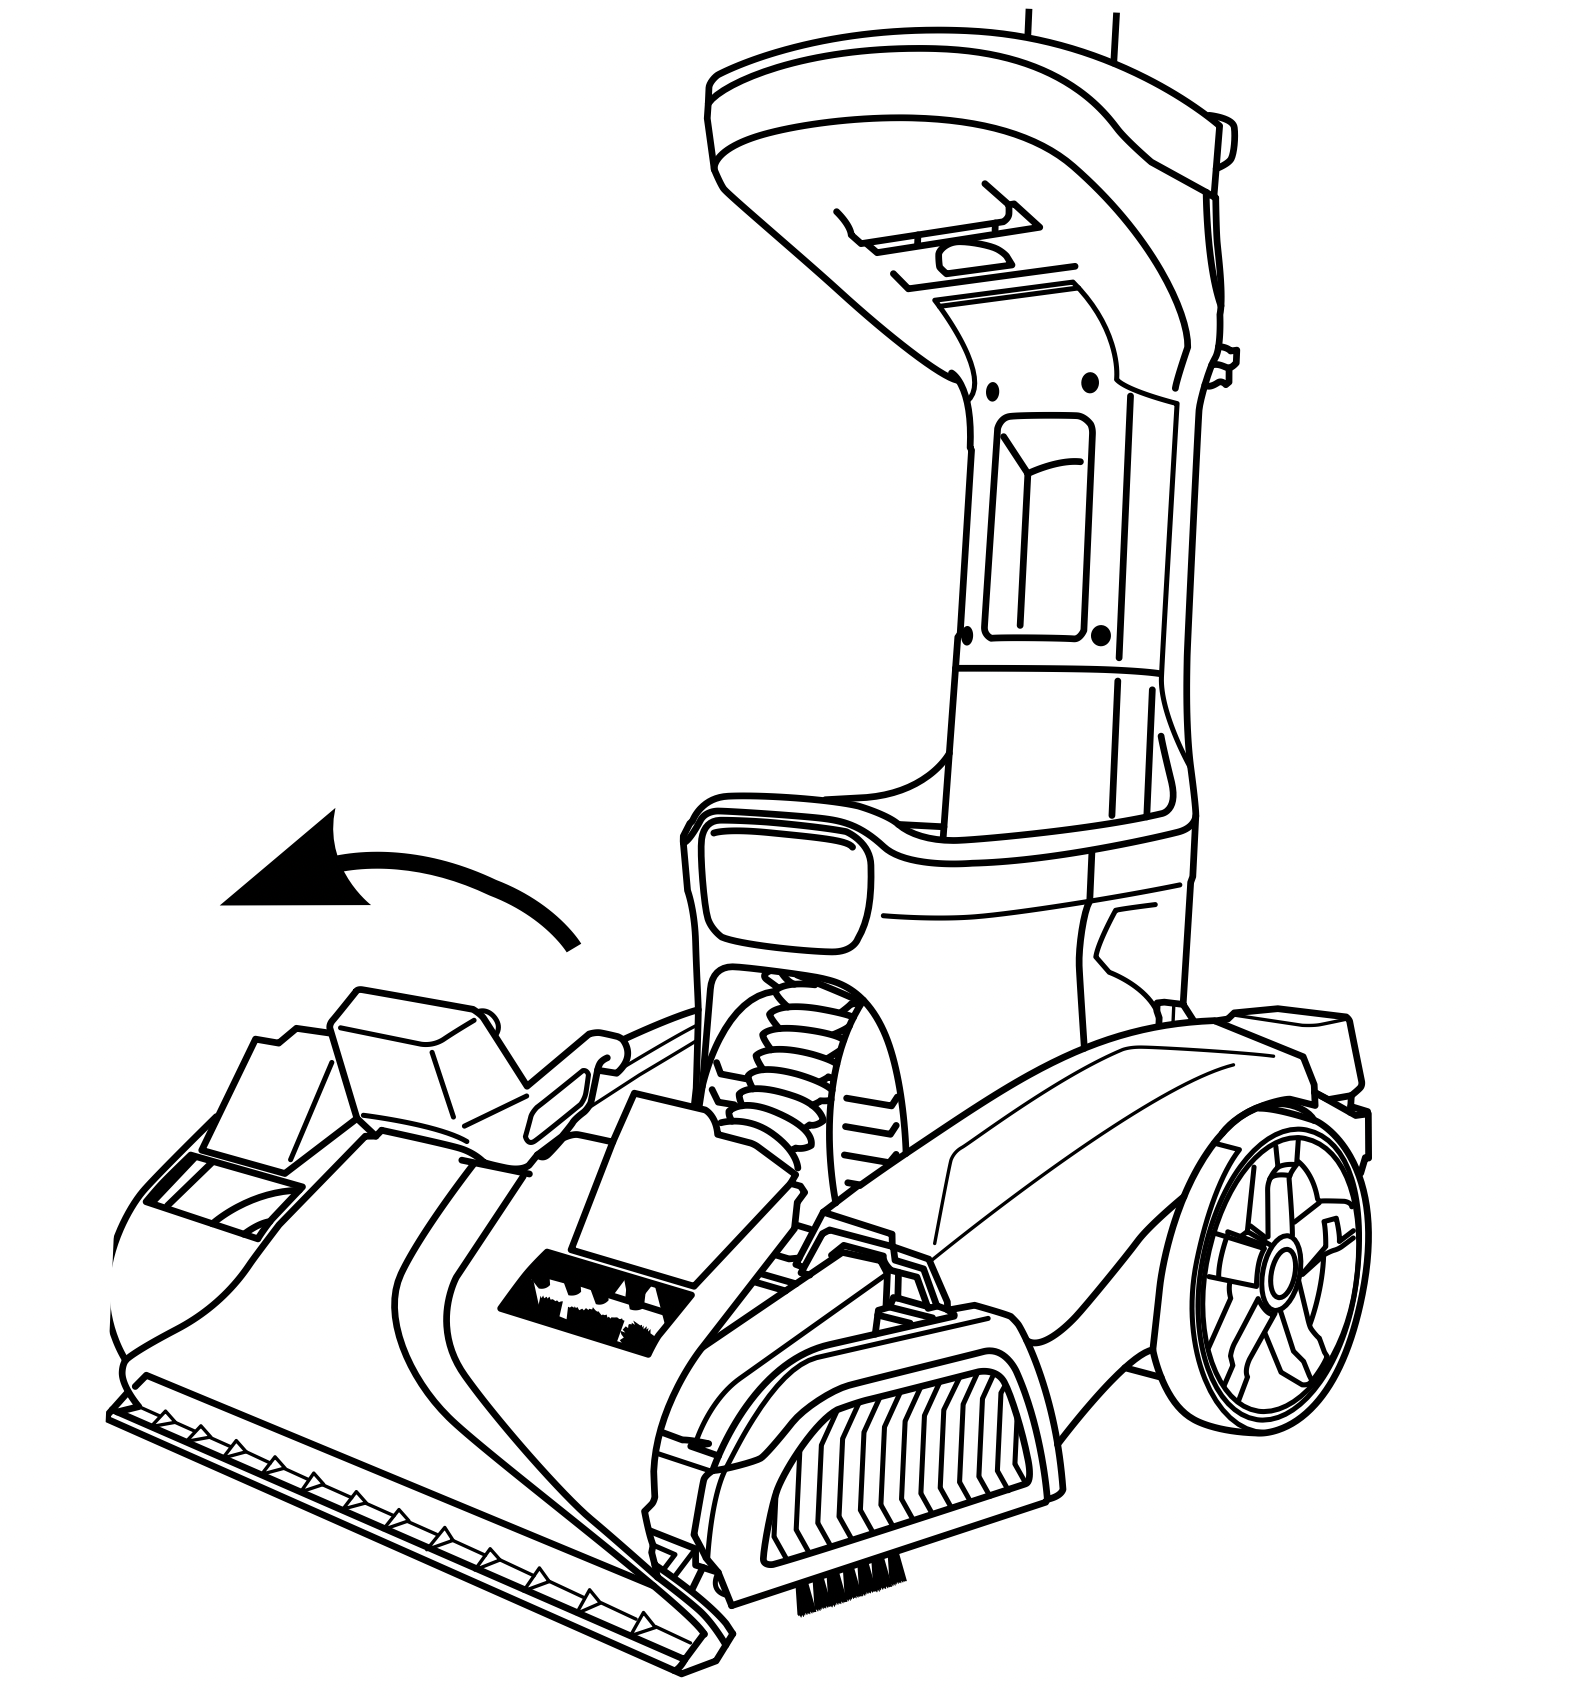
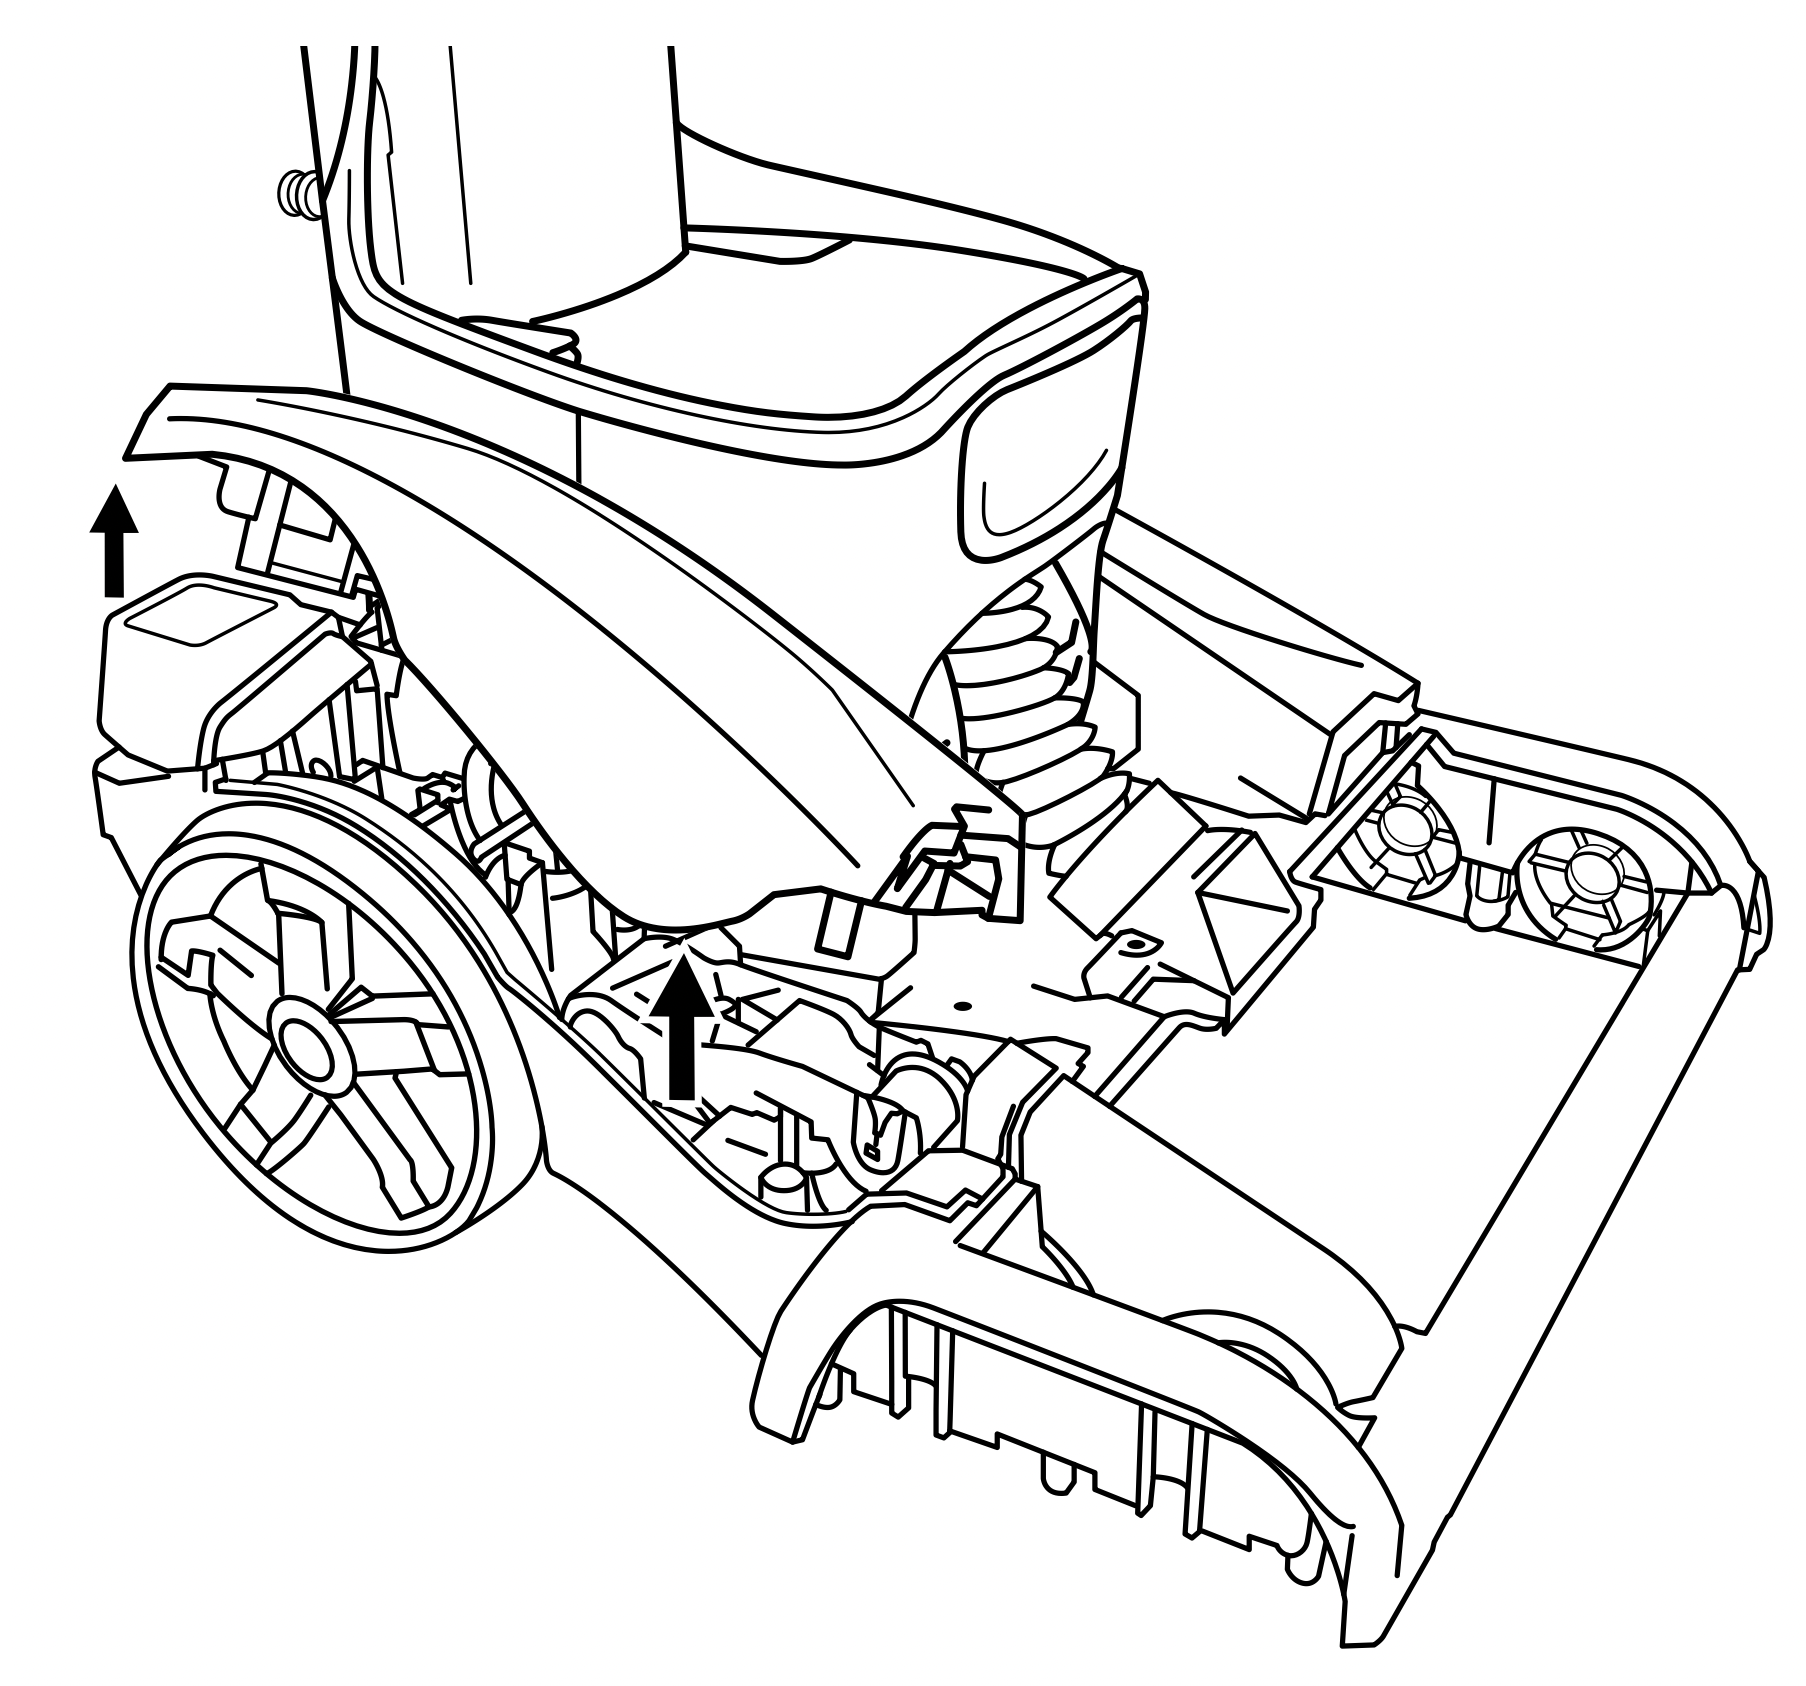
- Remove the nozzle cover by pulling up and forward on the latch.
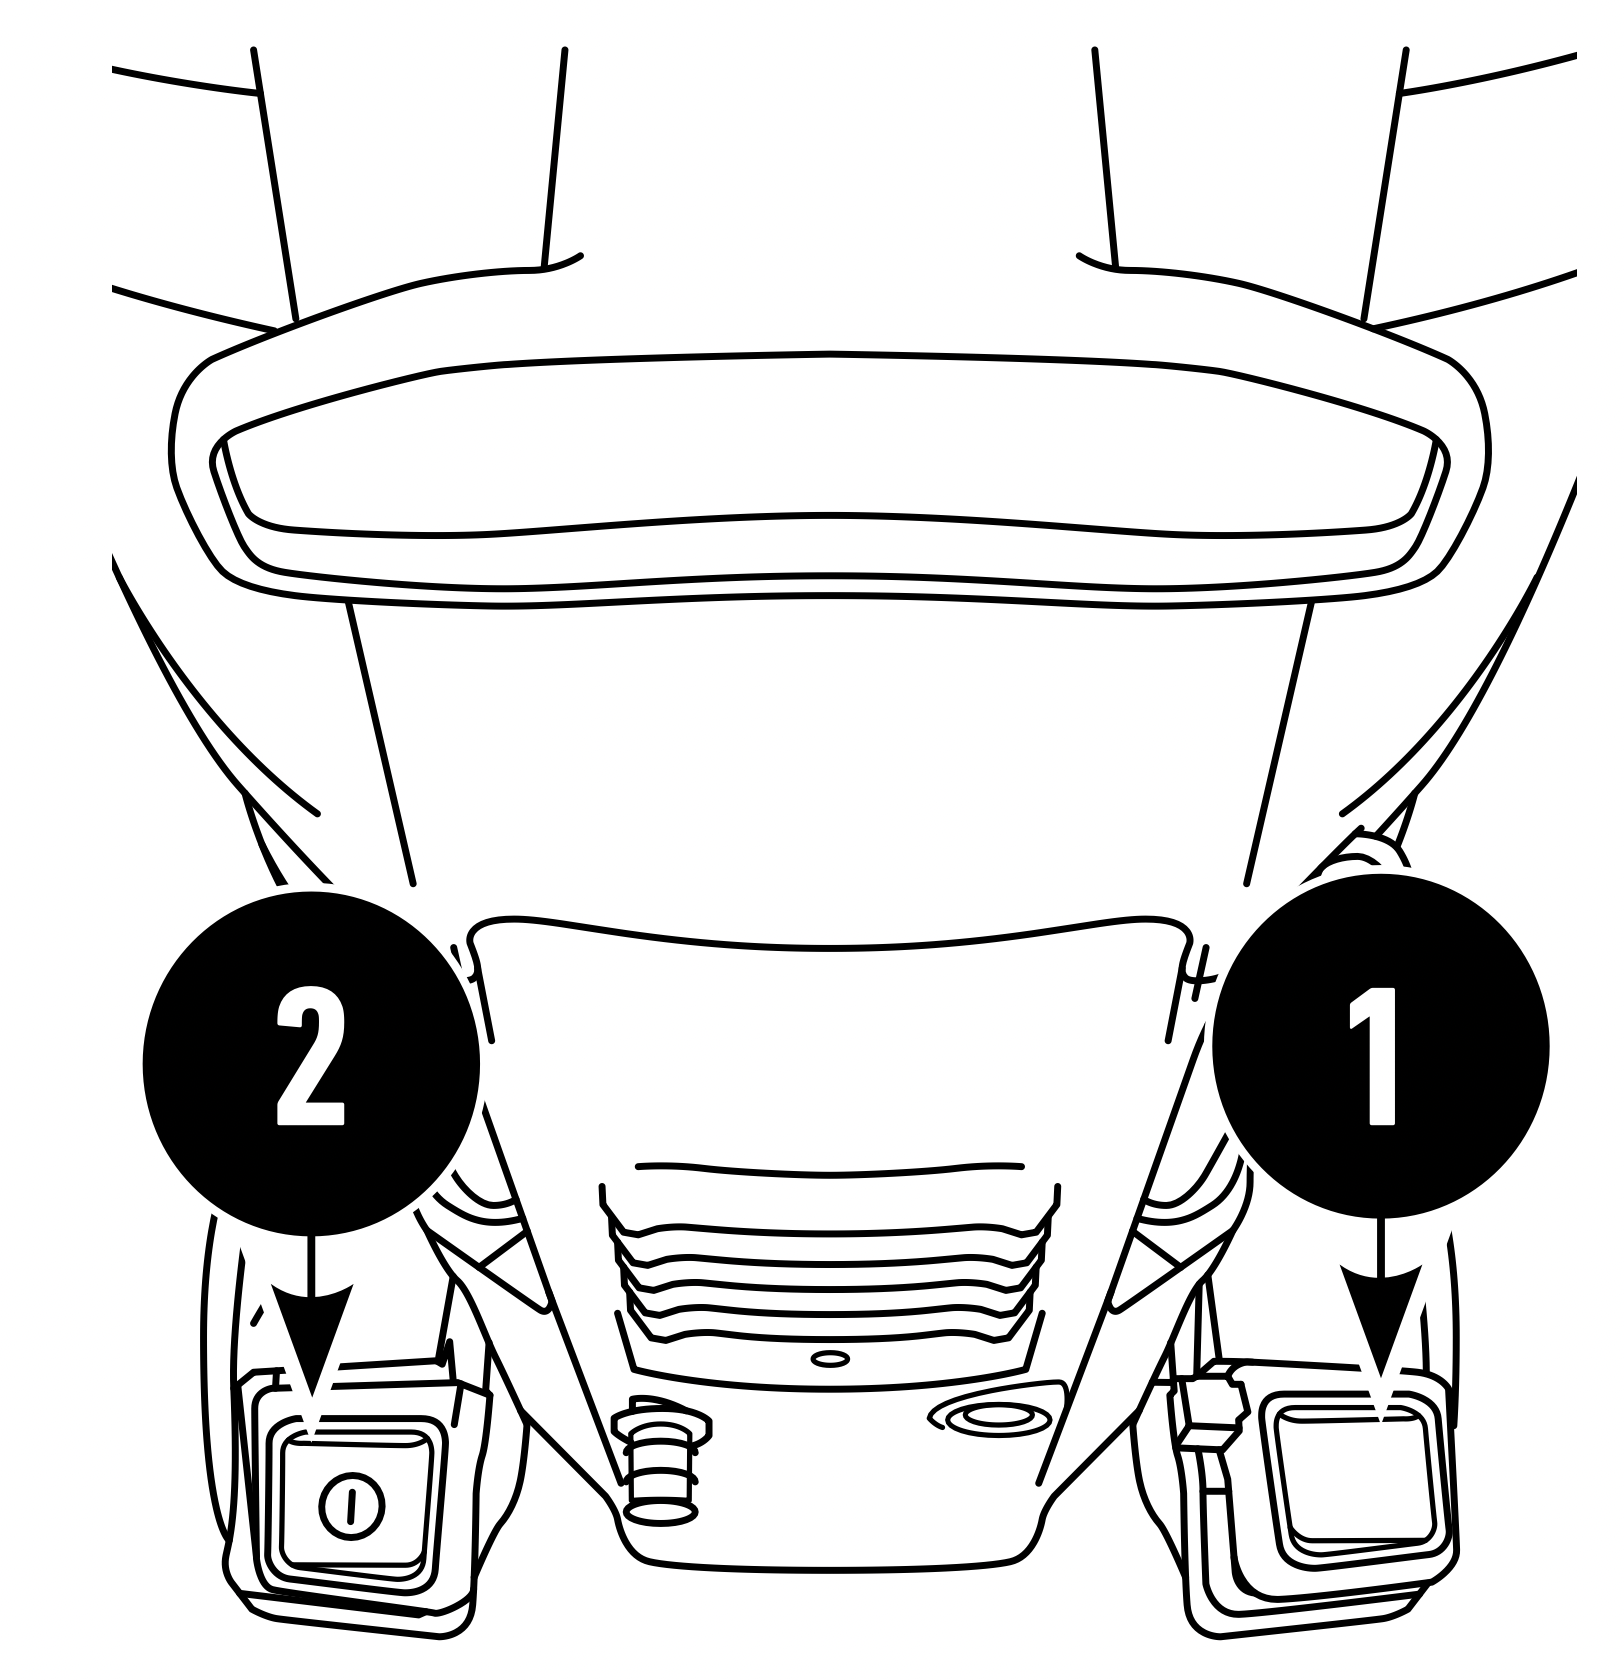
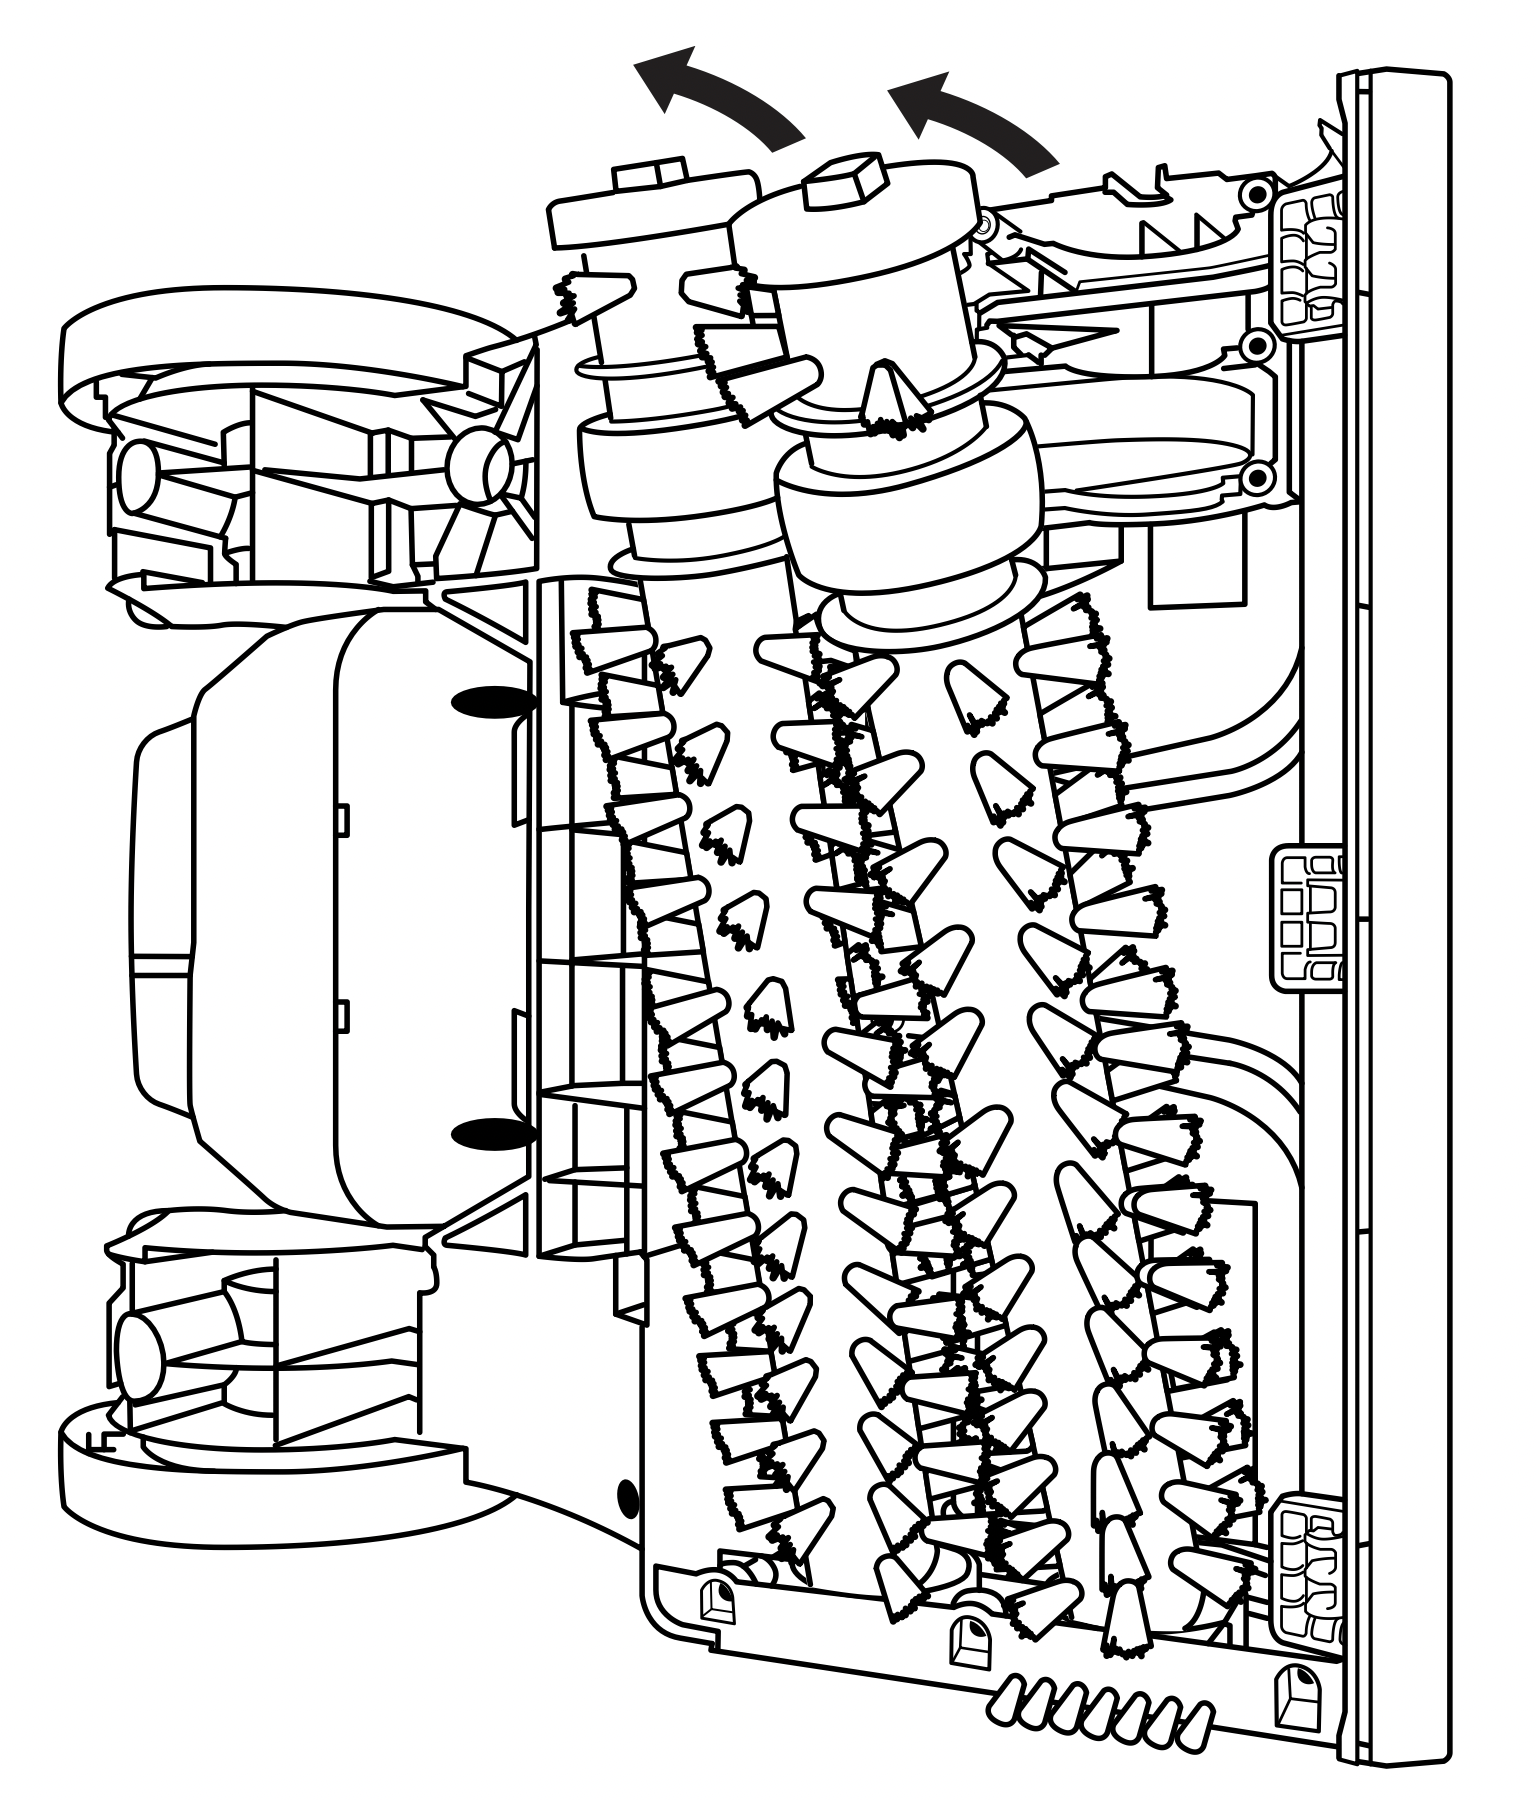
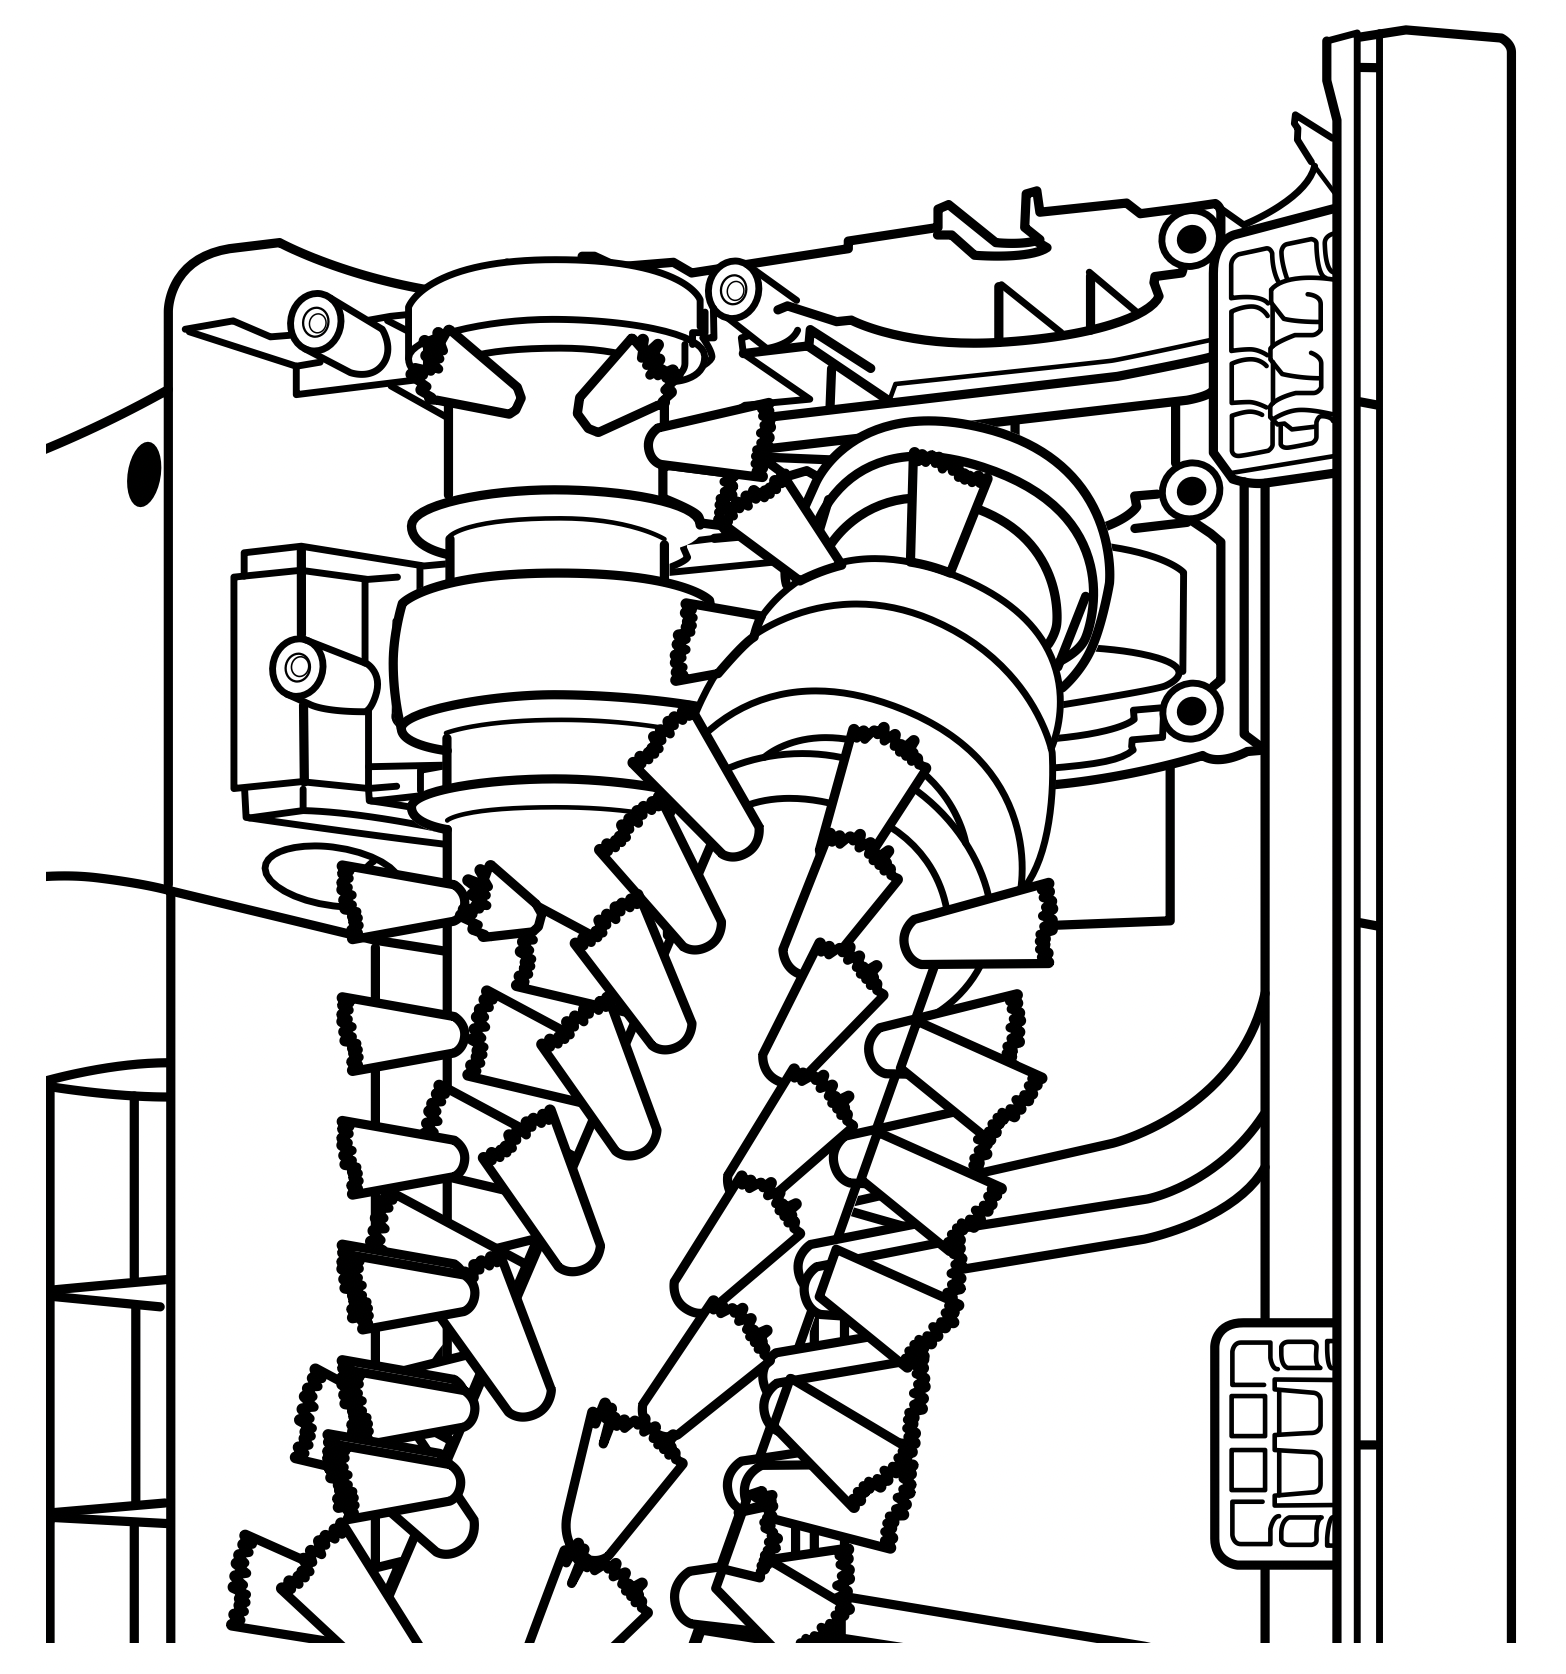
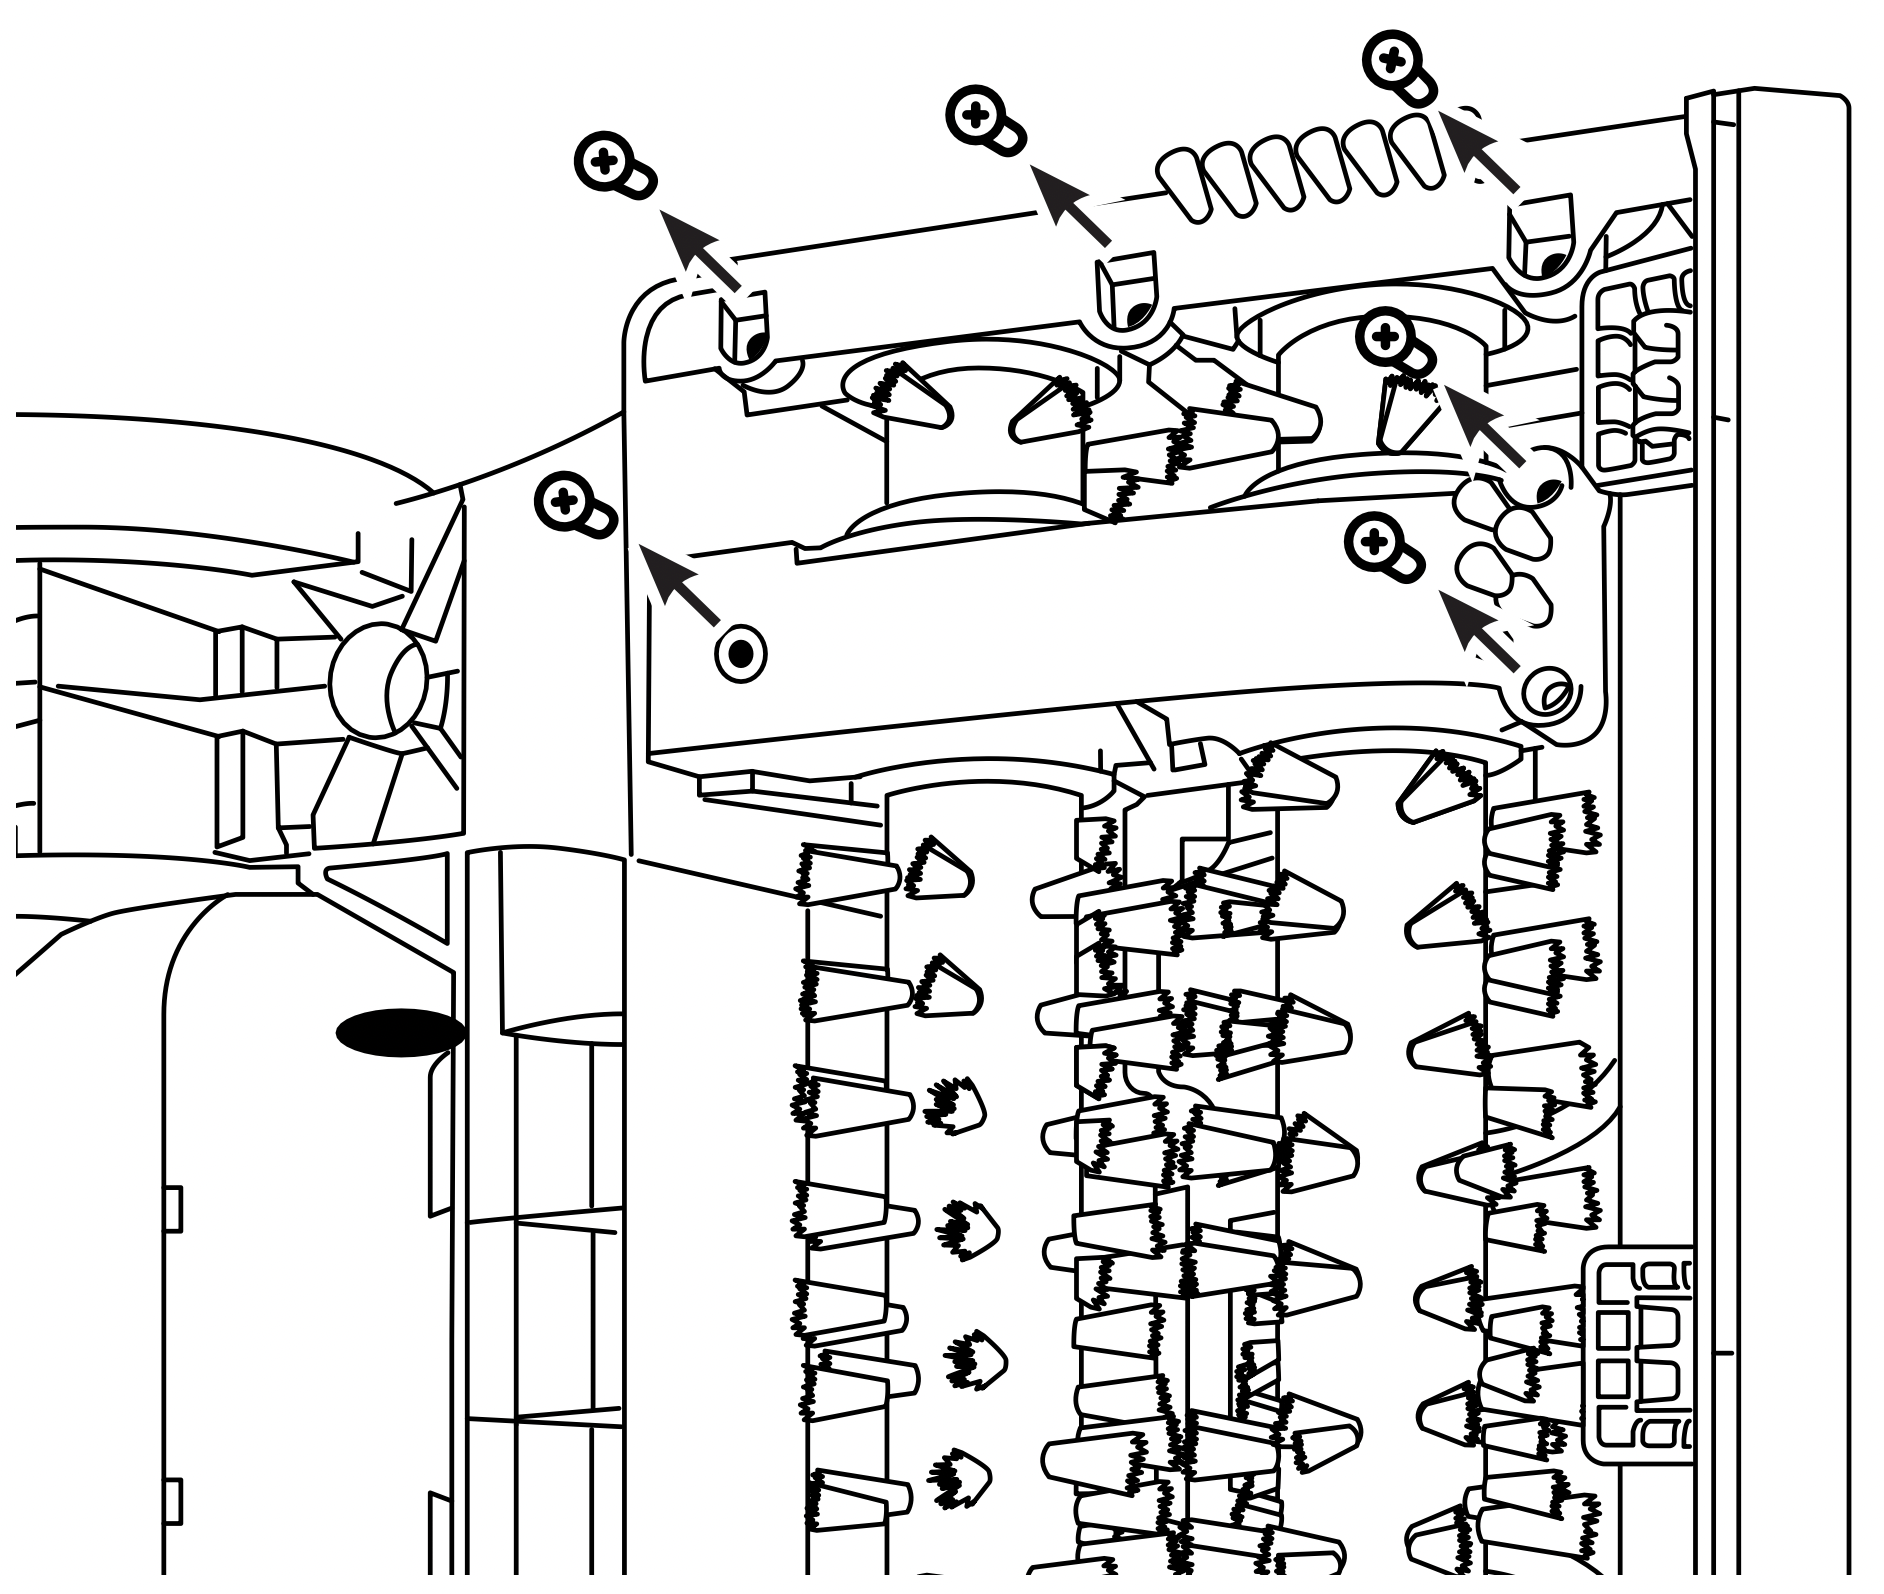
- Lay the product down to access the underside. Use a Philips screwdriver to remove 6 screws. Arrows show location of screws on the underside of your cleaner.
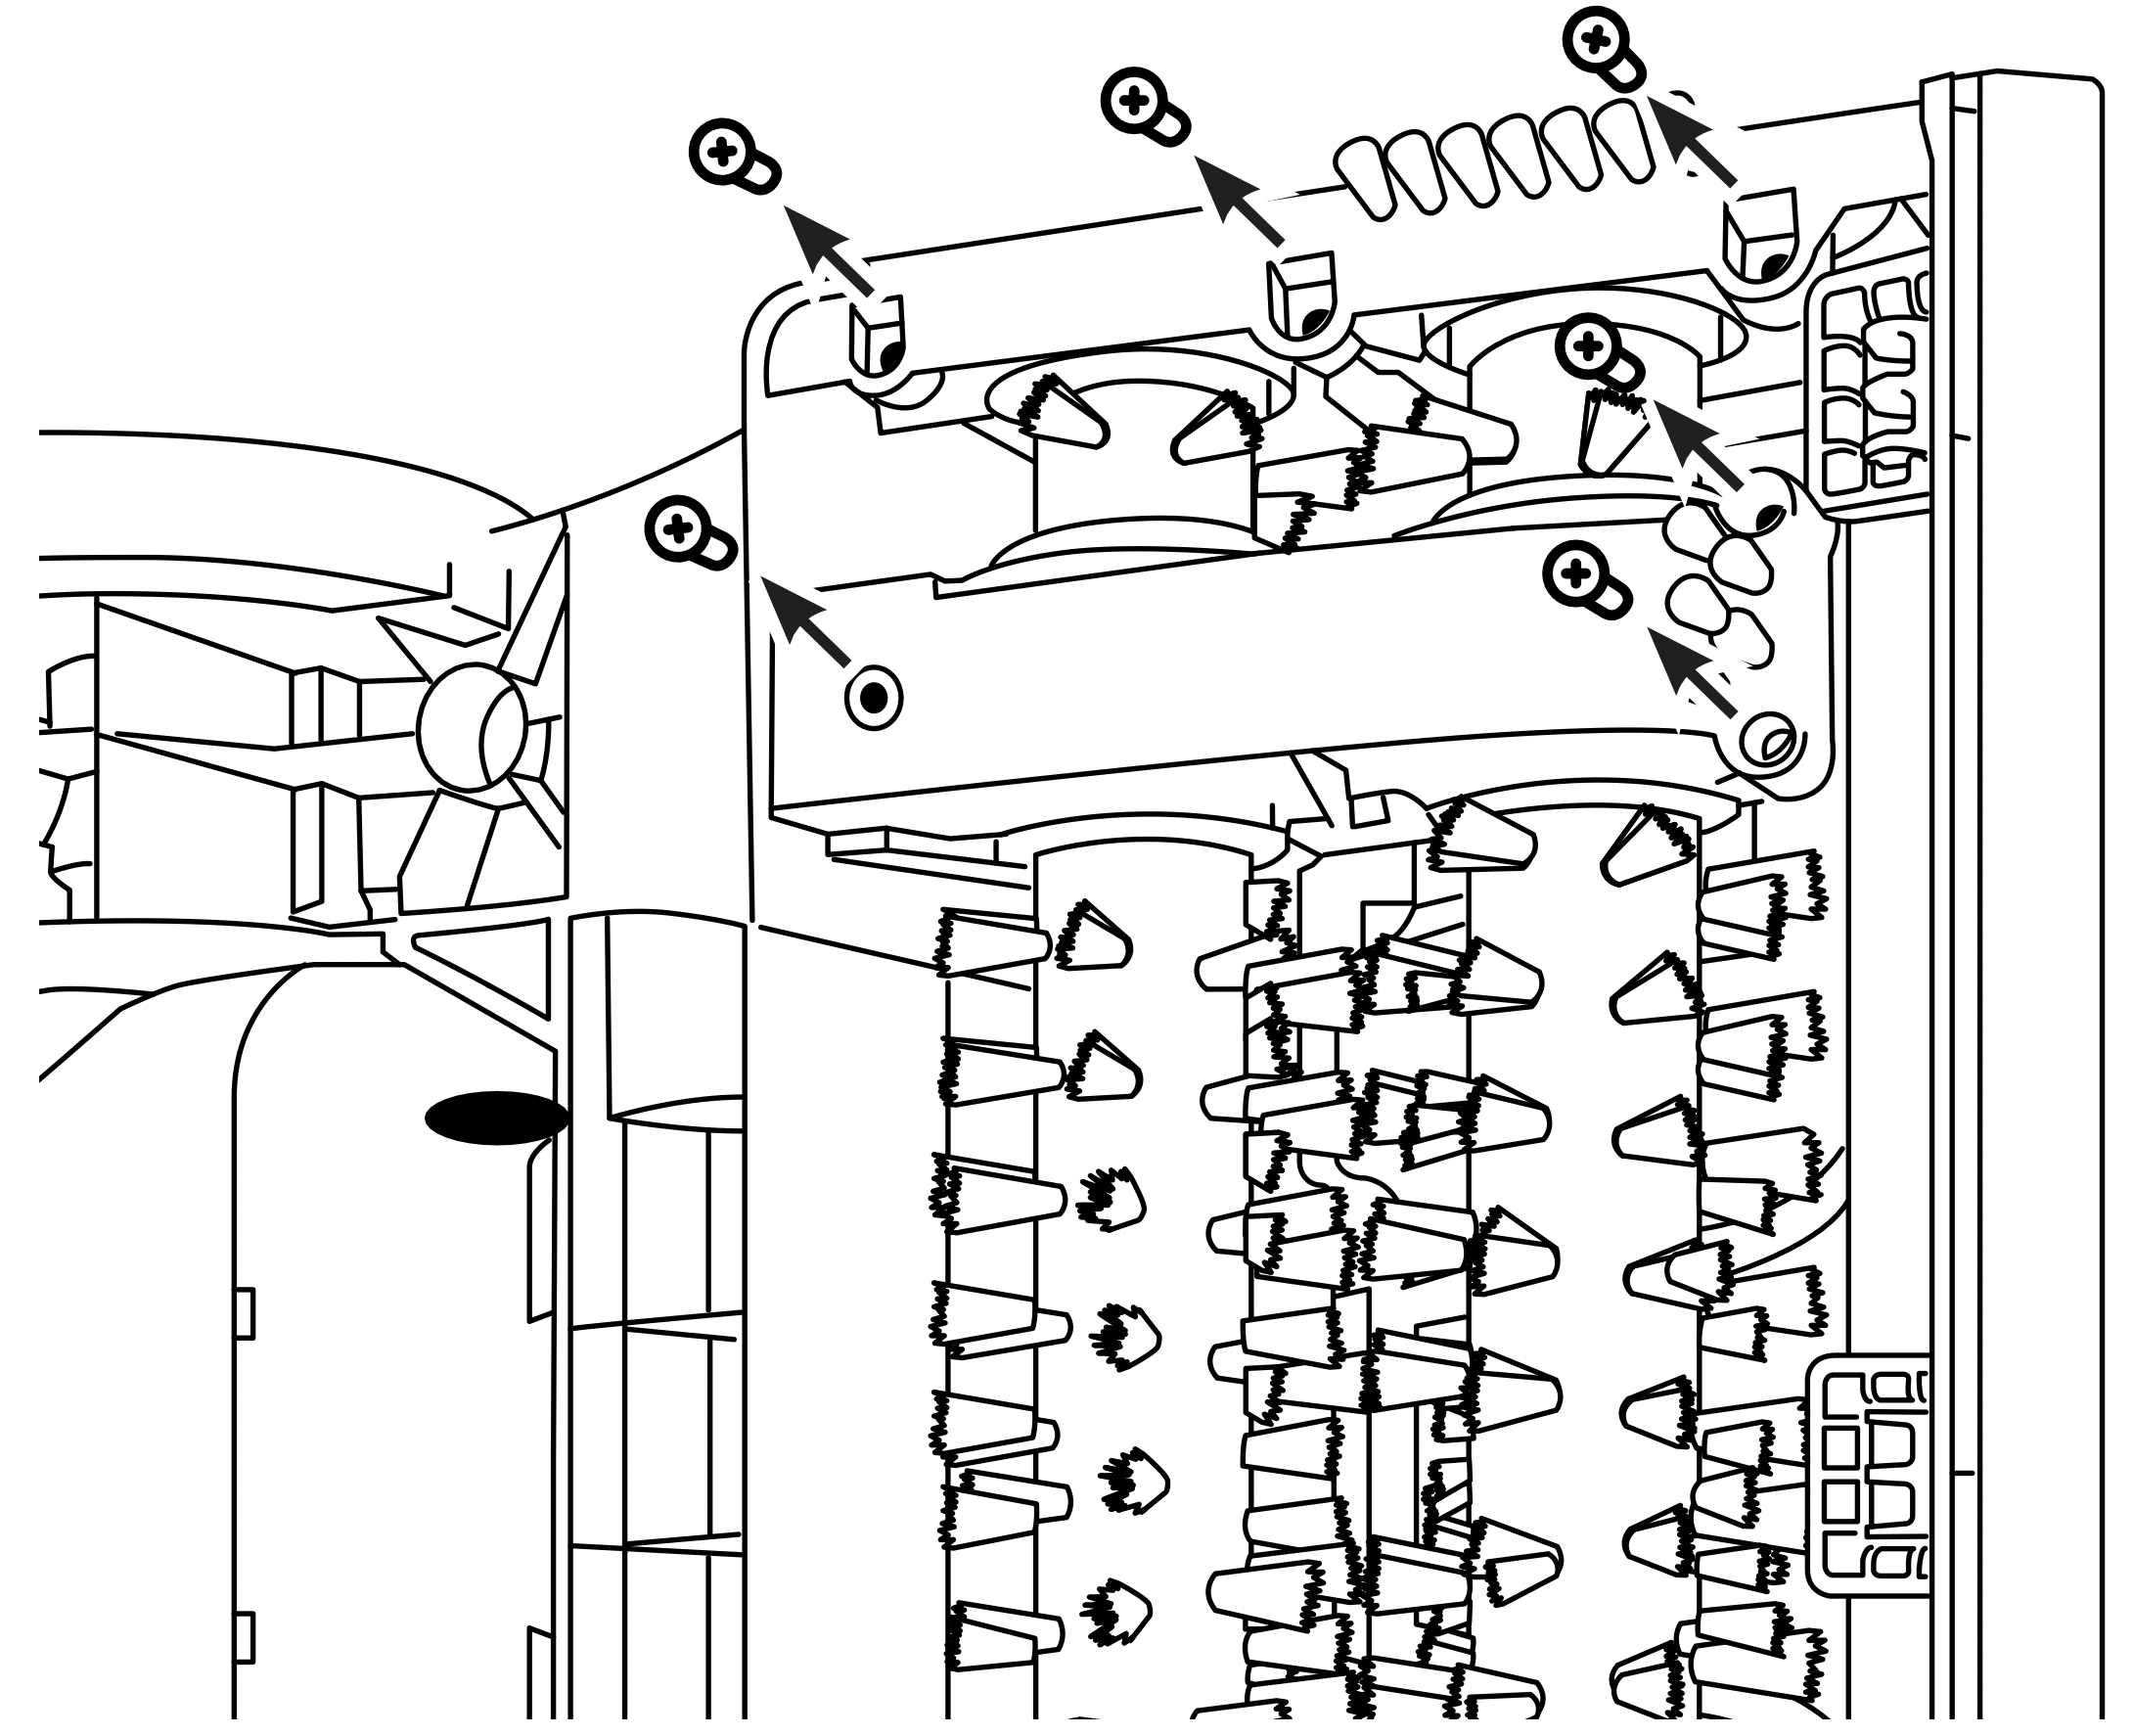
- Remove underside belt cover and the brush roll end cap.

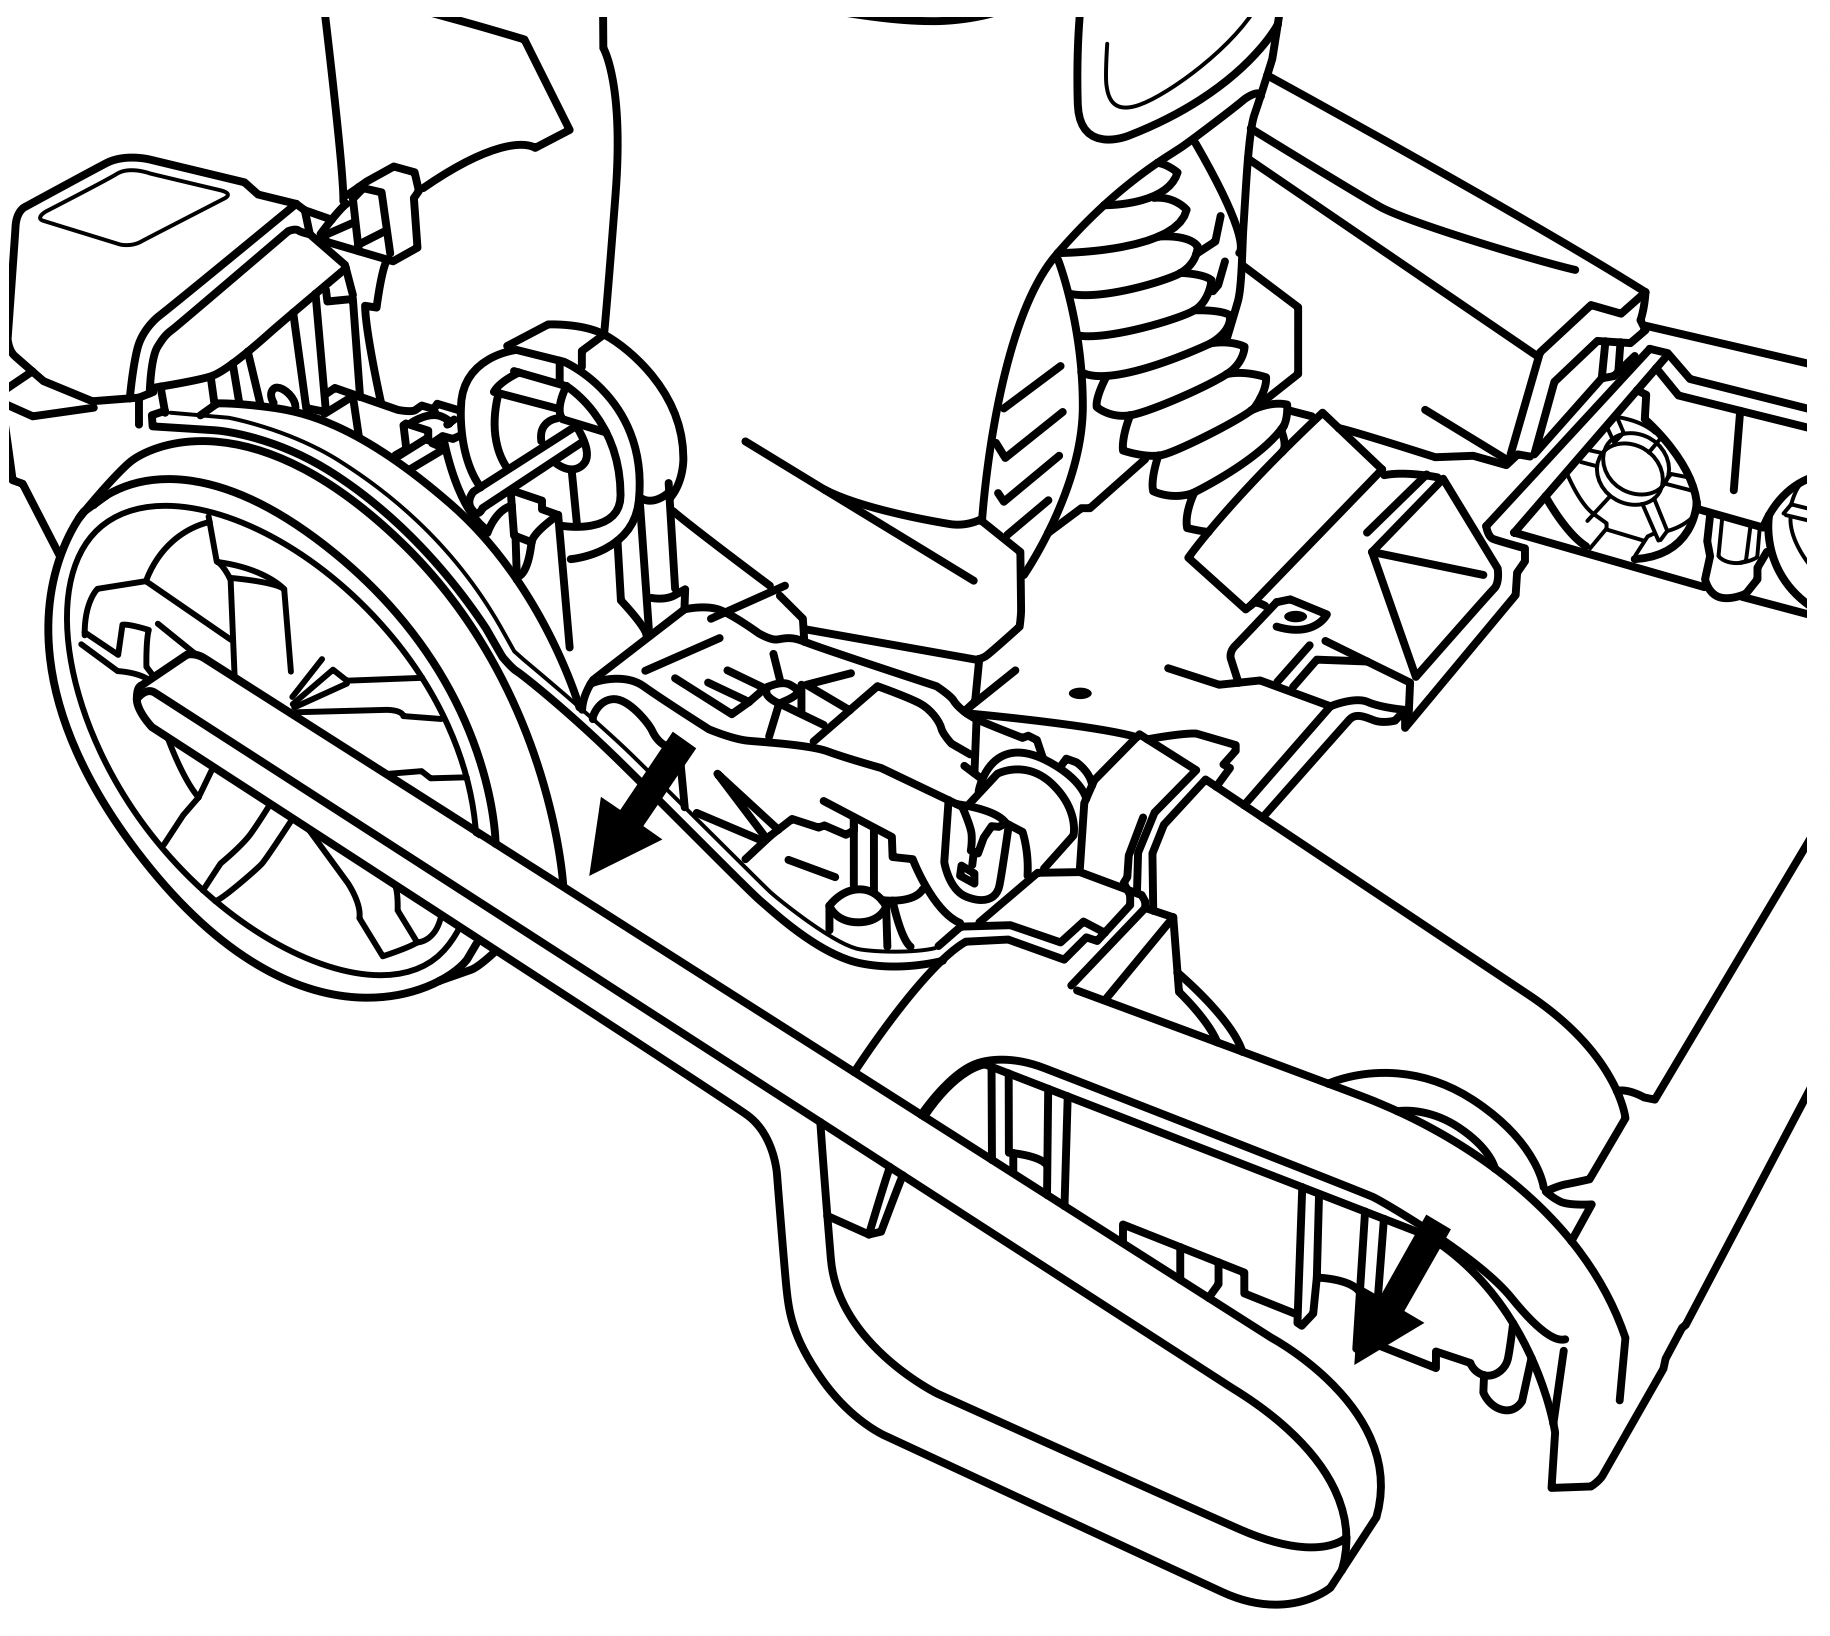
- Pull both brush rolls out toward user to remove from cleaner. Belt will still be attached to cleaner.
CORD STORAGE: Wrap the power cord around the cord hooks for convenient storage. Attach the plug end to the cord.
REMOVING THE BELT
- To remove belt, unscrew foot side cover from underside (3 screws).
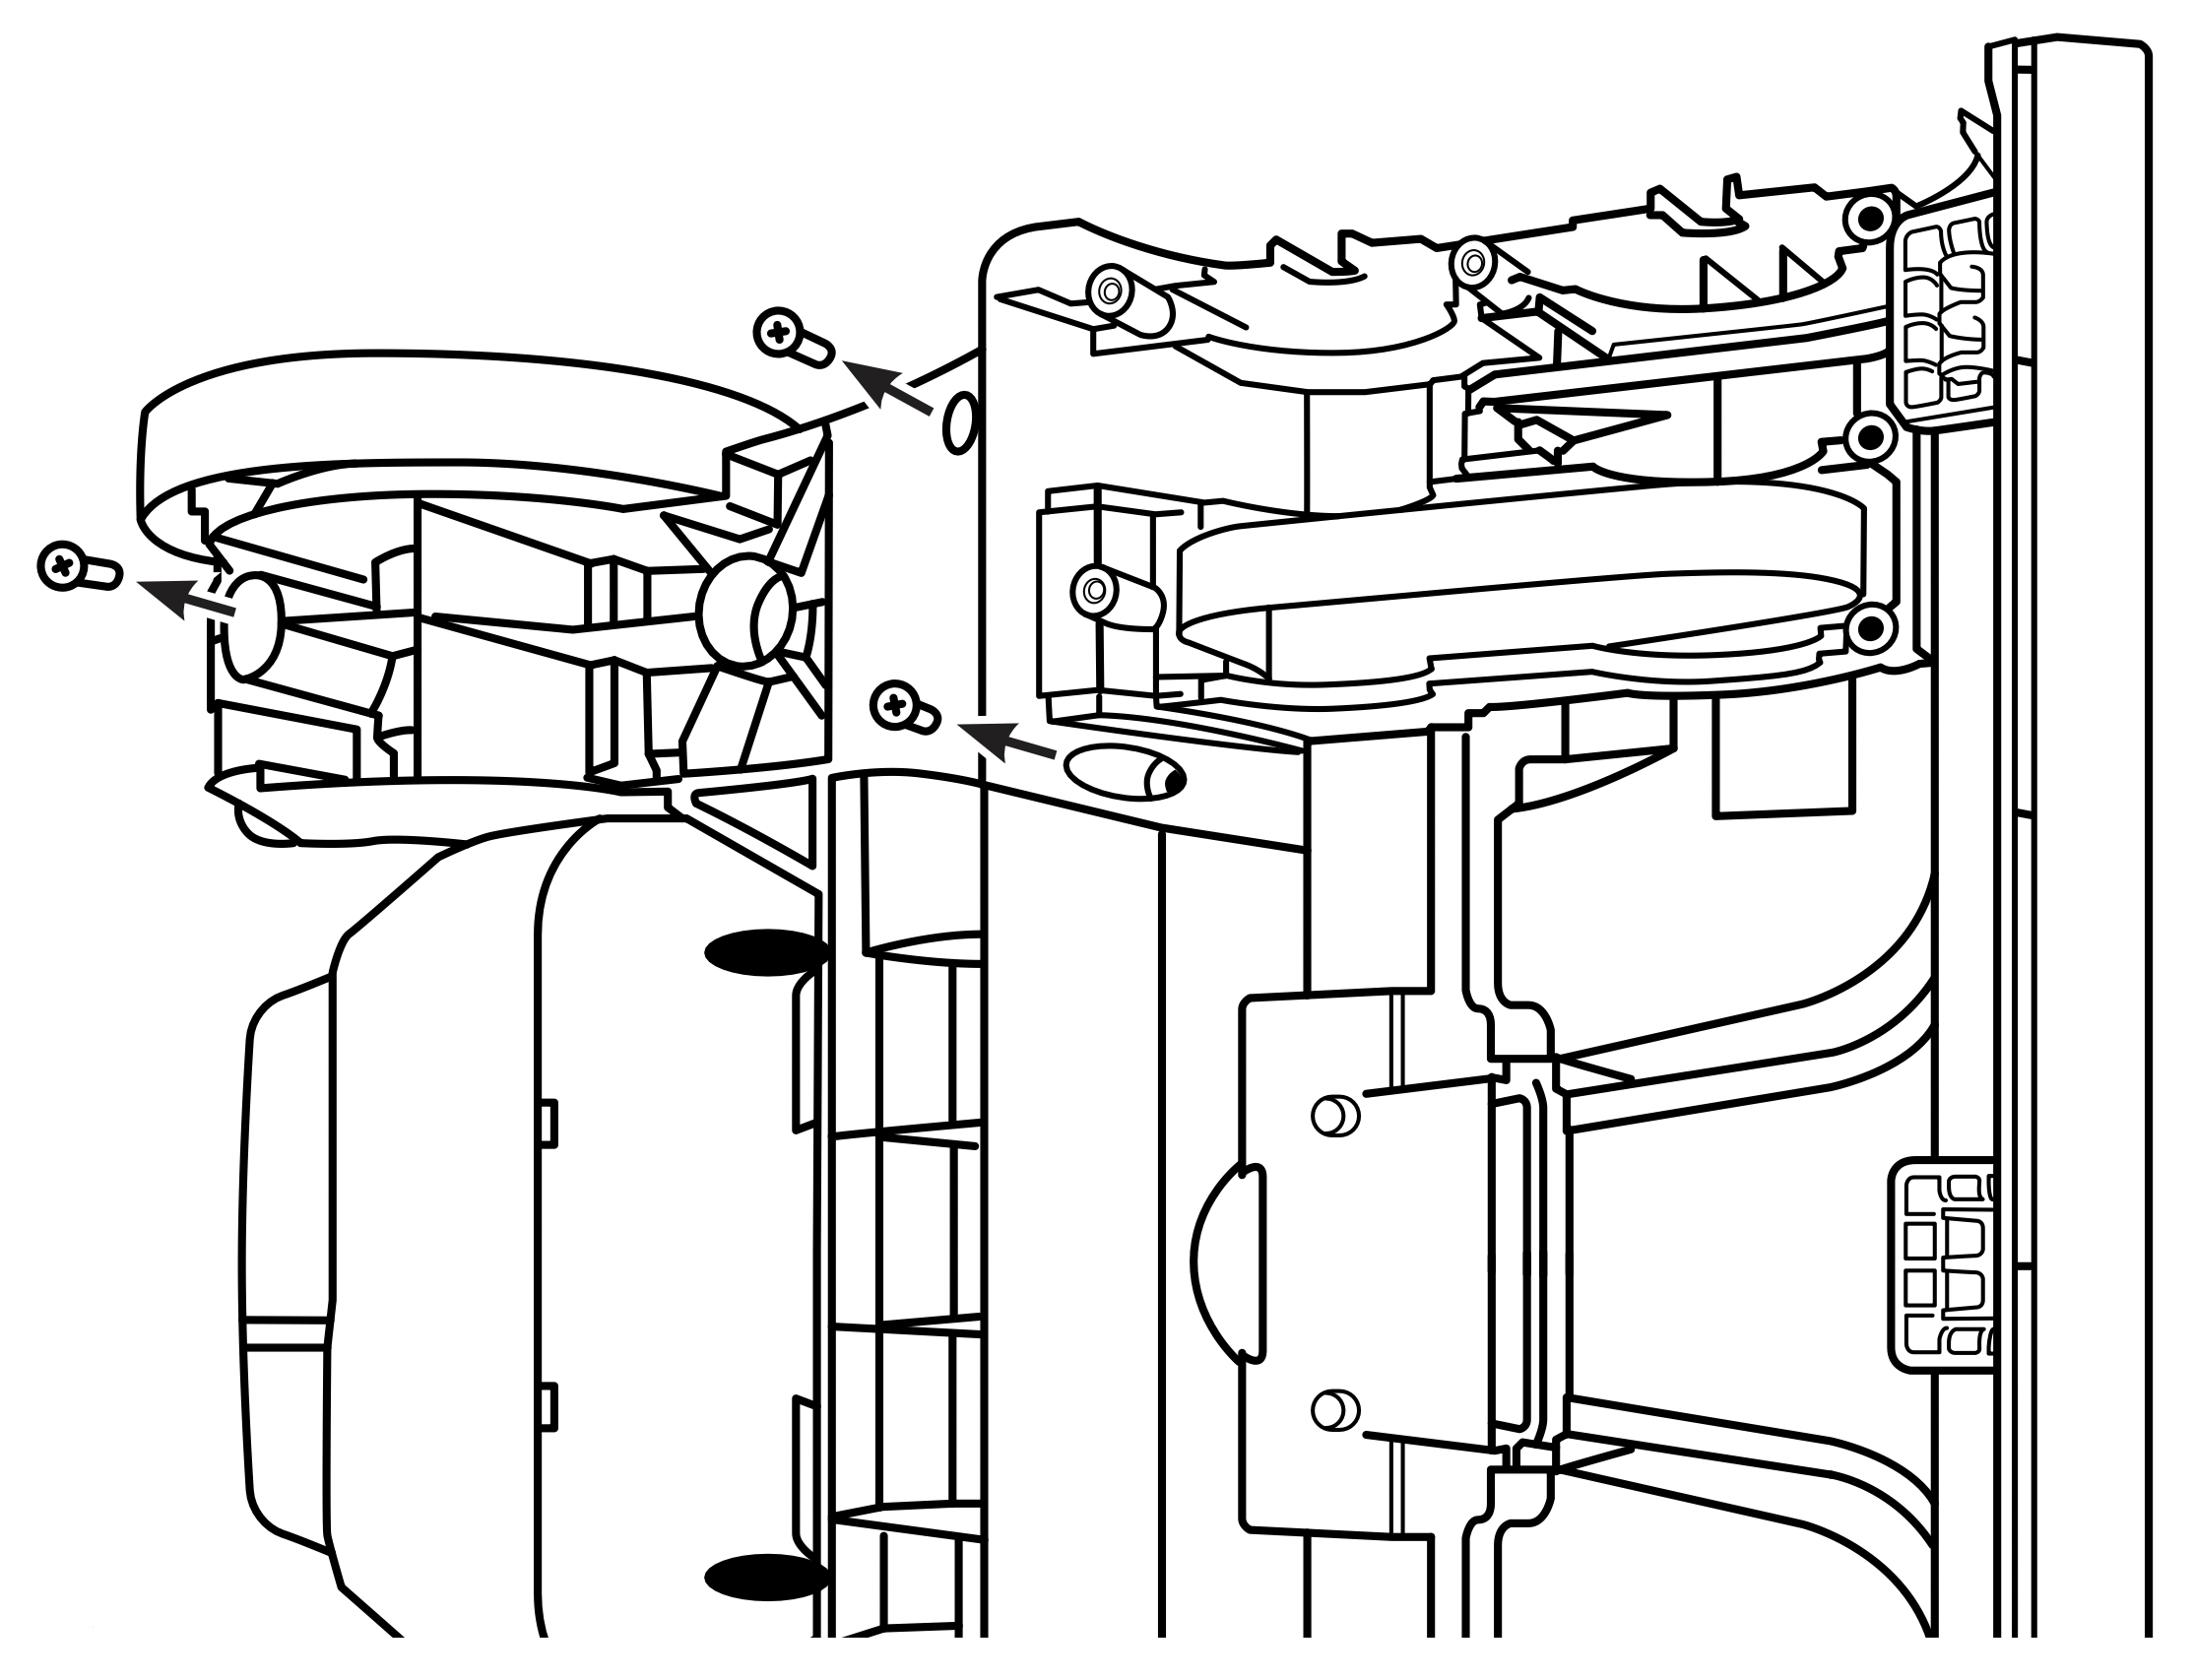
- Flip cleaner upright and remove upper belt cover from foot.
- Slide belt off shaft and remove. If replacing belt, install the new belt.
REPLACING THE BRUSH ROLL
- Slip brush roll through belt. Make sure belt is centered on pulley when replacing.
- With belt in place, pull and slide brush roll into unit, making sure that the brush roll end caps are in correct orientation.
- Replace belt cover and secure by replacing all 6 screws.
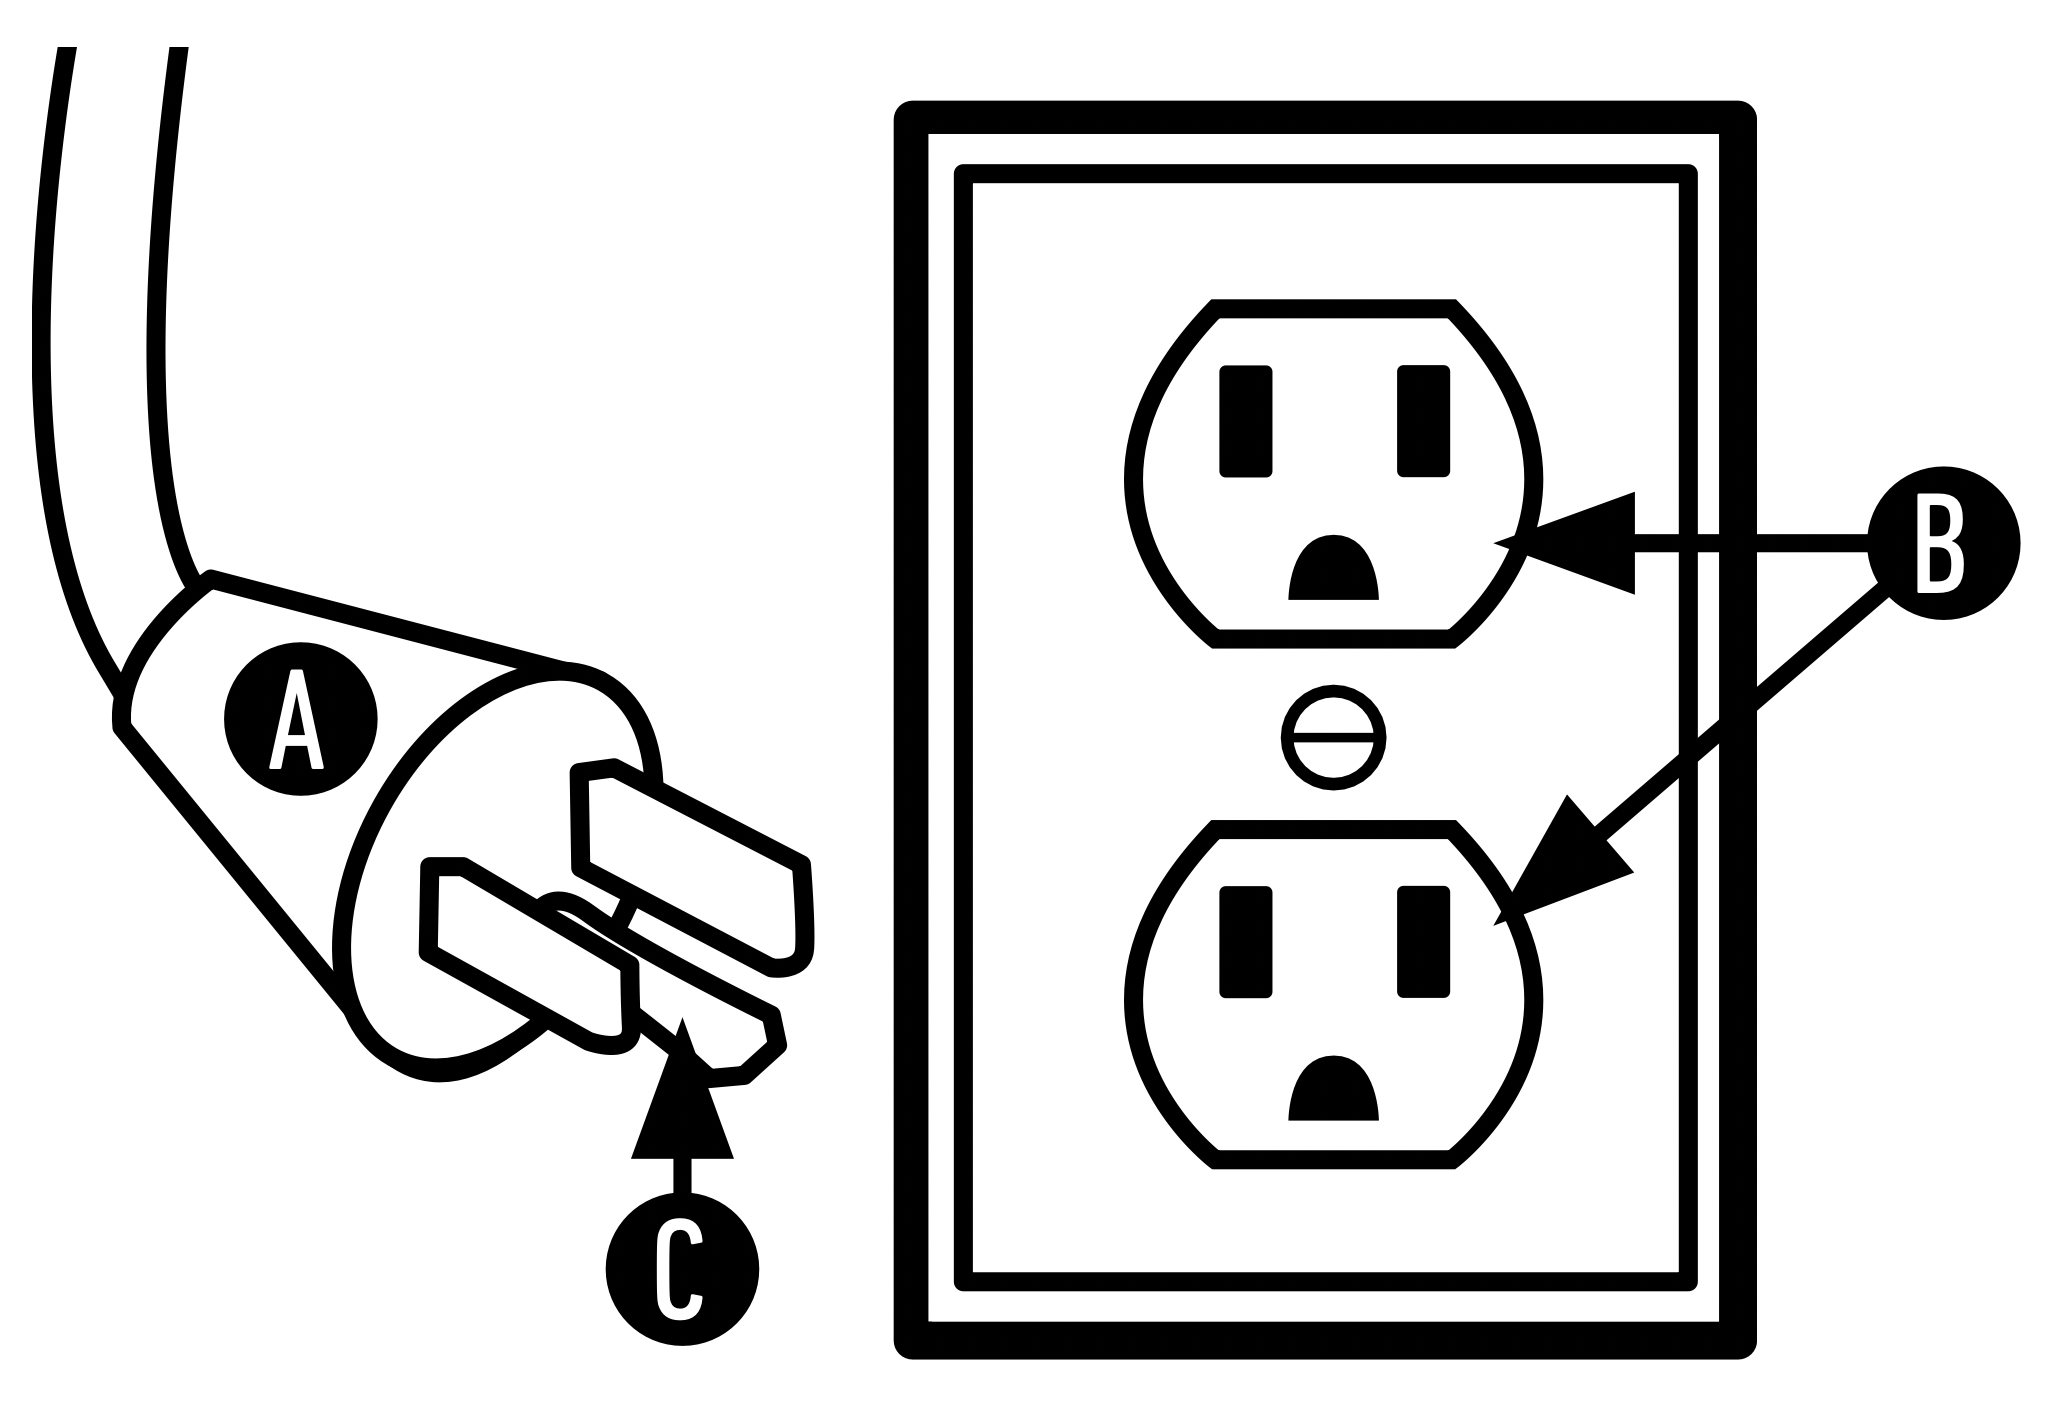
GROUNDING INSTRUCTIONS
This appliance must be grounded. If it should malfunction or breakdown, grounding provides a path of least resistance for electric current to reduce the risk of electric shock. This appliance is equipped with a cord having an equipment-grounding conductor (C) and grounding plug (A). The plug must be inserted into an appropriate outlet (B) that is properly installed and grounded in accordance with all local codes and ordinances.
WARNING: Improper connection of the equipment-grounding conductor can result in the risk of electric shock. Check with a qualified electrician or service person if you are in doubt as to whether the outlet is properly grounded. Do not modify the plug provided with the appliance - if it will not fit the outlet, have a proper outlet installed by a qualified electrician.
This appliance is for use on a nominal 120-volt circuit and has a grounding plug that looks like the plug (A) illustrated in Fig. 1.
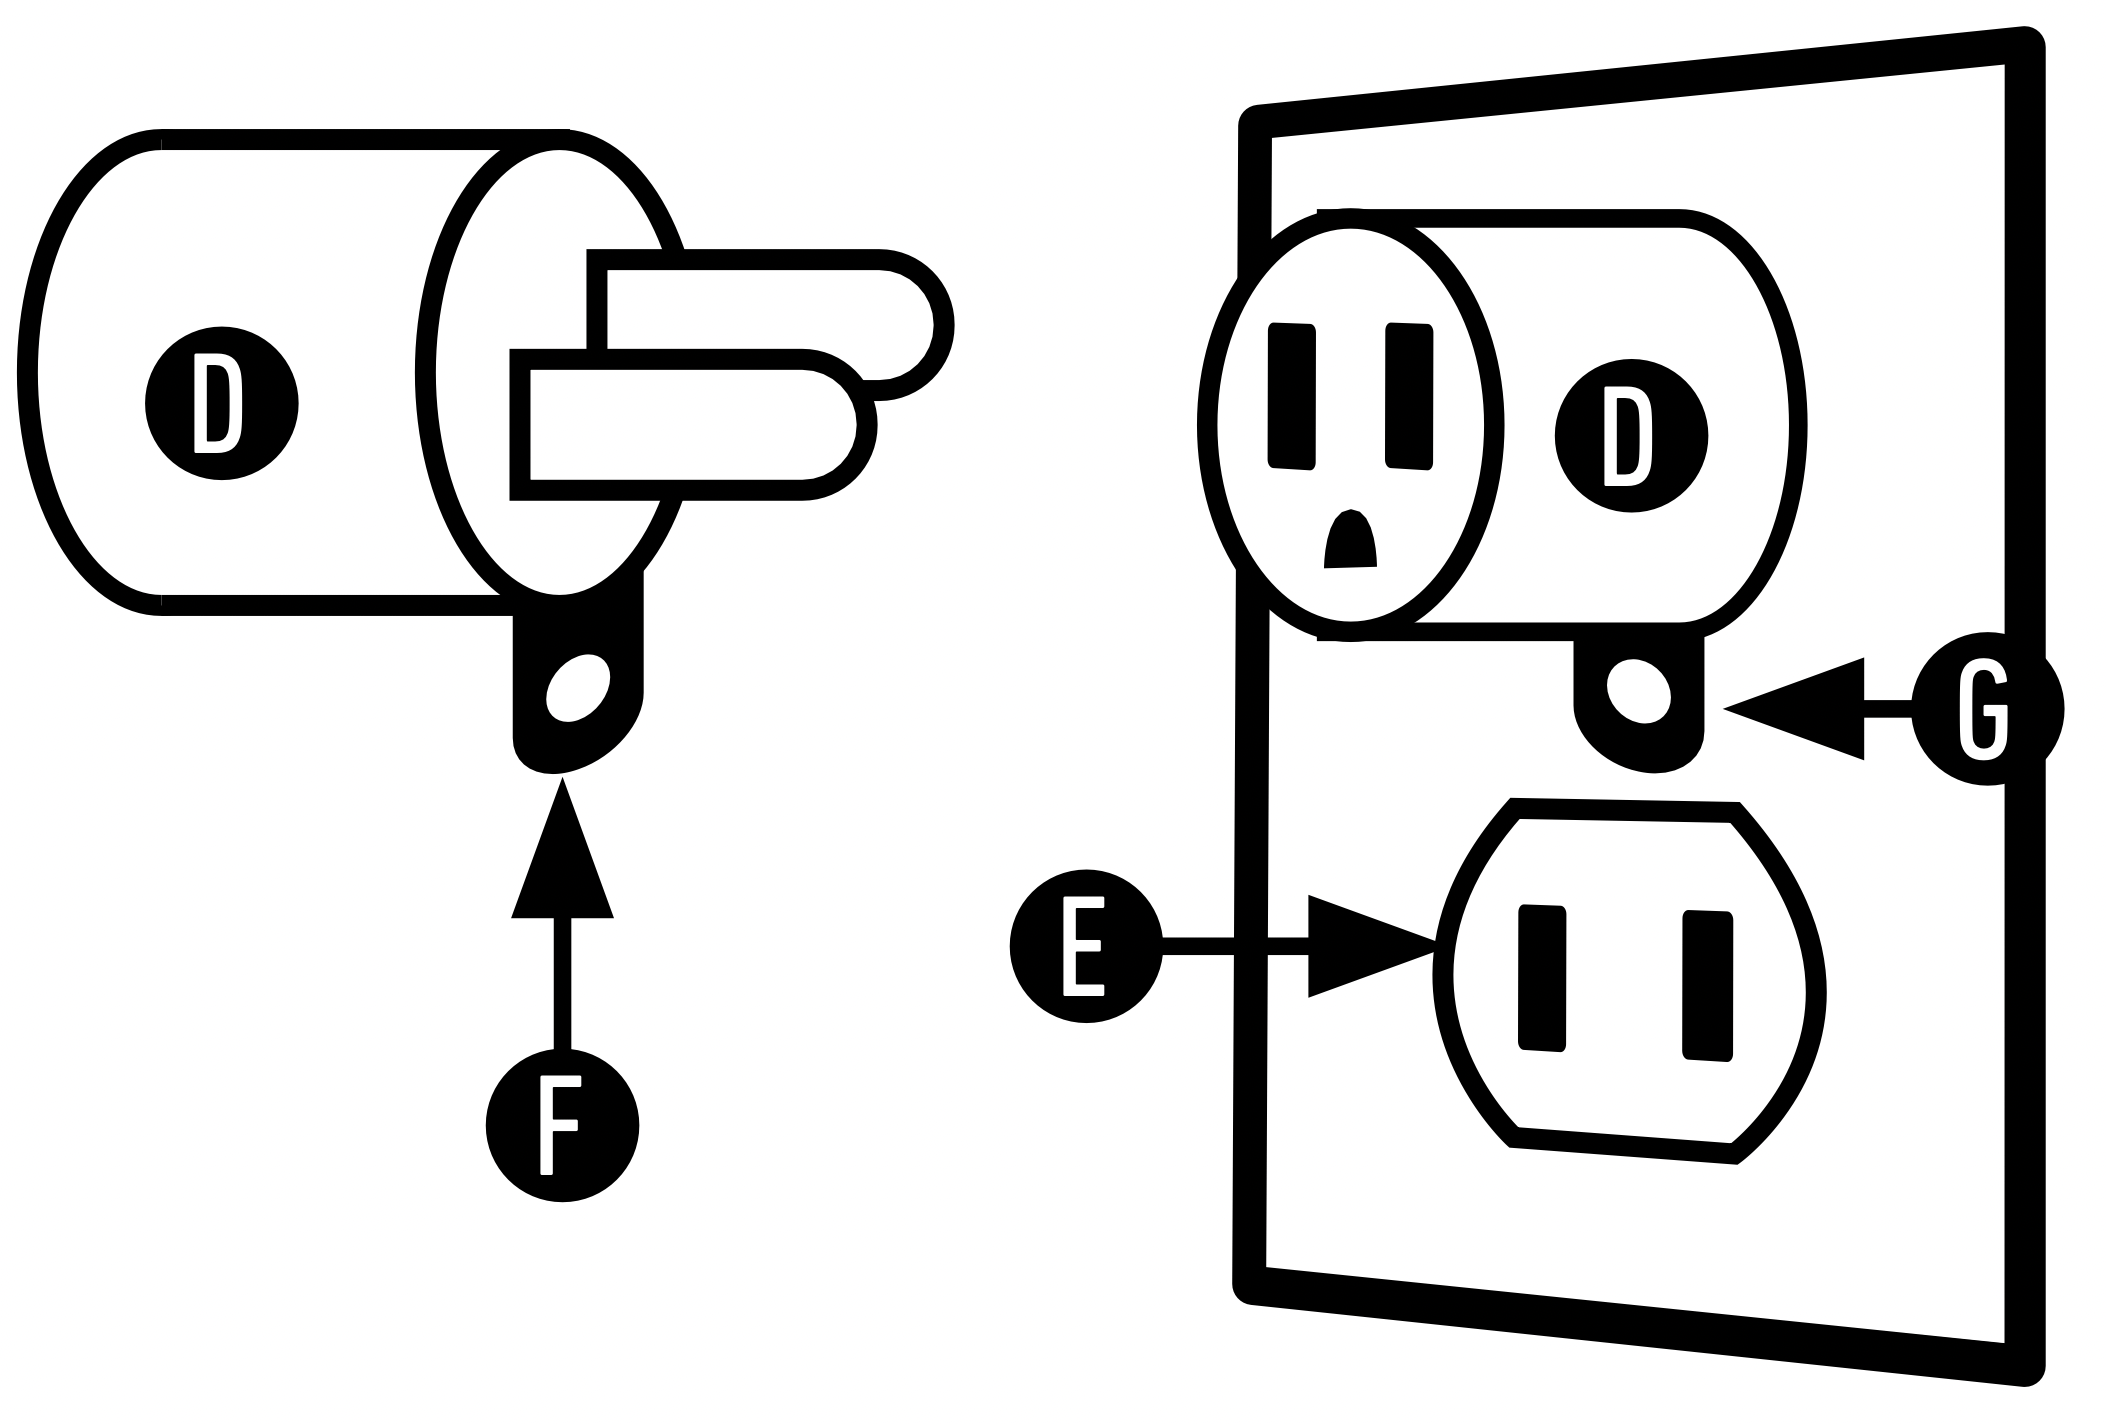
A temporary adapter (D) may be used to connect this plug to a 2-pole receptacle (E) if a properly grounded outlet is not available (Fig. 2). The temporary adapter should be used only until a properly grounded outlet (B) can be installed by a qualified electrician (Fig. 1). The green colored rigid ear, lug, or the like (F) extending from the adapter must be connected to a permanent ground (G) such as a properly grounded outlet box cover (Fig. 2). Whenever the adapter is used, it must be held in place by a metal screw. NOTE: In Canada, the use of a temporary adapter is not permitted by the Canadian Electrical Code.
TROUBLESHOOTING
WARNING: To reduce the risk of personal injury, unplug before cleaning or servicing.
CAUTION: To reduce the risk of injury from moving parts - Unplug before servicing. Do not use cleaner without brushes in place.
| PROBLEM |
POSSIBLE CAUSE |
POSSIBLE SOLUTION
|
| Cleaner won’t run |
- Not firmly plugged in.
- No voltage in wall plug.
- Blown fuse or tripped breaker.
- Fuse in cleaner blown.
- On/Off pedal not depressed.
|
- Plug unit in firmly.
- Check fuse or breaker in home.
- Replace fuse or reset breaker in home.
- Take to service center.
- Press pedal.
|
| Low suction |
- Dirty Water Tank full/automatic shut off engaged.
- Blockage in tool on end of hose.
- Dirty Water Lid not on correctly.
- Dirty Water Tank Debris Filter clogged.
- Blockage in nozzle.
- Recovery Tank not properly secured.
- Recovery Nozzle not on correctly.
- Blockage in hose.
|
- Remove and empty Dirty Water Tank. See "How to Empty."
- Remove tool and clear blockage.
- Make sure lid is on securely. See “How to Clean."
- See "How to Clean."
- See "How to Clean."
- Replace Recovery Tank and secure recovery tank latch.
- Remove and replace Recovery Nozzle. See “How to Remove & Clean Nozzle.”
- Drop a coin through, clear with broom handle.
|
| Hose Nozzle stops spraying liquid during use |
- Clean Water Tank is empty.
- Loose connection to connection port on foot of cleaner.
|
- Turn off Cleaner and fill Clean Water tank.
- Check for secure connection to connection port on foot of Cleaner.
|
| Accessory Tool will not spray after filling the Clean Water Tank or Solution Tank |
- Air is trapped in the hose & pump.
|
- Turn on the Cleaner. If hose does not spray, prime the pump by lowering the hose down to the floor and hold the trigger for up to on minute.
- Aim downward & squeeze trigger.
|
| Hose will not spray after priming pump |
- Pump is defective.
- Not connected properly.
|
- Call for service: 1-800-944-9200.
- Check connection.
|
| Clean water won’t dispense |
- Clean Water Tank not firmly in place.
- Clean Water Tank empty.
|
- Make sure tank is securely locked in position.
- Refill container according to cleaning instructions.
|
| Brushes won’t rotate during floor cleaning |
- Belt is broken.
- Unit in upright position.
|
- Replace belt. See “Maintenance.”
- Brushes will not rotate in upright position. Step on handle release to start cleaning.
|
| Water is Leaking out of Carpet Cleaner |
- Clean Water Tank or Dirty Water Tank not FIRMLY in place.
|
- Make sure the tank is secure.
- Carpet Cleaner may drip residual moisture after use. Allow unit and brushes to dry before storing on hard floor surface.
|