Loading ...
Loading ...
Loading ...
7
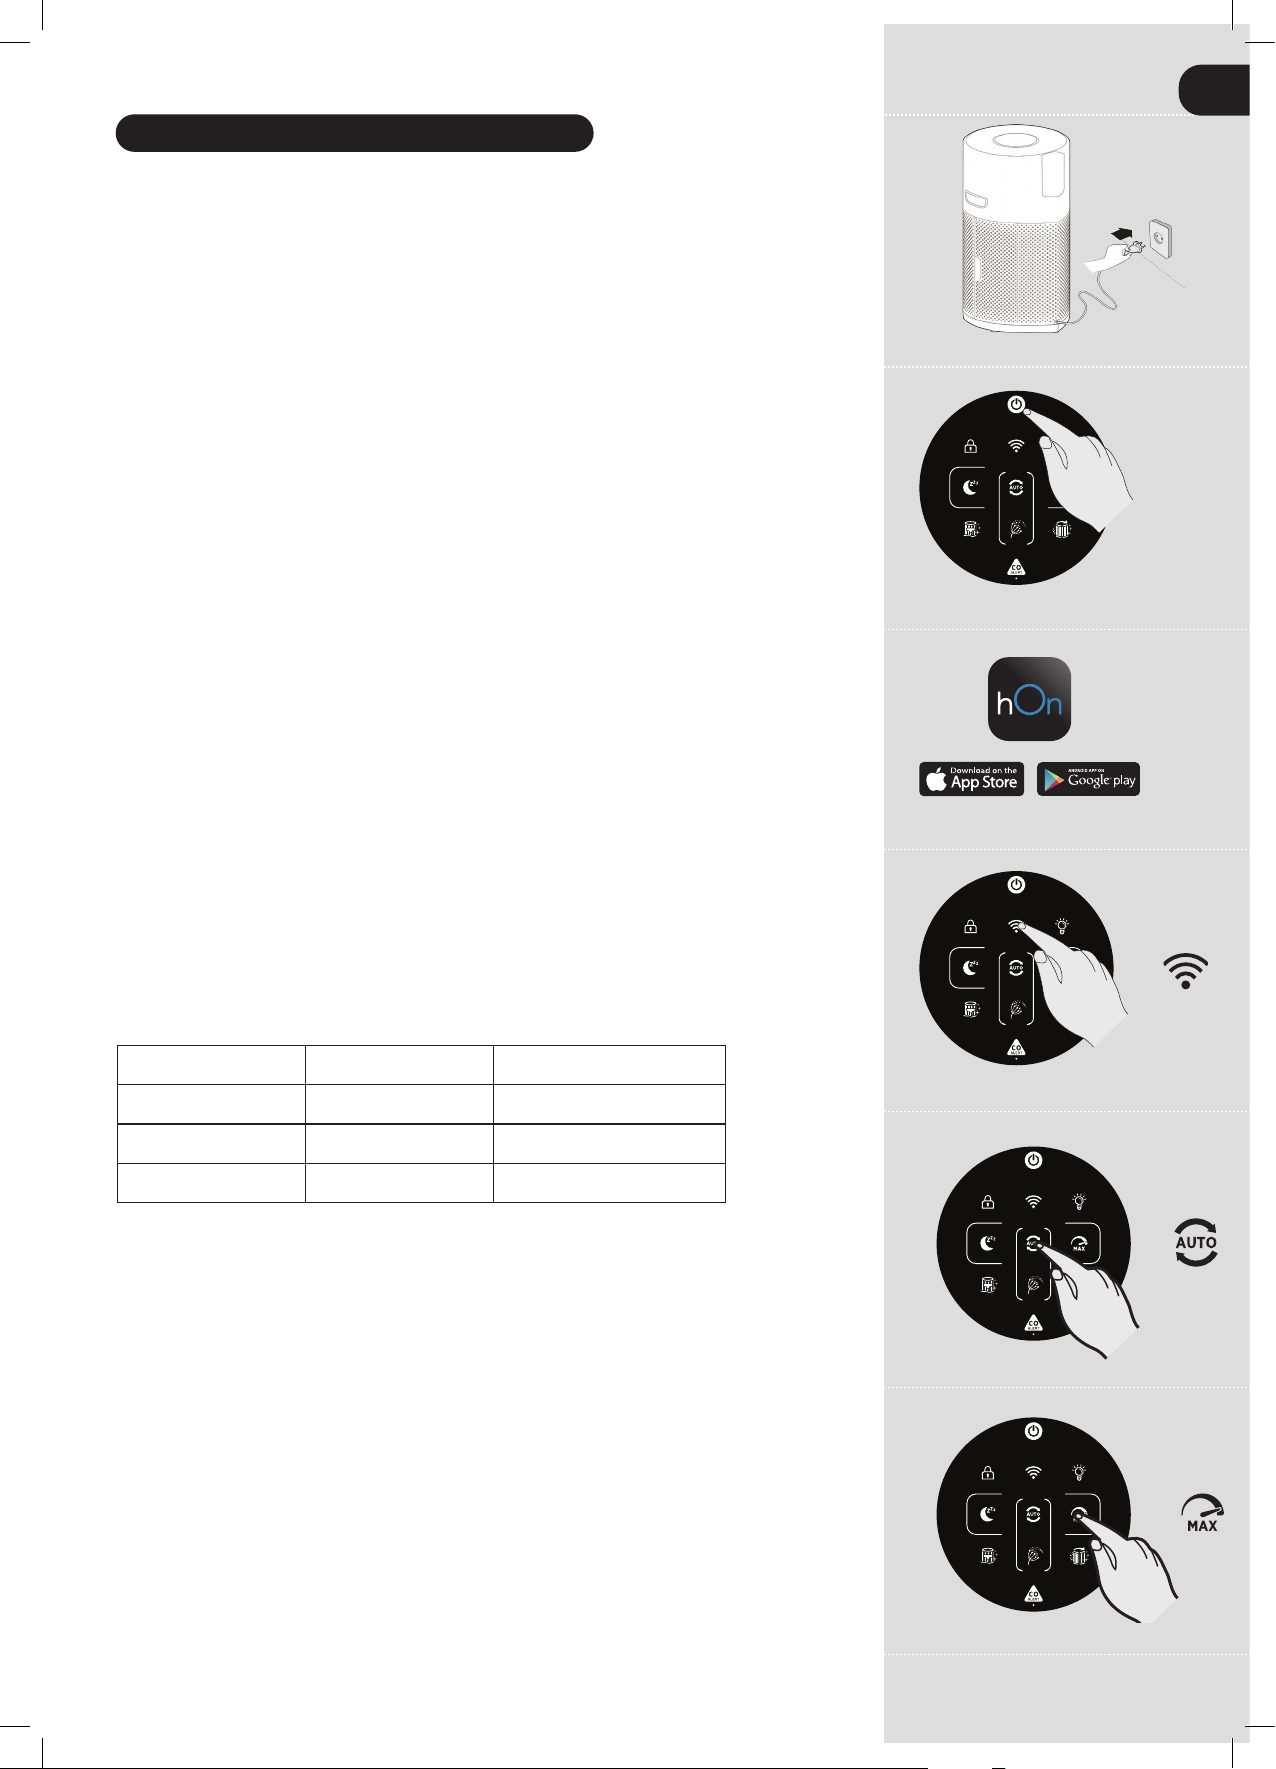
Fig. 2
Fig. 3
Fig. 6
Fig. 5
Fig. 4
Fig. 7
Plug in the Product [Fig. 2]:
Pull out the power cord and plug into a power supply.
All lights on the Control Panel / Display will fully illuminate for approximately 1 second to indicate a
succesful plug in.
The POWER button will be dimly lit and the CO sensor light will be ON to indicate that the Multi Sensor
Monitoring System has started working to monitor the indoor Carbon Monoxide level.
Switching on the Product [Fig. 3]:
To switch on your product, press the POWER button on the display.
The Air Quality LED Ring will illuminate through all colours in sequence whilst the sensors are analysing
the realtime air condition. After a few seconds, the Air Quality LED ring will select the appropriate colour
for the air quality at that time.
Your H-Purier product will immediately enter AUTO MODE and begin to purify the indoor air.
The AUTO MODE button, LIGHT CONTROL button and on the Display will illuminate.
The following functions are available via the Display buttons:
Press the Wi-Fi button to turn on/off remote access.
Press the AUTO, MAX or SLEEP buttons to select a purifying mode.
Press the LIGHT CONTROL button to set the brightness of the display lights.
Press the CHILD LOCK button to inactivate all the buttons on the Control Panel / Display.
Press the POWER button to switch off the air purier.
Pairing to Wi-Fi:
In order to access all the H-Puriers functions from anywhere, it is suggested to download the hOn App.
You will be able to control your product in the most efcient way.
Instructions:
1. Download the hOn application from the App Store or Google Play. [Fig. 4]
2. Open the APP, create an account with your e-mail and a password.
3. Conrm login.
4. Ensure your mobile device is connected to Wi-Fi.
5. Log into the hOn app.
6. Press and hold the Wi-Fi button on the display for 5 seconds, there will an audible beep and the
Wi-Fi button will start ashing to indicate it is waiting for a connection. [Fig. 5]
7. Follow the in app instructions to connect your mobile device to your product.
8. When successfully paired, the Wi-Fi button on the product will remain illuminated.
9. To reset the Wi-Fi, press & hold the Wi-Fi button for 5 Secs.
Wireless Parameters for Pairing
Technology Wi-Fi Bluetooth
Standard IEE 802.11 b/g/n Bluetooth v4.2, BR/EDR, BLE
Frequency Band(s) (MHz)
2401 ~ 2483 2402 ~ 2480
Maximum Power (mW)
100 10
MODE Functions:
There are 3 available air purifying modes via the display: AUTO MODE, MAX MODE & SLEEP MODE
Auto mode is the default setting for your product when switched on, all modes can be selected manually
by pressing the related button on the display.
POLLEN ALLERGY mode can be activated via the hOn APP.
AUTO MODE [Fig. 6]:
This is the default mode of your H-Purier product when rst switched on. In Auto Mode, the H-Purier
automatically adjust its fan speed to the actual indoor air quality level to always guarantee an optimal air
purication.
This is the recommended setting for your product.
In AUTO mode, after 30 minutes of excellent air quality, your product will enter an ECO mode by
pausing the purifying function, the Multi Sensor Monitoring System will continue to analyse the indoor air
and automatically switch on the purifying function when required.
MAX MODE [Fig. 7]:
Press the MAX mode button on the display to activate air purifying at maximum power setting. To exit
MAX mode simply select AUTO mode or SLEEP mode.
USING YOUR H-PURIFIER
GB
Loading ...
Loading ...
Loading ...