Loading ...
Loading ...
Loading ...
20 21
ninjakitchen.eu
VACUUM BLENDING
WITH YOUR SINGLE-SERVE FRESHVAC™ CUP
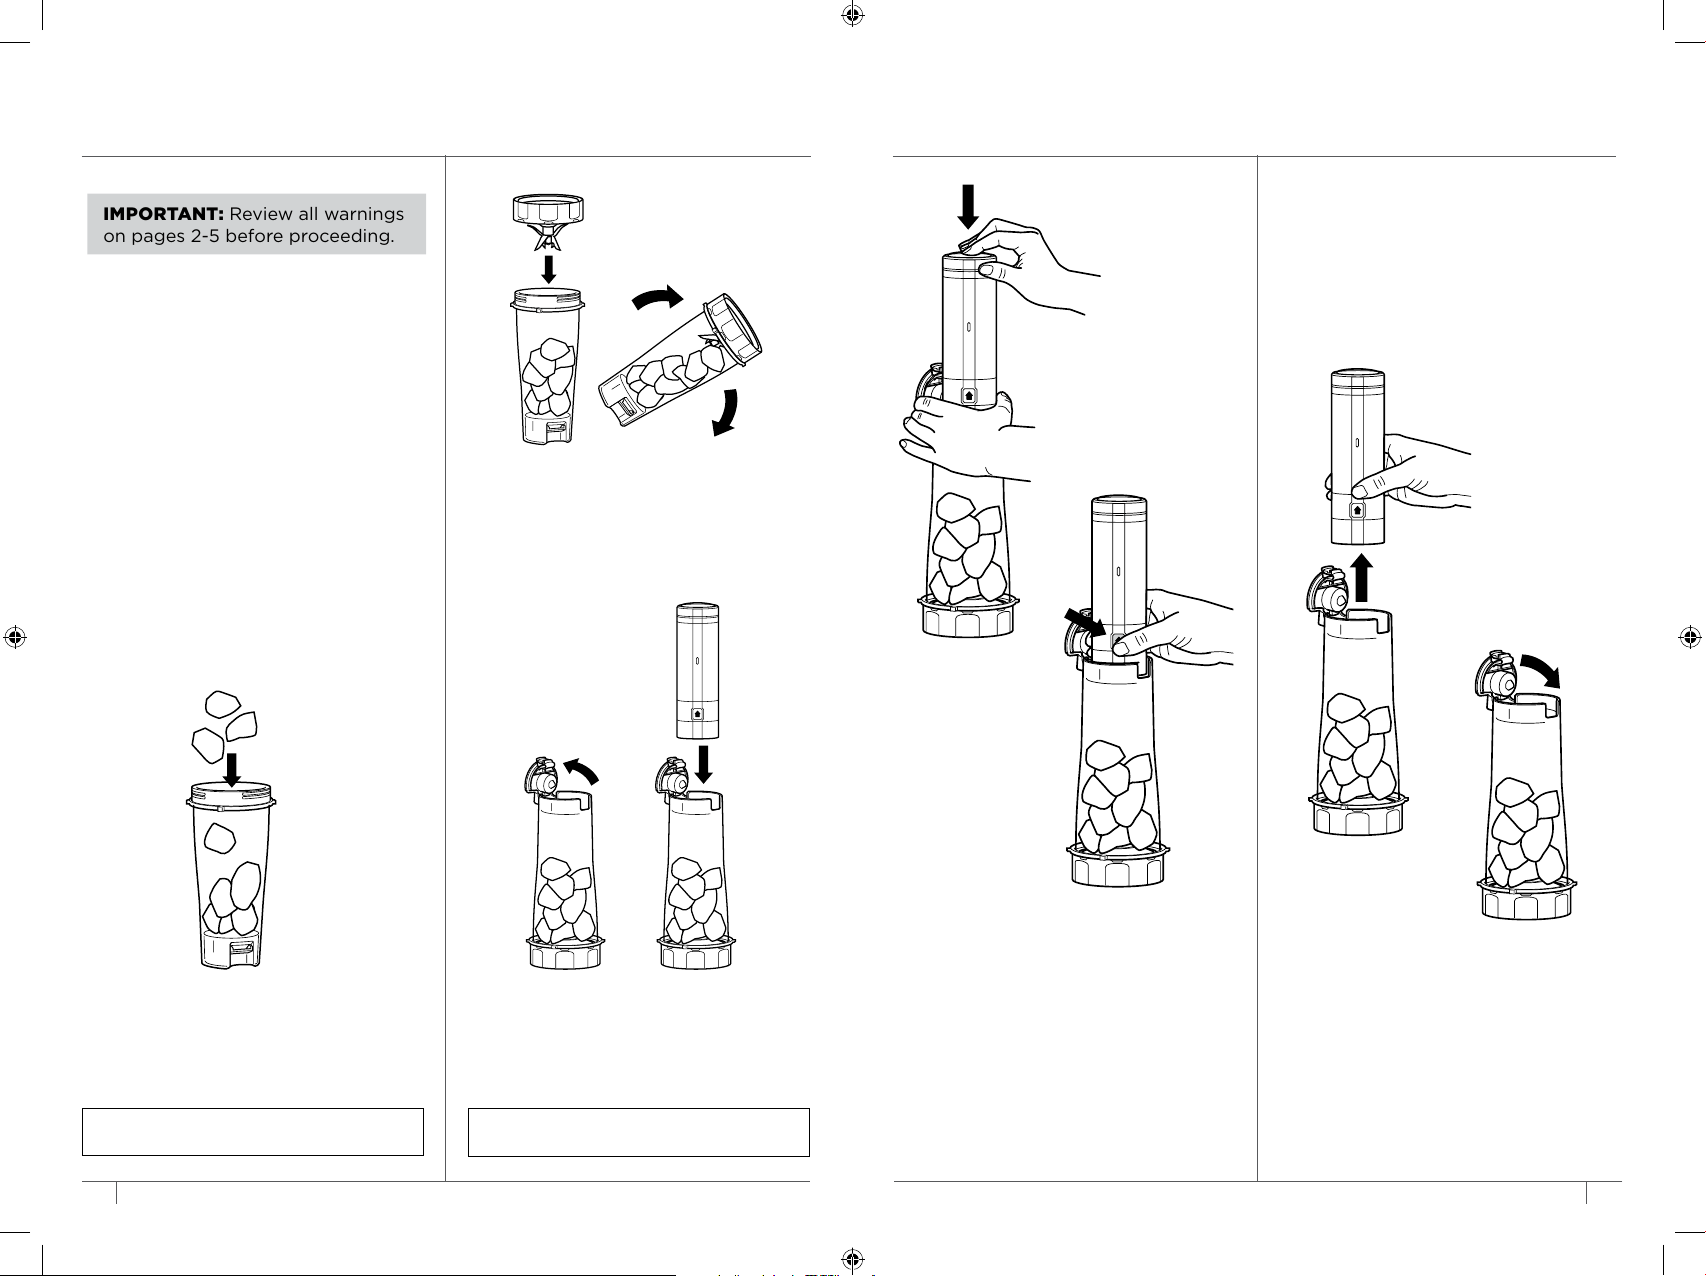
IMPORTANT: Review all warnings
on pages 2-5 before proceeding.
SINGLE-SERVE VACUUM CUP
WITH VACUUM SEAL CAP�
2
Place the Pro Extractor Blade®
Assembly on the top of the cup
and turn clockwise to seal.
3
Turn cup upside down so
the Flip & Seal Lid is on top.
1
Add ingredients to the FreshVac™ Cup.
DO NOT add ingredients past
the MAX LIQUID line on the cup.
4 To open the Flip & Seal Lid,
press the tab and lift. Place the
FreshVac
™ Pump on top of the
release seal.
5
To vacuum seal the cup, hold the
pump in place over the release seal.
Press the power button on top of
the pump once to begin vacuum
sealing. The pump will make a
motorised noise and the light on
the pump will illuminate in white
while vacuum sealing is in progress.
8 Close the Flip & Seal Lid. Press
it closed until it clicks into place.
9 To blend ingredients, follow
instructions on page 22.
When blending is complete,
pressure must be released from
the cup through the release seal
before opening the lid. See step 5
on page 23.
6 When vacuum sealing is complete,
the pump will shut o automatically
and the green light on the pump
will illuminate.
7 To release the pump from the cup,
press the eject button located at
the bottom front of the pump.
Vacuum Blending recommended
for extractions, smoothies, soups, dips,
and dressings for brighter flavours,
vibrant colours, and improved textures.
Non Vacuum Blending recommended
whipped desserts that benefit from
adding air and frozen drinks with
highly frozen ingredients for best
performance, thicker results.
NOTE: Overfilling the cup may cause
harm to the FreshVac Pump when in use.
NOTE: Ensure FreshVac Tab is dry before
using FreshVac Pump.
Loading ...
Loading ...
Loading ...