Loading ...
Loading ...
Loading ...
Anti-tip device
102
Use a level to align the range.
– Rear adjustment right and left:
You will need an open-end wrench
(3/8" (10 mm)).
– Front adjustment right and left:
You will need an open-end wrench
(5/8" (16 mm)) for the locknut and
an open-end wrench (1/2" (13
mm)) for the adjustable nut.
1 22 33
a
Locking clamp
b
Rear adjustment
c
Front adjustment
Align the range.
Slide the locking clamp firmly back
into the range.
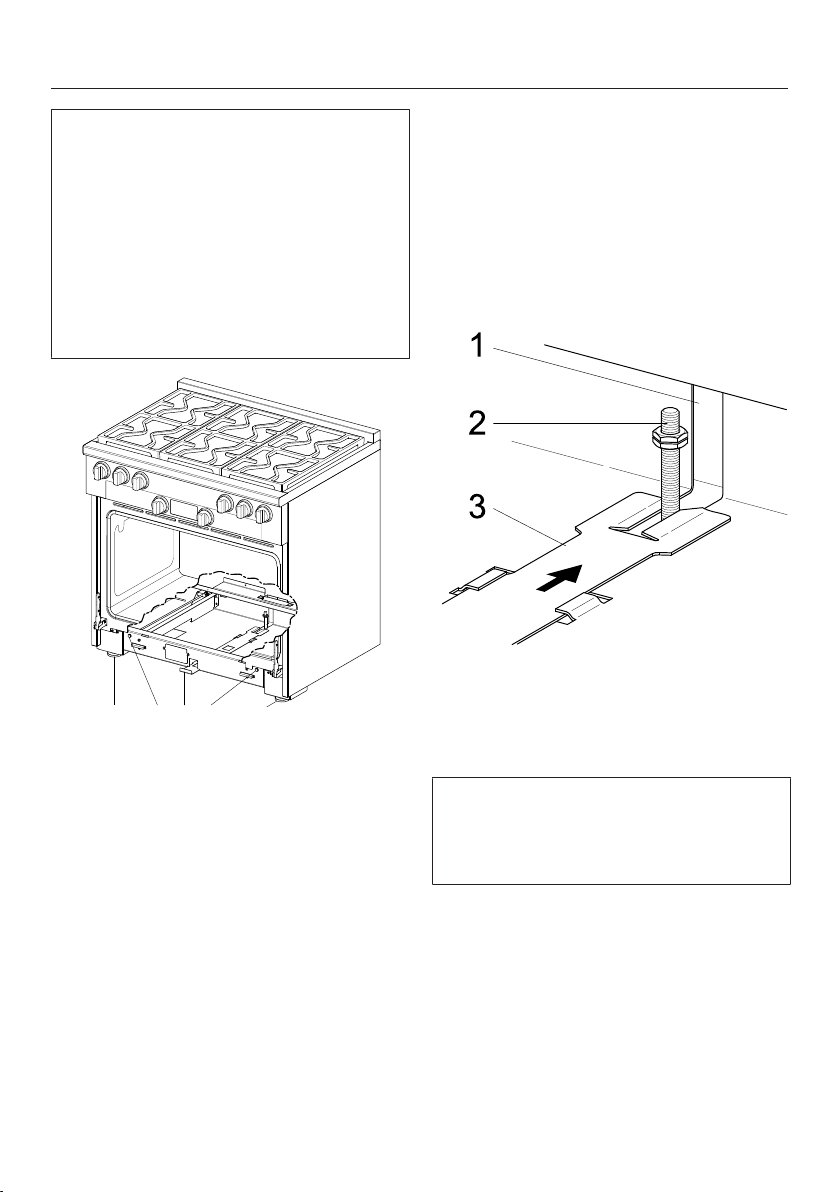
In the range housing, there is an
opening for the bolt of the anti-tip
device. The opening allows the range to
be slid onto the anti-tip device and
back to the wall.
The locking clamp must noticeably
engage with the bolt so that anti-tip
protection is ensured for the range.
a
Opening in the range housing
b
Bolt of the anti-tip device
c
Locking clamp with slot
The toe kick cover can only be
attached if the locking clamp has
been slid all the way into the
appliance.
Install the toe kick cover on the
range.
Loading ...
Loading ...
Loading ...