Loading ...
Loading ...
Loading ...
8
Warning: To reduce the risk of electric shock, the power cord must be
disconnected before removing the dust bag, shake-out bag, changing
the filters or performing maintenance or trouble-shooting checks.
4
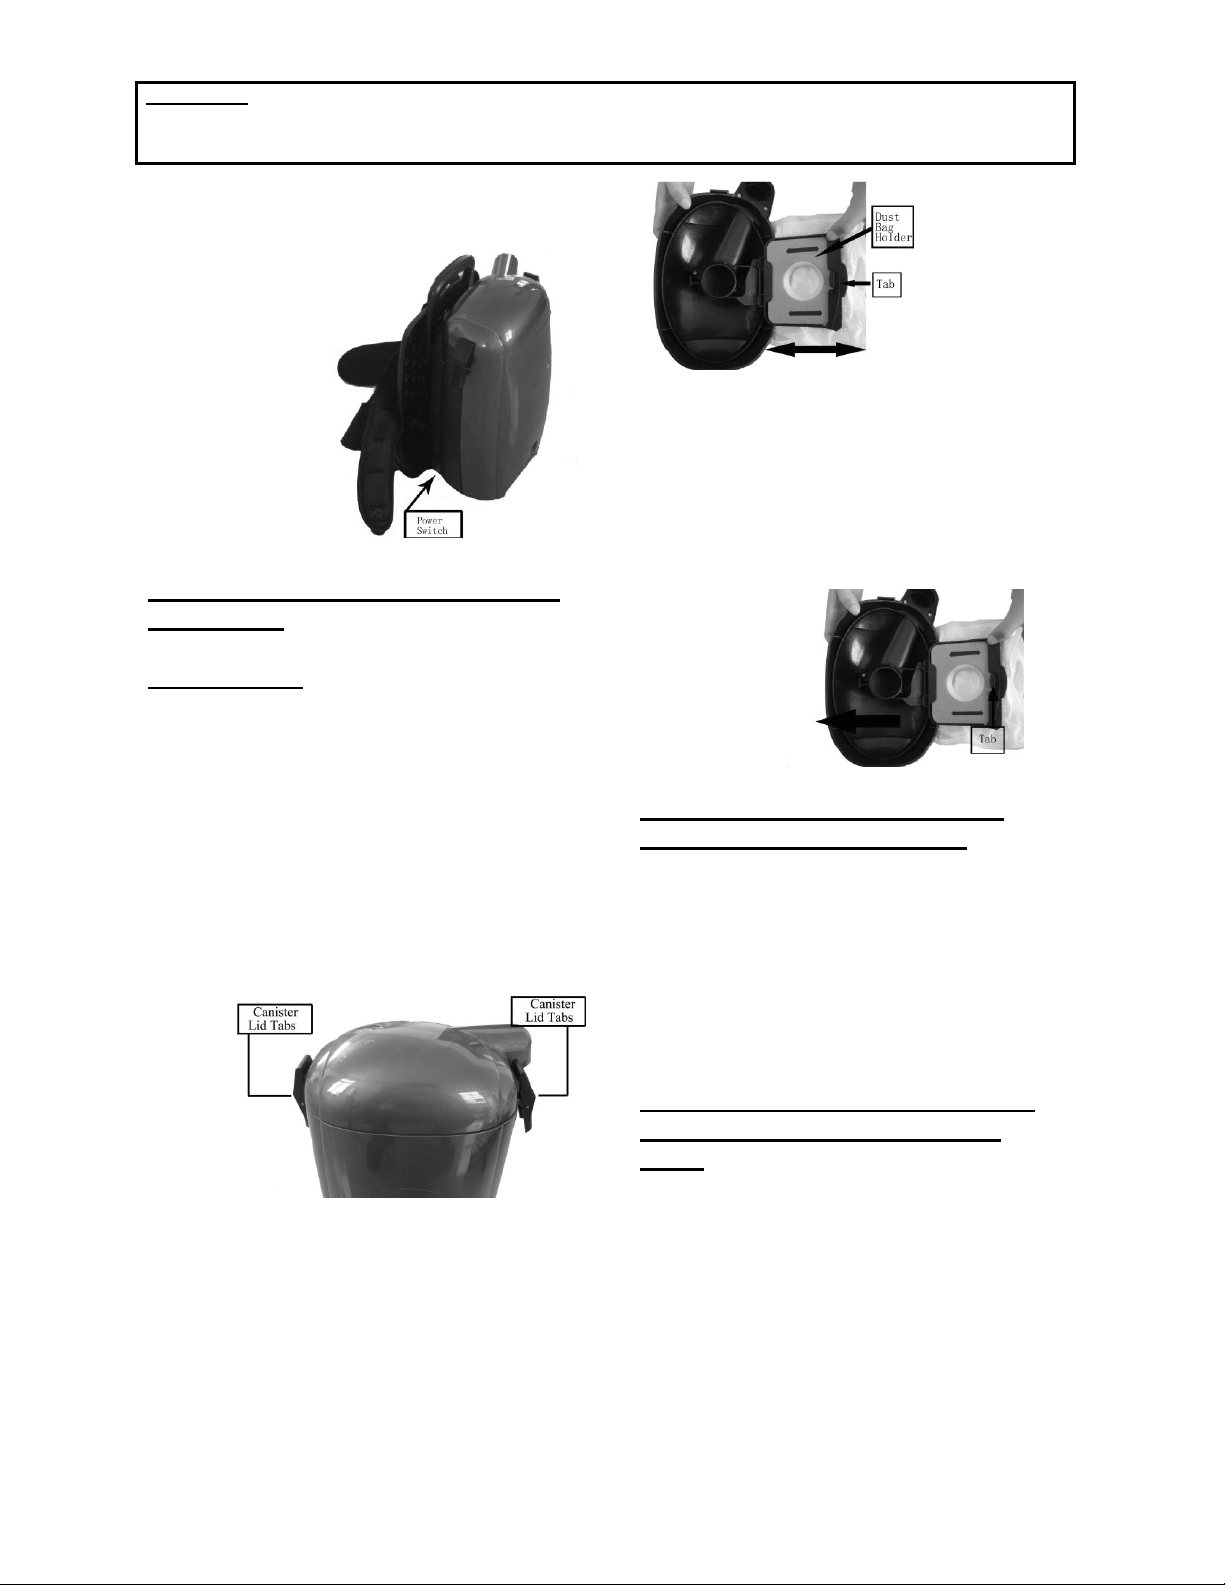
Turn the unit on by pressing the
switch located near the base of the
unit to turn the vacuum cleaner
on. (Fig. 17)
(Fig. 17)
Removing & Replacing HEPA
Dust Bag
Important: DO NOT
use the
vacuum without all filters, shake-out
bag, and with or without HEPA dust
bag in place.
To remove the HEPA dust bag from
the vacuum:
1
To remove the HEPA dust bag,
press on the canister lid tabs on
each side of the unit and lift
canister lid. (Fig. 18)
(Fig. 18)
2
Pull the tab on the HEPA dust bag
holder out slightly and flip
upwards.
3
Hold the HEPA dust bag in your
hand, slide it out from the slots in
the bag holder. Hold carefully in
order to avoid having dust fall out
of the HEPA dust ba
g
. (Fi
g
. 19)
(Fig. 19)
4
Replace the HEPA dust bag
with a new bag.
Do not
reuse
the same bag.
5
The cardboard face of the new
bag should rest securely in the
dust bag cover guides. (Fig.
20)
(Fig. 20)
Cleaning & Replacing the
Shake-Out Bag - Note:
Clean
the shake-out bag outdoors
when changing the HEPA dust
bag. Optimum performance is
achieved by using the HEPA dust
bag with the shakeout bag
decreasing the need for washing
the shake-out bag.
Cleaning & Replacing when
used with the HEPA Dust
Bag:
1
Replace the shake-out bag,
holding the handle at the
bottom of the bag, shake
outdoors vigorously over a
garbage receptacle until there
is no more dust.
2
Inspect shake-out bag
regularly for tears or damage.
Replace shake-out bags if
damage or tears are present.
Loading ...
Loading ...
Loading ...