Loading ...
Loading ...
Loading ...
4
1. Main Unit
2. Exhaust Grill
3. On/Off Power Switch
4. Canister Lid Tabs
5. Waist Band
6. Shoulder Straps
7. Back Board Panel
8. Carry Handle
9. Hose Inlet
10. Canister Lid
11. Flexible Hose
12. Flexible Hose handle
13. Variable Suction Control
14. Telescopic Tube
15. Telescopic Tube Button
16. Waist Band Back Support Panel
17. Waist Band
18. Oval Dusting Brush
19.
Crevice Tool
20.
Blowing Port
21.
Furniture Nozzle
22. Floor to Carpet Brush
23. Exhaust Filter
24.
Blowing Attachments
25.
HEPA Dust Bag
26.
Shake-Out Bag
27. HEPA Pre-Motor Filter
28. Turbo Brush (Not Pictured)
OPERATING INSTRUCTIONS
Assembling Your Vacuum
Cleaner -
Note:
Always
remove
the
power
plug
from the wall outlet before
attaching or removing accessories.
Important:
Do NOT use the vacuum
without all filters, shake-out bag,
and HEPA dust bag in place.
1
Unplug the power cord and
remove
the flexible hose.
2
To open the canister lid, press on
the canister lid tabs on each side
of the unit and lift canister lid.
(Fig. 1)
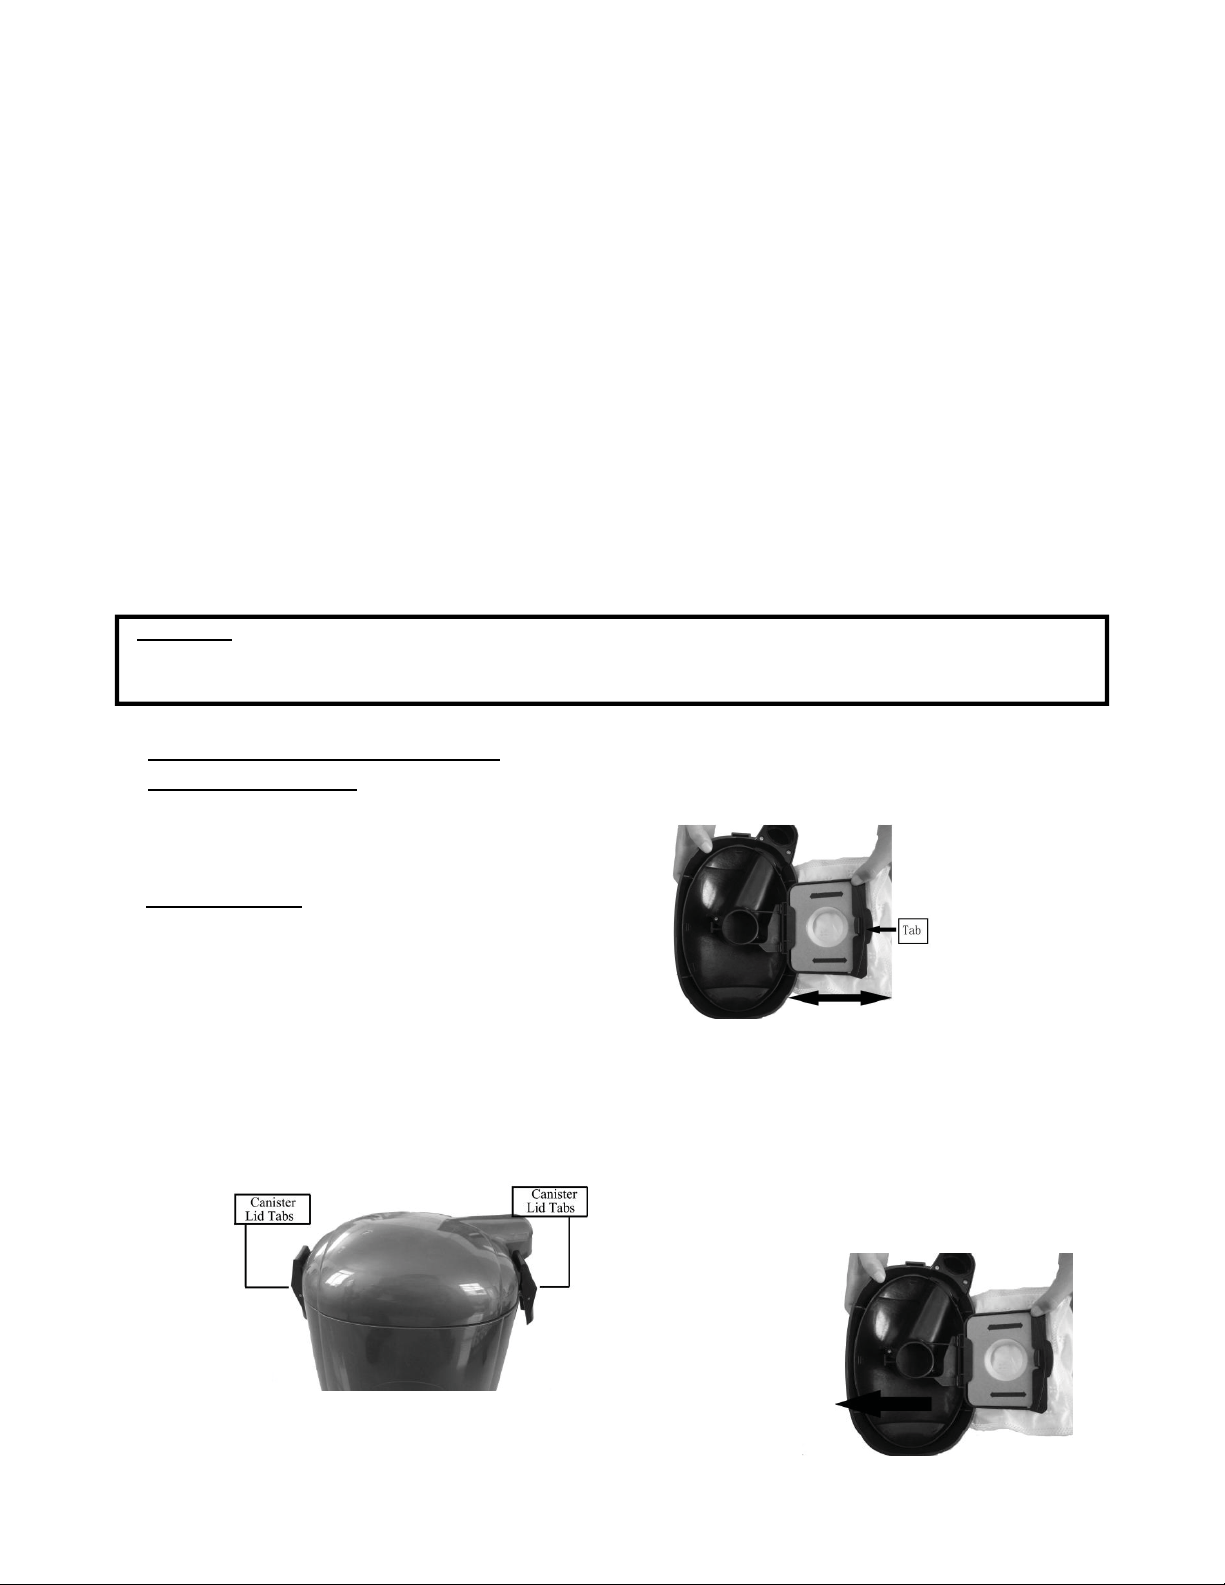
3
Pull the tab on the HEPA dust
bag holder out slightly and flip
upwards. (Fig. 2)
(Fig. 2)
4
Holding the HEPA dust bag in
your hand, slide it firmly
between the slots in the bag
holder. (Fig. 2)
5
The cardboard face to the new
bag should rest securely in the
dust bag cover guidelines. (Fig.
3)
(Fig. 3)
Warning: To reduce the risk of electric shock, the power cord must be disconnected
before removing the dust bag, shake-out bag, changing the filters or
performing maintenance or trouble-shooting checks.
Loading ...
Loading ...
Loading ...