GB User manual
Cafe Grano
Foreword2
NOTE
This symbol draws your attention to some special
information.
CAUTION
This symbol draws your attention to possible
dangers.
WELCOME TO THE NIVONA FAMILY!
We are delighted at the confidence you have shown in us by choosing
a quality product from NIVONA.
We would like to express our sincere THANKS.
To ensure maximum enjoyment of your NIVONA machine, please
read through this document carefully and pay attention to the safety
instructions before using the machine for the first time.
Please keep this document in a safe place. Then you can use it as a
reference or pass it on to any subsequent owner.
We hope you enjoy your NIVONA product and, with it, a good, flavour-
ful cup of coffee.
Best wishes to you from the NIVONA team!
SYMBOLS USED
The following symbols are used in these instructions:
TIP
This symbol indicates helpful advice on how to use
the machine.

Contents
Safety instructions
3
1.
CONTENTS
1. SAFETY INSTRUCTIONS ........................................................... 3
1.1. Correct use ......................................................................................................... 3
1.2. General instructions for the user ....................................................... 3
1.3. Limits to the range of users .................................................................. 4
2. CONTROL ELEMENTS ............................................................... 5
3. INITIAL STARTUP ........................................................................ 6
3.1. Preparation ......................................................................................................... 6
3.2. Assembling and setting up the appliance .................................. 6
4. PREPARING GROUND COFFEE ................................................ 7
4.1. Grind settings .................................................................................................... 7
4.2. Coffee grinding ................................................................................................ 8
5. CLEANING .................................................................................... 9
6. CUSTOMER SERVICE & WARRANTY .................................... 10
7. DISPOSAL .................................................................................. 10
8. TECHNICAL DATA ...................................................................... 11
1. SAFETY INSTRUCTIONS
CAUTION
Repairs to electrical appliances must be carried
out only by specialised technicians! Improper
repairs can expose the user to considerable dan-
gers! If the machine is used other than for its
intended purpose or is operated or maintained
improperly, we cannot accept liability for any
resulting damage!
1.1. Correct use
Use the coffee grinder only for grinding roasted,
untreated coffee beans, and not for grinding any other
type of foodstuffs! Always make sure that there are no
foreign objects mixed in with the coffee beans, which
voids the warranty.
DE
GB
FR
NL
PL
RU

4 Safety instructions
1.2. General instructions for users
Set the machine on a dry, level and stable surface, and
use it only indoors. Never place this machine on a hot
surface, near other appliances which become very hot
when in use (e.g. stove, deep fryer), or near open flames.
Never fill the machine above the maximum mark (risk
of overheating!)
The mains supply voltage must always match the
working voltage of the machine. Please refer to the
type plate on the machine.
Do not operate the machine if the mains supply cable
or the casing is damaged.
Never allow the mains supply cable to come into con-
tact with hot parts of other machines, and check that
it is not pinched or rubbing against any sharp edges.
Never pour water into the machine.
Never immerse the machine in water.
Always keep the mains supply plug dry and keep it
away from moisture.
Do not pull on the mains supply cable to disconnect
the plug from the mains socket.
If a fault occurs, disconnect the mains plug immedi-
ately (never by pulling on the mains supply cable or
the machine itself).
Before carrying out maintenance or cleaning, check
that the machine is switched off and that the mains
plug is disconnected.
After use, allow the machine to cool down sufficiently
before carrying out any maintenance or cleaning work.
Make sure that the cable does not hang down or get
in the way.
If repair of the machine is required (including replace-
ment of the mains cable!), please first contact the
NIVONA service telephone or the dealer from which
the machine was purchased, and, after authorisation,
send the appliance to NIVONA Central Customer
Service, Südwestpark 49, D-90449 Nuremberg,
Germany.
1.3. Limits to the range of users
This machine can be used by children 8 and older and
by persons with physical, sensory, or mental impair-
ments or who are lacking in experience and knowl-
edge, provided they are acting under supervision or
have been instructed on how to use the machine safely
and are aware of the possible dangers. Children must
not play with the machine. Cleaning and maintenance
of this machine must not be carried out by children
unless they are age 8 or over and are acting under
supervision. The machine and its connection line must
be kept away from children younger than 8.

2.
Control elements 5
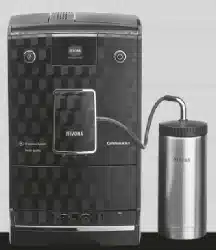
2. CONTROL ELEMENTS
Bean holder lid
Rotatable bean holder
Scale for grind fineness setting
Rotary control for
grinding time / quantity
Removable collecting container
for ground coffee powder
Power cable storage
compartment in the bottom
Collecting container
with maximum fill mark
Maximum fill mark
DE
GB
FR
NL
PL
RU

Initial startup6
3.
3. INITIAL STARTUP
3.1. Preparation
Remove the machine and other supplied parts from the packaging
Wipe all parts of the machine with a dry cloth
3.2. Assembling and setting up the machine
Place the body of the machine on a dry, level work surface
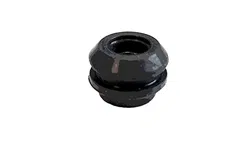
Check that there are no foreign objects under the rubber seal in the grinder and that
the rubber seal is correctly in place
Place the bean holder lid on the bean holder
Place the bean holder on the body of the machine (The mark on the bean holder must
allign with to the right mark on the machine body)
Turn the bean holder to the left
Connect the mains supply cable to a power socket which has been correctly installed
(Any unnecessary length of cable remains inside the cable storage compartment)
When using the machine for the first time, pour in only a few beans
Switch on the machine

Preparing ground coffee 7
4.
Grind fineness setting
4. PREPARING GROUND COFFEE
4.1. Grind fineness settings
There are 16 highly precise settings (which are essentially continuous) for selecting the de-
gree of fineness of the grind. Each of the 4 main settings is subdivided into 4 fineness steps
– allowing selection ranging from extra-fine- to fine- to medium- to coarse-ground coffee.
Tastes and preferences vary, so we recommend trying out different settings according to
personal preference and the type of coffee bean roast. We can suggest the following as a
general guide and for reference:
Coarse
particularly suitable for making coffee pow-
der when the coffee is filtered manually
Medium
recommended if using ground
coffee in conventional stove-top
espresso machines
Fine
should be selected when using ground cof-
fee in filter coffee machines or in automatic
pump-pressure espresso machines.
Extra Fine
recommended for preparing
mocha or Turkish or Greek coffee
Dark oily beans should be ground 1 or 2 steps coarser than usual
The finer the grind setting selected, the longer the time required to grind a given quantity.
For example, in 20 seconds the machine grinds more coffee with the Coarse setting
than with the Fine setting.
If the coffee in the coffee machine is too thin or is running through too quickly, try a finer
grind setting. If espresso or coffee is taking too long to brew, try a coarser grind setting.
DE
GB
FR
NL
PL
RU

Preparing ground coffee8
NOTE
To stop the grinding process early, turn
the bean holder to the right through the
Coarse setting up to the end stop – the
grinding process will stop immediately,
while the timer continues until it reaches
0. This interruption of the grinding process
can be useful if the amount of coffee is
set too large or a foreign object in the
coffee is blocking the grinder.
Grind amount / grind-
ing time adjustment
4.2. Coffee grinding
Coffee can be ground only with the bean holder in place and a fineness setting selected
through the position of the bean holder. If the fineness selector is fully to the right, the coffee
grinder will not operate.
This machine has a time-controlled pre-set grind amount. The rotary control on the front of
the coffee grinder can be used to adjust the required duration of the grinding process and
therefore the grind amount.
Pour the desired type of coffee beans into the bean holder
Check that the ground coffee collecting container is in place and is empty
Turn the bean holder to the desired fineness setting
Select the desired grinding time (amount) using the rotary selector
The grinding process then starts immediately and automatically. It ends when the rotary
selector timer reaches the 0 position.
TIP
Never start the grinder without the collecting container in place
Do not remove the bean holder while beans are being poured in
We recommend: To enjoy maximum flavour, do not grind more beans than you will
use immediately
Before taking out the full collecting container, tap the machine gently a few times to
bring down any coffee powder that may have remained stuck inside >

Cleaning 9
5.
NOTE
Please note – If using dark, oily cof-
fee beans, the machine will need to be
cleaned more frequently than with light,
less oily beans.
The individual parts of this machine are
not suitable for washing in a dishwasher!
We recommend cleaning the grinder and
seal ring each time after grinding with the
finest grind setting.
5. CLEANING
Regular cleaning will ensure that you continue to enjoy your machine.
Before every cleaning, always pull out the mains supply plug!
Never pour water or other liquids into the machine!
With the bean holder removed, clean the grinding chamber from below as often as pos-
sible, using a brush, for example, to prevent caking of oily coffee residues to the extent
possible (to do this, grip the top part of the grinder at the rubber seal and take it off)
Clean the seals between the bean holder and the grinder, using a brush for example
Clean the outside of the machine using a wet cloth – check that all parts of the
machine have dried completely before the next use
The bean holder and ground coffee collecting container can be easily removed to allow
better cleaning
Never fill the collecting container above the maximum mark. Excess coffee powder
can be drawn back up into the grinder and cause overheating, which can damage
the machine!
Do not grind continuously for more than about 3 minutes, as this will cause all parts
to overheat, which can adversely affect the coffee flavour
DE
GB
FR
NL
PL
RU

Customer service & warranty
Disposal
10
6.
7.
6. CUSTOMER SERVICE & WARRANTY
WARRANTY & CUSTOMER SERVICE CONDITIONS
Please see the accompanying information sheet for detailed warranty and customer service con-
ditions.
7. DISPOSAL
Electrical and electronic appliances contain numerous of materials which are still valuable
or are harmful to the environment, and so should not be treated in the same way as normal
household waste. If treated as household waste or handled incorrectly, they may cause harm
to human health or to the environment. Therefore, never include a possibly faulty appliance
with the household waste, but take it to the collecting point for the recovery and recycling of
old electrical and electronic devices set up by the local authorities.
You can obtain more information from your local town hall, waste disposal service provider,
or the retailer from which the machine was purchased.

Technical data
8.
11
8. TECHNICAL DATA
Voltage 220–240 V AC, 50 Hz
Power output 100W
Conformity mark CE
This machine meets the following
EU Directives:
2014/35/EU (Low-voltage Directive)
2014/30/EU (EMC Directive)
2011/65/EU (Directive on the restriction
of the use of certain hazardous substances
in electrical and electronic equipment)
Bean holder capacity 300 g max.
DE
GB
FR
NL
PL
RU

ANR 000125020
BDA NICG 130 GB Rev.00 15.02.2021
NIVONA Apparate GmbH
Südwestpark 49
D-90449 Nuremberg
www.nivona.com
2021 © Copyright NIVONA Apparate GmbH, Germany
All rights reserved