Loading ...
Loading ...
Loading ...
4
Setup
Using the Bubble Level
Use the integrated bubble level located under the platter to ensure the turntable is on a level surface. The turntable
is level when the bubble is in the center of the circle.
For example, if the bubble is on the left, this means the turntable is leaning too much to the right. Raise the
turntable’s right feet by turning them counter-clockwise. The bubble will move toward the center.
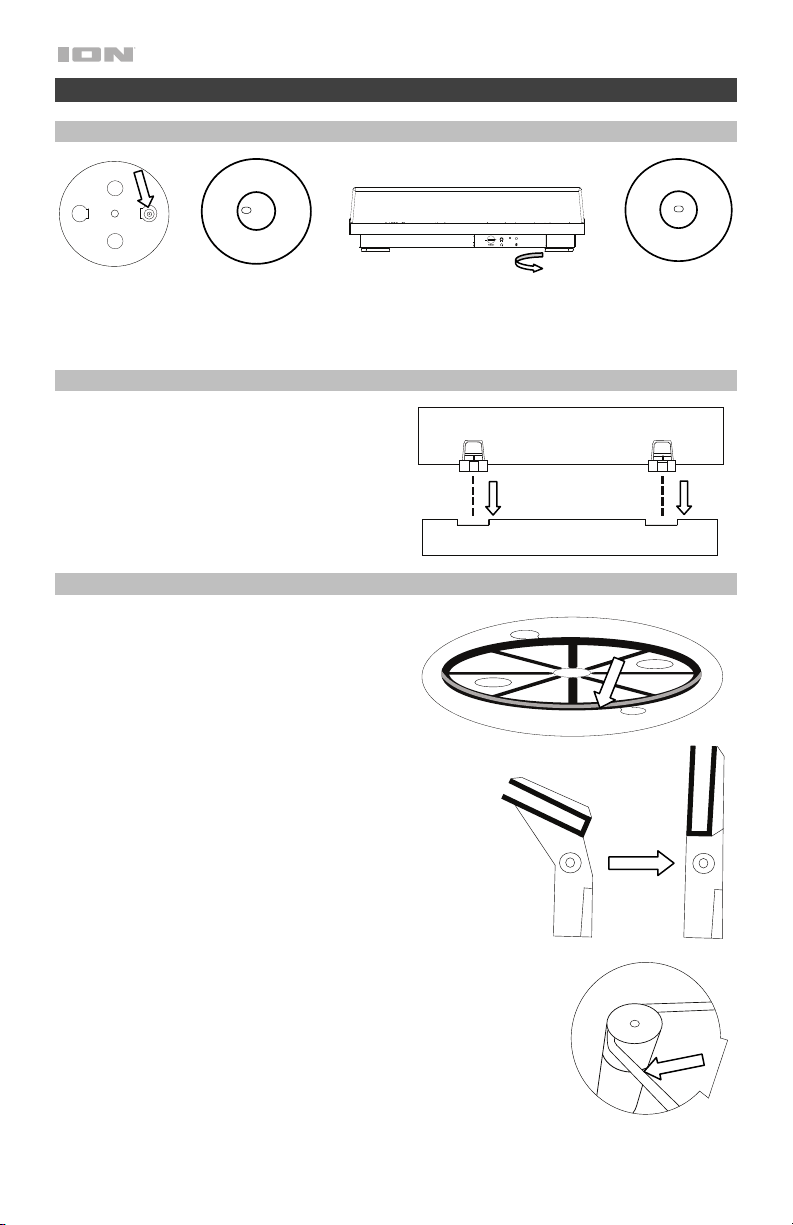
Connecting the Dust Cover to Pro500BT
1. Insert the included hinges (found in plastic bags
inside the foam packaging in the box contents) into
the back panel hinge plates.
2. Insert the dust cover into the space between the
hinges to clasp the dust cover (see images on
right).
3. Flip up the hinges so they are in the upright
position (see images on right).
Attaching the Turntable Belt
1. Make sure the power adapter is not connected to
Pro500BT.
2. Place the platter upside-down on a flat surface and
position the belt so that it is wrapped around the
underside of the platter’s inner ring, centered
straight and free of any twists (see image on right).
3. Move your thumb through the platter’s larger belt
window and carefully lift part of the belt up. Flip over
the platter and place the belt over the groove in the
brass motor spindle, while aligning the platter back
onto the middle spindle (see image on right).
4. Connect the power adapter to the turntable and
power on the turntable.
5. Set the Motor Start/Stop switch to the Start
position to see if the platter motor spins. If the
platter does not spin, try the steps listed above
again.
Front Panel
Loading ...
Loading ...
Loading ...