
Loading ...
Loading ...
Loading ...
8
Unpacking
Carton Contents
• Cordless trimmer + edger
• Safety guard
• Edger guide + ower guard
• 20 V EcoSharp
®
LITE lithium-ion battery
• 20 V EcoSharp
®
lithium-ion battery charger
• Manuals with registration card
1. Carefully remove the cordless trimmer + edger and check
to see that all of the above items are supplied.
2. Inspect the product carefully to make sure no breakage or
damage occurred during shipping. If you nd damaged or
missing parts, DO NOT return the unit to the store. Please
call the Snow Joe
®
+ Sun Joe
®
customer service center at
1-866-SNOWJOE (1-866-766-9563).
NOTE: Do not discard the shipping carton and packaging
material until you are ready to use the cordless grass
trimmer + edger. The packaging is made of recyclable
materials. Properly dispose of these materials in
accordance with local regulations or save the packaging
for long-term product storage.
IMPORTANT! The equipment and packaging material are
not toys. Do not let children play with plastic bags, foils, or
small parts. These items can be swallowed and pose a
suocation risk!
Assembly
mWARNING! Do not insert the battery until assembly is
complete. Failure to comply could result in accidental starting
and possible serious personal injury.
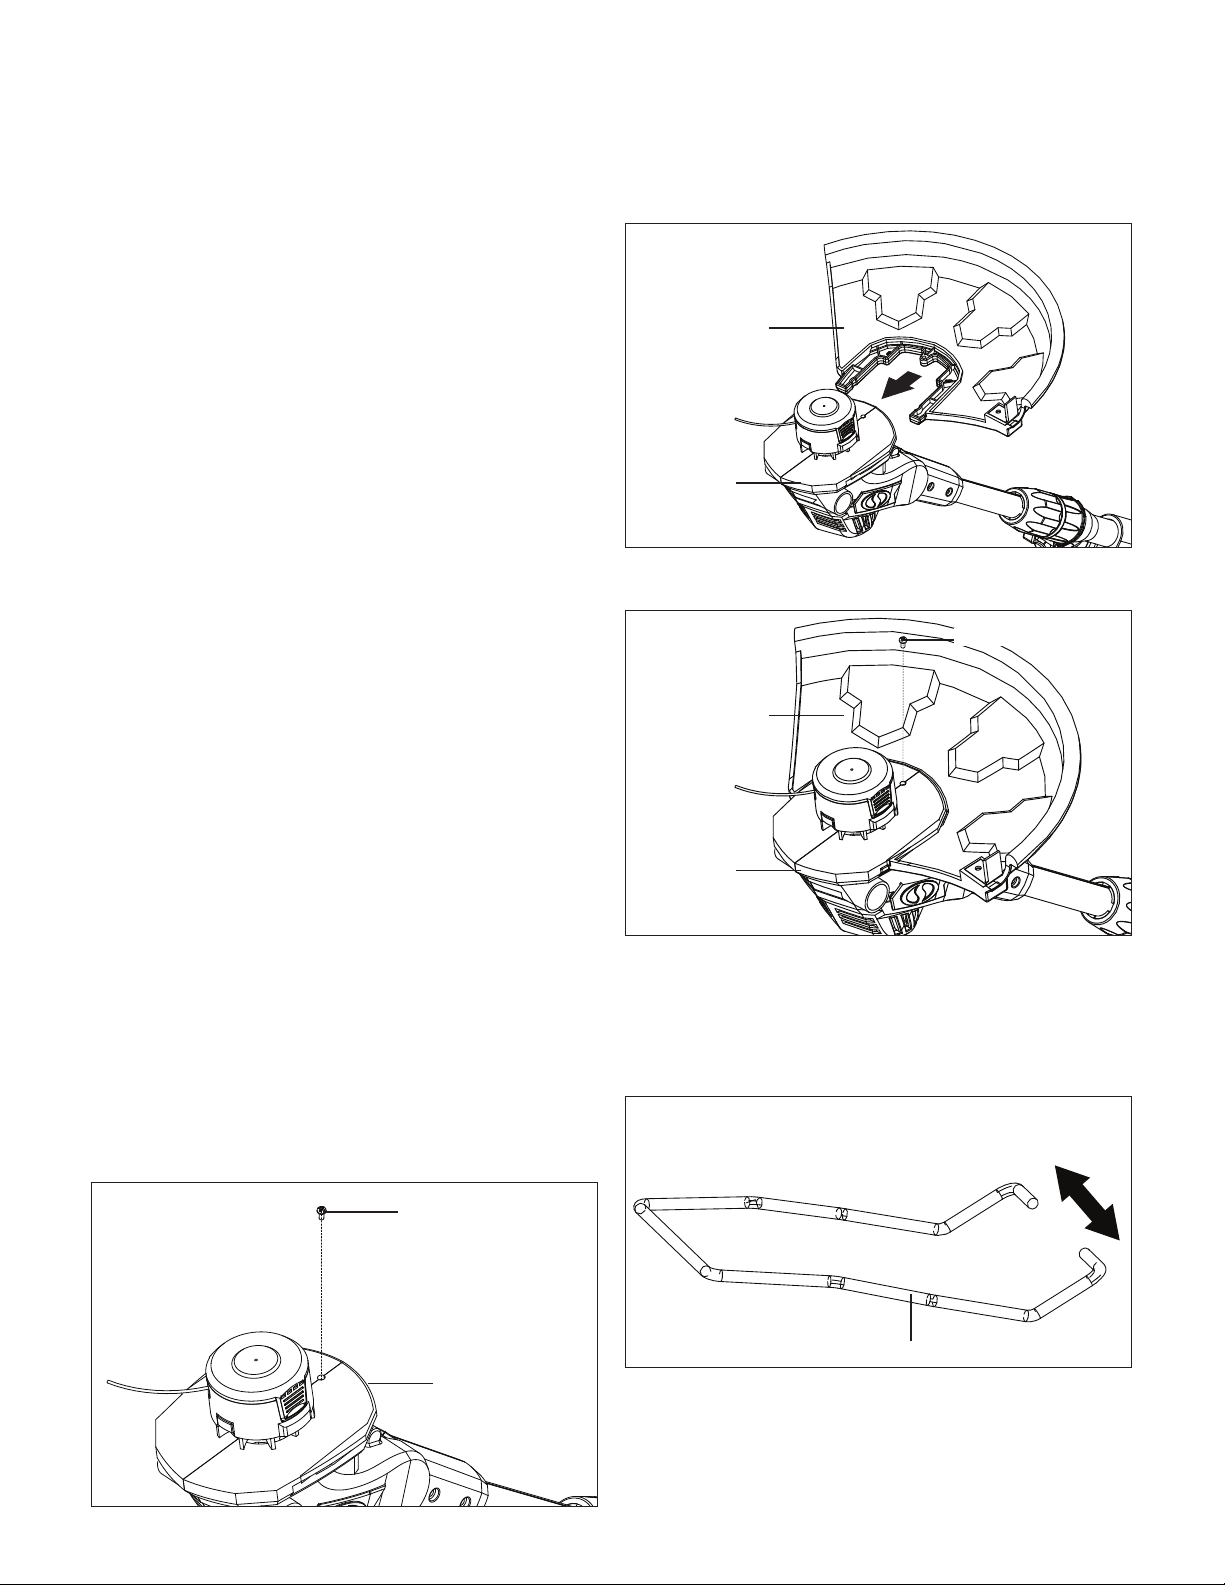
Fitting the Safety Guard
mWARNING! The guard must be properly installed. The
guard provides the operator and other bystanders with some
protection from thrown objects.
1. Using a screwdriver, remove the small screw that is
secured in the small hole in the motor housing (Fig. 1).
2. Place the safety guard in the direction of the arrow shown
to align it with the screw hole in the motor housing
(Fig. 2).
3. Firmly press the safety guard into place and secure it to
the trimmer head with the screw provided (Fig. 3).
NOTE: Never use the tool unless the safety guard is
properly tted.
Fitting the Edger Guide + Flower Guard
1. Lightly spread the edger guide + ower guard by hand
while approaching the motor housing (Fig. 4).
2. While lightly spreading the edger guide + ower guard, t
the curved ends into the small holes on both sides of the
motor housing, and release (Fig. 5).
Fig. 1
Screw
Trimmer
head
Fig. 2
Safety guard
Trimmer
head
Fig. 3
Safety guard
Trimmer
head
Screw
Fig. 4
Edger guide + ower guard
Loading ...
Loading ...
Loading ...