Loading ...
Loading ...
3 / 4Kwikset Technical Support: 1-866-863-6584 • www.kwikset.com
Add the lock to your smart home system
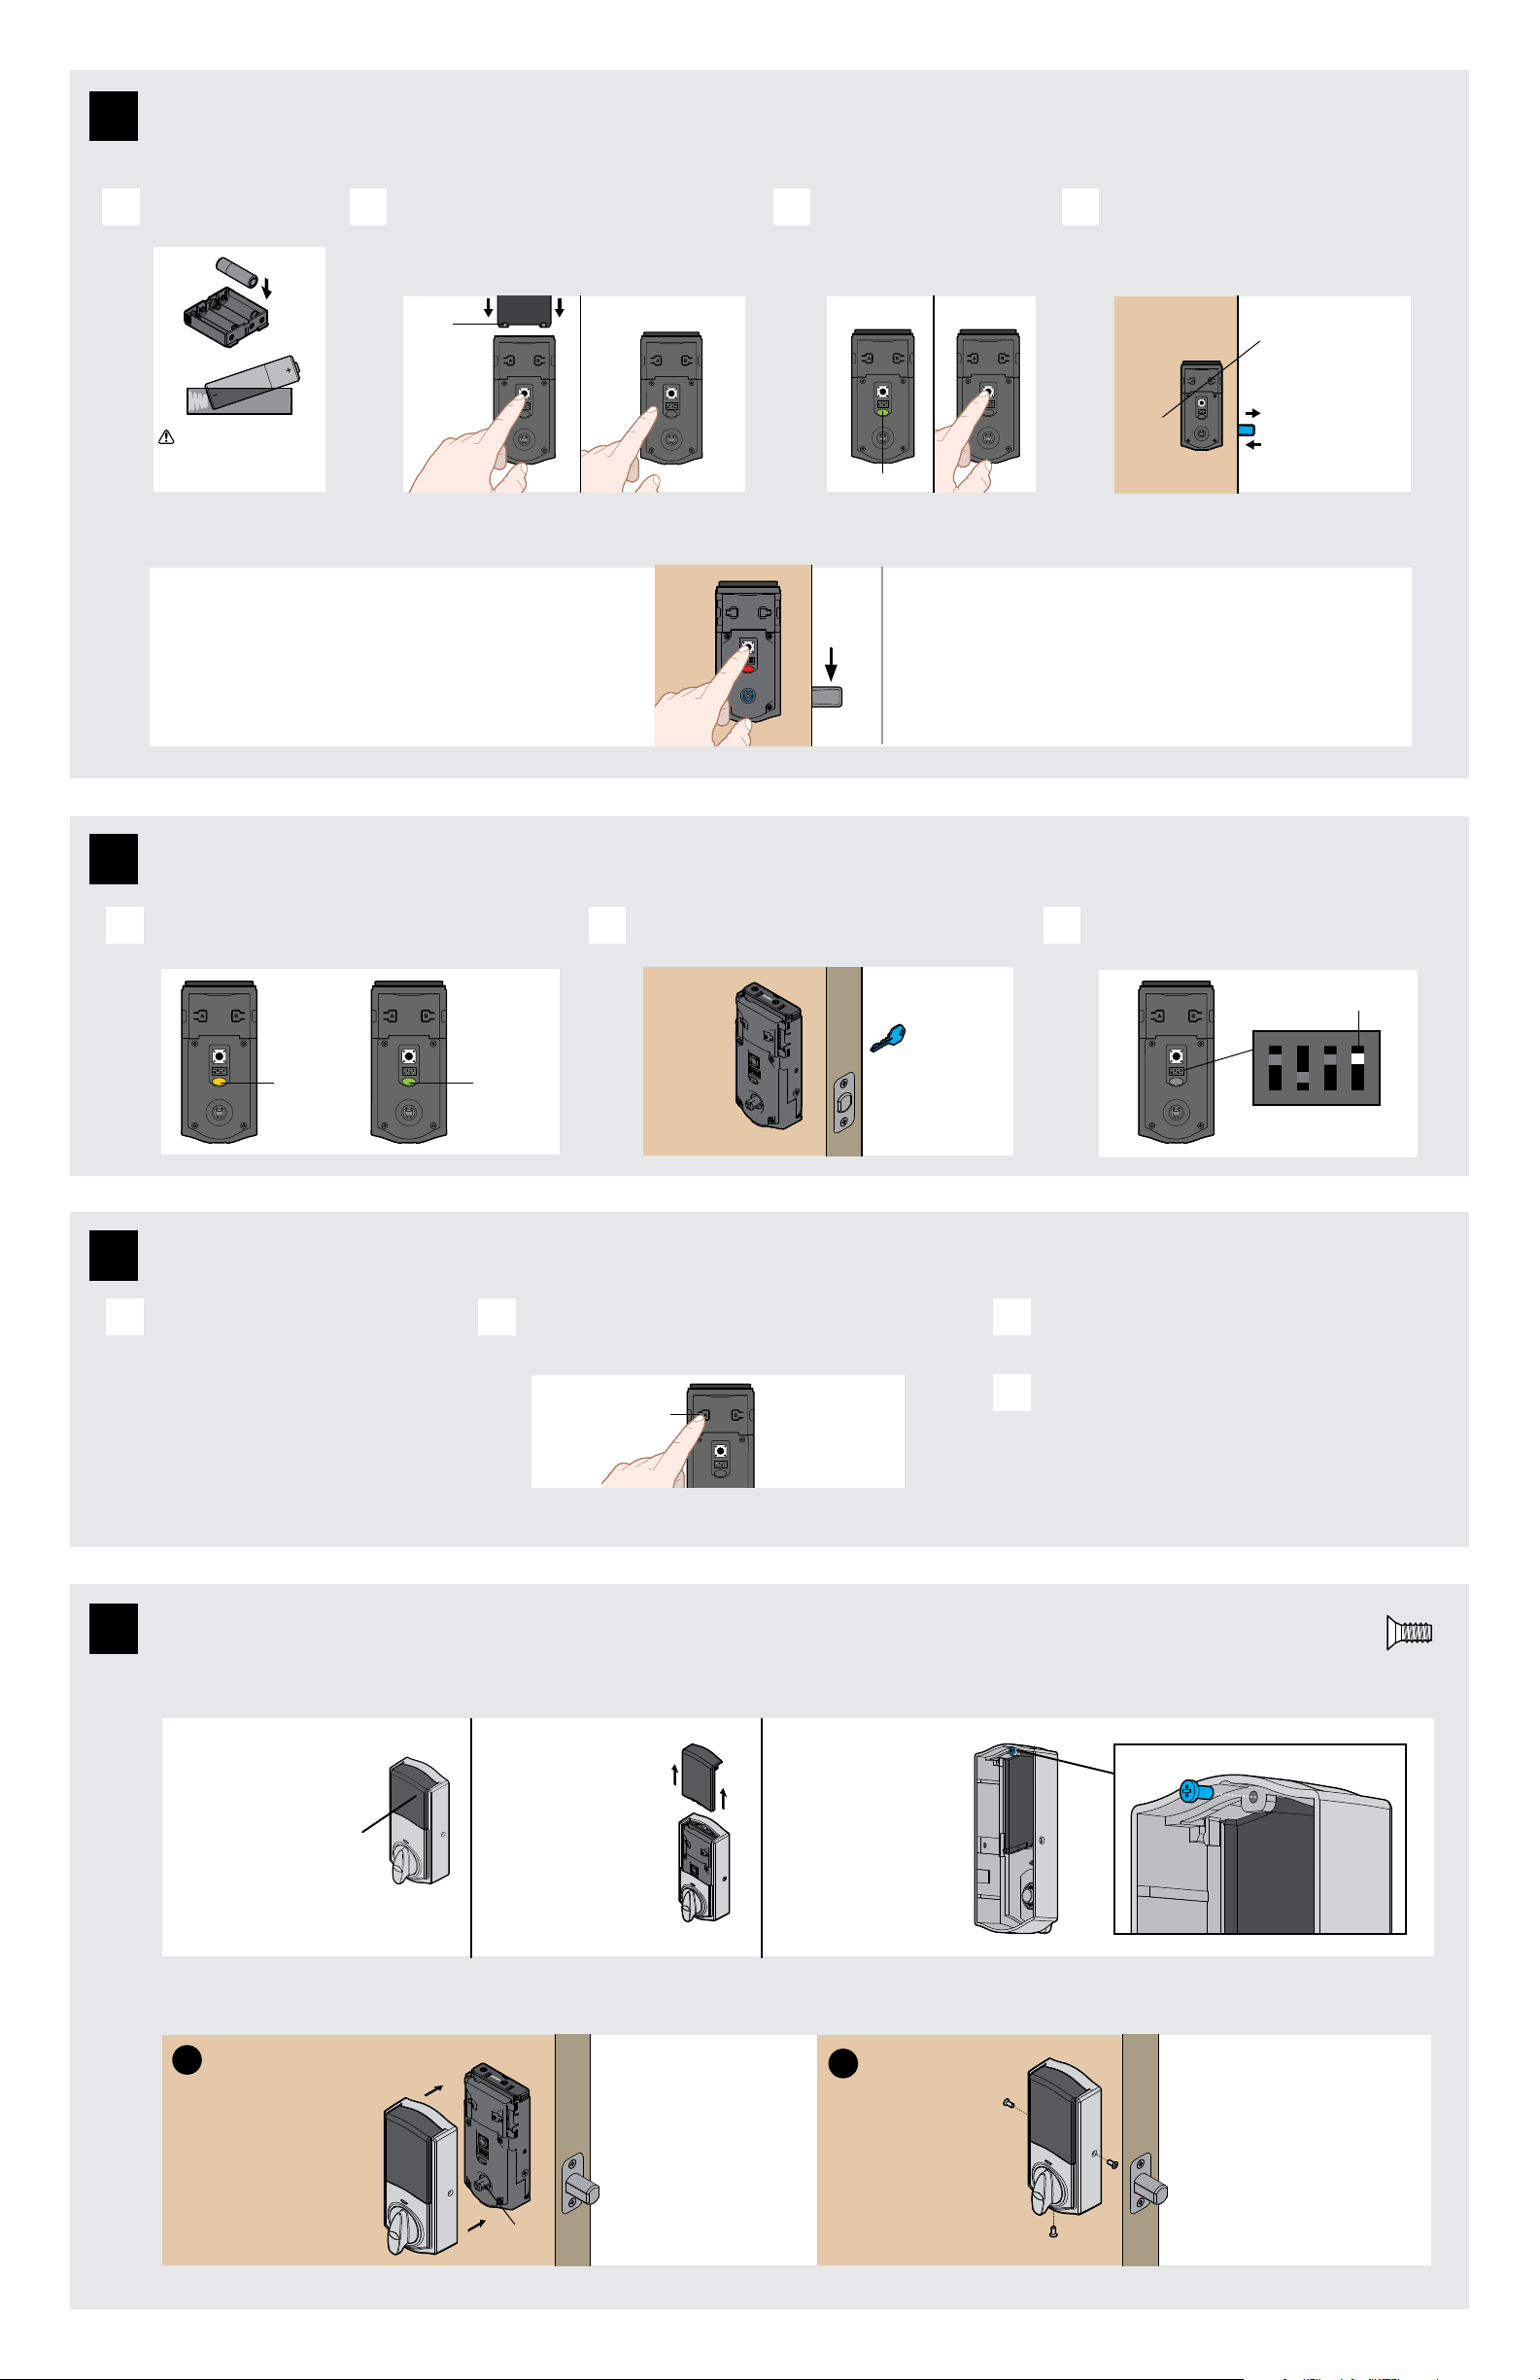
window
If you wish to unlock
the window, you can
slide it up for more
convenient access
to the programming
buttons while the
cover is installed.
To unlock the
window, remove
the security screw.
The window
on the interior
cover is locked
by default to
prevent someone
from tampering
with your lock's
settings.
Important Information about the interior cover
Cover Installation:
Install cover.
Note: You may need to
rotate the turnpiece to align
with the turnpiece shaft.
turnpiece
shaft
Install screws.
a
b
Install the interior cover
Note: The interior cover and
screws must be removed
for battery pack access.
actual
size
Check the Status LED
This step will teach the lock the orientation of your door and is crucial for lock operation.
Perform the door handing process
5
6
7
8
The Status LED blinks every six seconds to communicate
whether the door is locked or unlocked.
Use your key to lock and unlock your door, and verify
that the Status LED is communicating correctly.
If the Status LED is displaying the wrong door
lock status, lip switch #4 to the ON position.
A B C
A B C D
Install 4 AA batteries
in the battery pack.
Ensure correct polarity.
For best results, use new,
non-rechargeable Alkaline
batteries only.
Make sure the door is open. Insert the battery pack
while PRESSING AND HOLDING the Program button.
Keep pressing the button for three seconds after the
battery pack is installed, then release the button.
The Status LED will lash red and
green, and the lock will beep.
Press and release the Program
button again.
The latch bolt will retract and extend on its own
to learn the orientation of the door. Did the
Status LED turn green or red?
If the bolt does not move, make sure
the batteries are installed correctly,
and perform steps 5A5D again.
status LED
Metal
contacts
at bottom,
facing out.
BALDWIN ESTATE DEADBOLTS:
If your latch bolt is to the RIGHT of your interior assembly, and the
Status LED is solid red after door handing, press and release the
Program button again. The door handing process will restart.
If you are unsure if your lock is Baldwin Estate, see
chart on page 1 or compatible deadbolt list online.
Red Status LED
Green: Door handing
successful. Continue
to step 6.
Red: See “Red Status
LED” below.
Right
OTHER DEADBOLTS:
If the Status LED is solid red after door handing, make sure
the batteries are installed correctly and the lock interior
is correctly installed. Perform steps 5A5D again.
Amber:
Locked
Green:
Unlocked
Switch #4
Initiate the process to add the
lock to your system at your smart
home controller. Refer to your
smart home system instructions
for more information.
When prompted by your smart home system to add the
lock, press button “A” on the lock interior one time. The
red LED will illuminate when the lock enters Add Mode.
If successful, re-name the lock in your system
(if applicable).
If unsuccessful, follow your system's instructions to
remove the lock from the controller and any other
network, then press button “A” on the lock one time.
Perform steps 7A7C again.
If still unsuccessful, see "Troubleshooting: Adding
the Lock to a Smart Home System" on page 4.
A B C
D
button “A”
Please allow time for the controller to add the lock.
Loading ...