Loading ...
Loading ...
Loading ...
12
5. Do not use detergent or solvents as these could cause
irreparable damage to the snow thrower. Chemicals can
destroy the plastic parts.
6. To protect the snow thrower from corrosion when storing
for long periods, lightly oil the metal parts.
7. Store the appliance in a dry area out of reach of children.
8. For the user's safety, worn or damaged parts must be
replaced. Replace with original replacement parts only.
Parts from another snow thrower may not t properly,
causing an unsafe situation.
Replacing the Rubber Plates
NOTE: When replacing worn rubber plates, pay close attention
to carefully distinguish between the coarse and smooth side of
the plates. Place the coarse side inside and the smooth side
outside.
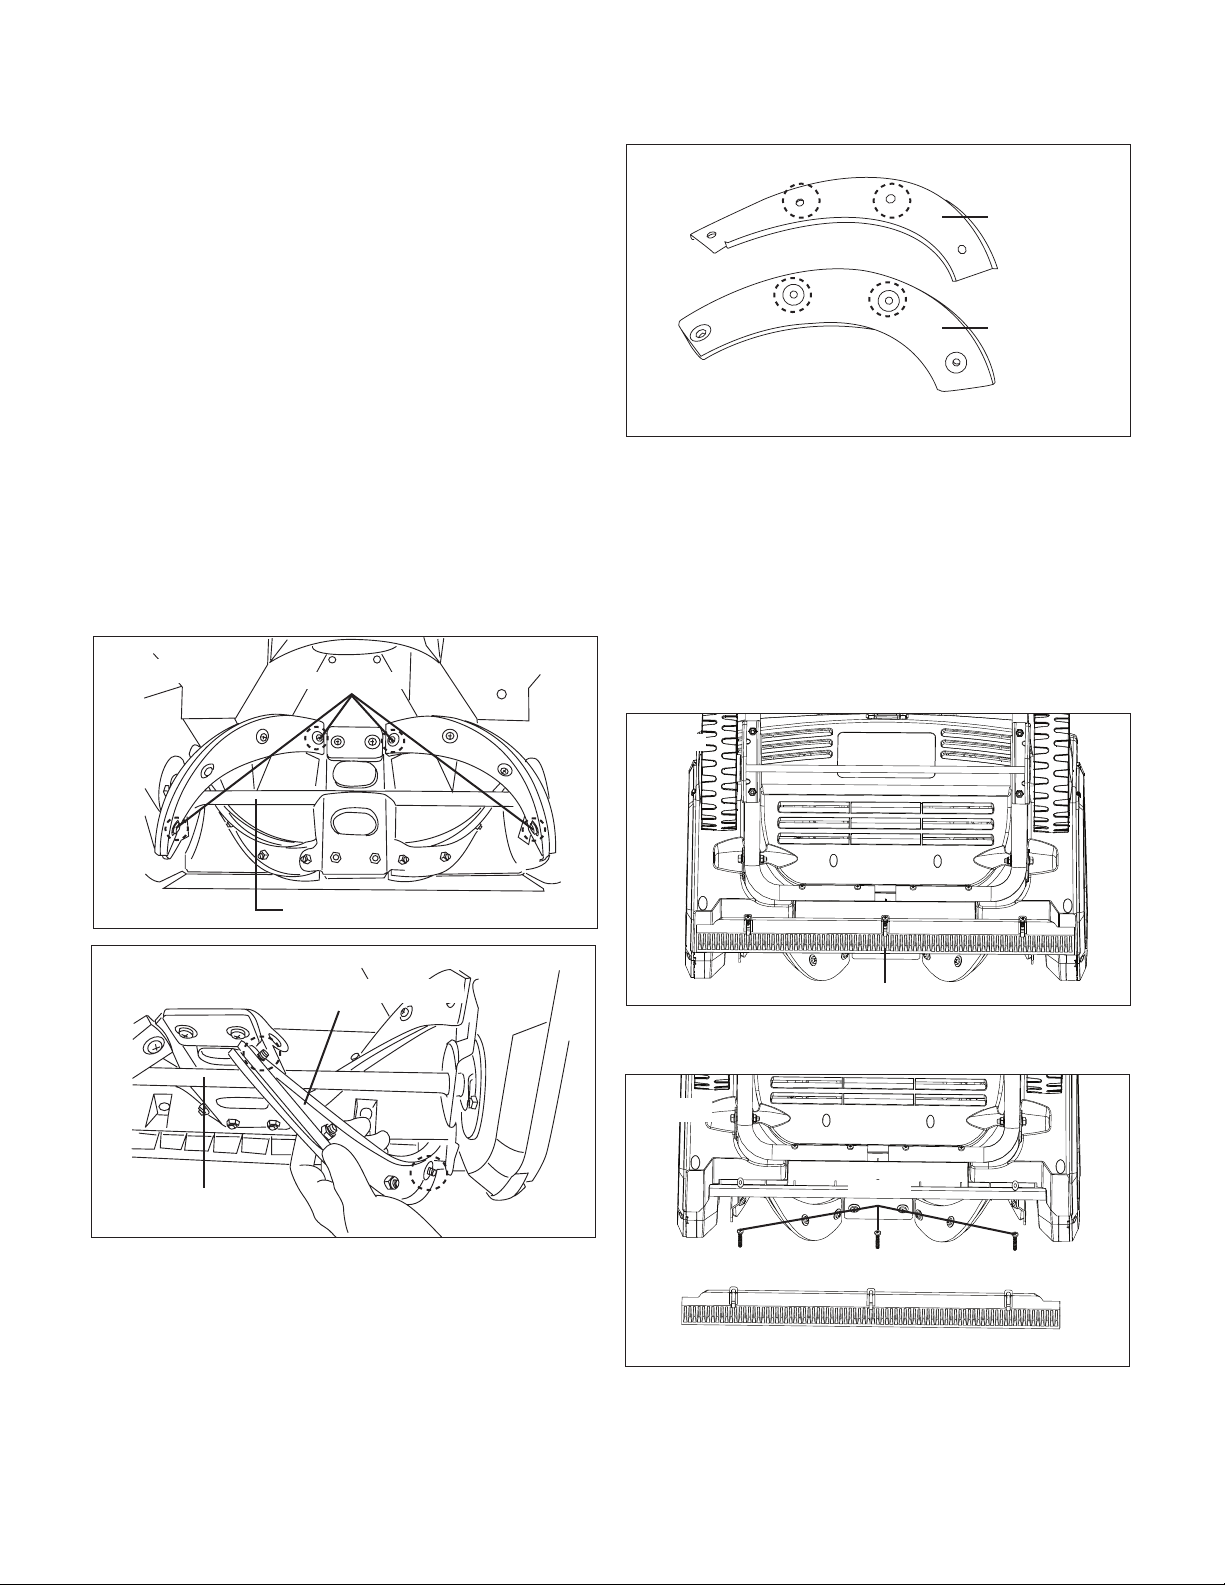
1. Detach the worn rubber plate assembly by removing the
four sets of nuts and bolts used to secure it to the auger
assembly (Figs. 17 – 18).
2. Loosen the middle two sets of nuts and bolts to detach
the worn rubber plate from the metal frame (Fig. 19).
3. Attach the new rubber plate onto the metal frame by
replacing and tightening the middle four sets of nuts and
bolts (Fig. 19).
4. Reassemble the rubber plate assembly to the auger
assembly by replacing and tightening the two sets of nuts
and bolts used to secure it (Figs. 17 – 18).
Replacing the Scraper Bar
1. The scraper bar is located at the base of the snow thrower
beneath the rotor housing (Fig. 20).
2. Detach the worn scraper bar from the snow thrower by
removing the 3 screws that hold it in place (Fig. 21).
3. Install the new scraper bar and fasten it securely to the
snow thrower with the 3 screws (Fig. 21).
Fig. 17
Nuts + Bolts
Auger assembly
Fig. 18
Rubber plate assembly
Auger assembly
Metal frame
Rubber plate
Fig. 19
Fig. 20
Scraper bar
Fig. 21
Screws
Loading ...
Loading ...
Loading ...