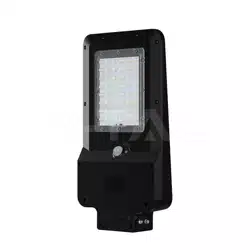

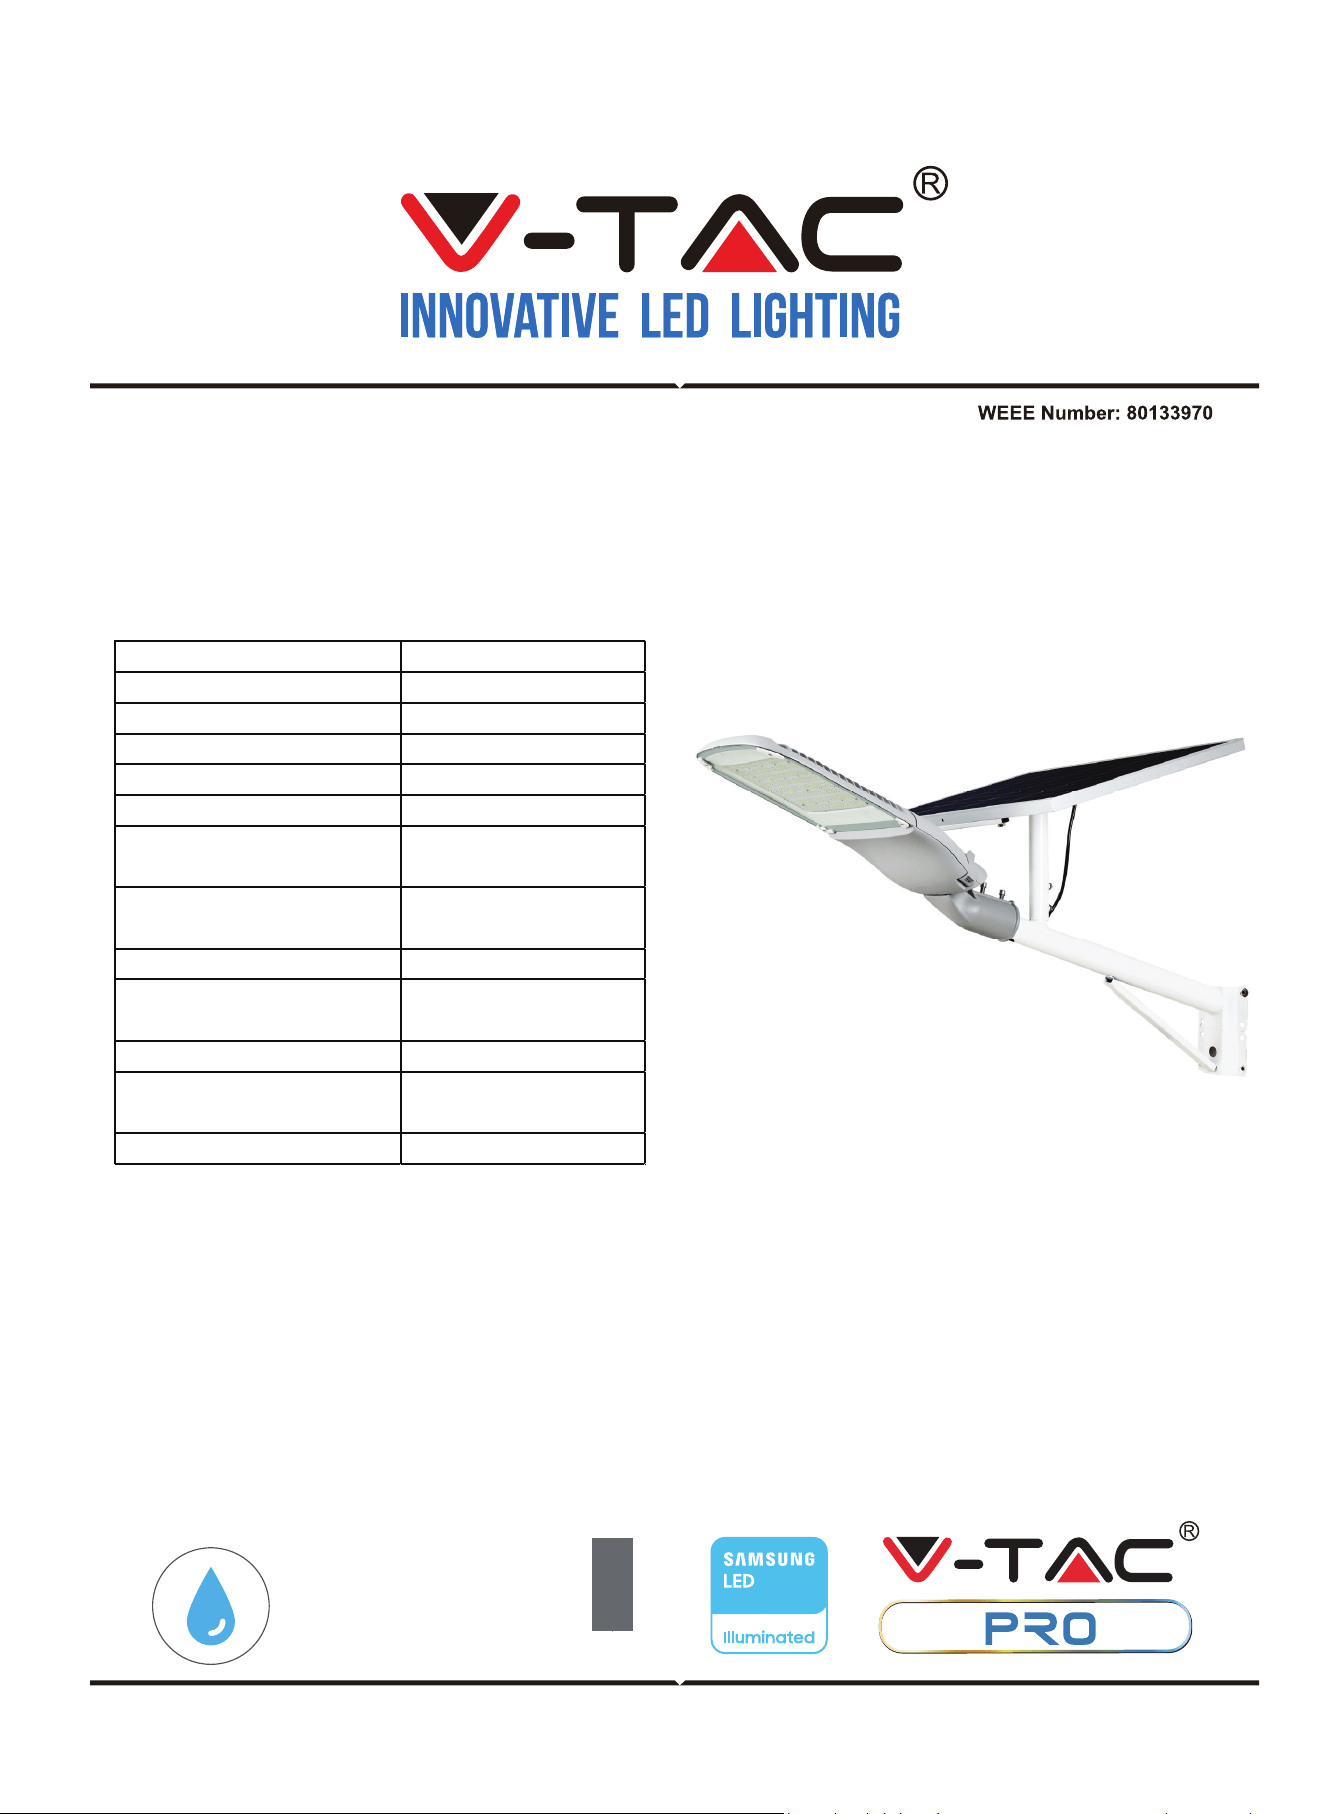
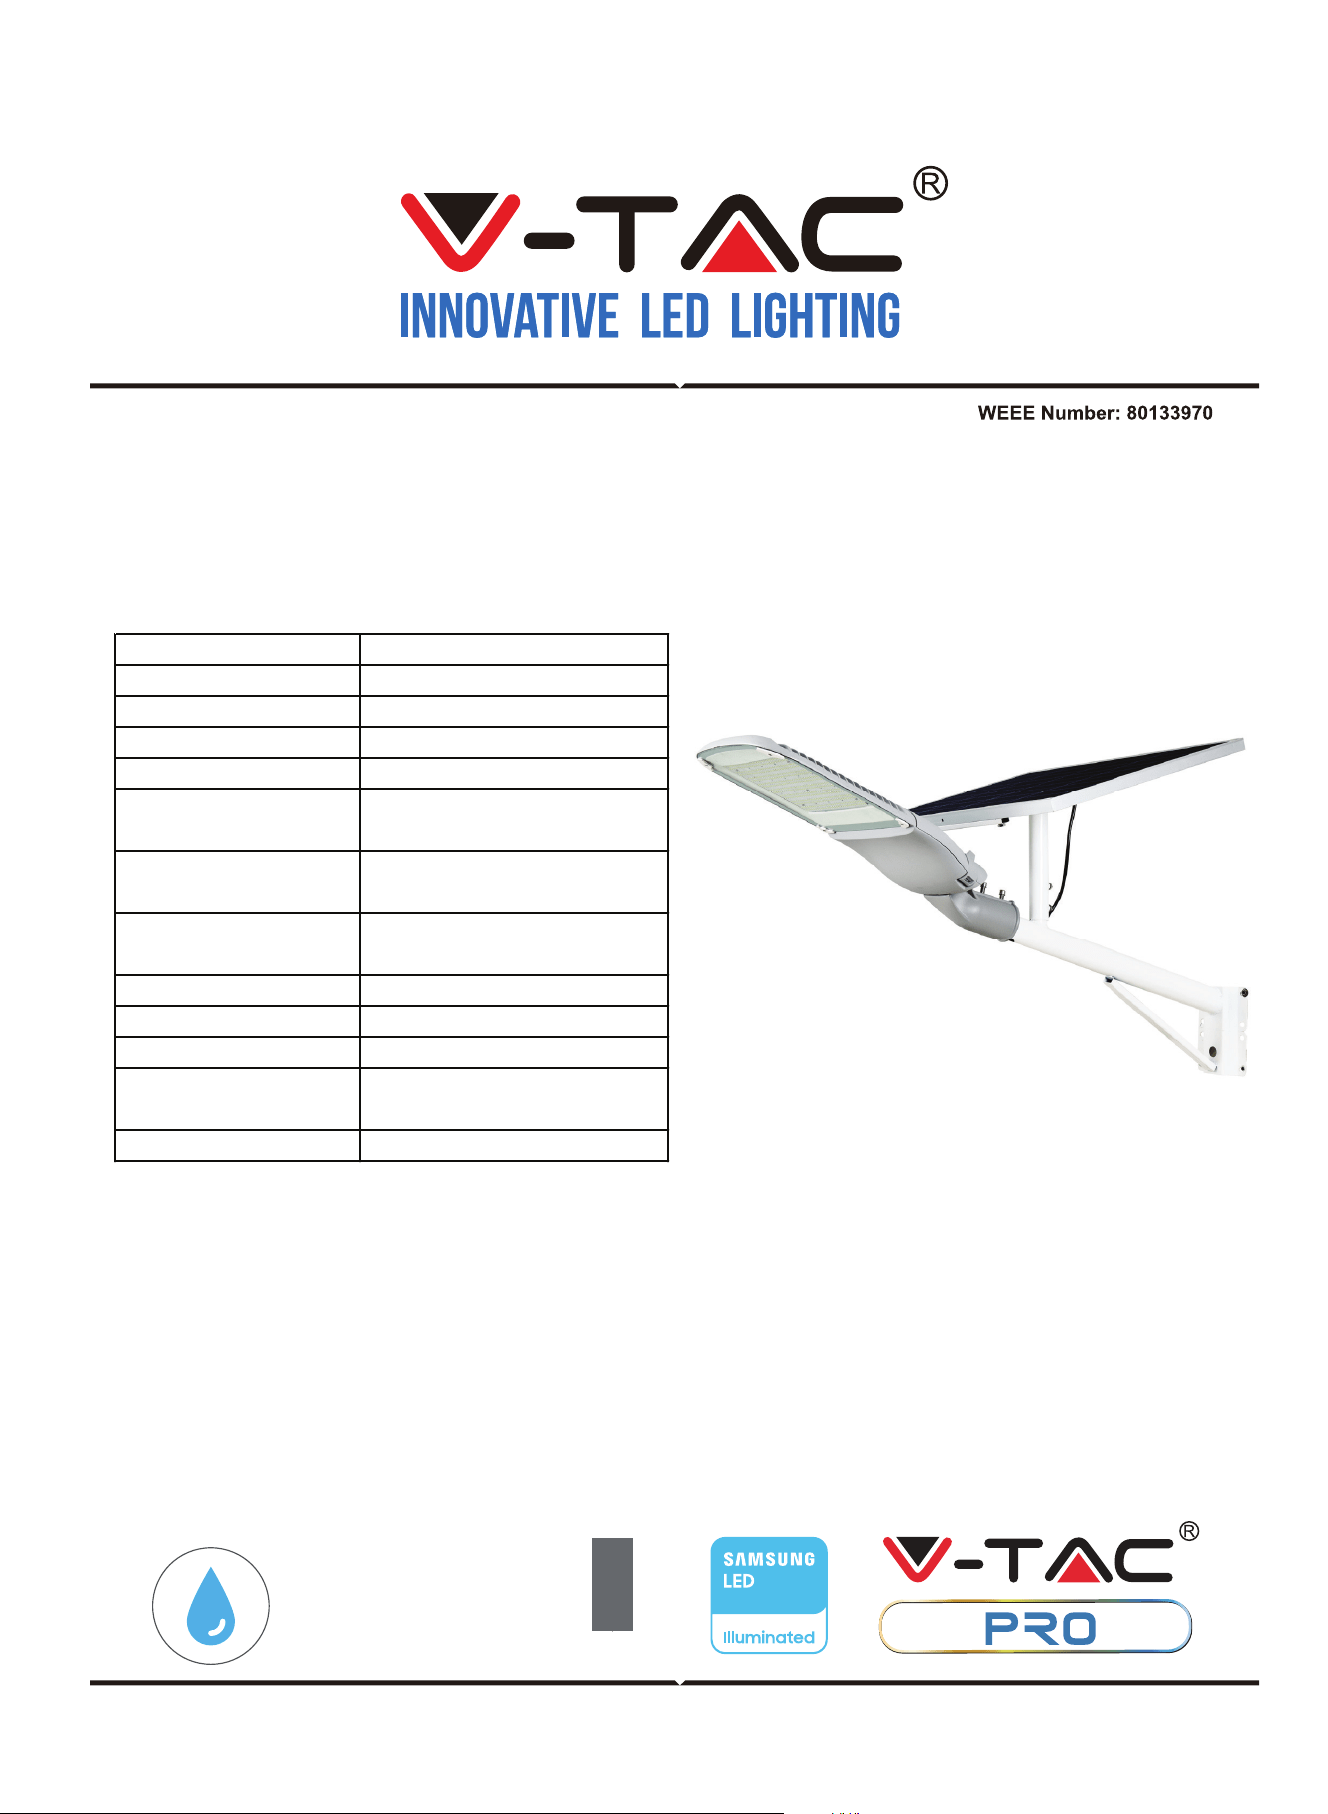
LED SOLAR STREETLIGHT
TECHNICAL DATA:
INTRODUCTION & WARRANTY
WARNING!
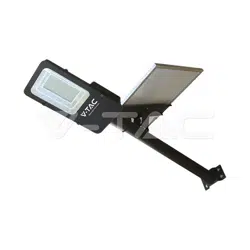
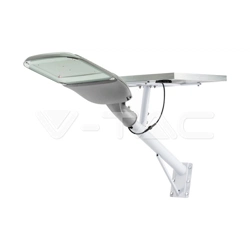
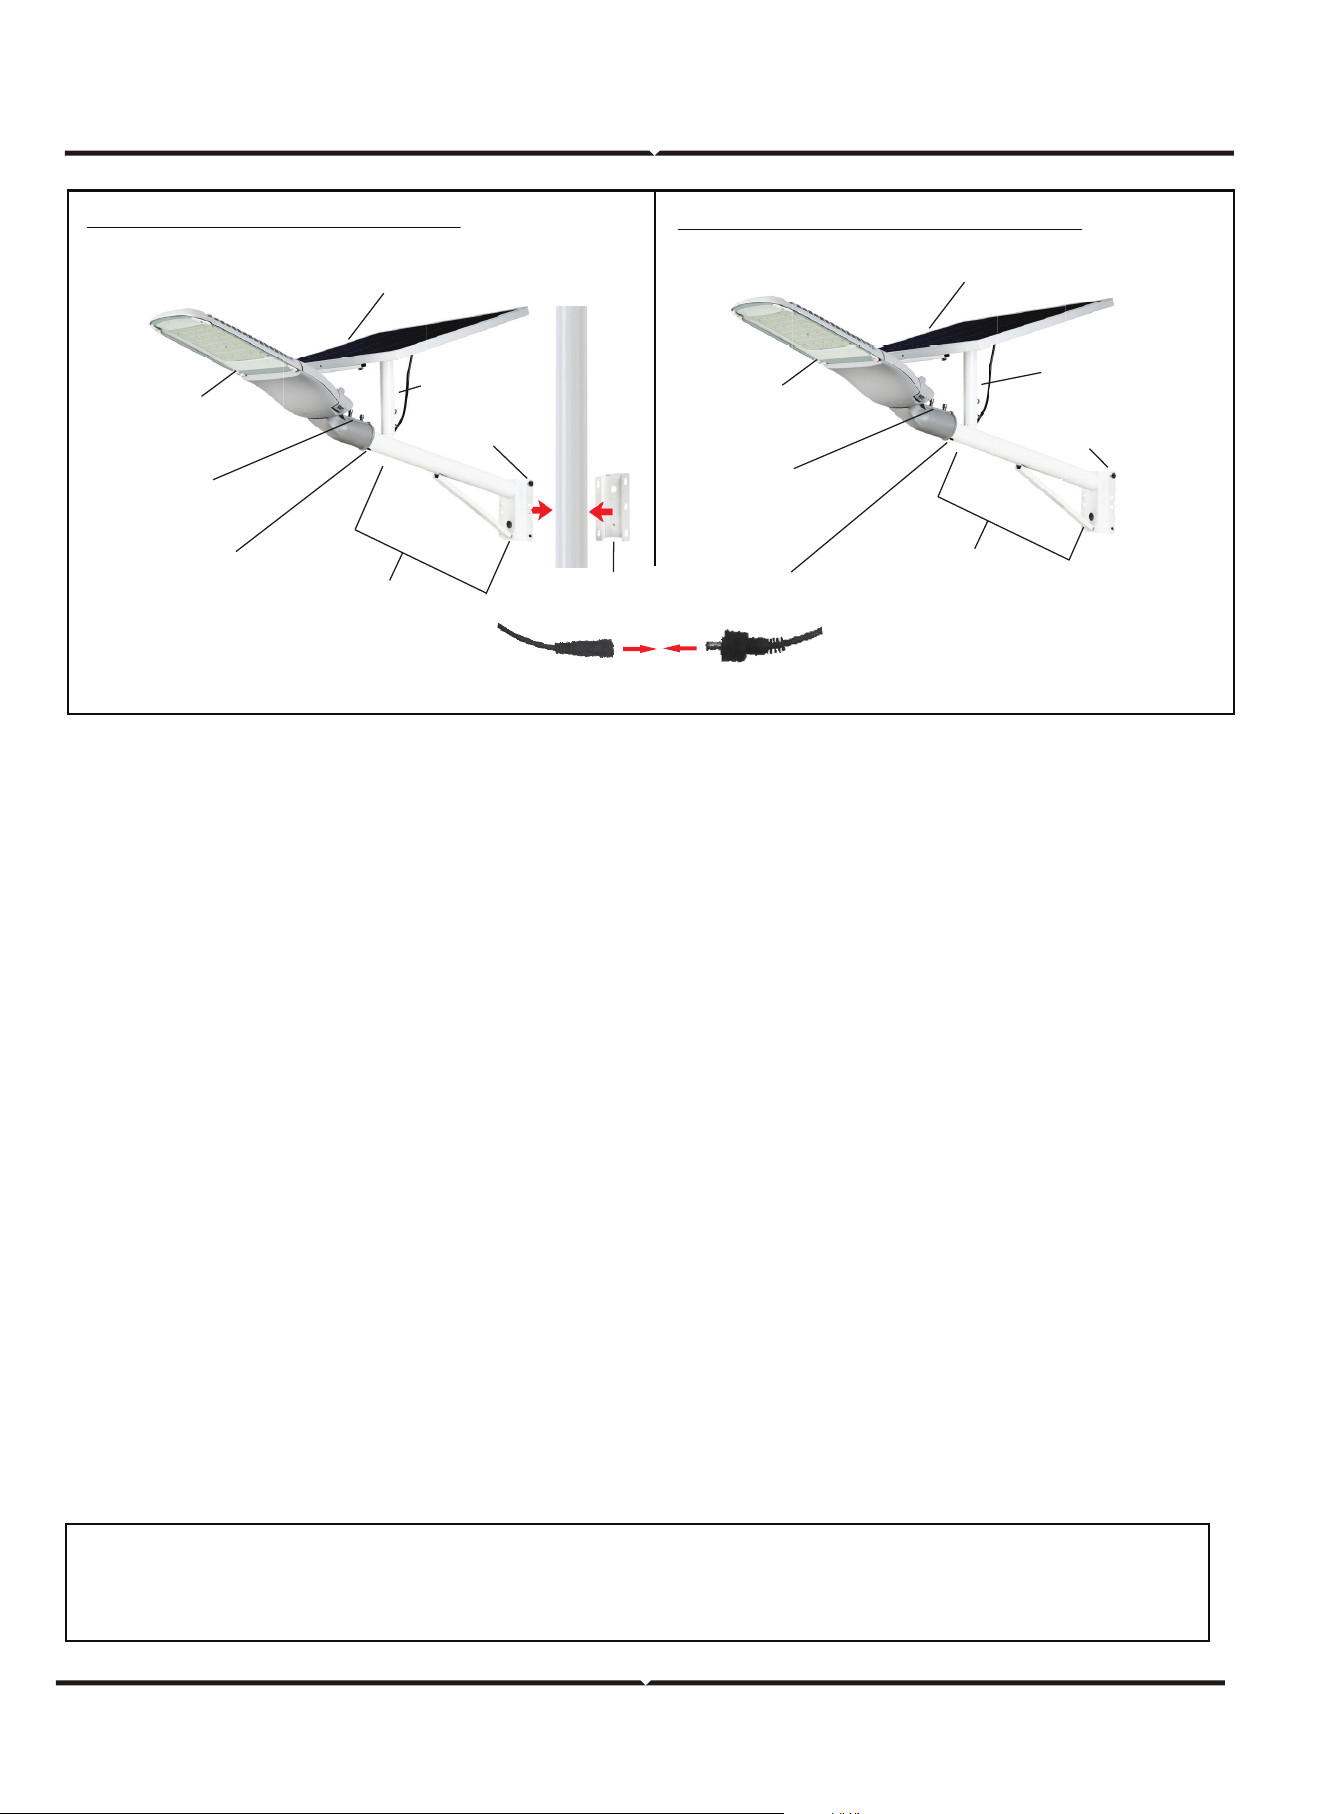
LAMP POST INSTALLATION
WALL MOUNT INSTALLATION
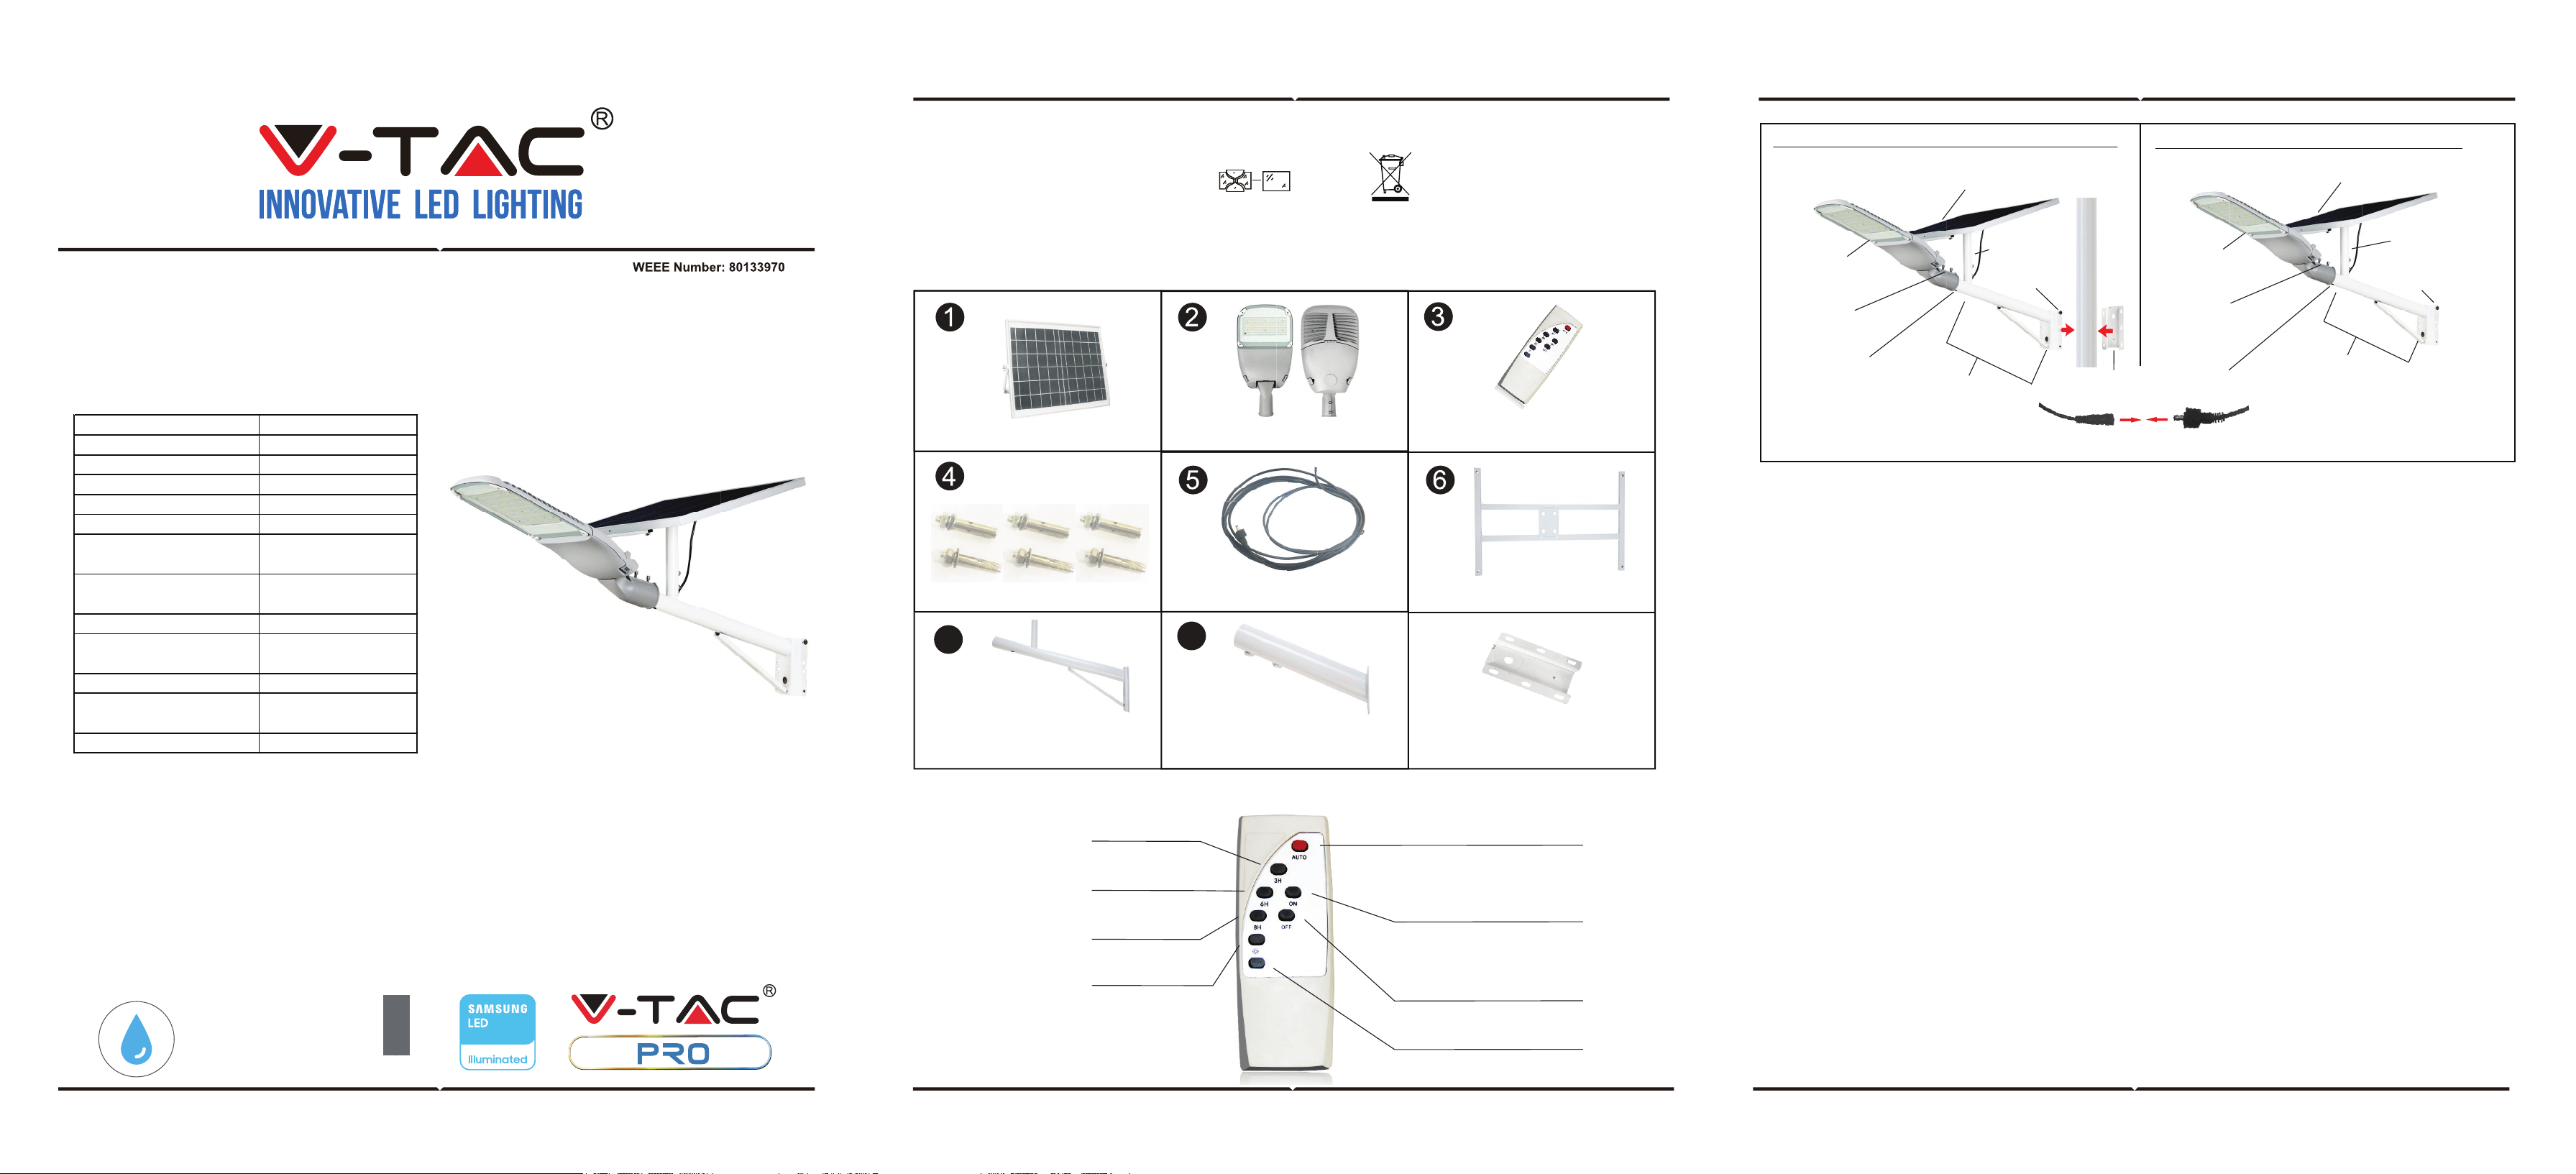
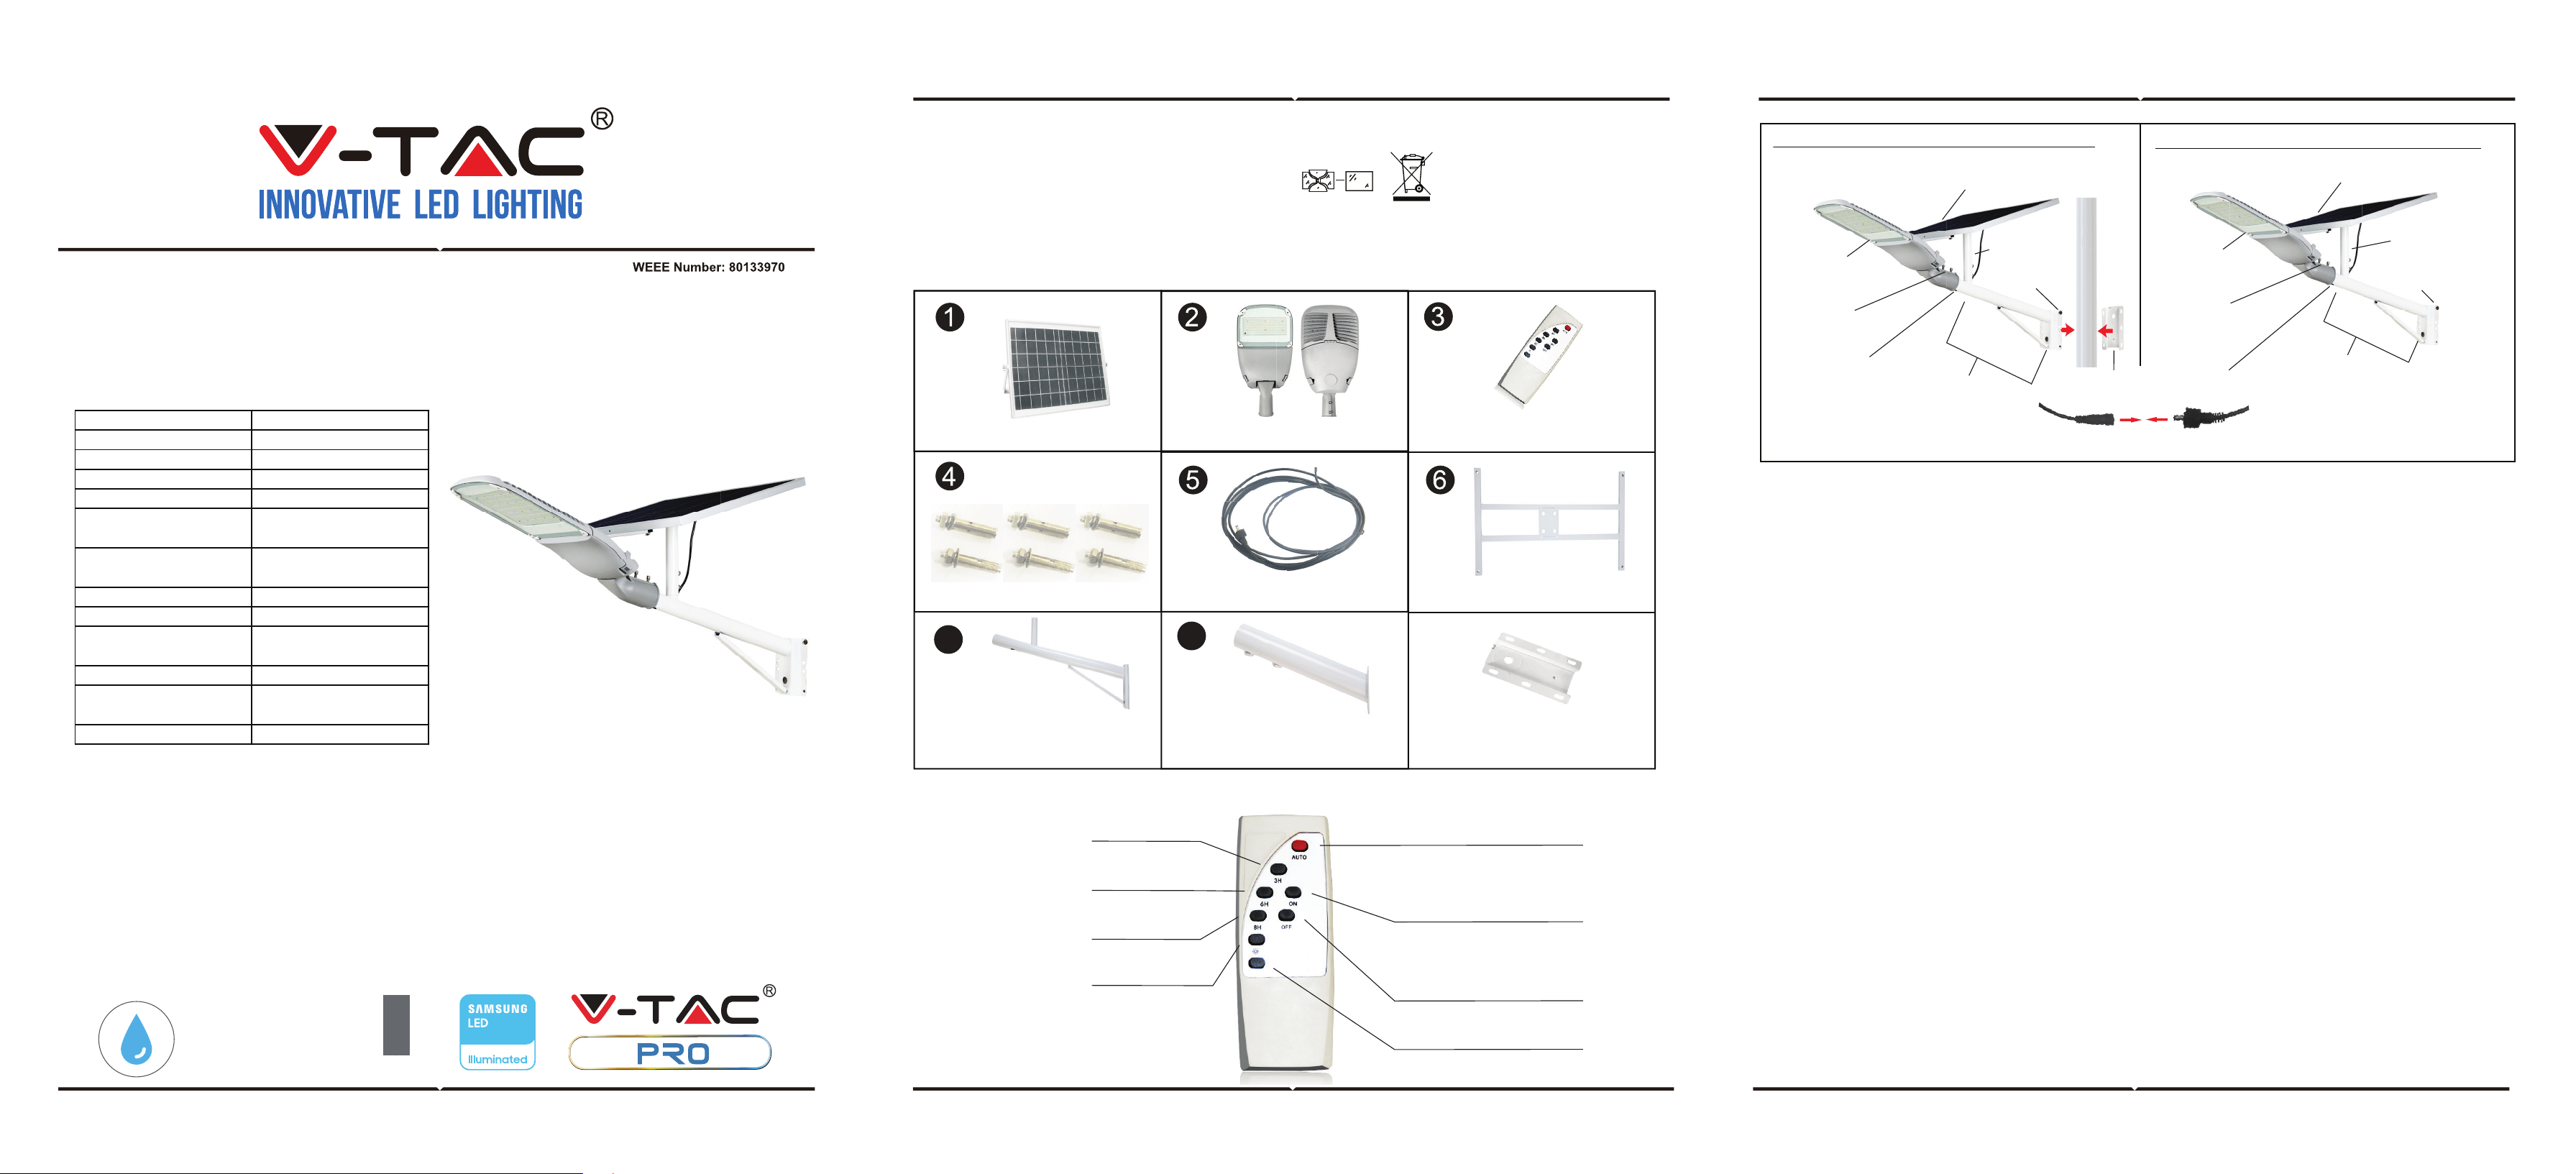
PARTS INCLUDED
INSTALLATION GUIDE:
MAINTENANCE
REMOTE CONTROL
INSTALLATION INSTRUCTION
1. Installation must be performed by a qualified electrician
2. Replace any cracked protective shield.
3. Keep away from the fire.
4. Don't immerse in the water
5. Luminaire cannot be installed in low-lying areas, so as not to soak.
This marking indicates that this
product should not be disposed
of with other household wastes.
3 hours regular
6 hours regular
8 hours regular
Optically controlled mode
Semi-bright mode
Force to turn on the lights
(Optical control is null)
Force to turn off the lights
(Optical control is null)
Full bright mode
• Before installing please remove all the parts to check if all are in good condition or not.
• Install the Protruding Pole on a wall or on a Lamp Pole with the Expansion Screws
• Fix the Solar Panel on the Bracket. Fix them on the Mounting Arm and tighten the screws.
• Place the Mounting Arm on the top pole part of the Protruding Pole
• Fix the Luminaire on the front portion of the Protruding Pole
• Make sure that the connection Plug on the luminaire is carefully stretched out from the hole
beneath the Protruding Pole
• Now Connect the plugs and tighten the Waterproof Cap.
• The luminaire should be connected to the solar panel against the sun light. Please makes
sure the solar panel is adjusted in correct angle in order to receive sunlight.
• After installation test the light using the remote control.
• The remote control is designed with an operation distance of 8-10m
• Clean the light with a dry, lint-free cloth.
• Check the solar panel for dirt regularly. If dirt or is present remove it to guarantee flawless
function of the product.
• Especially during the winter, keep the product free from snow and ice.
• Confirm installation direction is correct (solar panel should be at top)
• Confirm no objects blocking the solar panel to receive sunlight
Light Source
Internal six angle
screw fixation
Mounting Arm
(For Solar Panel)
Solar Charging
(The battery is in the lamp housing)
Screw fixation
Hole
Protruding Pole
(For Wall/Pole Installation)
Expansion Plate
Plug the male and female plugs
and tighten the waterproof cap
Light Source
Internal six angle
screw fixation
Solar Charging
(The battery is in the lamp housing)
Screw fixation
1.2m Wire
Expansion Screw 2*6
Moun�ng Arm
(For Solar Panel)
Solar Panel Bracket
Solar LightSolar Panel Remote Control
1 Expansion Plate
(For Lamp Post Installa�on)
Thank you for selecting and buying V-TAC product. V-TAC will serve you the best. Please read these
instructions carefully before starting the installation and keep this manual handy for future reference.
If you have any another query, please contact our dealer or local vendor from whom you have
purchased the product. They are trained and ready to serve you at the best. The warranty is valid for
3 years from the date of purchase. The warranty does not apply to damage caused by incorrect
installation or abnormal wear and tear. The company gives no warranty against damage to any
surface due to incorrect removal and installation of the product. This product is warranted for manu
facturing defects only.
3
YEARS
WARRANTY
*
IN CASE OF ANY QUERY/ISSUE WITH THE PRODUCT, PLEASE REACH OUT TO US AT: SUPPORT@V-TAC.EU
FOR MORE PRODUCTS RANGE, INQUIRY PLEASE CONTACT OUR DISTRIBUTOR OR NEAREST DEALERS.
V-TAC EUROPE LTD. BULGARIA, PLOVDIV 4000, BUL.L.KARAVELOW 9B
IP65
RATING
7
8
Protruding Pole
(For Wall/Pole Installa�on)
Mounting Arm
(For Solar Panel)
Protruding Pole
(For Wall/Pole Installation)
Hole
Model VT-ST303
Solar Panel Wa�s DC 9V, 50W
Lumens 3000LM
Beam Angle 120⁰
LED Chip Type SMD 2835
CRI >80
Maximum mounting height 6-8 Meters
Operation Temperature -20 to +45°c
Ba�ery Type LiFePO4 6.4V Ba�ery
Charging Time 4-6 hrs Sunlight Charging
Working Time 8-10hrs
Maximum installation height 6-8 Meters
No. of LEDs 572 PCS
ENGLISH ENGLISH
LED SOLAR STREETLIGHT
TECHNICAL DATA:
INTRODUCTION & WARRANTY
WARNING!
LAMP POST INSTALLATION
WALL MOUNT INSTALLATION
PARTS INCLUDED
INSTALLATION GUIDE:
MAINTENANCE
REMOTE CONTROL
INSTALLATION INSTRUCTION
1. Installation must be performed by a qualified electrician
2. Replace any cracked protective shield.
3. Keep away from the fire.
4. Don't immerse in the water
5. Luminaire cannot be installed in low-lying areas, so as not to soak.
This marking indicates that this
product should not be disposed
of with other household wastes.
3 hours regular
6 hours regular
8 hours regular
Optically controlled mode
Semi-bright mode
Force to turn on the lights
(Optical control is null)
Force to turn off the lights
(Optical control is null)
Full bright mode
• Before installing please remove all the parts to check if all are in good condition or not.
• Install the Protruding Pole on a wall or on a Lamp Pole with the Expansion Screws
• Fix the Solar Panel on the Bracket. Fix them on the Mounting Arm and tighten the screws.
• Place the Mounting Arm on the top pole part of the Protruding Pole
• Fix the Luminaire on the front portion of the Protruding Pole
• Make sure that the connection Plug on the luminaire is carefully stretched out from the hole
beneath the Protruding Pole
• Now Connect the plugs and tighten the Waterproof Cap.
• The luminaire should be connected to the solar panel against the sun light. Please makes
sure the solar panel is adjusted in correct angle in order to receive sunlight.
• After installation test the light using the remote control.
• The remote control is designed with an operation distance of 8-10m
• Clean the light with a dry, lint-free cloth.
• Check the solar panel for dirt regularly. If dirt or is present remove it to guarantee flawless
function of the product.
• Especially during the winter, keep the product free from snow and ice.
• Confirm installation direction is correct (solar panel should be at top)
• Confirm no objects blocking the solar panel to receive sunlight
Light Source
Internal six angle
screw fixation
Mounting Arm
(For Solar Panel)
Solar Charging
(The battery is in the lamp housing)
Screw fixation
Hole
Protruding Pole
(For Wall/Pole Installation)
Expansion Plate
Plug the male and female plugs
and tighten the waterproof cap
Light Source
Internal six angle
screw fixation
Solar Charging
(The battery is in the lamp housing)
Screw fixation
1.2m Wire
Expansion Screw 2*6
Moun�ng Arm
(For Solar Panel)
Solar Panel Bracket
Solar LightSolar Panel Remote Control
1 Expansion Plate
(For Lamp Post Installa�on)
Thank you for selecting and buying V-TAC product. V-TAC will serve you the best. Please read these
instructions carefully before starting the installation and keep this manual handy for future reference.
If you have any another query, please contact our dealer or local vendor from whom you have
purchased the product. They are trained and ready to serve you at the best. The warranty is valid for
3 years from the date of purchase. The warranty does not apply to damage caused by incorrect
installation or abnormal wear and tear. The company gives no warranty against damage to any
surface due to incorrect removal and installation of the product. This product is warranted for manu
facturing defects only.
3
YEARS
WARRANTY
*
IN CASE OF ANY QUERY/ISSUE WITH THE PRODUCT, PLEASE REACH OUT TO US AT: SUPPORT@V-TAC.EU
FOR MORE PRODUCTS RANGE, INQUIRY PLEASE CONTACT OUR DISTRIBUTOR OR NEAREST DEALERS.
V-TAC EUROPE LTD. BULGARIA, PLOVDIV 4000, BUL.L.KARAVELOW 9B
IP65
RATING
7
8
Protruding Pole
(For Wall/Pole Installa�on)
Mounting Arm
(For Solar Panel)
Protruding Pole
(For Wall/Pole Installation)
Hole
Model VT-ST303
Solar Panel Wa�s DC 9V, 50W
Lumens 3000LM
Beam Angle 120⁰
LED Chip Type SMD 2835
CRI >80
Maximum mounting height 6-8 Meters
Operation Temperature -20 to +45°c
Ba�ery Type LiFePO4 6.4V Ba�ery
Charging Time 4-6 hrs Sunlight Charging
Working Time 8-10hrs
Maximum installation height 6-8 Meters
No. of LEDs 572 PCS
ENGLISH ENGLISH
СВЕТОДИОДНА СОЛАРНА УЛИЧНА ЛАМПА
ТЕХНИЧЕСКИ ДАННИ:
ВЪВЕДЕНИЕ И ГАРАНЦИЯ
ПРЕДУПРЕЖДЕНИЕ
ИНСТАЛАЦИЯ НА СТЪЛБ ЗА ОСВЕТЛЕНИЕ
ИНСТАЛАЦИЯ ЗА МОНТАЖ НА СТЕНА
ВКЛЮЧЕНИ ЧАСТИ
РЪКОВОДСТВО ЗА ИНСТАЛАЦИЯ:
ТЕХНИЧЕСКА ПОДДРЪЖКА
ДИСТАНЦИОННО УПРАВЛЕНИЕ
ИНСТРУКЦИИ ЗА ИНСТАЛАЦИЯ
1. Монтажът трябва да бъде извършен от квалифициран
електротехник
2. Заменете напуканите защитни покрития.
3. Да се пази от пожар.
4. Да не се потапя във вода.
5. Осветителното тяло не може да бъде монтирано в
ниски зони, за да се избегне потапяне във вода.
Тази маркировка показва, че
продуктът не трябва да се изхвърля
заедно с останалия битов отпадък.
3 часа регулярно осветление
6 часа регулярно осветление
8 часа регулярно осветление
Оптично контролиран режим
Режим на половин яркост
Принудително включване на
осветлението (оптичният
контрол е нула)
Принудително изключване на
осветлението (оптичният
контрол е нула)
Режим пълна яркост
• Преди инсталация, моля отстранете всички части за да проверите дали всички са в добро състояние.
• Инсталирайте стълба за височинен монтаж на стена или върху стълб на лампа с помощта на разширителни
винтове
• Закрепете соларния панел върху скобата. Закрепете ги върху монтажното рамо и затегнете винтовете.
• Поставете монтажното рамо върху горната част на стълба за височинен монтаж
• Прикрепете осветителното тяло върху фронталната част от стълба за височинен монтаж
• Уверете се, че свързващото съединение на осветителното тяло е внимателно опънато от отвора под стълба
за височинен монтаж
• Сега свържете съединенията и затегнете водонепроницаемия капак.
• Осветителното тяло трябва да бъде свързано със соларния панел и насочено към слънчевата светлина.
Моля, уверете се, че соларният панел е регулиран спрямо точния ъгъл, необходим за получаване на
слънчева светлина.
• След инсталация, тествайте осветлението, като използвате дистанционното управление.
• Дистанционното управление е проектирано с експлоатационно разстояние от 8-10m
• Почистете осветлението със суха кърпа без влакна.
• Редовно проследявайте соларния панел за замърсяване. В случай че е налично замърсяване, почистете
го, за да гарантирате безпроблемното функциониране на продукта.
• Особено през зимата, съхранявайте продукта далеч от сняг и лед.
• Уверете се, че посоката на инсталацията е правилна (соларният панел трябва да бъде на върха)
• Моля уверете се, че обекти не блокират соларния панел, така че да получава слънчева светлина.
Източник на
осветление
Вътрешно ъглово
закрепяне с
шестстранен винт
Рамо за монтаж
(за соларен
панел)
Соларно зареждане (Батерията се
намира в корпуса на лампата)
Фиксиране на
винт
Отвор
Стълб за височинен
монтаж (за инсталация на
стена/стълб)
Разширителна плоскост
Включете мъжките и женските съединители и
затегнете водонепроницаемото покритие
Източник на
осветление
Вътрешно ъглово
закрепяне с
шестстранен винт
Соларно зареждане (Батерията се
намира в корпуса на лампата)
Фиксиране на винт
1.2 m проводник
Разширителен винт 2*6
Монтиращо рамо
(за соларен панел)
Скоба за соларен панел
Соларно осветлениеСоларен панел
Дистанционно управление
1 разширителна плоскост (за
инсталация на стълб на
осветление)
Благодарим ви, че избрахте и закупихте продукт на Ви-Тек (V-TAC). Ви-Тек (V-TAC) ще ви
послужи по най-добрия възможен начин. Моля прочетете тези инструкции внимателно преди
инсталация и съхранявайте ръководството за бъдещи справки. Ако имате други въпроси, моля
свържете се с нашия дилър или с местния търговец, от който сте закупили продукта. Те са
обучени и са готови да ви послужат по най-добрия начин. Гаранцията е валидна за период от 3
години след датата на закупуване. Гаранцията не се прилага по отношение на щети, причинени
поради неправилен монтаж или необичайно износване. Дружеството не предоставя гаранция
срещу щети по каквато и да е повърхност поради неправилното отстраняване и монтаж на
продукта. Гаранцията за този продукт се дава само за производствени дефекти.
3
YEARS
WARRANTY
*
IP65
RATING
7
8
Стълб за височинен монтаж (за
инсталация на стена/стълб)
Рамо за монтаж
(за соларен
панел)
Стълб за височинен
монтаж (за инсталация на
стена/стълб)
Отвор
BULGARIAN BULGARIAN
Модел VT-ST303
Ватове на соларен панел DC 9V, 50W
Лумени 3000LM
Ъгъл на лъч 120⁰
Тип чип за светодиод SMD 2835
Индекс на цветопредаване >80
Максимална височина на
монтаж
6-8 метра
Експлоатационна
температура
-20 to +45°C
Тип батерия Батерия LiFePO4 6.4V
Време за зареждане
4-6 часа зареждане от
слънчева светлина
Време за работа 8-10 часа
Максимална височина на
монтаж
6-8 метра
Брой светодиоди 572 бр.

LAMPIONE SOLARE A LED
DATI TECNICI:
INTRODUZIONE E GARANZIA
AVVERTIMENTO
INSTALLAZIONE DEL PALO DELLA LAMPADA
INSTALLAZIONE A PARETE
PARTI INCLUSE
MANUALE DI INSTALLAZIONE:
MANUTENZIONE
TELECOMANDO
ISTRUZIONI PER L'INSTALLAZIONE
1. L'installazione deve essere eseguita da un elettricista qualificato.
2. Sostituire qualsiasi schermo protettivo incrinato.
3. Tenere lontano dal fuoco.
4. Non immergere nell'acqua.
5. Il lampione solare a led non deve essere installato in zone basse
per evitare l'immersione nell'acqua.
Questo marchio indica che il
prodotto non deve essere smaltito
insieme agli altri rifiuti domestici.
3 ore di illuminazione regolare
6 ore di illuminazione regolare
8 ore di illuminazione regolare
Modalità a controllo ottico
Modalità di semi luminosità
Attivazione forzata dell'illuminazione
(il controllo ottico è nullo)
Disattivazione forzata dell'illuminazi-
one (il controllo ottico è nullo)
Modalità di luminosità completa
• Prima dell'installazione, rimuovere tutte le parti per controllare se tutte siano in buone condizioni.
• Installare il palo di montaggio in altezza su una parete o su un palo per lampione stradale con le viti
di espansione
• Fissare il pannello solare alla staffa. Fissarli al braccio di montaggio e serrare le viti.
• Posizionare il braccio di montaggio alla parte superiore del palo di montaggio in altezza.
• Fissare il lampione solare a led alla parte anteriore del palo di montaggio in altezza.
• Assicurarsi che la spina di connessione del lampione solare a led sia accuratamente tirata fuori dal
foro sotto il palo di montaggio in altezza.
• Ora collegare le spine e serrare il tappo impermeabile.
• Il lampione solare a led dovrebbe essere collegato al pannello solare e orientato verso la luce del
sole. Assicurarsi che il pannello solare sia regolato nell'angolo corretto per ricevere la luce del sole.
• Dopo l'installazione, testare prova l'illuminazione utilizzando il telecomando.
• Il telecomando è progettato per una distanza di funzionamento di 8-10 m.
• Pulire la lampada con un panno asciutto e senza pelucchi.
• Controllare regolarmente che il pannello solare non sia sporco. Se è sporco, pulirlo per garantire il
funzionamento impeccabile del prodotto.
• Specialmente durante l'inverno, mantenere il prodotto libero da neve e ghiaccio.
• Verificare che la direzione di installazione sia corretta (il pannello solare dovrebbe essere in alto)
• Assicurarsi che non ci siano oggetti che bloccano il pannello solare per ricevere la luce del sole
Sorgente
luminosa
Fissaggio angolo
interno con vite
esagonale
Braccio di
montaggio (per
pannello solare)
Ricarica solare (la batteria si trova
nell'alloggiamento della lampada)
Fissaggio a vite
Foro
Palo di montaggio in
altezza (per l'installazione
a parete/palo)
Piastra di espansione
Collegare i connettori maschio e femmina
e serrare il tappo impermeabile.
Sorgente
luminosa
Fissaggio angolo
interno con vite
esagonale
Ricarica solare (la batteria si trova
nell'alloggiamento della lampada)
Fissaggio a vite
Condu�ore da 1,2 mVite di espansione 2*6
Braccio di montaggio
(per pannello solare)
Staffa del pannello solare
Luce solarePannello solare Telecomando
1 piastra di espansione
(per installazione su palo)
Grazie per aver scelto e acquistato il prodotto della V-TAC. La V-TAC Le servirà nel miglior modo
possibile. Si prega di leggere attentamente queste istruzioni prima di iniziare l’installazione e di con-
servare questo manuale a portata di mano per riferimenti futuri. In caso di qualunque altra domanda
si prega di contattare il nostro rivenditore o il distributore locale da chi è stato acquistato il prodotto.
Loro sono addestrati e pronti a servirla nel miglior modo possibile. La garanzia è valida per 3 anni
dalla data d’acquisto. La garanzia non si applica ai danni provocati dall’installazione errata o dall’usura
anomala. L’azienda non fornisce alcuna garanzia per danni a qualsiasi superficie a causa della rimozi-
one e dell’installazione errata del prodotto. La garanzia di questo prodotto è valida soltanto per difetti
di fabbricazione.
3
YEARS
WARRANTY
*
IP65
RATING
7
8
Palo di montaggio in altezza
(per installazione a
parete/palo)
Braccio di
montaggio (per
pannello solare)
Palo di montaggio in
altezza (per l'installazione
a parete/palo)
Foro
ITALIAN ITALIAN
Modello VT-ST303
Wa�s del Pannello solare DC 9V, 50W
Lumen 3000LM
Angolo del fascio luminoso 120⁰
Tipo di chip LED SMD 2835
CRI (Indice di resa
cromatica)
>80
Altezza massima di
montaggio
6-8 metri
Temperatura di
funzionamento
da -20 a +45°C
Tipo di ba�eria Ba�eria LiFePO4 6.4V
Tempo di ricarica
4-6 ore di ricarica alla luce
del sole
Tempo di lavoro 8-10 ore
Altezza massima di
installazione
6-8 metri
Numero di LED 572 pz.

LED SZOLÁR UTCAI FÉNY
MŰSZAKI ADATOK:
BEVEZETÉS ÉS GARANCIA
FIGYELEM
LÁMPAOSZLOP TELEPÍTÉSE
FALRA TELEPÍTÉS
ALKATRÉSZEK
TELEPÍTÉSI ÚTMUTATÓ:
KARBANTARTÁS
TÁVIRÁNYÍTÓ
TELEPÍTÉSI ÚTMUTATÓ
1. A szerelést képzett villanyszerelőnek kell elvégeznie
2. Cserélje ki a repedt védőpajzsot.
3. Tűztől távol tartsa.
4. Ne merülje a vízbe
5. A lámpatest nem telepíthető alacsonyan fekvő területekre, hogy ne
ázzon be.
Ez a jelölés azt jelzi, hogy ezt a
terméket nem szabad más
háztartási hulladékkal együtt
megsemmisíteni.
3 óra rendszeres
6 óra rendszeres
8 óra rendszeres
Optikailag vezérelt mód
Félfényes mód
A lámpák bekapcsolásának
kényszerítése (az optikai vezérlés
nem érvényesül)
A lámpák kikapcsolásának
kényszerítése (az optikai vezérlés
nem érvényesül)
Teljes fényes mód
• Telepítés előtt kérjük, távolítsa el az összes alkatrészt, hogy ellenőrizze, jó-e vagy sem.
• Helyezze a kiálló oszlopot a falra vagy a lámpaoszlopra a tágító csavarokkal
• Rögzítse a napelemet a konzolon. Rögzítse őket a rögzítőkarra, és húzza meg a csavarokat.
• Helyezze a rögzítőkart a kiálló oszlop felső oszloprészére
• Rögzítse a lámpatestet a kiálló oszlop elülső részén
• Győződjön meg arról, hogy a lámpatest csatlakozó dugója gondosan ki van-e húzva a kiálló
oszlop alatti lyukból
• Most csatlakoztassa a csatlakozókat és húzza meg a vízálló kupakot.
• A lámpatestet a napfény ellen kell csatlakoztatni a napelemhez. Kérjük, ellenőrizze, hogy a
napelem megfelelő szögben van-e beállítva a napfény befogadásához.
• Telepítés után ellenőrizze a fényt a távirányítóval.
• A távirányító működési távolsága 8-10m.
• Tisztítsa meg a fényt száraz, szöszmentes ruhával.
• Rendszeresen ellenőrizze, hogy a napelem nem szennyezett-e. Ha szennyeződés van jelen,
távolítsa el, garantálja a termék hibátlan működését.
• Különösen télen tartsa a terméket hó- és jégmentesen.
• Ellenőrizze a telepítés helyes irányát (a napelemnek fent kell lennie)
• Ellenőrizze, hogy a napelemet nem akadályozza-e a napfény befogadása
Fényforrás
Belső hatszögű
csavarrögzítés
Szerelőkar
(napelemhez)
Napelemes töltés (Az akkumulátor a
lámpaházban van)
Csavar rögzítés
Lyuk
Kiálló oszlop (fal/oszlop
felszereléséhez)
Bővítő lemez
Dugja be a férfi és női
csatlakozókat, és húzza meg a
vízálló kupakot
Fényforrás
Belső hatszögű
csavarrögzítés
Napelemes töltés (Az akkumulátor a
lámpaházban van)
Csavar rögzítés
1,2 m huzal
Tágítócsavar 2*6
Szerelőkar
(napelemhez)
Napelem tartó
NapfényNapelem Távirányító
1 bővítőlemez (lámpaosz-
lop telepítéséhez)
Köszönjük, hogy választotta és megvásárolta a V-TAC terméket. V-TAC nyújtja Önnek a legjobb
szolgáltatást. Kérjük, a szerelés előtt figyelmesen olvassa el ezeket az utasításokat és óvja ezt a
kézikönyvet későbbi használatra. Ha további kérdései vannak, kérjük, forduljon forgalmazójához vagy
helyi eladójához, akitől megvásárolta a terméket. Ők képzettek és készek a legjobb szolgálatra. A
jótállás a vásárlás napjától számítva 3 évig érvényes. A garancia nem vonatkozik a helytelen szerelés
vagy az abnormális kopás okozta károkra. A cég nem vállal semmilyen garanciát a felület káro-
sodásáért, a termék helytelen eltávolításáért és szereléséért. Ez a termék garanciája csak a gyártási
hibákra vonatkozik.
3
YEARS
WARRANTY
*
IP65
RATING
7
8
Kiálló oszlop (fal/oszlop
felszereléséhez)
Szerelőkar
(napelemhez)
Kiálló oszlop (fal/oszlop
felszereléséhez)
Lyuk
HUNGARIAN HUNGARIAN
Modell VT-ST303
Napelem Wa� DC 9V, 50W
Lumen 3000LM
Sugárzási szög 120⁰
LED chip típus SMD 2835
CRI >80
Maximális rögzítési
magasság
6-8 méter
Működési hőmérséklet -20°C-től +45°C-ig
Akkumulátor típusa LiFePO4 6.4V akkumulátor
Töltési idő 4-6 órás napfénytöltés
Munkaidő 8-10 óra
Maximális beépítési
magasság
6-8 méter
LED-ek száma 572 darab

LED SOLAR STRASSENLATERNE
TECHNISCHE DATEN:
EINFÜHRUNG UND GEBRAUCHSANWEISUNG
WARNUNG
INSTALLATION DER LAMPENPFOSTEN
WANDMONTAGE
TEILE ENTHALTEN
INSTALLATIONSANLEITUNG:
INSTANDHALTUNG
FERNBEDIENUNG
INSTALLATIONSANWEISUNG
1. Die Installation muss von einem qualifizierten Elektriker
durchgeführt werden.
2. Ersetzen Sie eine gerissene Schutzabdeckung.
3. Halten Sie sich vom Feuer fern.
4. Nicht ins Wasser eintauchen.
5. Leuchte darf nicht in tiefer gelegenen Bereichen installiert
werden, um nicht durchnässt zu werden.
Diese Kennzeichnung gibt an, dass
dieses Produkt nicht zusammen
mit anderen Haushaltsabfällen
entsorgt werden darf.
3 Stunden üblicherweise
6 Stunden üblicherweise
8 Stunden üblicherweise
Optisch gesteuerter Modus
Halbheller Modus
Mechanisch die Lichter einschalten
(optische Steuerung ist null)
Mechanisch die Lichter ausschalten
(optische Steuerung ist null)
Vollheller Modus
• Bitte entfernen Sie vor der Installation alle Teile, um zu überprüfen, ob alle in gutem Zustand sind oder nicht.
• Installieren Sie den hervorstehenden Pfosten an einer Wand oder an einem Lampenmast mit den Spreizschrau-
ben.
• Befestigen Sie das Solarpanel an der Halterung. Befestigen Sie sie am Montagearm und ziehen Sie die Schrau-
ben fest.
• Setzen Sie den Montagearm auf dem oberen Pfostenteil des hervorstehenden Pfostens.
• Befestigen Sie die Leuchte am vorderen Teil des hervorstehenden Pfostens.
• Achten Sie darauf, dass der Anschlussstecker an der Leuchte vorsichtig aus dem Loch unter dem hervorstehen-
den Pfosten herausgezogen wird.
• Schließen Sie nun die Stecker an und ziehen Sie die wasserdichte Kappe fest.
• Die Leuchte sollte gegen das Sonnenlicht an das Solarpanel angeschlossen werden. Bitte stellen Sie sicher, dass
das Solarpanel im richtigen Winkel eingestellt ist, um Sonnenlicht zu empfangen.
• Testen Sie die Leuchte nach der Installation mit der Fernbedienung.
• Die Fernbedienung ist mit einer Reichweite von 8-10 m ausgelegt.
• Reinigen Sie die Leuchte mit einem trockenen, fusselfreien Tuch.
• Überprüfen Sie das Solarpanel regelmäßig auf Verschmutzungen. Falls Verschmutzungen vorhanden sind,
entfernen Sie diese, um eine einwandfreie Funktion des Produkts zu gewährleisten.
• Insbesondere für den Winter: Halten Sie das Produkt frei von Schnee und Eis.
• Stellen Sie sicher, dass die Montagerichtung korrekt ist (das Solarpanel sollte oben liegen).
• Vergewissern Sie sich, dass keine Gegenstände das Solarpanel blockieren, um Sonnenlicht zu empfangen.
Lichtquelle
Befestigung durch
interne Sechs-
kantschraube
Montagearm
(für Solarpanel)
Solarladung (Der Akku befindet sich
im Lampengehäuse)
Verschraubung
Loch
Hervorstehender Pfosten
(für Wand-/Pfosteninstalla-
tion)
Ausdehnungsplatte
Stecken Sie den männlichen und weiblichen Stecker
ein und ziehen Sie die wasserdichte Abdeckung fest
Lichtquelle
Befestigung durch
interne Sechs-
kantschraube
Solarladung (Der Akku befindet sich
im Lampengehäuse)
Verschraubung
1.2m Draht
Spreizschraube 2*6
Montagearm (für
Solarpanel)
Solarpanel-Halterung
Solar LeuchteSolarpanel Fernbedienung
1 Ausdehnungspla�e (für
Lampenpfosteninstalla�on)
Wir danken Ihnen, dass Sie ein V-TAC ausgesucht und gekauft haben. V-TAC wird Ihnen die besten
Dienste erweisen. Lesen Sie, bitte, diese Gebrauchsanweisung vor der Montage aufmerksam durch
und halten Sie sie für Auskünfte in der Zukunft parat. Sollten Sie weitere Fragen haben, kontaktieren
Sie, bitte, unseren lokalen Händler oderVerkäufer, von dem Sie das Produkt gekauft haben. Sie sind
ausgebildet und bereit Sie auf die bestmögliche Art und Weise zu unterstützen. Die Gewährleistungs-
frist beträgt 3 Jahre ab dem Kaufdatum. Die Gewährleistung bezieht sich nicht auf Schäden, die durch
unsachgemäße Montage oder ungewöhnliche Abnutzung und Verschleiß verursacht worden sind. Das
Unternehmen gewährt keine Garantie für durch unsachgemäßen Produktabbau oder unsachgemäße
Montage entstandene Schäden an jeglichen Oberflächen. Diese Gewährleistung gilt nur für Herstel-
lungsmängel.
3
YEARS
WARRANTY
*
IP65
RATING
7
8
Hervorstehender Pfosten (für
Wand-/Pfosteninstalla�on)
Montagearm
(für Solarpanel)
Hervorstehender Pfosten
(für Wand-/Pfosteninstalla-
tion)
Loch
GERMAN GERMAN
Modell VT-ST303
Solarpanel Wa�s DC 9V, 50W
Lumen 3000 LM
Abstrahlwinkel 120⁰
LED Chip Typ SMD 2835
CRI >80
Maximum mounting
height
6-8 Meter
Betriebstemperatur -20 to +45°c
Akku Typ LiFePO4 6.4V Ba�erie
Ladezeit
4-6 Std Sonnenlicht zum
Aufladen
Arbeitszeit 8-10 Std
Maximale
Installationshöhe
6-8 Meter
Anzahl der LEDs 572 STCK
FAROLA LED SOLAR
DATOS TÉCNICOS:
INTRODUCCIÓN Y GARANTÍA
¡ADVERTENCIA
INSTALACIÓN EN POSTE
INSTALACIÓN EN PARED
PIEZAS INCLUIDAS
GUÍA DE INSTALACIÓN:
MANTENIMIENTO
CONTROL REMOTO
INSTRUCCIONES DE INSTALACIÓN
1. La instalación debe ser realizada por un electricista certificado.
2. Reemplace los protectores grietados.
3. Manténgalo alejado del fuego.
4. No lo sumerja en agua.
5. La luminaria no debe instalarse en zonas bajas para evitar la
inmersión en agua.
Esta marca indica que el producto
no debe desecharse con los residu-
os generales.
3 horas de iluminación regular
6 horas de iluminación regular
8 horas de iluminación regular
Modo de control óptico
Modo de medio brillo
Encender forzosamente la iluminación
(el control óptico es cero)
Apagar forzosamente la iluminación
(el control óptico es cero)
Modo de brillo total
• Antes de la instalación, retire todas las piezas para comprobar que están en buenas condiciones.
• Instale el poste para instalación en altura en una pared o en un poste de luz usando tornillos de
expansión
• Fije el panel solar a la abrazadera. Fíjelos al brazo para instalación y apriete los tornillos.
• Coloque el brazo para instalación en la parte superior del poste para instalación en altura
• Coloque la luminaria en la parte delantera del poste para instalación en altura
• Asegúrese de que la conexión de la luminaria es tendido cuidadosamente desde la abertura debajo
del poste para instalación en altura.
• Ahora conecte las conexiones y apriete la cubierta impermeable.
• La luminaria debe estar conectada al panel solar y dirigida hacia la luz solar. Asegúrese de que el
ángulo del panel solar sea ajustado correctamente para que se pueda recibir la luz solar.
• Después de la instalación, pruebe la iluminación con el control remoto.
• El control remoto está diseñado para una distancia de operación de 8-10 m
• Limpie la luz con un paño seco y sin pelusas.
• Revise regularmente el panel solar para ver si está sucio. Si está sucio, límpielo para asegurar el
buen funcionamiento del producto.
• Especialmente durante el invierno, mantenga el producto libre de nieve y hielo.
• Asegúrese de que la dirección de instalación sea correcta (el panel solar debe estar en la parte
superior).
• Asegúrese de que ningún objeto bloquee la recepción de la luz solar del panel solar.
Fuente de luz
Fijación de esquina
interior con tornillo
hexagonal
Brazo para
instalación (para
panel solar)
Carga solar (la batería se encuentra
en la carcasa de la lámpara)
Tornillo de
fijación
Agujero
Poste para instalación en
altura (para instalación en
pared/poste)
Placa de expansión
Conecte los conectores macho y
hembra y apriete la tapa impermeable.
Fuente de luz
Fijación de esquina
interior con tornillo
hexagonal
Carga solar (la batería se encuentra
en la carcasa de la lámpara)
Tornillo de fijación
Conductor de 1,2 mTornillo de expansión 2 * 6
Brazo para instalación
(para panel solar)
Abrazadera de panel solar
Iluminación solarPanel solar Control remoto
1 placa de expansión
(para instalación en poste
de iluminación)
Le agradecemos que ha elegido y adquirido la V-TAC. V-TAC le servirá del mejor modo posible. Pedi-
mos que antes de comenzar la instalación lea atentamente las presentes instrucciones y las guarde
en un lugar adecuado para consultas próximas. En caso de dudas o preguntas, póngase, por favor, en
contacto con el representante o suministrador más cercano de quien ha comprado el producto. Él
será debidamente instruido y dispuesto para atenderle de la mejor manera posible. La garantía
tendrá una duración de 3 años, contados a partir de la fecha de la compra. La garantía no será aplica-
ble a daños ocasionados por instalación incorrecta o gasto inhabitual. La empresa no otorgará
garantía para daños de superficies de cualquier tipo generados por su eliminación e instalación incorr-
ectas. La garantía cubrirá solo defectos de producción de fábrica.
3
YEARS
WARRANTY
*
IP65
RATING
7
8
Poste para instalación en
altura (para instalación en
pared/poste)
Brazo para
instalación (para
panel solar)
Poste para instalación en
altura (para instalación en
pared/poste)
Agujero
SPANISH SPANISH
Modelo VT-ST303
Vatios del panel solar DC 9V, 50W
Lúmenes 3000LM
Ángulo del haz 120⁰
Tipo de chip LED SMD 2835
Índice de reproducción
cromática
>80
Altura máxima de
instalación
6-8 metros
Temperatura de
operación
-20 a +45°C
Tipo de batería Bateria LiFePO4 6.4V
Tiempo de carga 4-6 horas de carga en luz solar
Tiempo de trabajo 8-10 horas
Altura máxima de
instalación
6-8 metros
Numero de LEDs 572 unidades
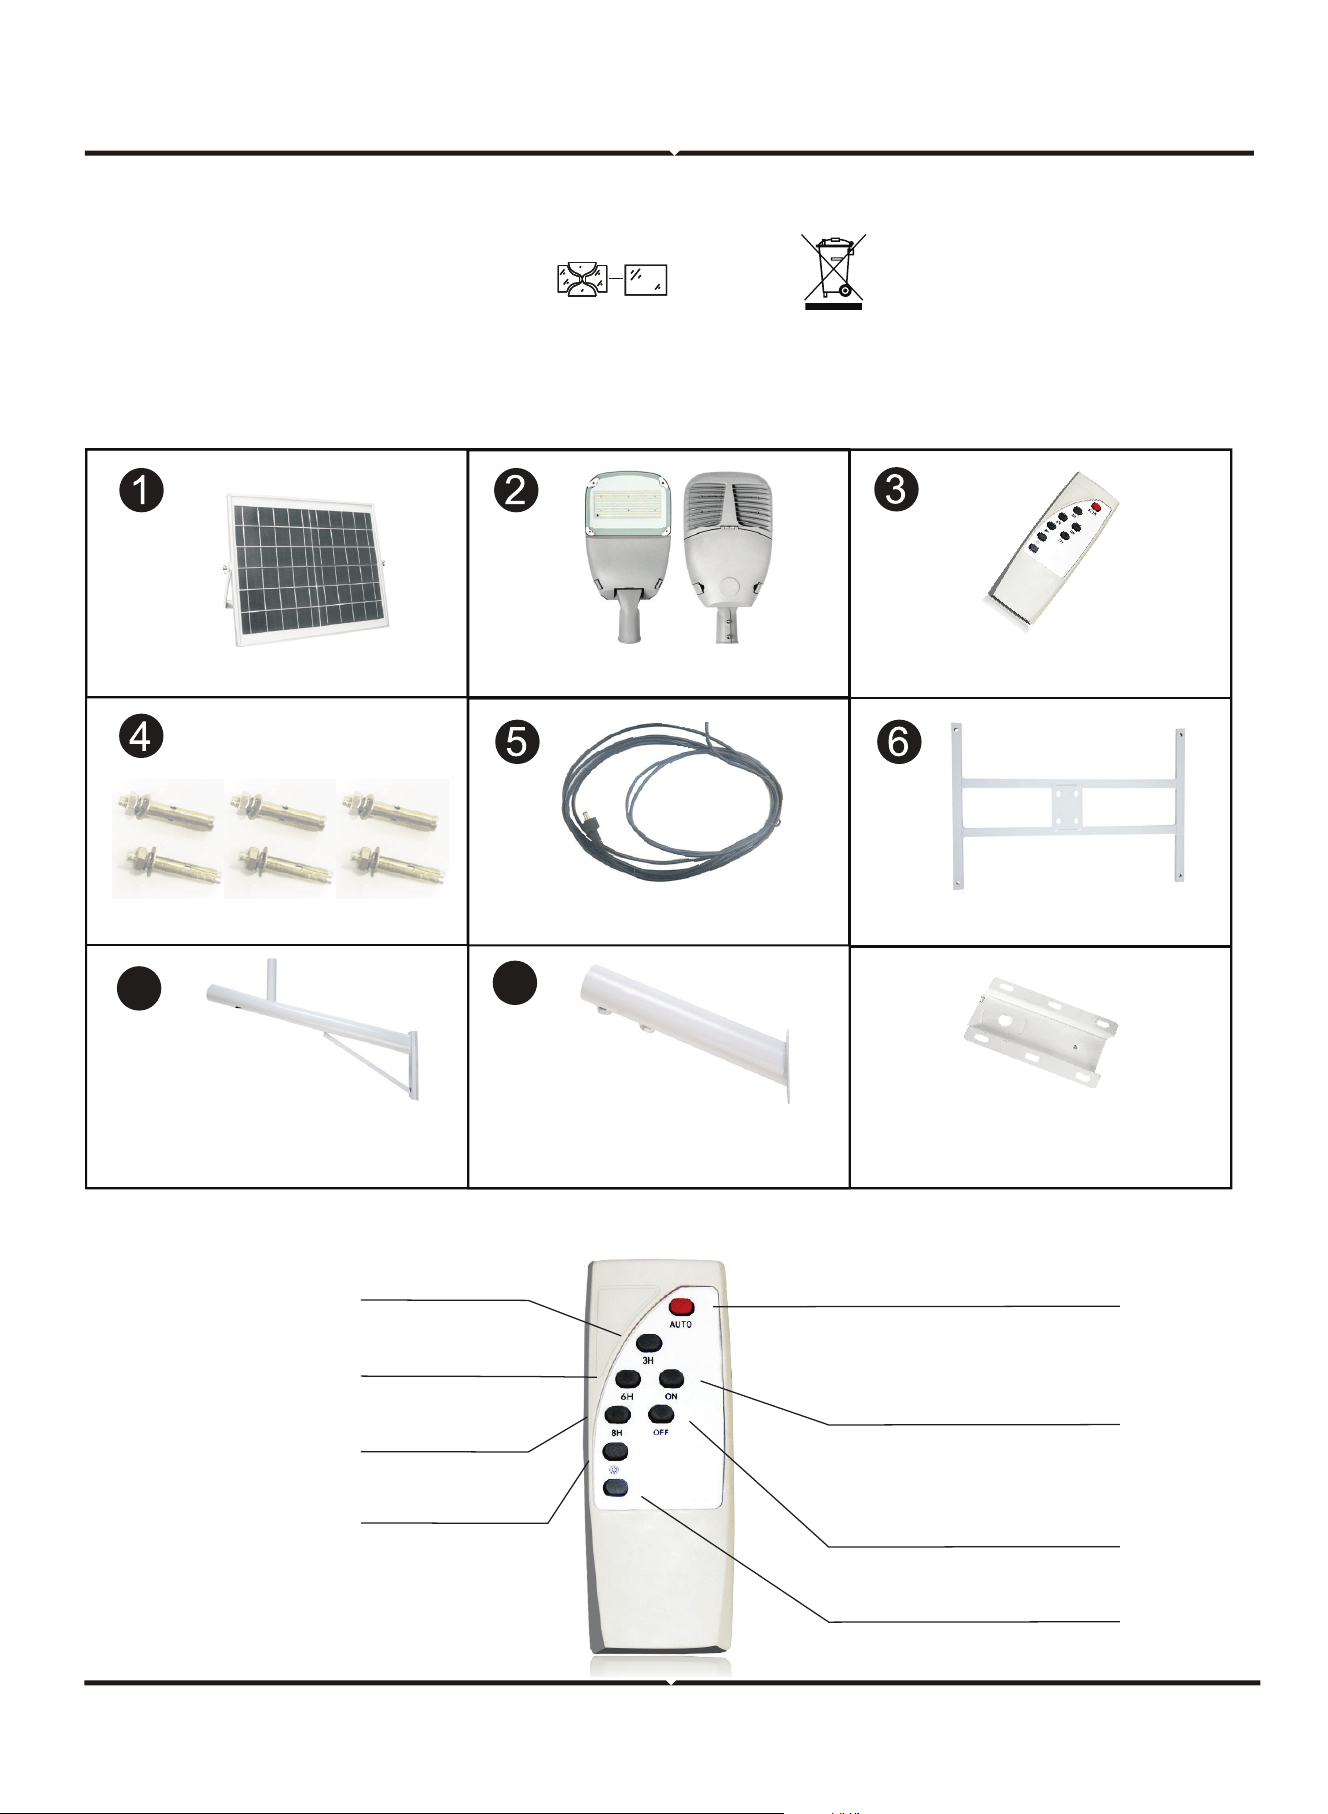
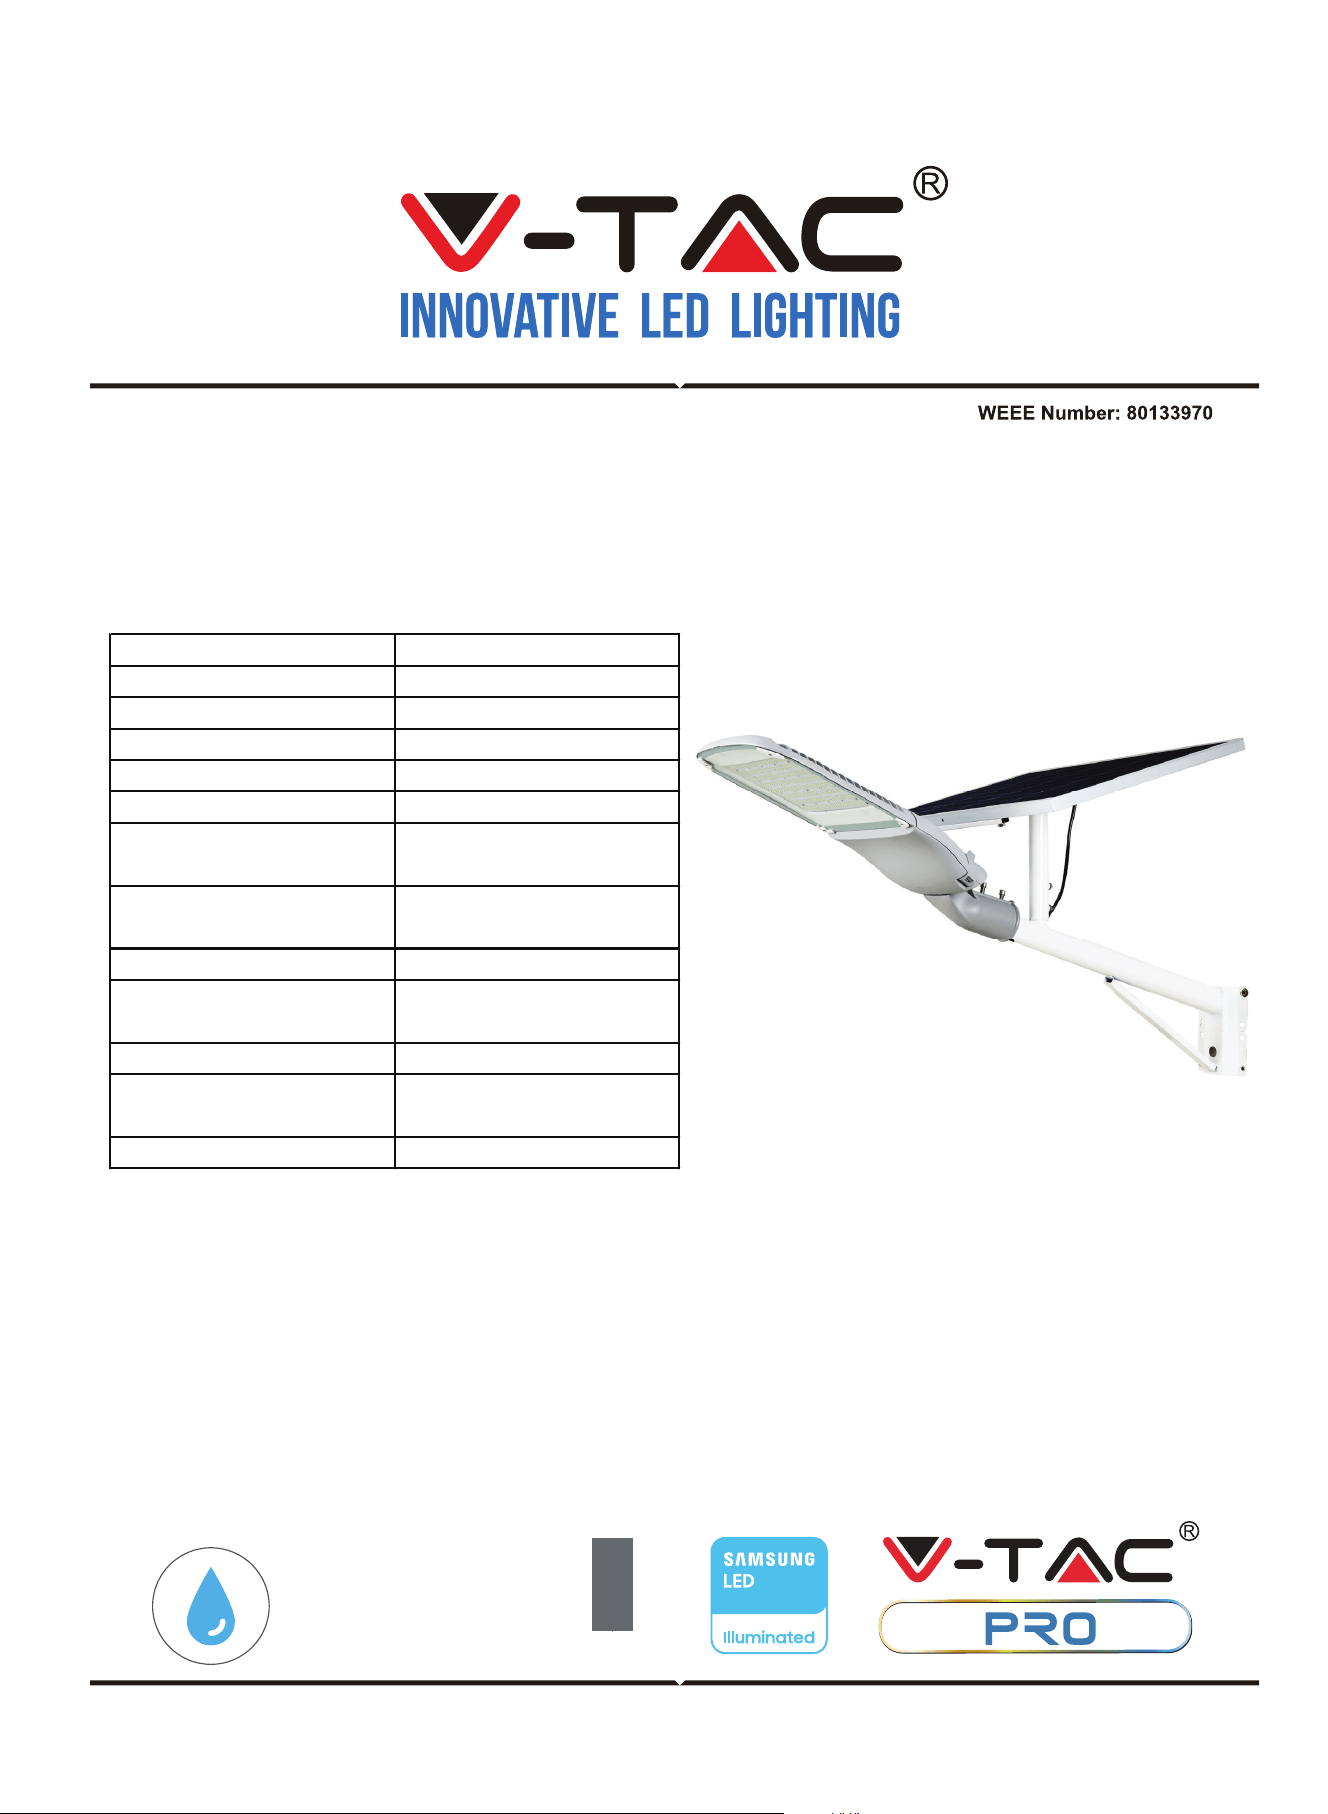
RÉVERBÈRE SOLAIRE À DEL
DONNÉES TECHNIQUES:
INTRODUCTION AND GARANTIE
AVERTISSEMENT Е
INSTALLATION DU MÂT D'ÉCLAIRAGE
INSTALLATION AU MUR
PIÈCES INCLUSES
GUIDE D'INSTALLATION:
ENTRETIEN
TÉLÉCOMMANDE
INSTRUCTION D'INSTALLATION
1. L'installation doit être effectuée par un électricien qualifié.
2. Remplacez tout écran de protection fissuré.
3. Tenir à l'écart du feu.
4. Ne pas immerger dans l'eau.
5. Le luminaire ne peut pas être installé dans des zones basses, afin de ne
pas être immergé.
Ce marquage indique que ce
produit ne doit pas être jeté
avec les autres déchets
ménagers.
3 heures en mode normal
6 heures en mode normal
8 heures en mode normal
Mode contrôle optique
Mode semi-lumineux
Activation forcée des éclairages
(le contrôle optique est nul)
Forcer l'extinction des éclairages
(le contrôle optique est nul)
Mode haute luminosité
• Avant de procéder à l'installation, veuillez retirer toutes les pièces pour vérifier si elles sont toutes en
bon état ou non.
• Installez le poteau en saillie sur un mur ou sur un mât d'éclairage avec les vis d'expansion
• Fixez le panneau solaire sur le support. Fixez-les sur le bras de montage et serrez les vis.
• Placez le bras de montage sur la partie supérieure du poteau en saillie
• Fixez le luminaire sur la partie avant du poteau en saillie
• Veillez à ce que la fiche de connexion du luminaire soit soigneusement sortie de l'orifice situé sous le
mât en saillie
• Raccordez maintenant les fiches et serrez le bouchon étanche.
• Le luminaire doit être raccordé au panneau solaire à l'abri de la lumière du soleil. Assurez-vous que le
panneau solaire est ajusté dans un angle correct afin de recevoir la lumière du soleil.
• Après l'installation, testez le luminaire à l'aide de la télécommande.
• La télécommande est conçue pour une distance de fonctionnement de 8-10m
• Nettoyez la lampe avec un chiffon sec et non pelucheux.
• Vérifiez régulièrement que le panneau solaire n'est pas encrassé. Si des saletés sont présentes,
retirez-les pour garantir un fonctionnement irréprochable du produit.
• En particulier pendant l'hiver, gardez le produit à l'abri de la neige et de la glace.
• Vérifiez que le sens d'installation est correct (le panneau solaire doit être en haut).
• Vérifiez qu'aucun objet n'empêche le panneau solaire de recevoir la lumière du soleil.
Source lumineuse
Fixation interne par
vis à six angles
Bras de
montage (pour
panneau solaire)
Chargement solaire (La batterie est
dans le boîtier de la lampe)
Fixation par vis
Trou
Poteau en saillie (pour
installation au mur/au
poteau)
Plaque d'expansion
Branchez les fiches mâle et femelle
et serrez le bouchon étanche.
Source lumineuse
Fixation interne par
vis à six angles
Chargement solaire (La batterie est
dans le boîtier de la lampe)
Fixation par vis
1,2 m de filVis d'expansion 2*6
Bras de montage
(pour panneau solaire)
Support de panneau solaire
Éclairage solairePanneau solaire Télécommande
1 plaque d'expansion (pour
installa�on sur mât d'éclairage)
Merci d’avoir choisi et acheté un produit à V-TAC. V-TAC vous offrira le meilleur. Veuillez lire attentive-
ment ces instructions avant de commencer l’installation et conservez ce manuel à portée de main
pour référence ultérieure. Si vous avez d’autres questions, veuillez contacter notre distributeur ou le
fournisseur local auprès duquel vous avez acheté le produit. Ils sont formés et prêts à vous servir au
mieux. La garantie est valable pour une période de 3 ans à compter de la date d’achat. La garantie ne
s’applique pas à des dommages causés par une installation incorrecte ou une usure anormale. La
société ne donne aucune garantie pour des dommages causés à une surface en raison d’un enlève-
ment et d’une installation incorrects du produit. Ce produit est couvert par une garantie pour des
défauts de fabrication seulement.
3
YEARS
WARRANTY
*
IP65
RATING
7
8
Poteau en saillie (pour instal-
la�on au mur/au poteau)
Bras de
montage (pour
panneau solaire)
Poteau en saillie (pour
installation au mur/au
poteau)
Trou
FRENCH FRENCH
Modèle VT-ST303
Panneau solaire Wa�s DC 9V, 50W
Lumens 3000LM
Angle du faisceau 120⁰
Type de puce LED SMD 2835
IRC >80
Hauteur de montage
maximale
6-8 mètres
Température de
fonctionnement
-20 to +45°C
Type de ba�erie Ba�erie LiFePO4 6.4V
Temps de charge
4-6 heures chargement à la
lumière du soleil
Durée de fonctionnement 8-10 heures
Hauteur maximale
d'installation
6-8 mètres
Nombre de LEDs 572 pces

LED SOLARNA ULIČNA SVJETILJKA
TEHNIČKI PODACI:
UVOD I JAMSTVO
UPOZORENJE
MONTAŽA NA RASVJETNI STUP
UGRADNJA SA ZIDNOM MONTAŽOM
UKLJUČENI DIJELOVI
PRIRUČNIK ZA UGRADNJU:
TEHNIČKA PODRŠKA
DALJINSKI UPRAVLJAČ
UPUTE ZA UGRADNJU
1. Instalaciju mora izvesti kvalificirani električar
2. Zamijenite ispucalu zaštitnu prevlaku .
3. Čuvajte od vatre.
4. Ne uranjajte u vodu.
5. Rasvjetno tijelo se ne smije ugrađivati na niskim područjima, kako bi se
izbjeglo potapanje u vodu.
Ova oznaka ukazuje da se
proizvod ne smije odlagati s
ostalim kućnim otpadom.
3 sata redovnog osvjetljenja
6 sata redovnog osvjetljenja
8 sata redovnog osvjetljenja
Optički kontrolirani način rada
Način rada s pola jačine svjetlosti
Prisilno uključenje osvjetljenje
(optičko upravljanje je nula)
Prisilno isključivanje rasvjete
(optičko upravljanje je nula)
Način rada s punom jačinom
svjetlosti
• Prije ugradnje molimo pregledajte sve dijelove, kako biste provjerili jesu li svi u dobrom stanju.
• Montirajte stup za visinsku montažu na zid ili na stup svjetiljke pomoću ekspanzijskih vijaka
• Pričvrstite solarnu ploču na nosač. Pričvrstite ih na montažnu konzolu i zategnite vijke.
• Postavite montažnu konzolu na gornji dio stupa za visinsku montažu
• Pričvrstite rasvjetno tijelo na prednji dio stupa za visinsku montažu
• Provjerite, dali je spojni priključak rasvjetnog tijela pažljivo razvuče od otvora ispod stupa za visinsku
montažu.
• Sada spojite spojke i zategnite vodonepropusni poklopac.
• Rasvjetno tijelo mora biti spojeno na solarnu ploču i usmjereno prema sunčevoj svjetlosti. Molimo
obratite pažnju da li je solarna ploča podešena na točan kut koji je potreban za primanje dovoljne
sunčeve svjetlosti.
• Nakon ugradnje testirajte rasvjetno tijelo pomoću daljinskog upravljača.
• Daljinski upravljač je namijenjen da funkcionira s radnom udaljenostom od 8-10m
• Rasvjetno tijelo se čisti suhom krpom koja ne ostavlja dlačice.
• Redovito nadgledajte solarnu ploču da li je zapraljana . Ako postoji zaprljanje, očistite je kako biste
osigurali nesmetano funkcioniranje proizvoda.
• Posebno zimi, držite proizvod podalje od snijega i leda.
• Provjerite je li smjer ugradnje ispravan (solarna ploča mora biti na vrhu)
• Molimo, obratite pažnju na to da razni predmeti ne blokiraju solarnu ploču, tako da ista prima dovol-
jno sunčeve svjetlosti.
Izvor svjetlosti
Unutarnje kutno
pričvršćivanje šestero-
kutnim vijkom
Montažni nosač
(za solarnu
ploču)
Solarno punjenje (baterija se nalazi
u kućištu svjetiljke)
Vijak za
učvršćivanje
Rupa
Stup za visinsku montažau
(za ugradnju na zid / stup )
Ekspanzijska pločica avnina
Uključite muški i ženski priključak i
zategnite vodonepropusnu prevlaku
Izvor svjetlosti
Unutarnje kutno
pričvršćivanje šestero-
kutnim vijkom
Solarno punjenje (baterija se nalazi
u kućištu svjetiljke)
Vijak za učvršćivanje
1,2 m vodič
Ekspanzijski vijak 2*6
Montažni nosač
(za solarnu ploču)
Nosač solarne ploče
Solarna rasvjetaSolarni panel Daljinski upravljač
1 ploča za proširenje
(za montažu na rasvjetni stup )
Hvala vam, što ste odabrali i kupili tvrtke Vi-Tek (V-TAC). Vi-Tek (V-TAC) će vam poslužiti na najbolji
mogući način. Molimo, pažljivo pročitajte ove upute prije instalacije i spremite upute za buduću
uporabu. Ako imate dodatnih pitanja, molimo obratite se našemprodavaču ili lokalnom trgovcu gdje
ste kupili ovaj proizvod. Oni su osposobljeni i spremni vam pomognu na najbolji način. Jamstvo za
ovaj proizvod vrijedi za razdoblje od 3 godine, računajući od dana kupnje. Jamstvo se ne odnosi na
štetu, nastalu nepravilnom ugradnjom ili neuobičajenim habanjem. Tvrtka ne jamči za štete koje
nastanu po bilo kojoj površini proizvoda, zbog nepravilne demontaže odnosno i ugradnje proizvoda.
Jamstvo za ovaj proizvod dano je samo za nedostatke koji su nastali samo tijekom njegove proiz-
vodnje.
3
YEARS
WARRANTY
*
IP65
RATING
7
8
Stup za visinsku ugradnju
(za ugradnju na zid / stup)
Montažni nosač
(za solarnu
ploču)
Stup za visinsku montažau
(za ugradnju na zid / stup )
Rupa
CROATIAN CROATIAN
Model VT-ST303
Vata solarne ploče DC 9V, 50W
Lumeni 3000LM
Kut svjetlosnog snopa 120⁰
Tip LED čipa SMD 2835
Indeks prikaza boja >80
Maksimalna visina
ugradnje
6-8 metara
Radna temperatura -20 to +45°C
Tip baterije Baterija LiFePO4 6.4V
Vrijeme punjenja
4-6 sati punjenja sunčevom
svjetlošću
Vrijeme funkcioniranja 8-10 sa�
Maksimalna visina
ugradnje
6-8 metara
Broj LED dioda 572 kom.
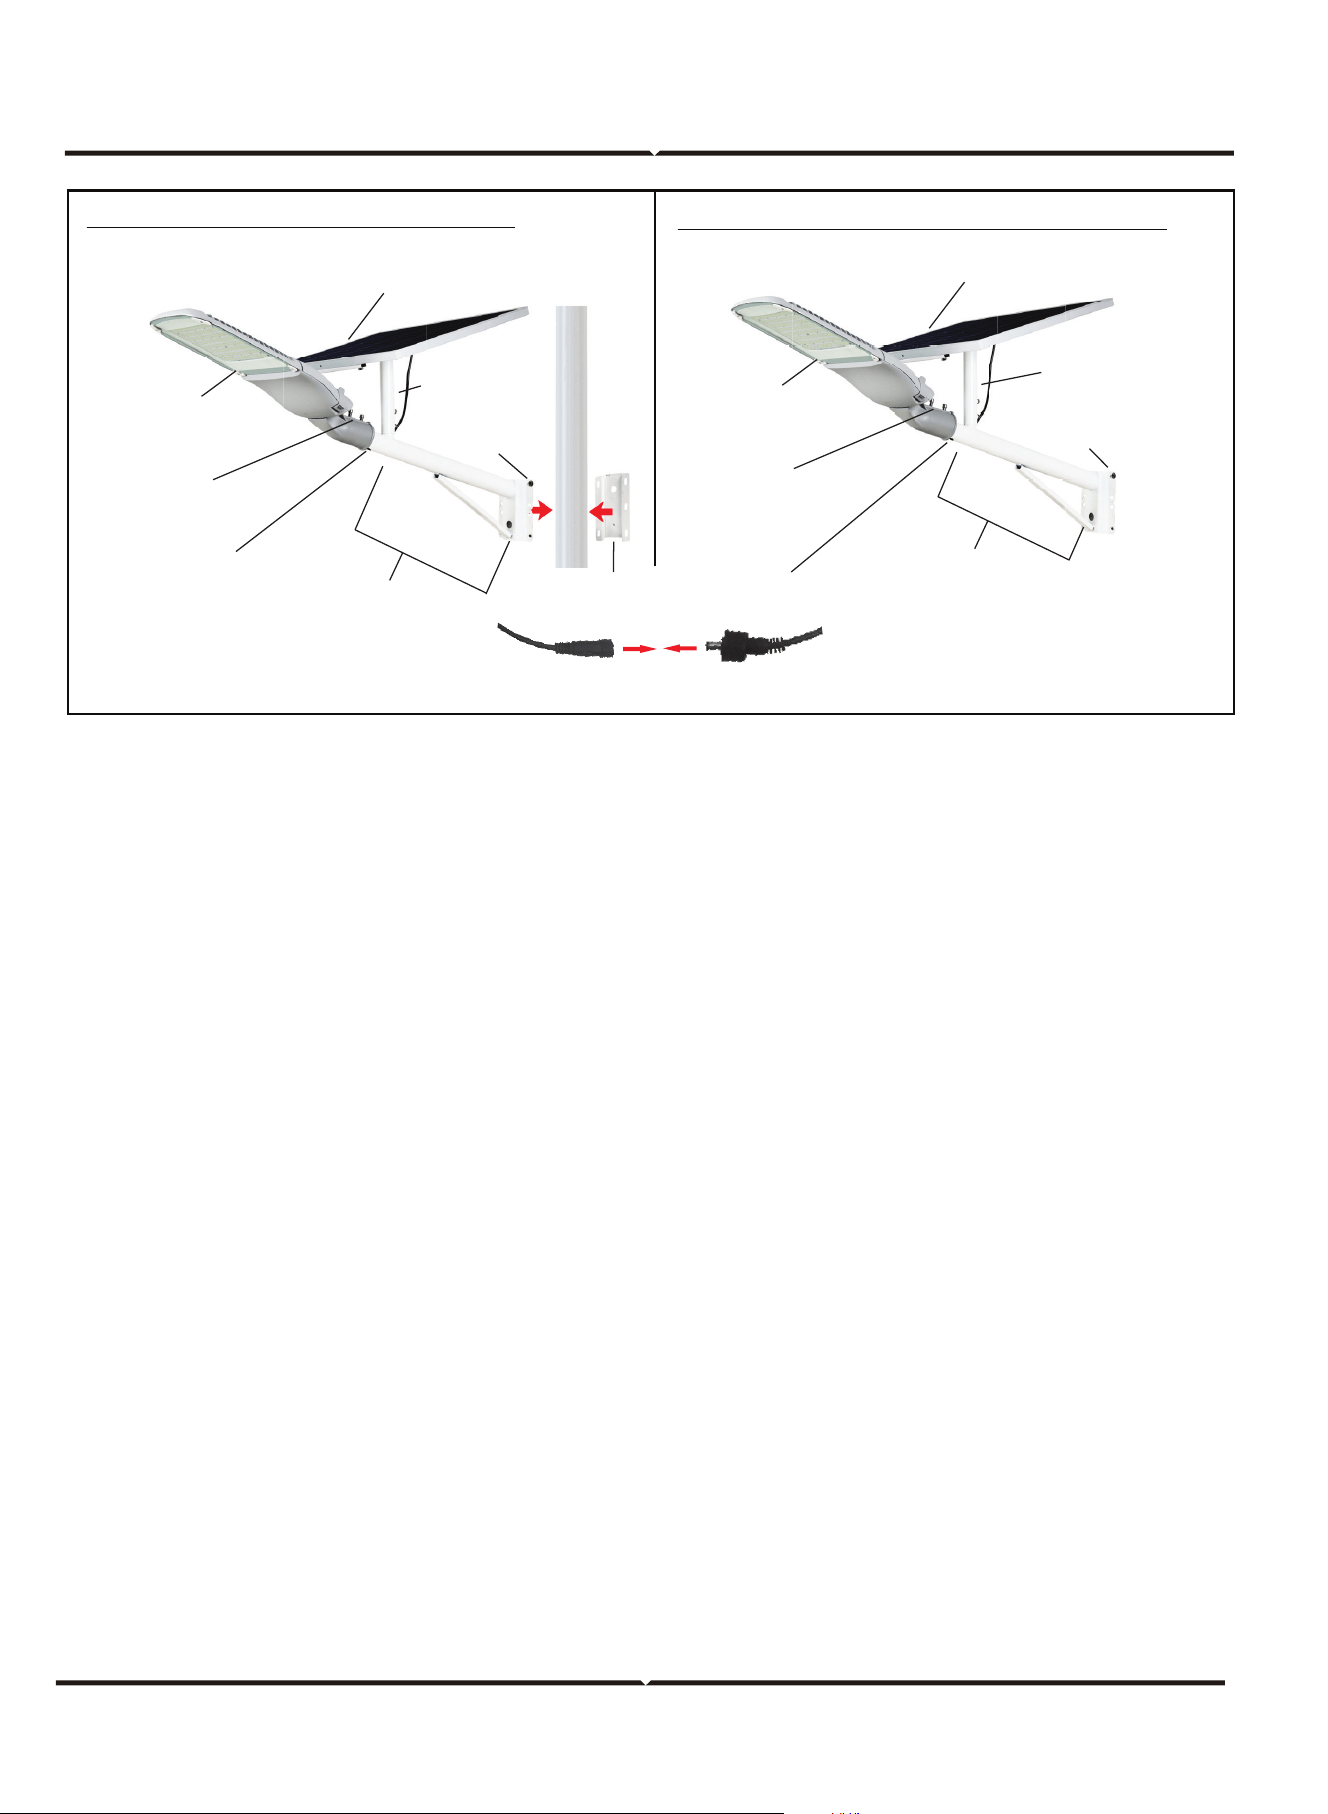
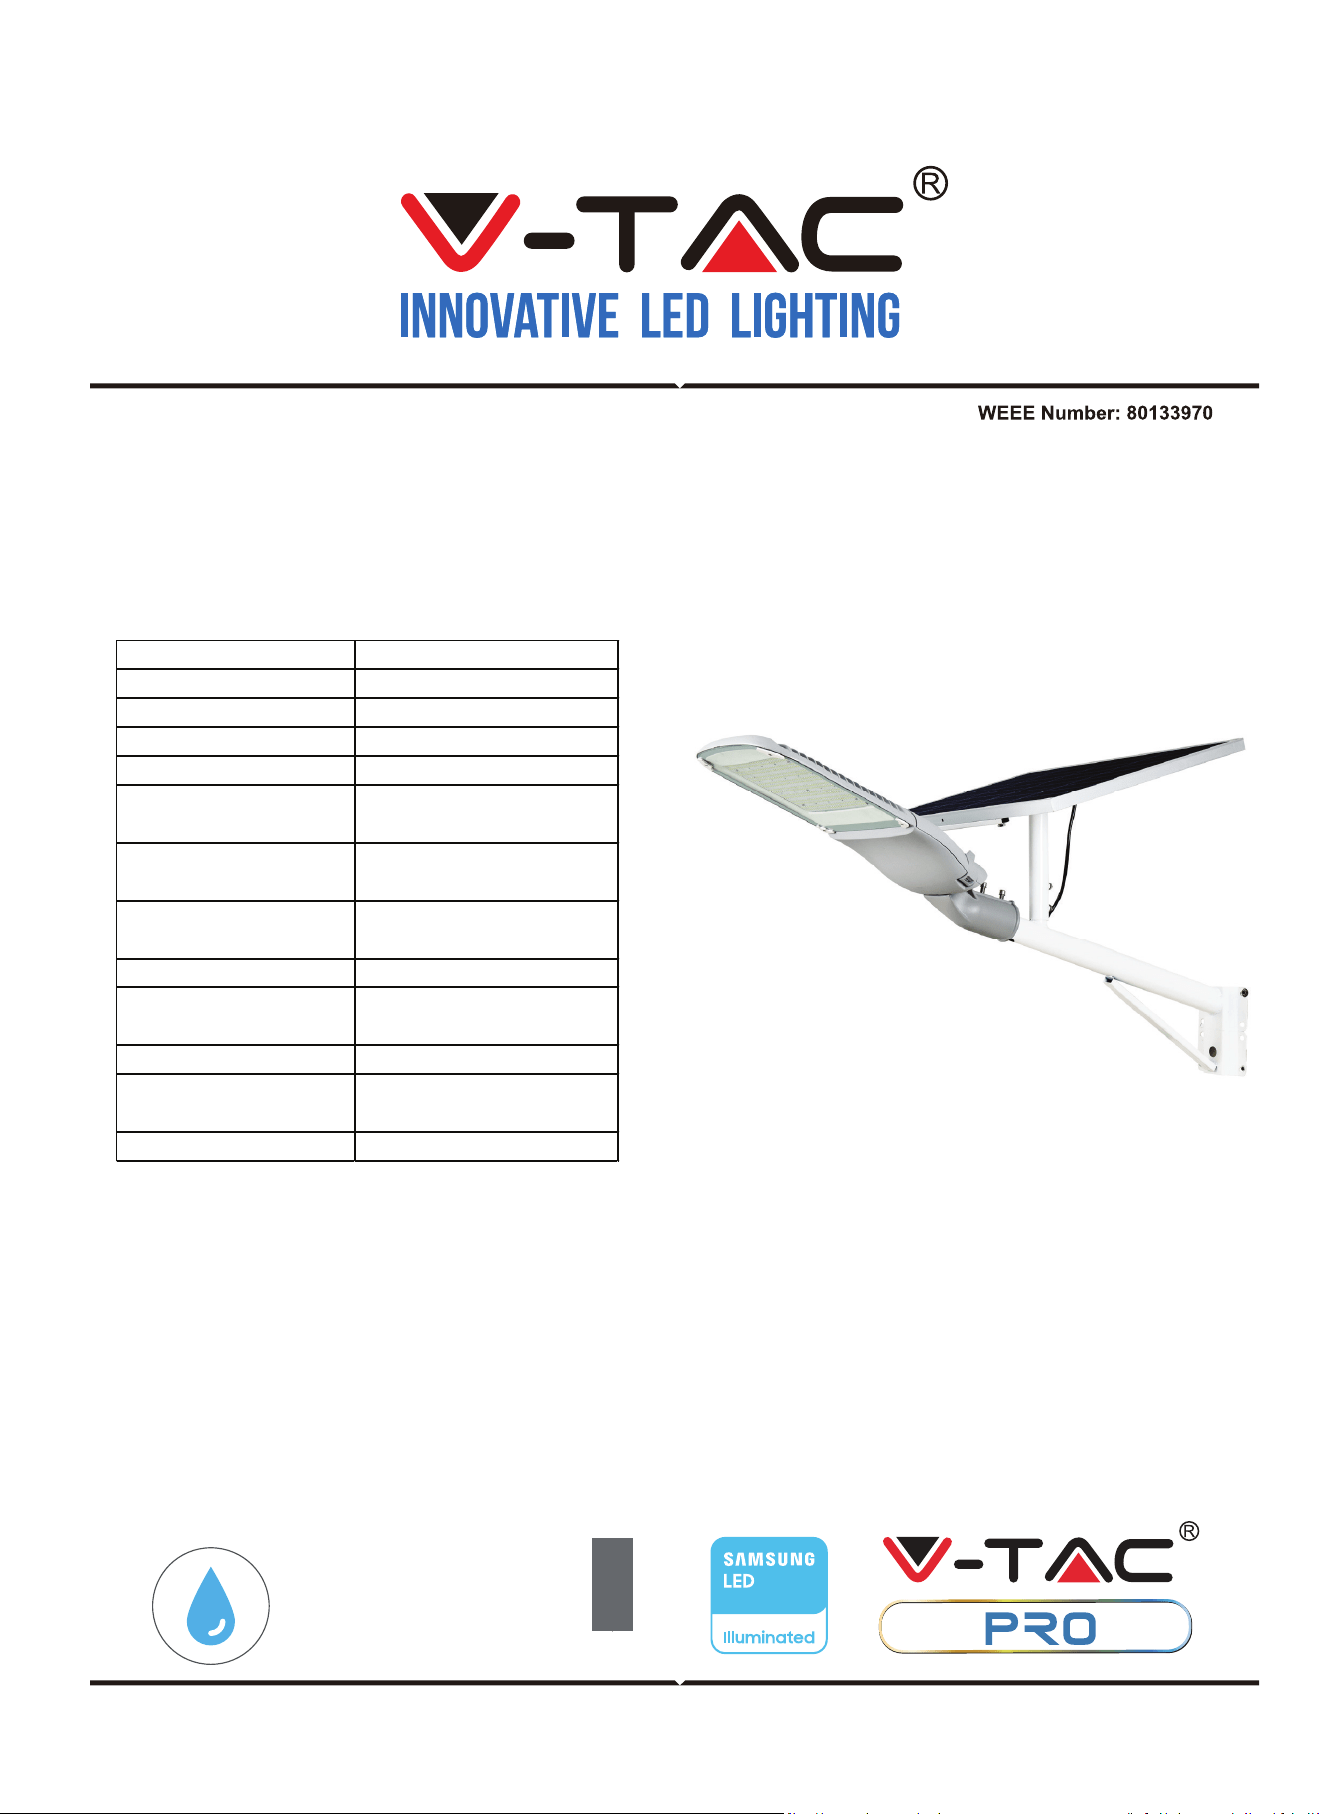
LÂMPADA SOLAR LED DE RUA
DADOS TÉCNICOS:
INTRODUÇÃO E GARANTIA
ADVERTÊNCIA
INSTALAÇÃO NUM POSTE
INSTALAÇÃO EM PAREDE
PEÇAS INCLUÍDAS
GUIA DE INSTALAÇÃO:
MANUTENÇÃO
CONTROLO REMOTO
INSTRUÇÕES DE INSTALAÇÃO
1. A instalação deve ser realizada por um eletricista certificado.
2. Substitua os protetores rachados.
3. MAntenha longe do fogo.
4. Não mergulhe em água.
5. A luminária não deve ser instalada em áreas baixas para
evitar a imersão em água.
Essa marcação indica que este
produto não deve ser descarta-
do com o lixo comum.
3 horas de iluminação regular
6 horas de iluminação regular
8 horas de iluminação regular
Modo opticamente controlado
Modo de meio brilho
Ligar forçosamente a luz
(o controlo óptico é zero)
Desligar forçosamente a luz
(o controle óptico é zero)
Modo de brilho total
• Antes da instalação, retire todas as peças para verificar se todas estão em boas condições.
• Instale o poste para instalação em altura em parede ou sobre um poste de luz com o uso de parafusos de
expansão
• Fixe o painel solar ao grampo. Fixe-os ao braço para instalação e aperte os parafusos.
• Coloque o braço para instalação na parte superior do poste para instalação em altura
• Fixe a luminária à parte frontal do poste para instalação em altura
• Assegure-se de que a conexão da luminária está cuidadosamente esticada a partir da abertura sob o poste
para instalação em altura.
• Agora conecte as conexões e aperte a tampa à prova de água.
• A luminária deve ser conectada ao painel solar e direcionada para a luz solar. Assegure-se de que o ângulo do
painel solar seja ajustado corretamente para que a luz solar possa ser recebida.
• Após a instalação, prove a iluminação com o uso do controlo remoto.
• O controlo remoto é projetado para uma distância de operação de 8-10 m
• Limpe a luz com um pano seco e sem fiapos.
• Verifique o painel solar regularmente para sujeira. Se estiver sujo, limpe-o para garantir uma operação sem
problemas do produto.
• Especialmente durante o inverno, mantenha o produto livre de neve e gelo.
• Assegure-se de que a direção de instalação esteja correta (o painel solar deve estar no topo)
• Assegure-se de que nenhum objeto bloqueia a recepção da luz solar do painel solar.
Fonte de luz
Fixação de canto
interno com
parafuso hexagonal
Braço para
instalação (para
painel solar)
Carregamento solar (a bateria está
localizada na carcaça da lâmpada)
Parafuso de
fixação
Furo
Poste para instalação em
altura (para instalação em
parede/poste)
Placa de expansão
Conecte os conectores macho e fêmea
e aperte a tampa à prova de água
Fonte de luz
Fixação de canto
interno com
parafuso hexagonal
Carregamento solar (a bateria está
localizada na carcaça da lâmpada)
Parafuso de fixação
Condutor de 1,2 mParafuso de expansão 2 * 6
Braço para instalação
(para painel solar)
Grampo para painel solar
Iluminação solarPainel solar Controlo remoto
1 placa de expansão
(para instalação em
poste de iluminação)
Agradecemos que escolheu e adquiriu o produto da V-TAC. A V-TAC irá servir-lhe da melhor maneira
possível. Por favor, leia atentamente estas instruções antes da instalação e mantenha este manual
para referência no futuro. Se tiver outras dúvidas, entre em contacto com o nosso revendedor ou
comerciante local de quem adquiriu o produto. Eles são formados e estão prontos para lhe serem
úteis da melhor maneira possível. A garantia é válida por um período de 3 anos a partir da data de
compra. A garantia não se aplica a danos causados devido a uma instalação incorrecta ou desgaste
invulgar. A empresa não dá nenhuma garantia por danos de qualquer superfície devido à inadequada
remoção e instalação do produto. Este produto tem uma garantia apenas para defeitos de fabricação.
3
YEARS
WARRANTY
*
IP65
RATING
7
8
Poste para instalação em
altura (para instalação em
parede/poste)
Braço para
instalação (para
painel solar)
Poste para instalação em
altura (para instalação em
parede/poste)
Furo
PORTUGUESE PORTUGUESE
Modelo VT-ST303
Wa�s num painel solar DC 9V, 50W
Lúmenes 3000LM
Ângulo do feixe 120⁰
Tipo de chip LED SMD 2835
Índice de reprodução
cromática
>80
Altura máxima de
instalação
6-8 metros
Temperatura de operação -20 a +45°C
Tipo de bateria Bateria LiFePO4 6.4V
Tempo de carregamento
4-6 horas de carregamento
em luz solar
Tempo de trabalho 8-10 horas
Altura máxima de
instalação
6-8 metros
Número de LED 572 unidades
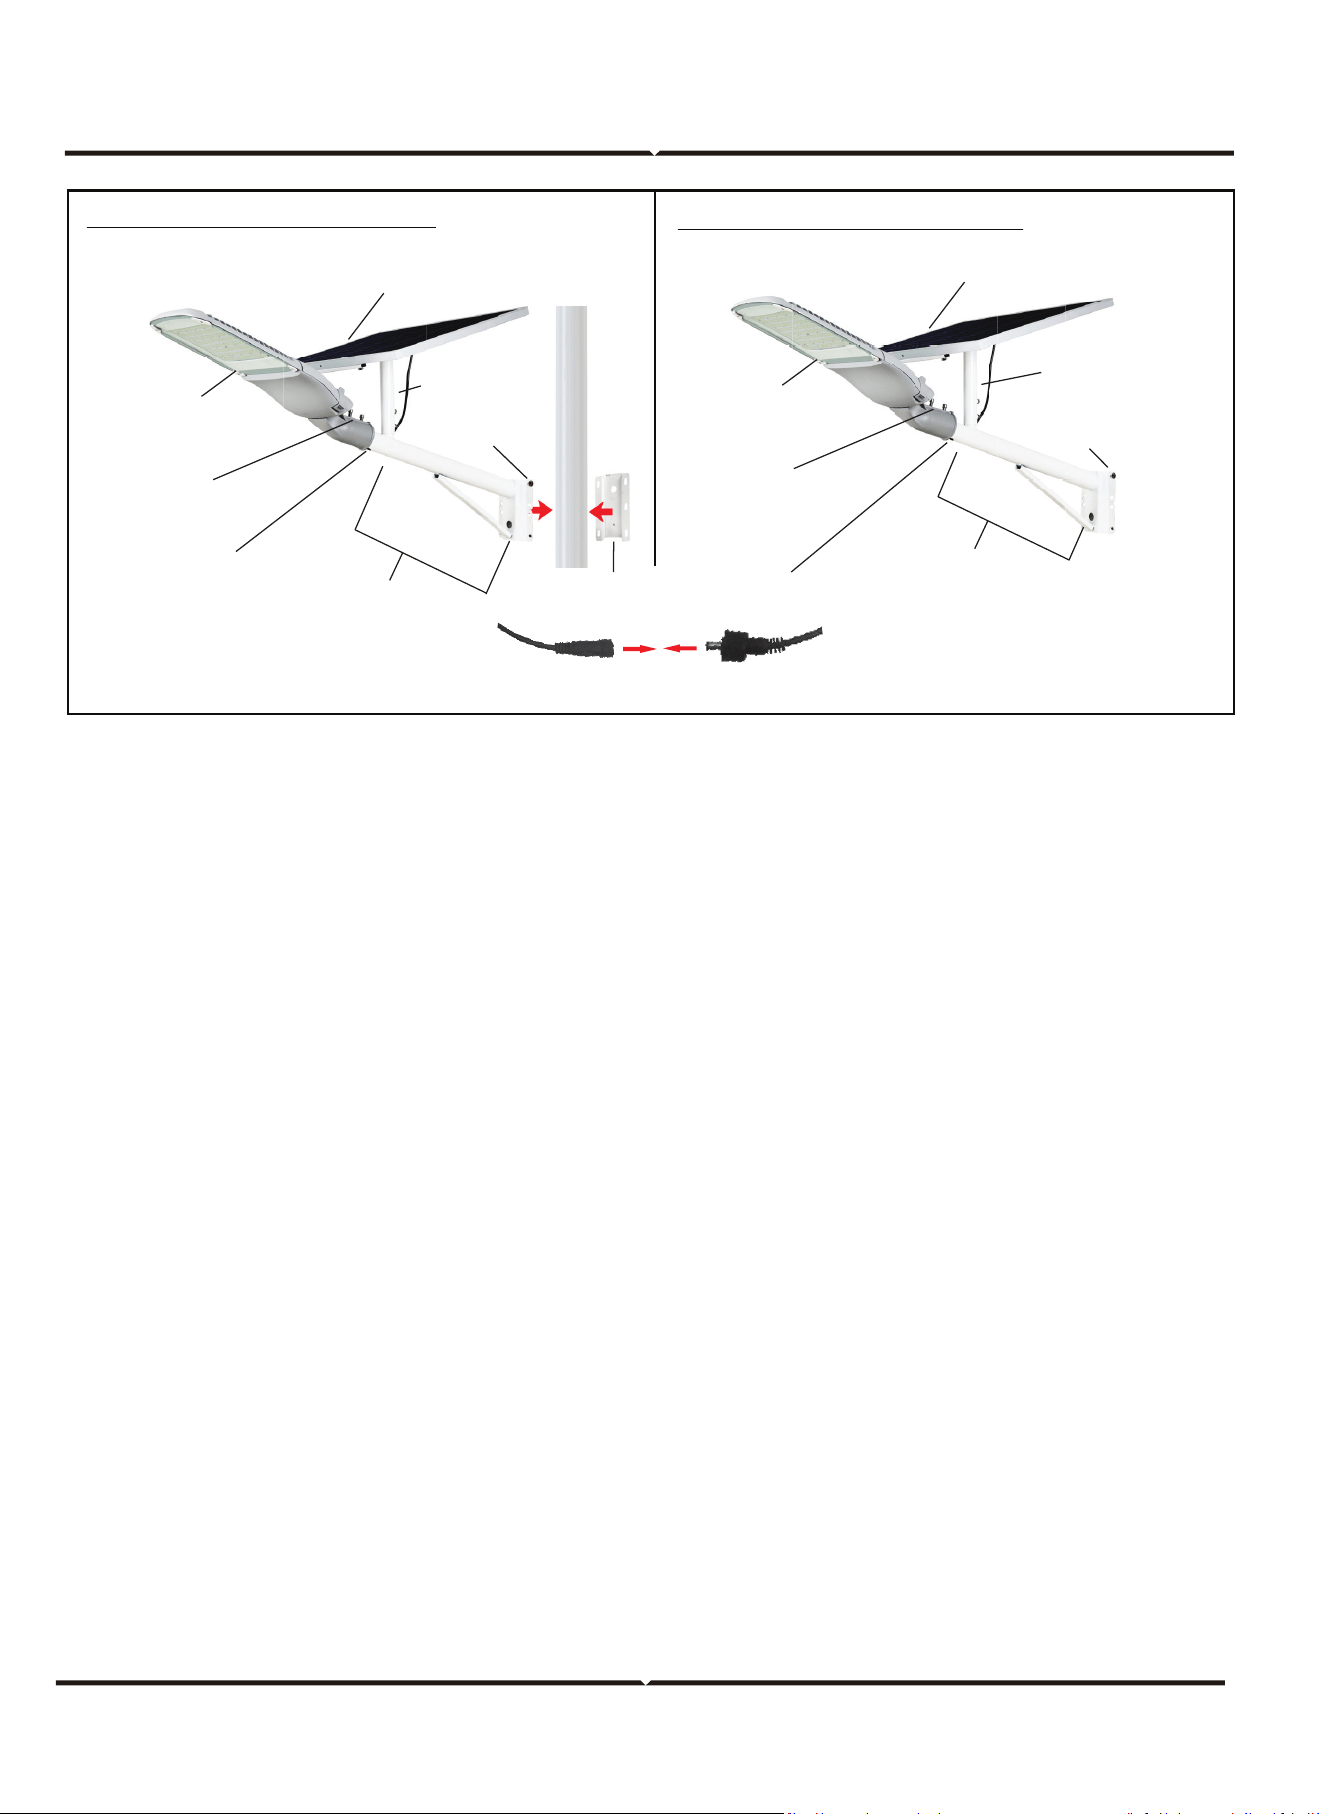
ULICZNE LAMPY SOLARNE LED
DANE TECHNICZNE:
WSTĘP I GWARANCJAD
OSTRZEŻENIE
MONTAŻ NA SŁUPIE OŚWIETLENIOWYM
MONTAŻ NA ŚCIANIE
CZĘŚCI W ZESTAWIE
INSTRUKCJA MONTAŻU:
KONSERWACJA
PILOT ZDALNEGO STEROWANIA
INSTRUKCJA MONTAŻU
1. Montaż musi być wykonany przez wykwalifikowanego elektryka.
2. Wymień pęknięte osłony ochronne
3. Chronić przed ogniem
4. Nie zanurzać w wodzie
5. Oprawy nie wolno montować w niskich obszarach, aby uniknąć
zanurzenia w wodzie.
Takie oznaczenie wskazuje, że
produktu nie należy wyrzucać
razem z innymi odpadami
domowymi.
3 godziny stabilnego świecenia
6 godziny stabilnego świecenia
8 godziny stabilnego świecenia
Tryb sterowany optycznie
Tryb połowy moźliwej jasności
Wymuszone włączanie oświetlenia
(kontrola optyczna na poziomie zerowym)
Wymuszone wyłączanie oświetlenia
(kontrola optyczna na poziomie zerowym)
Tryb pełnej jasności
• Przed zamontowaniem należy odłożyć wszystkie części, aby sprawdzić, czy one wszystkie są w dobrym stanie.
• Zamontuj słup do montażu na wysokości na ścianie lub na słupie oświetleniowym za pomocą śrub
rozporowych.
• Przymocuj panel słoneczny do wspornika. Przymocuj go do ramienia montażowego i dokręć śruby.
• Umieść ramię montażowe na szczycie drabiny w celu montażu na wysokości.
• Przymocuj oprawę oświetleniową do przedniej części słupa do montażu na wysokości.
• Upewnij się, że złącze połączające oprawę oświetleniową jest ostrożnie zamontowane do otworu pod słupem
do montażu na wysokości.
• Teraz podłącz złącza i dokręć wodoodporną osłonę.
• Oprawa oświetleniowa musi być podłączona do panelu słonecznego i skierowana na światło słoneczne.
Upewnij się, że panel słoneczny został odpowiednio ustawiony pod dokładnym kątem wymaganym do odbioru
światła słonecznego.
• Po zamontowaniu przetestuj działanie lampy za pomocą pilota zdalnego sterowania.
• Pilot zdalnego sterowania zaprojektowano z zasięgiem rzeczywistego działania w obszarze 8-10m.
• Wyczyść oprawę oświetleniową suchą, niestrzępiącą się szmatką.
• Regularnie monitoruj panel słoneczny pod kątem zanieczyszczenia. Jeśli zgromadził się na niej brud, wyczyść
go, aby zapewnić bezproblemowe działanie produktu.
• Szczególnie zimą należy trzymać produkt z dala od śniegu i lodu.
• Upewnij się, że oprawa została zamontowania w prawidłowym kierunku (panel słoneczny musi znajdować się
na górze).
• Upewnij się, że żaden przedmiot nie blokuje panelu słonecznego, aby mógł on otrzymywać światło słoneczne.
Źródło światła
Mocowanie narożnika
wewnętrznego za
pomocą śruby z łbem
sześciokątnym
Ramię montażowe
(do panelu
słonecznego)
Ładowanie solarne (akumulator znajduje
się w obudowie lampy)
Przymocowanie
śruby
Otwór
Słupek do montażu na
wysokości (do montażu na
ścianie/słupku)
Płytka rozszerzająca
Podłącz złącza męskie i żeńskie i
dokręć wodoodporną osłonę.
Źródło światła
Mocowanie narożnika
wewnętrznego za
pomocą śruby z łbem
sześciokątnym
Ładowanie solarne (akumulator znajduje
się w obudowie lampy)
Przymocowanie śruby
Przewód o długsci 1,2 m
Śruba rozporowa 2*6
Ramię montażowe
(do panelu słonecznego)
Wspornik panelu słonecznego
Oświetlenie słonecznePanel słoneczny Pilot zdalnego sterowania
1 płytka rozszerzająca
(do montażu na słupie oświetle-
niowym)
Dziękujemy za wybór i zakup produktu V-TAC. V-TAC będzie Ci służył najlepiej. Prosze przeczytać tę instrukcje
uważnie przed przystąpieniem do zainstalowania i zachować ją do użytku w przyszłości. Jeśli masz jakieś
pytania, proszę skontaktować się z naszym Przedstawicielem lub z dystrybutorem, od którego kupiłeś produkt.
Oni sa przeszkoleni i gotowi udzielić Ci pomocy. Gwarancja ważna jest 3 lata od zakupu. Gwarancja nie
obejmuje uszkodzeń wynikających z niewłaściwego zainstalowania lub nadzwyczajnego zużycia. Spółka nie
ponosi odpowiedzialności za ewentualne szkody spowodowane na powierzchniach podczas instalacji lub dein-
stalacji. Łączny czas świecenia opraw w ciągu doby nie może przekroczyć 10-12 godzin, 24-godzinna eksp-
loatacja produktu prowadzi do unieważnienia gwarancji. Gwarancja obejmuje jedynie wady powstałe z przy-
czyn tkwiących w produkcie.
3
YEARS
WARRANTY
*
IP65
RATING
7
8
Słupek do montażu na wysokości
(do montażu na ścianie/słupku)
Ramię montażowe
(do panelu
słonecznego)
Słupek do montażu na
wysokości (do montażu na
ścianie/słupku)
Otwór
POLISH POLISH
Model VT-ST303
Waty panelu słonecznego DC 9V, 50W
Lumenów 3000LM
Kąt świecenia: 120°
Typ chipa do LED SMD 2835
Wskaźnik oddawania barw >80
Maksymalna wysokość
montażu
6-8 metrów
Temperatura pracy -20 to +45°С
Typ baterii LiFeP04 6.4V
Czas ładowania
4-6 godzin ładowania
światłem słonecznym
Czas pracy: 8-10 godzin
Maksymalna wysokość
montażu Liczba diod
świetlnych
6-8 metrów
Liczba diod świetlnych 572 szt.
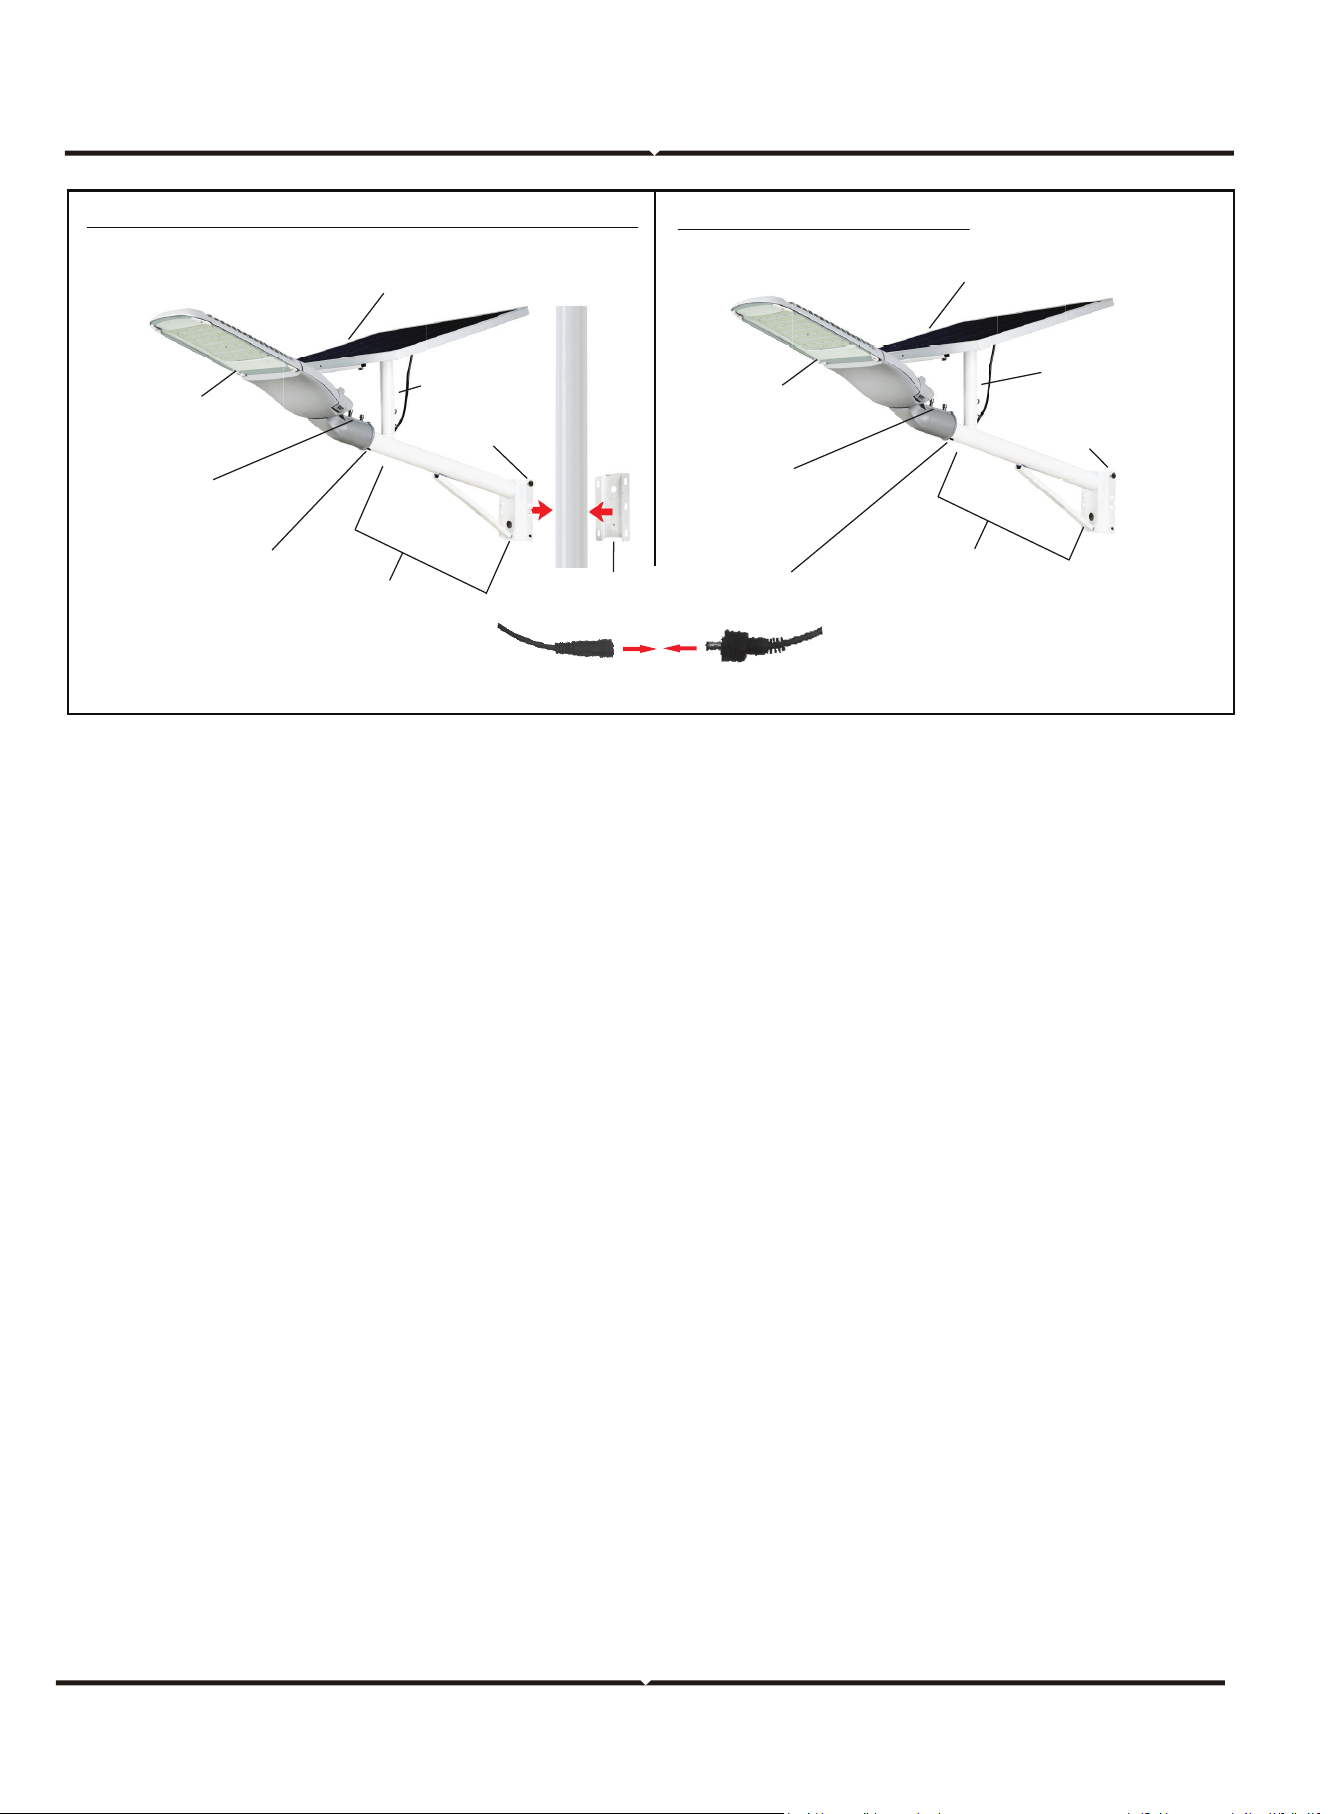

LED ΗΛΙΑΚΟΣ ΛΑΜΠΤΗΡΑΣ ΔΡΟΜΟΥ
ΤΕΧΝΙΚΑ ΧΑΡΑΚΤΗΡΙΣΤΙΚΑ:
ΕΙΣΑΓΩΓΗ - ΕΓΓΥΗΣΗ
ΠΡΟΕΙΔΟΠΟΙΗΣΗ
ΕΓΚΑΤΑΣΤΑΣΗ ΣΕ ΣΤΥΛΟ ΦΩΤΙΣΜΟΥ
ΕΓΚΑΤΑΣΤΑΣΗ ΣΤΕΡΕΩΣΗΣ ΣΕ ΤΟΙΧΟ
ΠΕΡΙΛΑΜΒΑΝΟΝΤΑΙ ΜΕΡΗ
ΕΓΧΕΙΡΙΔΙΟ ΧΡΗΣΗΣ:
ΤΕΧΝΙΚΗ ΣΥΝΤΗΡΗΣΗ
ΤΗΛΕΧΕΙΡΙΣΤΗΡΙΟ
ΟΔΗΓΙΕΣ ΕΓΚΑΤΑΣΤΑΣΗΣ
1. Η εγκατάσταση πρέπει να πραγματοποιηθεί από εξειδικευμένο
ηλεκτρολόγο.
2. Αντικαταστήστε τα ραγισμένα προστατευτικά καλύμματα.
3. Προστατέψτε από τη φωτιά.
4. Μην βυθίζετε σε νερό.
5. Το φωτιστικό δεν πρέπει να εγκατασταθεί σε χαμηλές περιοχές
για να αποφευχθεί η βύθιση σε νερό.
Αυτή η σήμανση υποδεικνύει ότι το
προϊόν δεν πρέπει να απορρίπτεται
με άλλα οικιακά απορρίμματα.
3 ώρες κανονικού φωτισμού
6 ώρες κανονικού φωτισμού
8 ώρες κανονικού φωτισμού
Οπτικά ελεγχόμενη λειτουργία
Λειτουργία μισής φωτεινότητας
Αναγκαστική ενεργοποίηση του
φωτισμού (ο οπτικός έλεγχος
είναι μηδέν)
Αναγκαστική απενεργοποίηση
του φωτισμού (ο οπτικός
έλεγχος είναι μηδέν)
Λειτουργία πλήρους φωτεινότητας
• Πριν από την εγκατάσταση, αφαιρέστε όλα τα μέρη για να βεβαιωθείτε ότι όλα είναι σε καλή κατάσταση.
• Τοποθετήστε το στύλο για εγκατάσταση σε ύψος σε τοίχο ή σε στύλο λαμπτήρα χρησιμοποιώντας βίδες διαστολής.
• Συνδέστε το ηλιακό πάνελ στο βραχίονα. Συνδέστε τα στον βραχίονα εγκατάστασης και σφίξτε τις βίδες.
• Τοποθετήστε το βραχίονα εγκατάστασης στο πάνω μέρος του στύλου εγκατάστασης σε ύψος.
• Τοποθετήστε το φωτιστικό στο μπροστινό μέρος του στύλου εγκατάστασης σε ύψος.
• Βεβαιωθείτε ότι η σύνδεση του φωτιστικού είναι τεντωμένη προσεκτικά από το άνοιγμα κάτω από το στύλο
εγκατάστασης σε ύψος.
• Τώρα συνδέστε τις συνδέσεις και σφίξτε το αδιάβροχο κάλυμμα.
• Το φωτιστικό πρέπει να είναι συνδεδεμένο με το ηλιακό πάνελ και να κατευθύνεται προς το ηλιακό φως.
Βεβαιωθείτε ότι το ηλιακό πάνελ έχει ρυθμιστεί στην ακριβή γωνία που απαιτείται για να δέχεται ηλιακό φως.
• Μετά την εγκατάσταση, ελέγξτε τον φωτισμό χρησιμοποιώντας το τηλεχειριστήριο.
• Το τηλεχειριστήριο έχει σχεδιαστεί με απόσταση λειτουργίας 8-10m
• Καθαρίστε το φωτισμό με στεγνό πανί χωρίς χνούδια.
• Να παρακολουθείτε τακτικά το ηλιακό πάνελ για μόλυνση. Εάν υπάρχει βρωμιά, καθαρίστε την για να
διασφαλίσετε τη λειτουργία του προϊόντος χωρίς προβλήματα.
• Ειδικά το χειμώνα, κρατήστε το προϊόν μακριά από χιόνι και πάγο.
• Βεβαιωθείτε ότι η κατεύθυνση εγκατάστασης είναι σωστή (το ηλιακό πάνελ πρέπει να βρίσκεται στην κορυφή)
• Βεβαιωθείτε ότι το ηλιακό πάνελ δεν εμποδίζεται από αντικείμενα έτσι ώστε να δέχεται ηλιακό φως.
Πηγή φωτισμού
Στερέωση
εσωτερικής γωνίας
με εξάγωνη βίδα
Βραχίονας
εγκατάστασης
(για ηλιακό
πάνελ)
Ηλιακή φόρτιση (Η μπαταρία
βρίσκεται στο περίβλημα του
λαμπτήρα)
Στερέωση βίδας
Άνοιγμα
Στύλος εγκατάστασης σε
ύψος (για εγκατάσταση σε
τοίχο / στύλος)
Πλακέτα διαστολής
Συνδέστε τα αρσενικά και θηλυκά βύσματα και
σφίξτε το αδιάβροχο κάλυμμα
Πηγή φωτισμού
Στερέωση
εσωτερικής γωνίας
με εξάγωνη βίδα
Ηλιακή φόρτιση (Η μπαταρία
βρίσκεται στο περίβλημα του
λαμπτήρα)
Στερέωση βίδας
1.2 m καλώδιον
Βίδα επέκτασης 2*6
Βραχίονας εγκατάστασης
(για ηλιακό πάνελ)
Βραχίονας για ηλιακό πάνελ
Ηλιακός φωτισμόςΗλιακό πάνελ Τηλεχειριστήριο
1 πλακέτα διαστολής (για
εγκατάσταση σε στύλο φωτισμού)
Σας ευχαριστούμε για το ότι επιλέξατε και αγοράσατε το προϊόν της Βι-ΤΑΚ(V-TAC). Η Βι-ΤΑΚ (V-TAC) θα σας
εξυπηρετήσει με τον καλύτερο δυνατό τρόπο. Παρακαλούμε να διαβάσετε προσεκτικά τις οδηγίες μας προτού
τοποθετήσετε και διατηρήστε τις οδηγίες για τη μετέπειτα ενημέρωσή σας. Αν έχετε άλλα ερωτήματα και απορίες,
παρακαλούμε να έλθετε σε επαφή με τον προμηθευτή μας ή με τον εγχώριο έμπορο από τον οποίο αγοράσατε το
προϊόν. Αυτοί εκπαιδεύτηκαν κατάλληλα και είναι πρόθυμοι να σας εξυπηρετήσουν με τον καλύτερο τρόπο. Η
εγγύηση ισχύει για περίοδο 3 ετών από την ημερομηνία της αγοράς. Η εγγύηση δεν εφαρμόζεται σε περίπτωση
που προκληθούν ζημιές εξαιτίας λάθος τοποθέτησης ή ασυνήθιστης φθοράς. Η εταιρεία δεν παρέχει εγγύηση για
ζημιές σε οποιαδήποτεεπιφάνεια εξαιτίας τις λάθος απομάκρυνσης ή τοποθέτησης του προϊόντος. Η εγγύηση του
προϊόντος αφορά μόνο τα ελαττώματα της παραγωγής.
3
YEARS
WARRANTY
*
IP65
RATING
7
8
Στύλος εγκατάστασης σε ύψος
(για εγκατάσταση σε τοίχο /
στύλος)
Βραχίονας
εγκατάστασης (για
ηλιακό πάνελ)
Στύλος εγκατάστασης σε
ύψος (για εγκατάσταση σε
τοίχο / στύλος)
Άνοιγμα
GREEK GREEK
Μοντέλο VT-ST303
Βατ του ηλιακού πάνελ DC 9V, 50W
Λούμεν 3000LM
Γωνία δέσμης 120⁰
Τύπος τσιπ LED SMD 2835
Δείκτης απόδοσης
χρωμάτων
>80
Μέγιστο ύψος
εγκατάστασης
6-8 μέτρα
Θερμοκρασία λειτουργίας -20 to +45°C
Τύπος μπαταρίας Μπαταρία LiFePO4 6.4V
Χρόνος φόρτισης
4-6 ώρες φόρτισης από
ηλιακό φως
Χρόνος λειτουργίας 8-10 ώρες
Μέγιστο ύψος
εγκατάστασης
6-8 μέτρα
Αριθμός LED 572 τεμ.
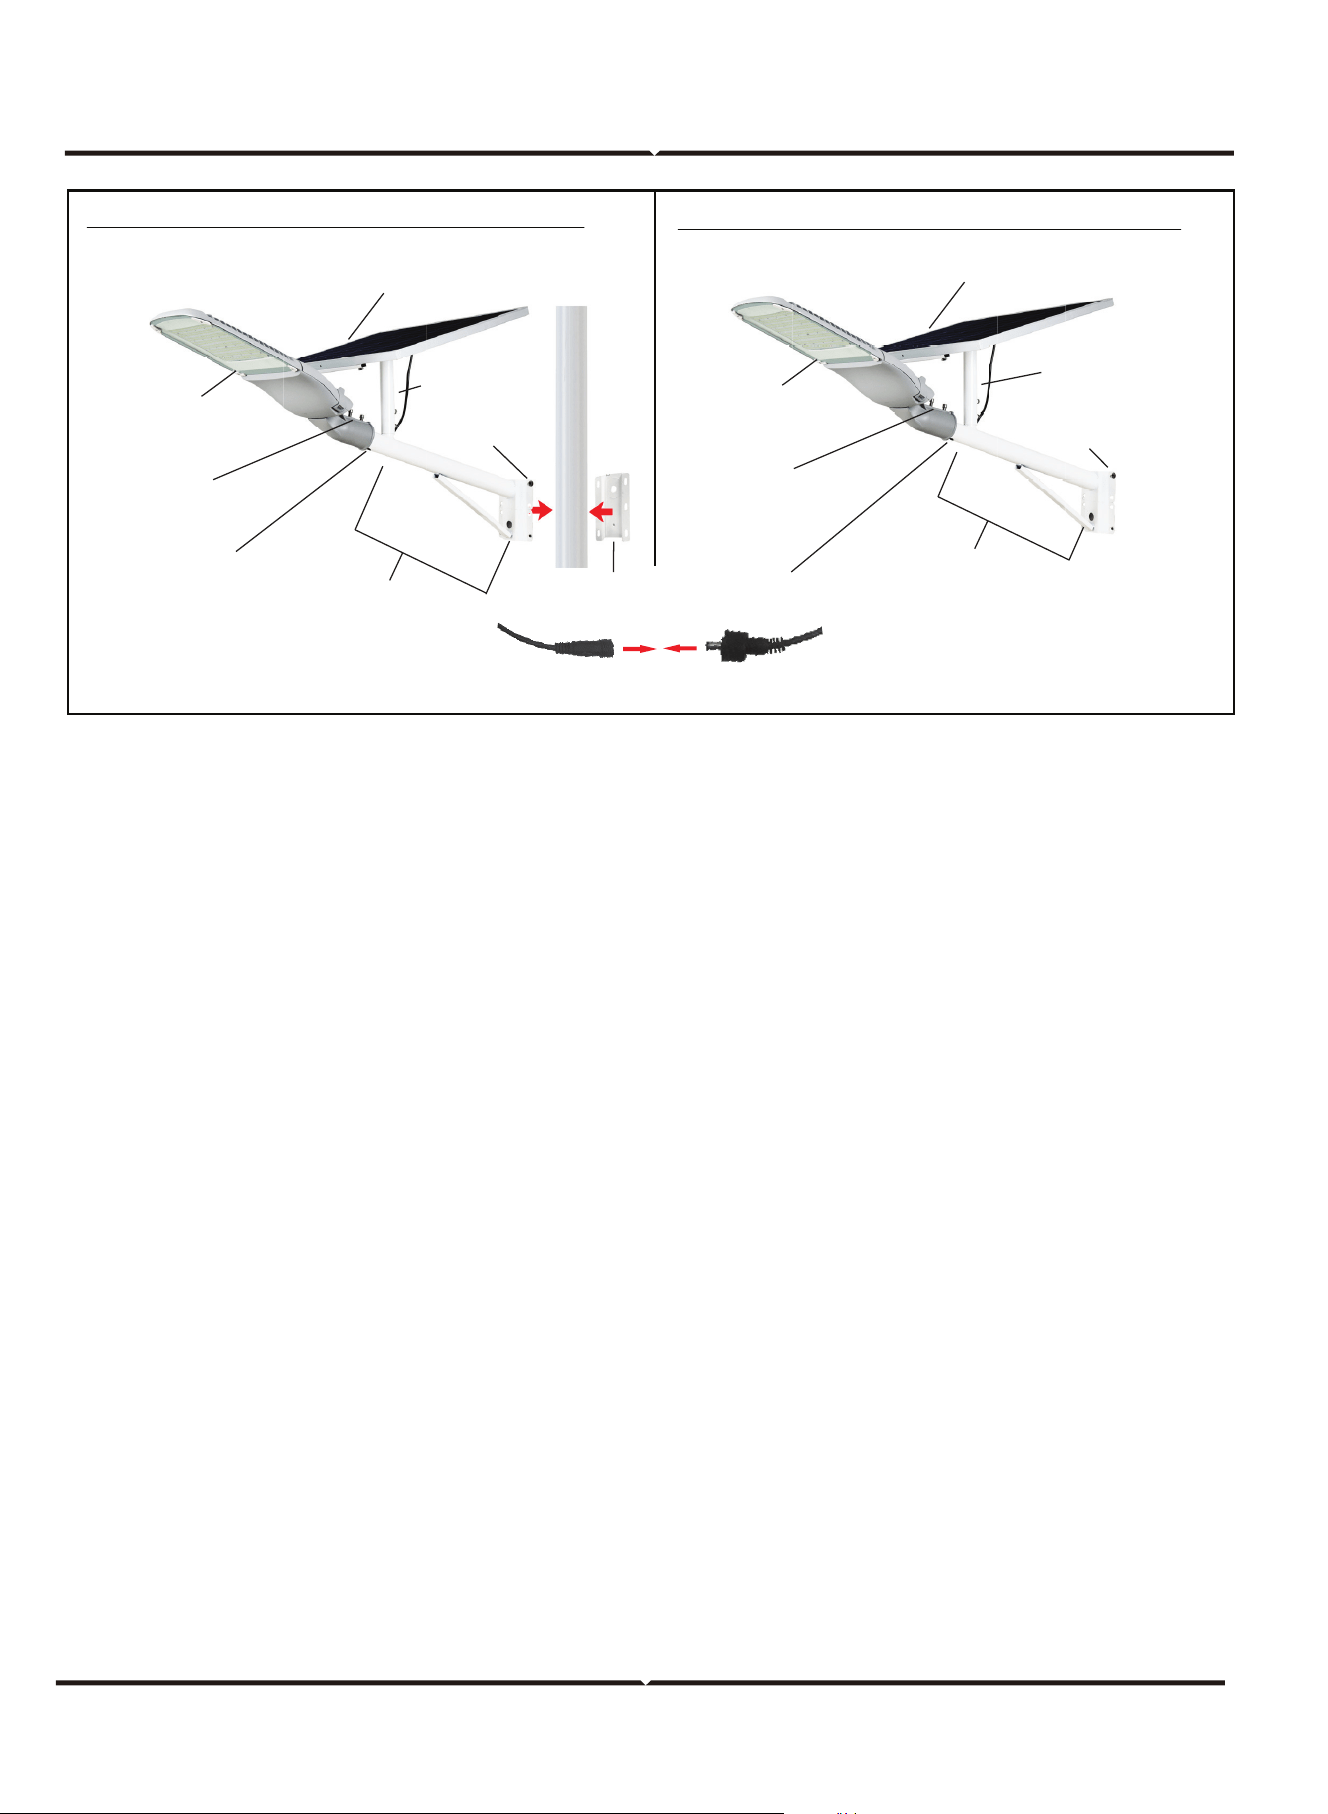

LAMPĂ SOLARĂ CU LED DE ILUMINAT STRADĂ
DATE TEHNICE:
INTRODUCERE, GARANŢIA
AVERTIZARE
INSTALARE PE STÂLP DE ILUMINAT
INSTALAŢIE PENTRU MONTAREA PE
PERETE
PIESE INCLUSE
MANUAL PRIVIND INSTALAREA:
ÎNTREŢINEREA TEHNICĂ
CONTROL DE LA DISTANŢĂ
INSTRUCŢIUNI DE INSTALARE
1. Montajul trebuie efectuat de către un tehnician autorizat.
2. Înlocuiţi acoperirile de protecţie crăpate.
3. A se feri de incendii.
4. Nu imersaţi în apă.
5.Acest corp de iluminare nu poate fi montat în zone joase, pentru a se evita imerasarea
acestuia în apă.
Acest marcaj arată că produsul nu
trebuie aruncat împreună cu deşeurile
menahere.
timp de 3 ore - iluminare regulată
timp de 6 ore - iluminare regulată
timp de 8 ore - iluminare regulată
Regim cu control optic
Regim cu luminozitate redusă
pe jumătate
Conectare forţată a luminii
(controlul optic este zero)
Deconectare forţată a luminii
(controlul optic este zero)
Regim de luminozitate completă
• Înainte să începeţi instalarea, vă rugăm să îndepărtaţi toate piesele ca să verificaţi dacă toate sunt într-o stare
bună.
• Instalaţi stâlpul de montare la înâlţime pe un perete sau stâlp pentru lampă, cu ajutorul şurubilor de expansie
• Fixaţi panoul solar peste scoaba. Fixaţi totul pe braţul de montare şi strângeţi şuruburile.
• Puneţi braţul de montare pe partea superioară a stâlpului de montare la înâlţime.
• Fixaţi corpul de iluminat pe partea frontală a stălpului de montare la înâlţime.
• Asiguraţi-vă că conectorul corpului de iluminat este întins cu atenţie de la orificiul sub stâlpul de montare la
înâlţime.
• Conectaţi apoi conectorii şi strângeţi capacul impermeabil.
• Corpul de iluminat trebuie conectat la panoul solar şi îndreptat spte lumina soarelui. Asiguraţi-vă că panoul solar
este poziţionat sub unghiul corect, necesar pentru obţinerea luminii solare.
• În urma instalării, testaţi iluminarea, folosind dispozitivul de control de la distanţă
• Controlul de la distanţă este proiectat pentru o distanţă de exploatare de 8-10m
• Curăţaţi lampa cu o cârpă uscată fără scame.
• Verificaţi în mod regulat dacă peste panoul solar este murdărie. Dacă este murdar, curăţaţi-l, ca să garantaţi
funcţionarea fără probleme a produsului.
• În special, în timpul iernii, feriţi produsul de zăpadă şi gheaţă.
• Asiguraţi-vă că direcţia în care este instalat panoul, este cea corectă (panoul solar trebuie să fie pe vârf)
• Asiguraţi-vă că nici un fel de obiecte nu blochează panoul solar, că acesta primeşte suficientă lumină solară.
Sursa de iluminat
Fixare la interior,
sub unghi, cu şurub
hexagonal
Braţ de montaj
(pentru panoul
solar)
Încărcare solară (Bateria se află în
corpul lămpii)
Fixarea şurubului
Orificiu
Stâlp de montare la
înălţime (pentru instalare
pe perete/pe stâlp)
Panou plat de expansie
Conectaţi conectorii - masculin şi feminin, şi
apoi strângeţi acoperirea impermeabilă
Sursa de iluminat
Fixare la interior,
sub unghi, cu şurub
hexagonal
Încărcare solară (Bateria se află în
corpul lămpii)
Fixarea şurubului
Conductor de 1.2 m
Şurub de expansie 2*6
Braţ de montare
(pentru panoul solar)
Scoabă pentru panoul solar
Iluminare solarăPanou solar Control de la distanţă
1 panou plat de expansie (pentru
instalarea pe stâlp de iluminat)
Vă mulţumim că aţi ales şi v-aţi cumpărat acest produs de V-TAC. V-TAC vă va fi de un mare folos, utilizându-l în
modul cel mai potrivit posibil. Vă rugăm să citiţi .aceste instrucţiuni cu atenţie, înainte să începeţi instalarea, şi
păstraţi-le pentru că s-ar putea să fie necesar să le recitiţi. Dacă aveţi şi alte întrebări, luaţi legătură cu dealer-ul
nostru sau cu comerciantul de la care v-aţi achiziţionat produsul. Aceştia sunt bine instruiţi şi întotdeauna sunt
disponibili să vă servească în modul cel mai bun posibil. Garanţia este valabilă pe un termen de 3 ani din data
achiziţionării produsului. Garanţia însă nu se aplică cu privire la daunele cauzate de instalare incorectă sau care
rezultă din uzura anormală de utilizare. Societatea nu acordă garanţie pentru daune produse pe suprafeţe,
indiferent de tipul acestora, care se datorează îndepărtării sau montării incorecte a produsului. Pentru acest
produs, garanţia se acordă numai pentru defecte de fabricaţie.
3
YEARS
WARRANTY
*
IP65
RATING
7
8
Stâlp de montare la înălţime
(pentru montarea pe perete/pe
stâlp)
Braţ de montaj
(pentru panoul
solar)
Stâlp de montare la
înălţime (pentru instalare
pe perete/pe stâlp)
Orificiu
ROMANIAN ROMANIAN
Modelul VT-ST303
Waţi - panou solar DC 9V, 50W
Lumeni 3000LM
Unghiul razei 120⁰
Tipul chip-ului LED SMD 2835
Indice de redare al
culorilor
>80
Înâlţimea maximă de
montare
6-8 metri
Tempertura de exploatare -20 to +45°C
Tipul bateriei baterfie LiFePO4 6.4V
Timp de încărcare
4-6 ore de încărcare cu
lumină solară
Timp de lucru 8-10 ore
Înălţimea maximă de
montare
6-8 metri
Numărul LED-urilor 572 buc.
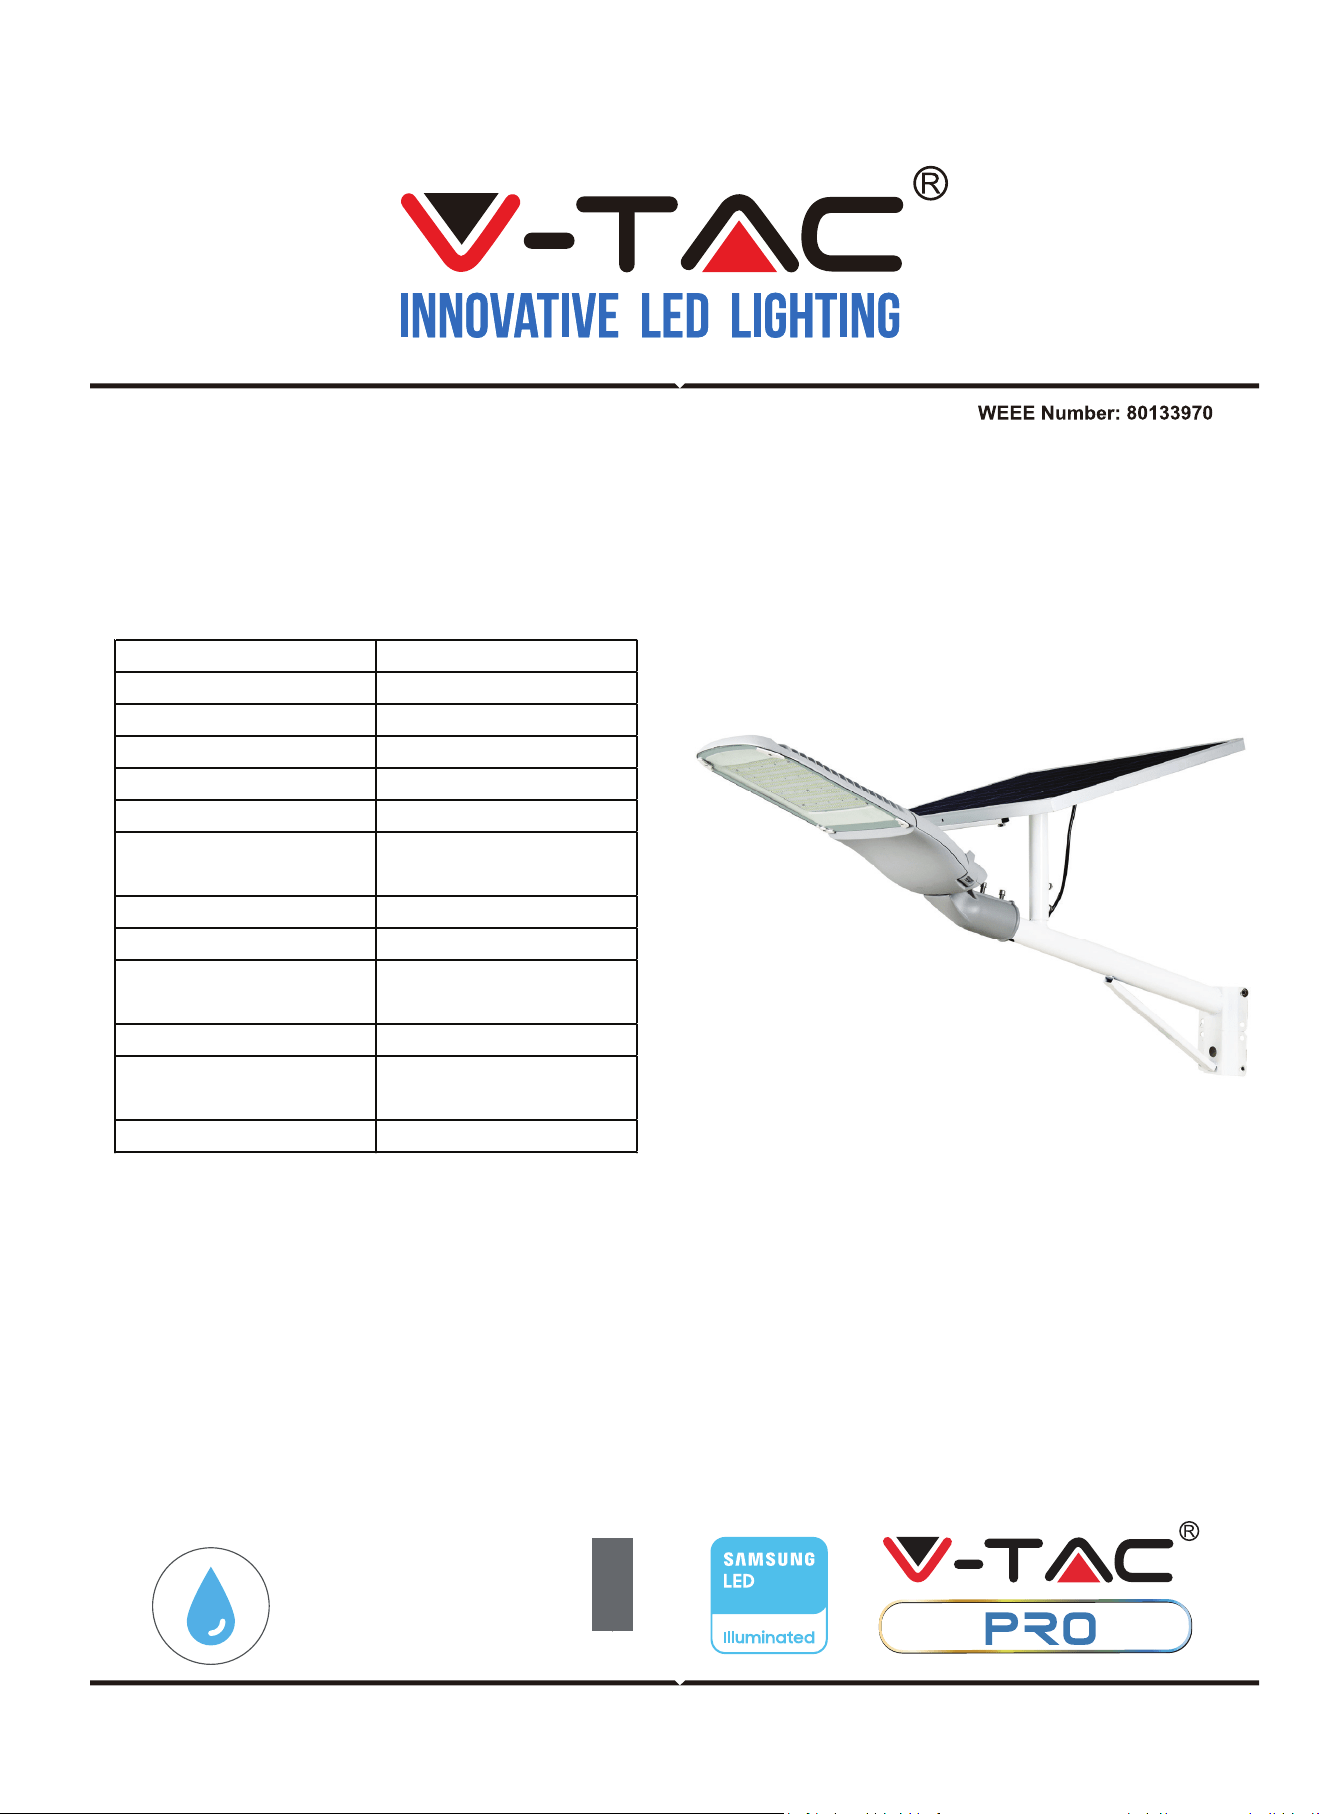
LED SOLÁRNÍ POULIČNÍ OSVĚTLENÍ
TECHNICKÉ ÚDAJE:
ÚVOD A ZÁRUKA
Upozornění
INSTALACE SLOUPŮ VEŘEJNÉHO OSVĚTLENÍ INSTALACE NA STĚNU
DÍLY V SOUČÁSTI
NÁVOD K INSTALACI:
ÚDRŽBA
DÁLKOVÉ OVLÁDÁNÍ
NÁVOD K INSTALACI
1. Instalaci musí provést kvalifikovaný elektrikář.
2. Vyměňte případný prasklý ochranný štít.
3. Chraňte před ohněm.
4. Neponořujte jej do vody.
5. Svítidlo nelze instalovat na nízko položených místech,
aby se nenamáčelo.
Toto označení znamená, že
produkt nesmí být likvidován
společně s ostatním domovním
odpadem.
3 hodiny pravidelného osvětlení
6 hodiny pravidelného osvětlení
8 hodiny pravidelného osvětlení
Opticky řízený režim
Režim polovičního jasu
Vynucené zapnutí osvětlení
(optické ovládání je nulové)
Vynucené vypnutí osvětlení
(optické ovládání je nulové)
Režim plného jasu
• Před instalací vyjměte všechny díly a zkontrolujte, zda jsou v dobrém stavu.
• Výškový žebřík namontujte na stěnu nebo na sloup svítidla pomocí rozpěrných šroubů.
• Upevněte solární panel na držák. Připevněte je na montážní rameno a utáhněte šrouby.
• Umístěte montážní rameno na horní část tyče pro výškovou montáž.
• Připevněte svítidlo k přední části tyče pro výškovou montáž.
• Ujistěte se, že je připojovací zástrčka na svítidle opatrně vytažena z otvoru pod tyčem pro výškovou
montáž.
• Nyní připojte zástrčky a utáhněte vodotěsnou krytku.
• Svítidlo by mělo být připojeno k solárnímu panelu a nasměrováno na sluneční světlo. Ujistěte se, že
je solární panel nastaven do přesného úhlu potřebného pro příjem slunečního světla.
• Po instalaci vyzkoušejte osvětlení pomocí dálkového ovládání.
• Dálkové ovládání je navrženo pro provozní vzdálenost 8-10 m.
• Svítidlo čistěte suchým hadříkem, který nepouští vlákna.
• Pravidelně kontrolujte, zda není solární panel znečištěný. Pokud je znečištění přítomno, vyčistěte jej,
abyste zajistili bezproblémový provoz výrobku.
• Zejména v zimním období udržujte výrobek mimo dosah sněhu a ledu.
• Zkontrolujte správný směr instalace (solární panel by měl být nahoře).
Zdroj světla
Vnitřní upevnění
šestihrannými
šrouby
Montážní
rameno (pro
solární panel)
Solární nabíjení (baterie je
v krytu svítidla)
Upevňovací šroub
Otvor
Tyč pro výškovou montáž
(pro instalaci na stěnu/s-
loup)
Rozšiřující deska
Zapojte zástrčku a zásuvku a
utáhněte vodotěsný uzávěr.
Zdroj světla
Vnitřní upevnění
šestihrannými
šrouby
Solární nabíjení (baterie je
v krytu svítidla)
Upevňovací šroub
1,2 m vodič
Rozšiřovací šroub 2*6
Montážní rameno
(pro solární panel)
Držák solárního panelu
Solární osvětleníSolární panel Dálkové ovládání
1 rozšiřující deska (pro
instalaci na sloup osvětlení)
Děkujeme, že jste si vybrali a koupili výrobek firmy V-TEK (V-TAC). V-TEK (V-TAC) vám nabízí ty
nejlepší výrobky. Před zahájením instalace si prosím pečlivě přečtěte tyto pokyny a uschovejte si
tento návod pro budoucí použití. Pokud máte další dotazy, obraťte se na našeho prodejce nebo míst-
ního obchodního zástupce, od kterého jste výrobek zakoupili. Oni jsou vyškoleni a jsou vám k dispozi-
ci pro všechny vaše potřeby. Záruka je platná po dobu 3 let od data zakoupení. Záruka se nevztahuje
na škody způsobené nesprávnou instalací nebo atypickým opotřebením. Společnost neposkytuje
záruku na poškození na jakémkoli povrchu kvůli neodbornému odstranění a instalaci výrobku.
Výrobek má záruku pouze pro výrobní vady.
3
YEARS
WARRANTY
*
IP65
RATING
7
8
Tyč pro výškovou montáž
(pro instalaci na stěnu/sloup)
Montážní
rameno (pro
solární panel)
Tyč pro výškovou montáž
(pro instalaci na stěnu/s-
loup)
Otvor
CZECH CZECH
Model VT-ST303
Wa�y na solární panel DC 9V, 50W
Lumeny 3000LM
Úhel paprsku 120⁰
Typ čipu LED SMD 2835
Index podání barev >80
Maximální montážní
výška
6-8 metrů
Provozní teplota -20 až +45 °C
Typ baterie Baterie LiFePO4 6,4 V
Doba nabíjení
4-6 hodin nabíjení na
slunci
Provozní doba 8-10 hodin
Maximální montážní
výška
6-8 metrů
Počet LED diod 572 ks
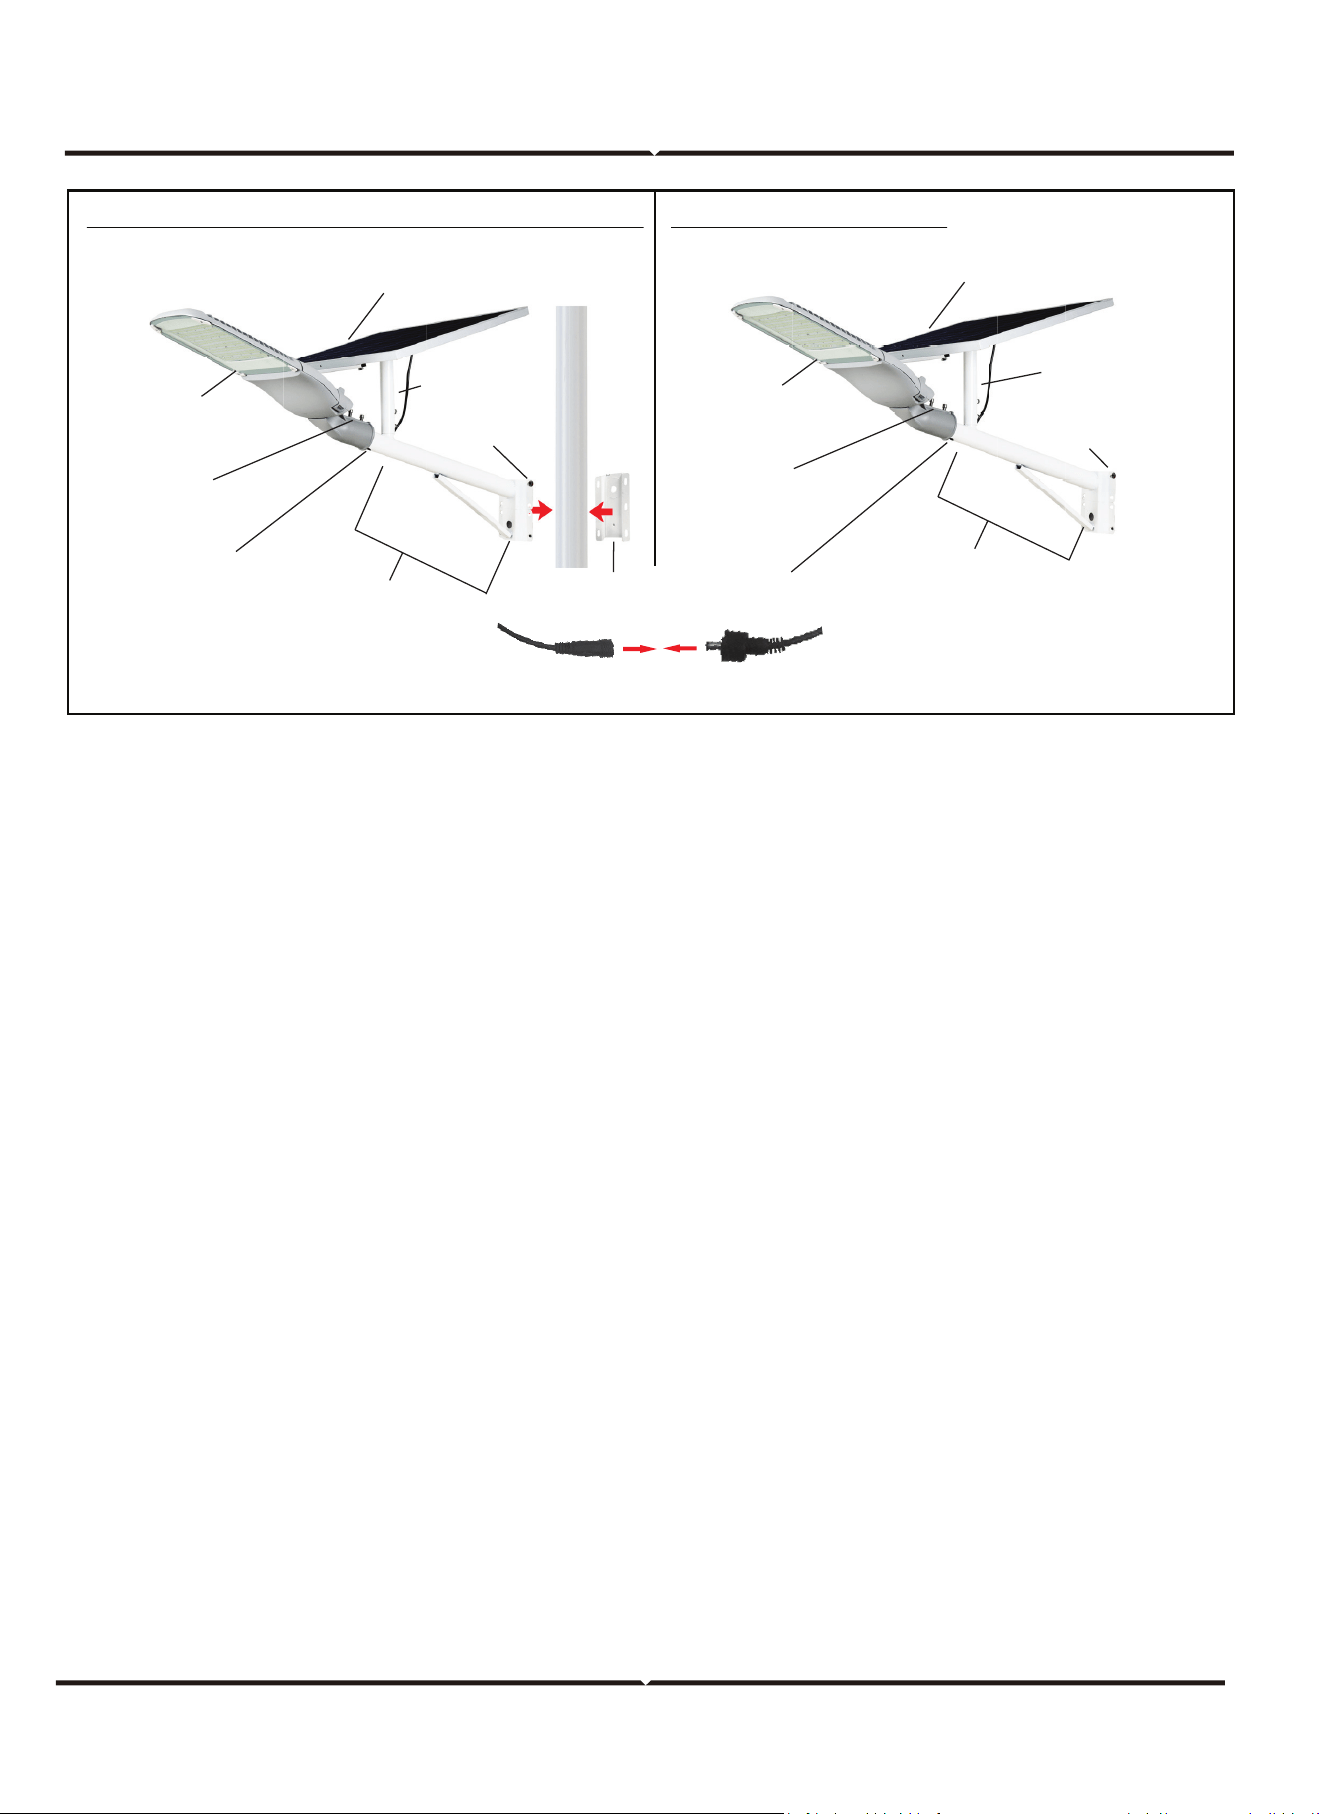