
Loading ...
Loading ...
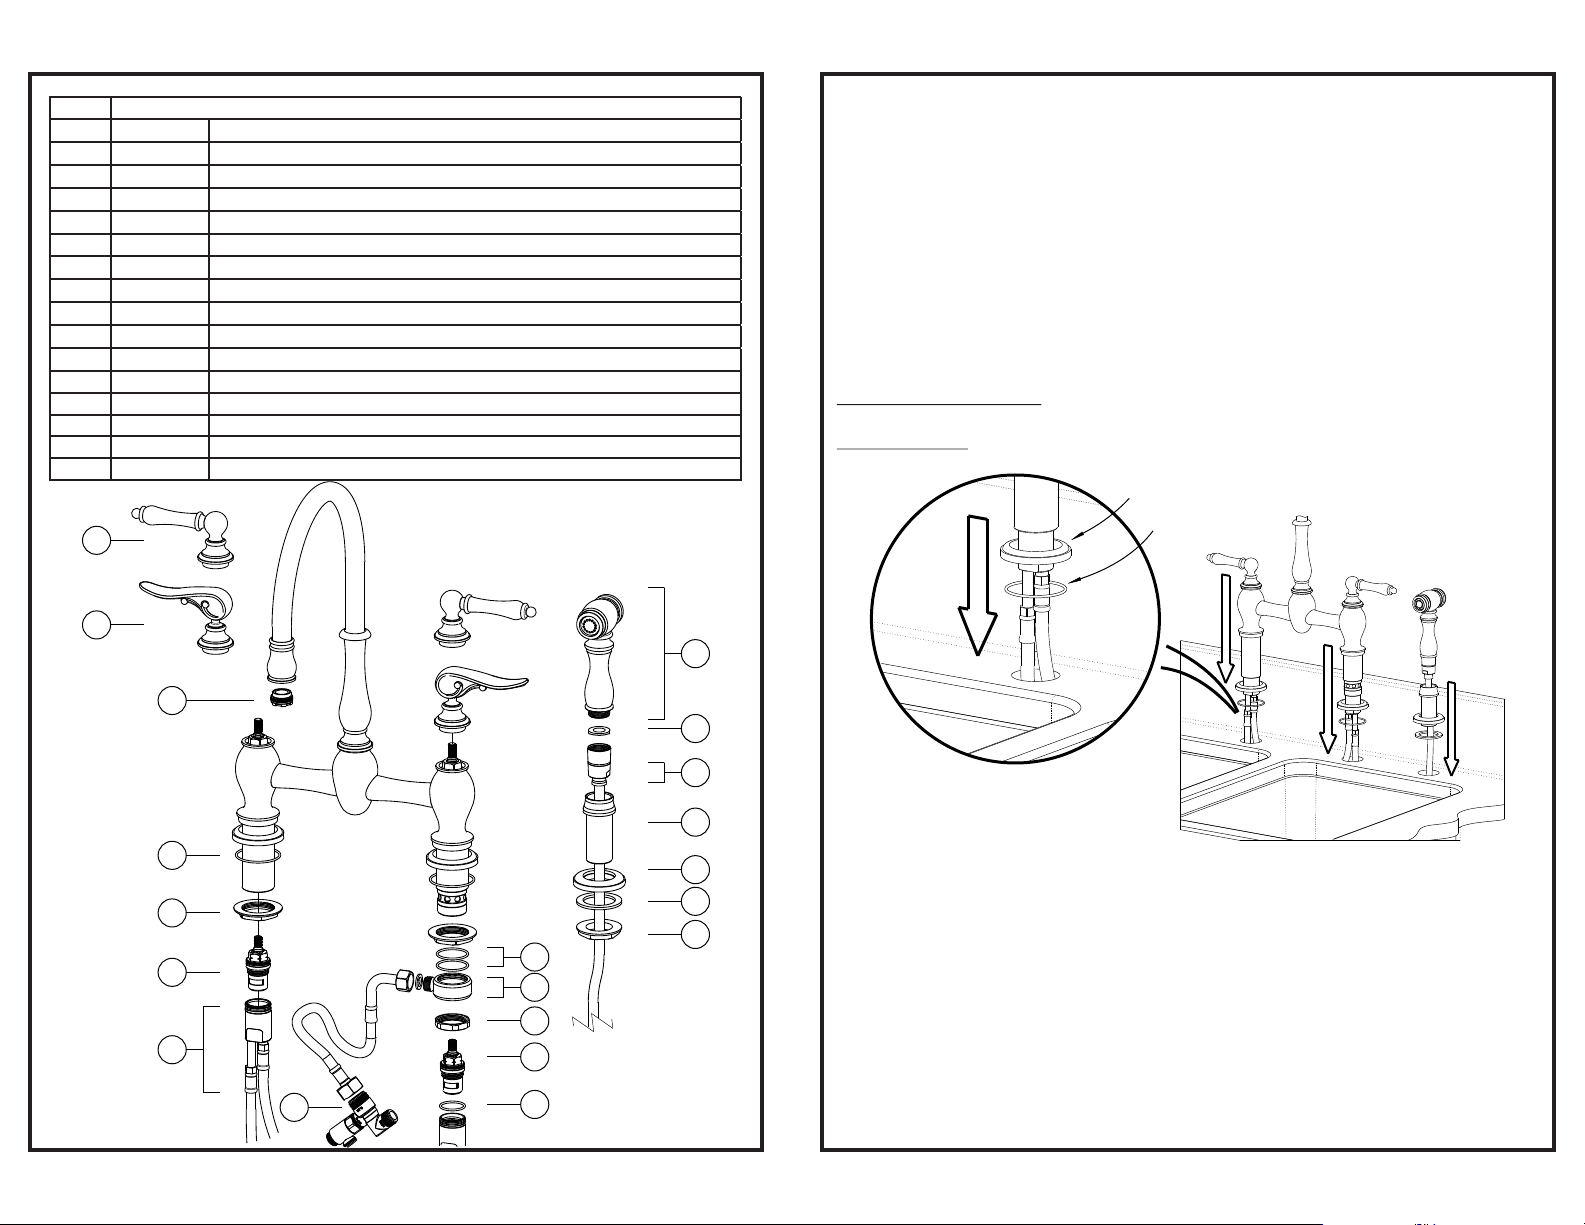
Aerator 2.2 GPM (For Aerator 1.5 GPM = 10560)
3/86/8
SPARE / REPLACEMENT PARTS LIST - FF6000
1 Cartridge Cold, Lead Free
2 Cartridge Hot, Lead Free
3
4
Handle, Standard Lever Swan
Handle, Decorative Swan
Tee Body & Diverter
Sidespray Head & Grip
Diverting Hose & Banjo Fitting
Valve Body & Connection Hoses
Locknut for Faucet
10210
10211
10418
10698
3-019 *
3-020 *
3-033
3-034 *
3-047
3-048
92038
5
6
7
8
9
10
11
2. Flush pipe work to ensure it is free from debris.
3. Cut mounting holes 1 3/8" diameter (8” center-to-center spread requirement for
faucet) in the desired position in sink.
4. Remove faucet and hardware from its protective packaging. Faucet comes
assembled.
8. Place the escutcheons (for FF6000) and large 'O'rings (for FF6000 and/or FF7000)
over the faucet shanks and place the faucet into the desired position.
ATTENTION: The rubber ‘O’ring should be sitting on top of the countertop and
between the faucet escutcheons. DO NOT use putty or other sealant at this location.
NOTES:
Solid surface installation: The sub-countertop mounting surface needs to be flat and
free of debris; otherwise the faucet will not sit properly.
Tile installation: Avoid installations near or on top of grout lines. The faucet will not sit
secure when sitting on such.
5. Detach hose fittings from tee body, temporarily remove locknut from diverting side.
6. Slide banjo fitting down from its location.
7. Unscrew plastic mounting nuts from the faucet shanks.
9. Assure that the handles and spout are properly aligned in correct positions; spout
should swivel face forward into sink and handles should point outward parallel with
bridge faucet. Handles should 1/4" turn towards front of sink (counter-clockwise
1/4" turn for hot side & clockwise 1/4" turn for cold side).
10. Slide plastic mounting nuts over supply lines. Install the plastic mounting nuts to
the threaded shanks from underneath the sink.
11. Tighten plastic mounting nuts with required plumbers wrench (1 7/16" size).
12. Slide banjo-divert fitting over the cold side supply lines followed with the thread
brass locknut into its location. Ensure fitting hose is positioned between both
shanks and fitting hose turns downwards inline with other supply lines.
13. Tighten threaded brass locknut with required plumbers wrench (1 7/16" size).
Escutcheon
‘O’ Ring
*NOTE: Specify color finish when
ordering replacement parts
Banjo Diverting Locknut
Locknut for Sidespray92037
12
Hose for Sidespray10564
13
Sidespray Base Shank10406 *
14
Escutcheon Flange10407 *
15
Bridge Faucet Sealing Kit3-058
16
1
2
3
4
5
6
7
9
10
11
8
15
14
13
16
12
16
16
16
16
Loading ...