Loading ...
Loading ...
Loading ...
13ninjakitchen. co.uk
12 ninjakitchen.uk
CARE & MAINTENANCE
CLEANING
Separate all parts. Wash bowl in warm,
soapy water with a soft cloth.
• Hand-Washing
Wash bowl, lid, disc and blade assemblies
in warm, soapy water. When washing
the blade assemblies, use a dishwashing
utensil with a handle to avoid direct hand
contact with blades.
Handle blade assemblies with care to
avoid contact with sharp edges. Rinse
and air-dry thoroughly.
• Dishwasher
All attachments are dishwasher safe. It
is recommended that the bowl, lid, disc
and blade assemblies be placed on the
top rack of the dishwasher ON LY. Ensure
the blade assembly is removed from the
bowl before placing in the dishwasher.
Exercise care when handling blade
assemblies.
• Motor Base
Turn o the unit and unplug the motor
base before cleaning. Wipe motor base
with a clean, damp cloth.
DO NOT use abrasive cloths, pads, or
brushes to clean the base.
STORING
Wrap the power cord around the cord
wrap on the back of the motor base.
Store the unit upright and store all blade
assemblies inside or attached to the bowl
with the lid locked in place.
DO NOT stack items on top of the
containers. Store any remaining
attachments alongside the unit or in a
cabinet where they will not be damaged
or create a hazard.
RESETTING THE MOTOR THERMOSTAT
This unit features a unique safety system
that prevents damage to the motor and
drive system should you inadvertently
overload the unit. If the unit is overloaded,
the motor will be temporarily disabled.
Should this occur, follow the reset
procedure below.
1 Unplug the unit from the socket.
2 Allow the unit to cool for approximately
30 minutes.
3 Remove the bowl’s lid and blade
assembly. Empty the bowl and ensure
no ingredients are jamming the blade
assembly.
IMPORTANT: Ensure that maximum
capacities are not exceeded. This is the
most typical cause of appliance overload.
ORDERING REPLACEMENT PARTS
To order additional parts and attachments,
visit ninjakitchen.co.uk
5 Press the Power button to turn on, then
select SLICE or LOW. Add the prepped
ingredients you want to slice or grate
through the feed chute on the lid. Use
the food pusher to help guide the
ingredients through the feed chute.
6 If using the Auto-iQ® program, the SLICE
disc will automatically stop spinning
at the end of the program. If using the
manual program LOW press the button
again wait for the unit to come to a
complete stop.
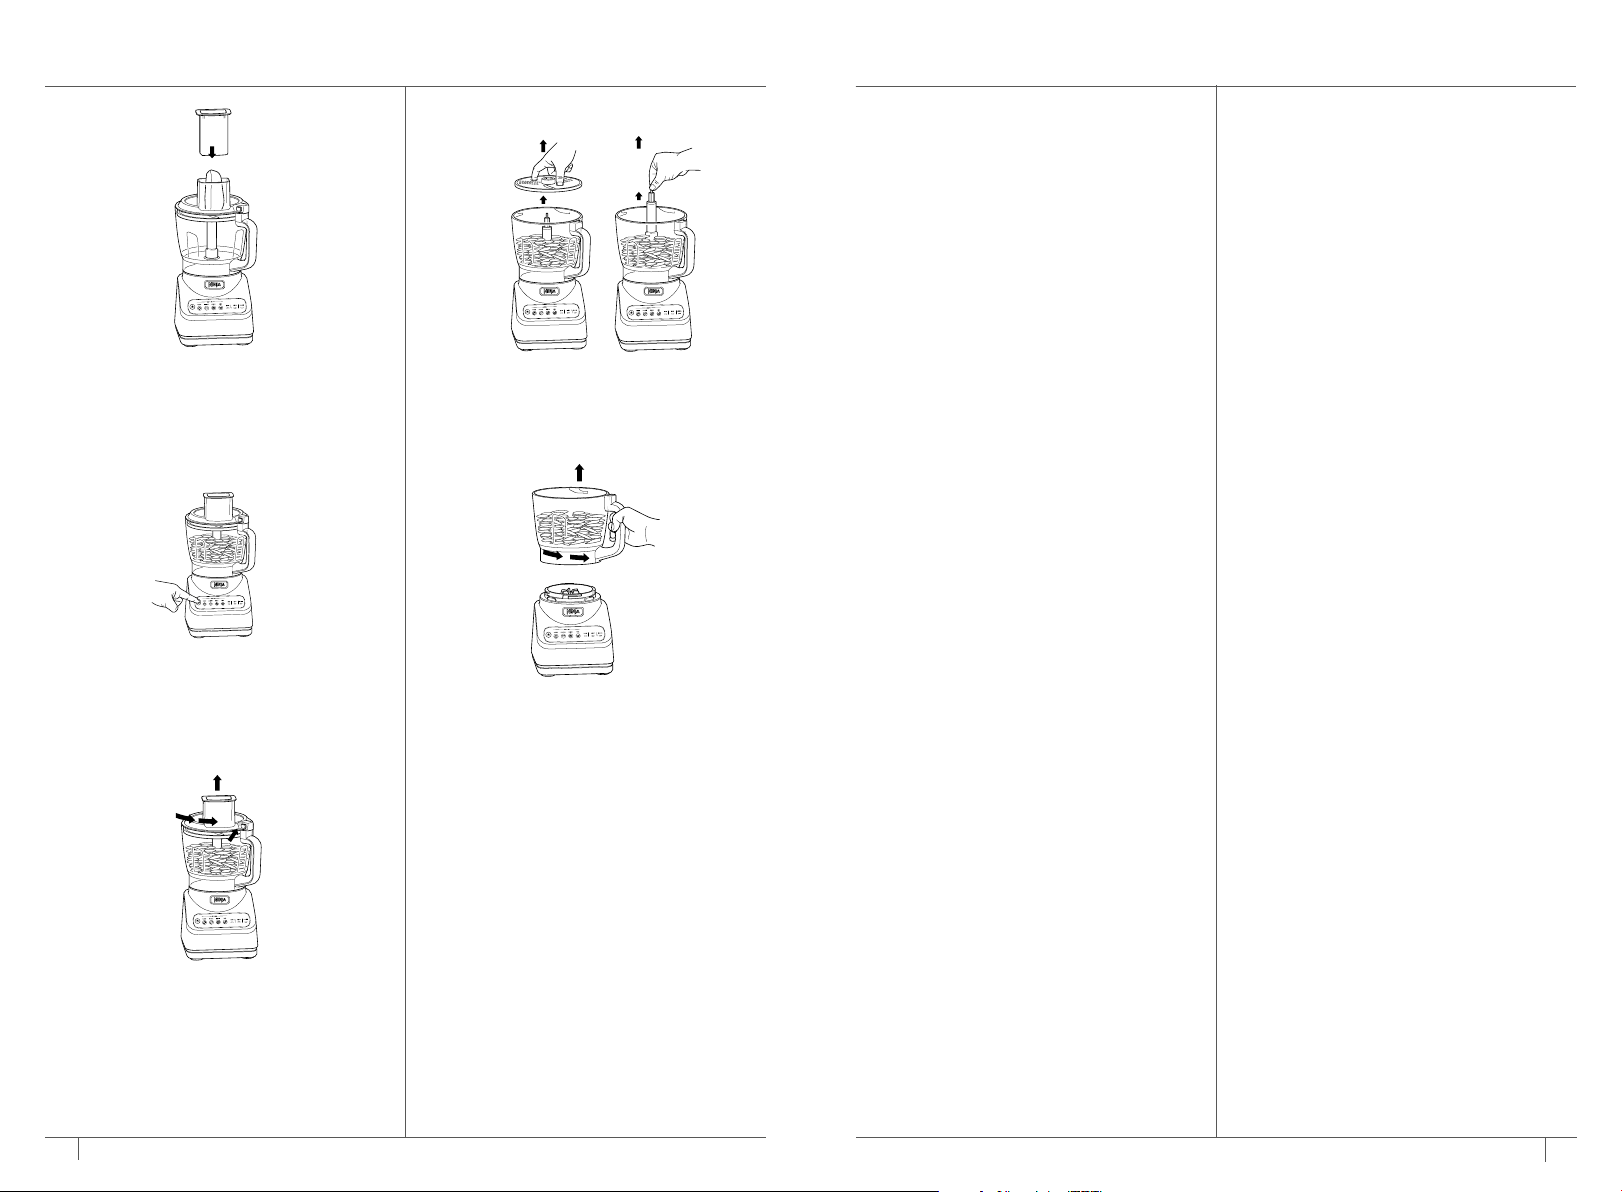
7 To remove the lid, press the button on the
feed chute lid near the handle to unlock,
then turn the lid anti-clockwise. Lift the lid
from the bowl.
8 Using the finger holes, carefully lift the
disc out of the bowl. Then, grasp the
adapter by the top of the shaft and lift
it out of the bowl.
10 Press the Power button to turn the unit
o, then unplug the unit. Refer to the
Care & Maintenance section for cleaning
and storage instructions.
9 To remove the bowl from the motor
base, turn the bowl anti-clockwise and
then lift it up.
USING THE SLICING/GRATING DISC – CON’T
Loading ...
Loading ...