Loading ...
Loading ...
Loading ...
9ninjakitchen. co.uk
8 n injakitchen.uk
3 Exercising care, grasp the Chopping
Blade Assembly by the top of the shaft
and place it onto the drive gear inside
the bowl. Note that the Chopping
Blade Assembly will fit loosely on the
drive gear.
4 Add ingredients to the bowl, making
sure not to exceed the MAX FILL line.
5 Place the feed chute lid on the bowl
and turn clockwise until you hear a
click, indicating the lid is locked in place.
The control panel will stop flashing,
indicating the bowl and lid are properly
assembled.
1 Remove all packaging materials from
the appliance. Exercise care when
unpacking blade assemblies. All blade
assemblies are sharp.
2 The Chopping Blade Assembly is NOT
locked in place in the bowl. Handle the
Chopping Blade Assembly by grasping
the top of the shaft.
3 Wash bowl, lid, disc, and blade
assemblies in warm, soapy, water using
a dishwashing utensil with a handle to
avoid direct contact with the blades.
Exercise care when handling blade
assemblies, as the blades are sharp.
4 Thoroughly rinse and air-dry all parts.
5 Wipe control panel with a soft cloth.
Allow it to dry completely before using.
BEFORE FIRST USE
IMPORTANT: Review all warnings on
pages 4–6 before proceeding.
NOTE: All attachments are BPA free and
dishwasher safe. It is recommended that
the bowl, lid, disc, and blade assemblies
be placed on the top rack of the
dishwasher. Exercise care when handling
blade assemblies.
FEATURES
Auto-iQ® PROGRAMS
The Power button should be used to turn the unit on or o.
AUTO-IQ®
Intelligent preset programs combine unique processing and pausing patterns that do
the work for you. Once an Auto-iQ® program is selected, it will start immediately and
automatically stop when processing is complete. To stop processing before the end of
a program, press the currently active button again.
MANUAL PROGRAMS
LOW and HIGH
When selected, each of these speeds
runs continuously until turned o. They
do not work in conjunction with any
preset Auto-iQ® programs.
PULSE
Oers greater control of pulsing and
processing. Operates only when PULSE is
pressed. Use short presses for short pulses
and long presses for long pulses.
CHOP
Timed pulses and pauses give you
consistent chopping results. Run
program once for a large chop, twice
for a small chop and three times if you
prefer it even finer.
PUREE
Create anything from silky-smooth sauces
to the perfect hummus.
SLICE
Use with the reversible disc shaped blade
to quickly slice or grate cheese and
vegetables with minimal eort.
MIX
Quickly mix together doughs and batters
for pizzas, bread, pastry and cakes.
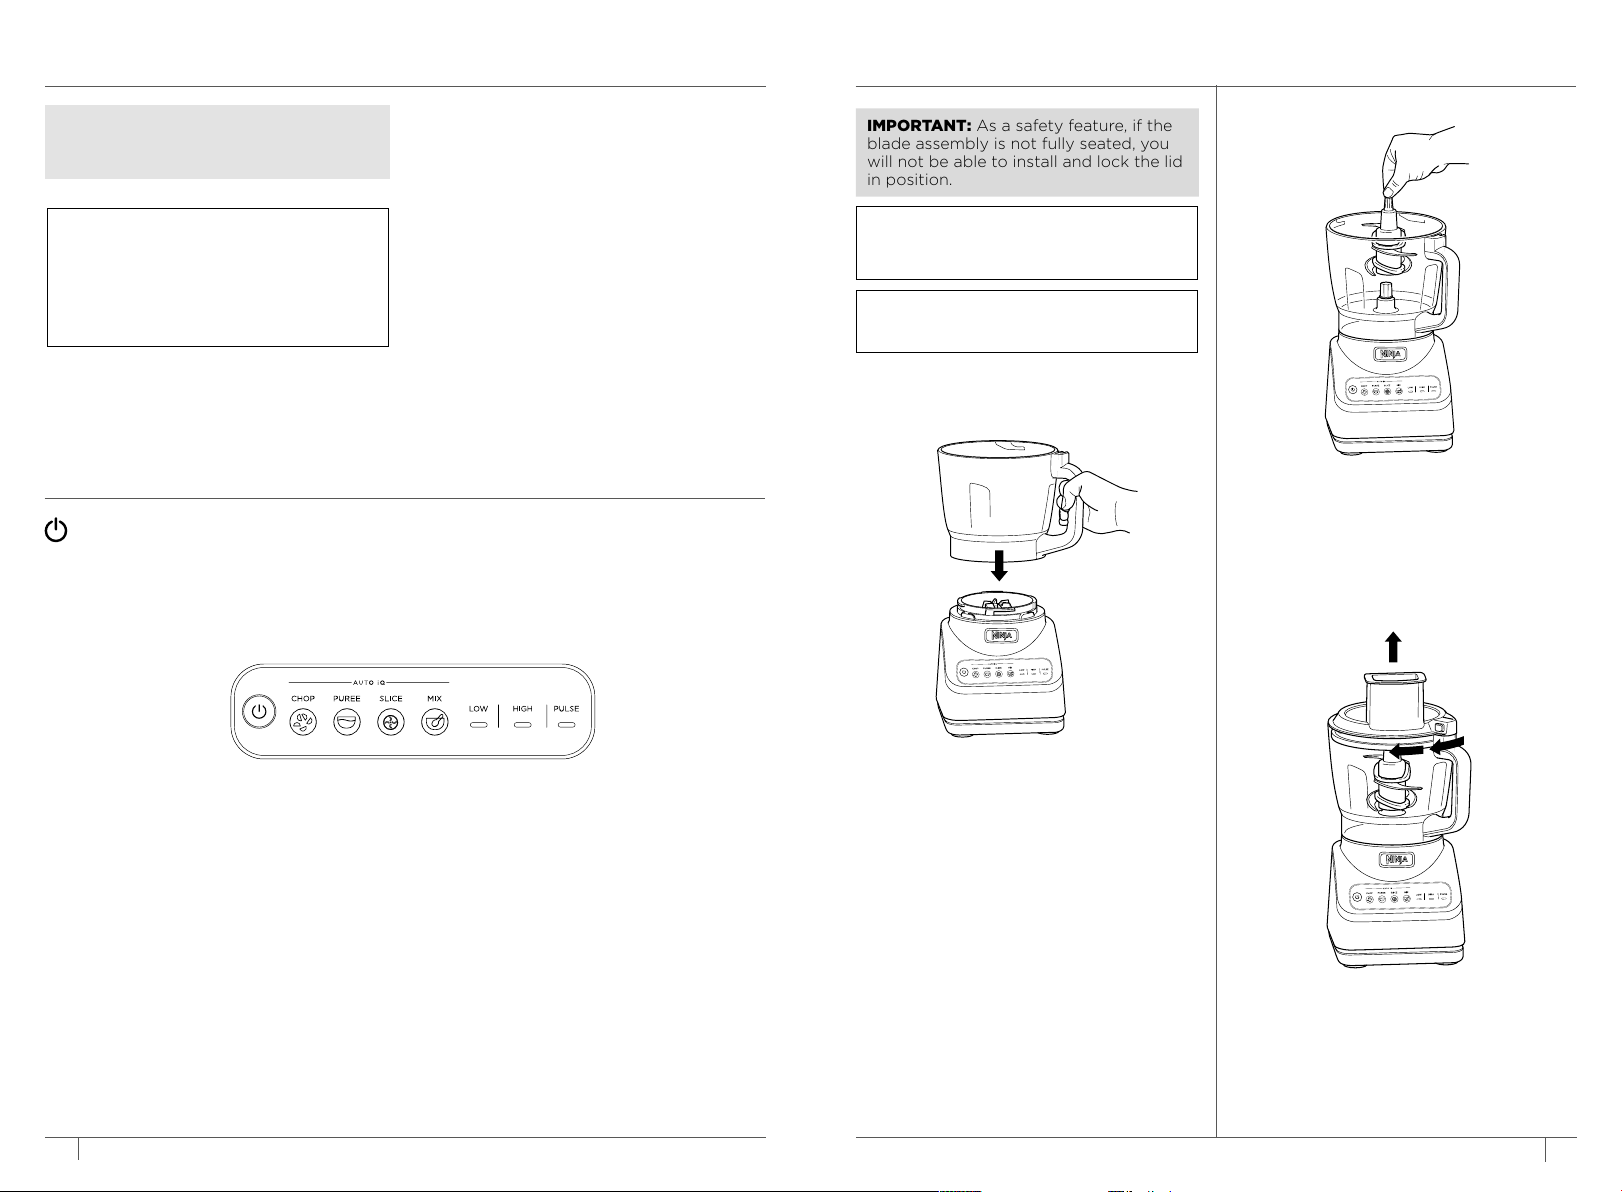
IMPORTANT: As a safety feature, if the
blade assembly is not fully seated, you
will not be able to install and lock the lid
in position.
NOTE: DO NOT add ingredients before
completing installation of the blade
assembly.
NOTE: Please follow the same instructions
to install the Dough Blade Assembly.
USING THE FOOD PROCESSOR BOWL
1 Place motor base on a clean, dry, level
surface such as a worktop or table.
2 Lower the Food Processor Bowl onto
the motor base and rotate clockwise
until it clicks into place.
BN650UK
mylar surface: Pantone black
PREVIEW WHEN ON
OUTLINE
PREVIEW WHEN OFF
LED KEY
white LEDs
BUTTON PLACEMENT
GRAPHICS KEY
graphics: cool gray 2C
mylar material: frosted and
smoke tinted
graphics: Pantone white
graphics: Pantone 7579C
satin chrome
Loading ...
Loading ...
Loading ...