Loading ...
Loading ...
Loading ...

9
Listening to a CD
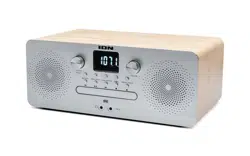
The built-in CD player allows you to play a CD on Air CD Pro.
To begin playing a CD:
1. Make sure that Air CD Pro is in CD Mode (see Selecting the Audio Input Mode for more details
if needed).
2. Open the Disc Tray by pressing the Eject button. The Display will temporarily show OP.
3. Place a CD in the tray.
4. Close the Disc Tray by pressing the Eject button again. The Display will show CL while the
Disc Tray is closing, and then Air CD Pro will read the CD. After Air CD Pro reads the CD, the
CD will be stopped and the total number of tracks will be shown on the Display.
5. Press the Play/Pause button to begin playing the CD. While a track is playing, the Display will
show the track time in minutes and seconds.
To pause a track, press the Play/Pause button on the unit or remote control. The Display will flash
to indicate that the track is paused.
To change the track, press and release the Previous or Next button. As you scroll through tracks
with these buttons, the Display will update with the current track number.
To rewind or fast-forward a track, press and hold the Previous or Next button. As you rewind or
fast-forward, the Display will update with the current track time.
To stop a CD, press the Stop button on the unit or remote control. When a CD is stopped, the
Display will show its total track number, and the CD will start from the beginning when it is played
again.
Programming a Custom Playlist
You can make a custom playlist of up to 20 tracks off the current CD, arranging the tracks in any
order you would like.
To program and play a custom playlist:
1. Make sure that CD Mode is selected and that the Disc Tray is closed with a CD in it.
2. Make sure that the CD is stopped. You will know the disc is stopped if you can see the total
track number on the Display. If the CD is not stopped, press the Stop button.
3. Press the Preset/Prog button on the front panel or the Prog button on the remote control to
initiate the programming process. After you press it, the Display will flash P01 (the first slot
number in the playlist). The Prog Icon will also begin flashing on the left side of the Display.
4. After the playlist slot number starts flashing on the Display, use the Previous and Next buttons
to scroll through the tracks on the CD. As you scroll through the tracks, the currently selected
CD track number will update on the Display.
5. Once you’ve identified the CD track that you want to assign to the playlist slot number, press the
Preset/Prog button on the front panel or the Prog button on the remote control.
6. The Display will now flash P02, and you can choose the second track for the playlist. Repeat
steps 4–5 for P02 and any subsequent playlist slot numbers. The playlist can contain up to 20
tracks, and you can assign the same CD track to multiple playlist slots if desired.
7. When you have finished assigning all tracks that you want in the playlist, press the Play/Pause
button to play the customized list of tracks. The Prog Icon will be solidly lit on the left side of
the Display to indicate that the playlist is programmed.
Loading ...
Loading ...
Loading ...