User Manual
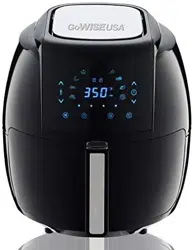
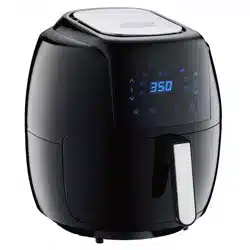
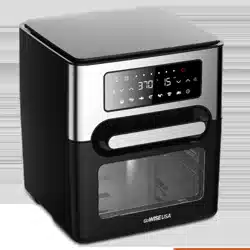
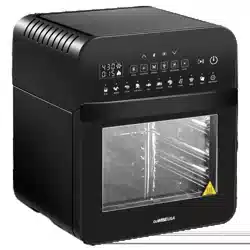
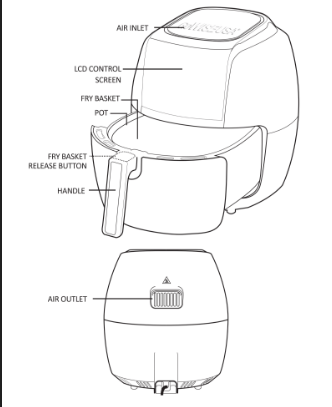
Product Structure & Features
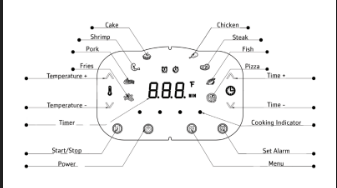
To cycle through the pre-set cooking programs, press the Power icon, then press the Menu icon. You can adjust time or temperature by pressing the “ ” or “
  ” icons.
Before First Use
1. Remove all packaging materials, stickers, and labels.
2. Clean the basket and pan with hot water, soap, and a non- abrasive sponge.
3. Wipe the inside and outside of the appliance with a clean cloth.
NOTE: DO NOT fill pan with oil or lard. The appliance uses rapid air circulation to fry.
How to Use Your Air Fryer
1. Place the air fryer on a flat and even surface. DO NOT PLACE THE AIR FRYER ON A SURFACE THAT IS NOT HEAT RESISTANT.
2. Place the basket in the pan. DO NOT FILL THE PAN WITH OIL OR ANY OTHER LIQUID.
3. Place the ingredients in the basket and then slide the basket and pan back into the appliance. The LCD should light up. NOTE: The basket is equipped with a button guard that ensures safe detachment. Simply slide the button back to detach the basket from the pan.
4. Press the Power icon and set cooking time and temperature by either choosing one of the 8 preset cooking programs using the Menu icon or manually set time and temperature with " " or "
 " icons. NOTE: To set up a different program after the fryer has started, press the "Start/Stop" button. Set a different program, then press the "Start/Stop" button again.
5. Press the Power icon once and set up the program by either choosing one of the pre-set cooking options using the Program button or manually setting a time and temperature using the  and “
and “ “ icons. Press the Power button again to start the fryer.
If you would like to make changes, such as adding more time or increasing the temperature, press the “START/STOP” icon to pause the cooking cycle and make your changes using the appropriate icons. Once you have made the adjustments, press the “START/STOP” icon to start the fryer again.
6. Once you have set the cooking time and temperature, press the "Start/Stop" button again. Four dots at the bottom of the display will blink repeatedly. If the four dots are solid, the cooker will go into standby mode.
7. You may need to shake the ingredients midway through cooking cycle. Pull the pan out of the air fryer by the handle (the air fryer will automatically power down), and carefully shake the ingredients inside the basket using the handle. Once you are done, slide the pan back into the air fryer and it will resume the cooking cycle.
CAUTION: DO NOT PRESS THE BUTTON ON THE HANDLE DURING THE SHAKING PROCESS. THIS WILL DETACH THE BASKET FROM THE PAN. If shaking the ingredients is too difficult to do while attached to the pan, place the pan and basket on a pot holder then detach basket from pan, and shake the basket only.
8. Slide the pan and basket back into the air fryer by carefully aligning the track inside the air fryer with the rim of the pan. If you are unable to insert the basket into the air fryer, try lifting the handle as you are sliding the basket into the fryer.
9. When the cooking time has been reached, the timer will beep five times. After the timer beeps, The air blower will stop shortly after (approx. 20 seconds).
10. Slide the pan out of the fryer and place it on a pot holder. NOTE: Oil from the ingredients will gather in the bottom of the pan, be careful when sliding pan out of fryer.
11. To remove the ingredients, slide the button guard up and press the release button on the handle to free the basket from the pan. Carefully pour ingredients out of basket onto plate.
NOTE: See diagram on Page 13.
12. If using tongs, make sure to use non-abrasive, non-metal tongs to avoid scratching the non-stick coating on the basket.
13. Press the Power icon and the fan will run for at approx. 20 seconds, then will go into standby mode.
NOTE: You must unplug the fryer to turn it off completely.
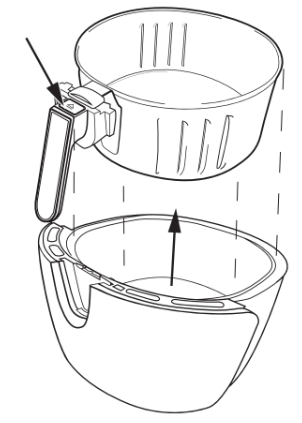
Detaching the basket
A Slide back handle cap to reveal the fryer basket release button
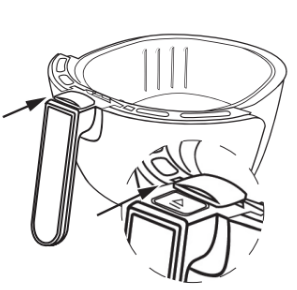
B Press fryer basket release button while pulling up handle to free the basket from the pot
CAUTION: NEVER PRESS THE RELEASE BUTTON DURING SHAKING; THIS WILL DETACH THE BASKET FROM THE PAN.
Setting the Alarm Function
The alarm function alerts the user to check food in 5, 10, or 15 minutes into the set cooking time.
- Press the “Start/Stop” button and choose either one of the cooking presets or manually set a time.
- Press the “Alarm” button displayed with the alarm clock icon.
- This function will give you an option to set up in 5, 10, or 15 minutes.
- Once you have chosen an alarm time, press the “Start/Stop” button to start the fryer. Both the cooking preset and alarm icons should be blinking during the cooking cycle. NOTE: The alarm function will alert the user in the chosen interval depending on the set cooking time. For example, if the fryer is set to 30 minutes with an alarm function set up for 10 minutes, the fryer will beep every 10 minutes within the minute cook cycle.
- To turn off the alarm function, press the “Start/Stop” icon then press the “Alarm” button repeatedly until you see the set temperature.
Cooking Guide
The table on next page is a guide that will help you with setting the time and temperature for certain ingredients.
NOTE: Please keep in mind that because ingredients differ in size, shape, brand, and origin, we cannot guarantee that this is the best setting for the ingredients you have.
Rapid Air Technology reheats the aid inside the fryer instantly; therefore, removing the pan of the air fryer for a brief period of time will not interrupt the cooking process.
TIPS:
- Small ingredients usually require shorter cooking time compared to larger ingredients.
- Shaking smaller ingredients midway through the cooking process will ensure the ingredients cook more evenly and give a better end result.
- Adding a very little amount of oil to fresh potatoes will give it a crispier result.
- Do not prepare extremely oily ingredients in the air fryer.
- Snacks that can be prepared in a traditional oven can also be prepared in the air fryer.
- The recommended amount of fries to allow for a crispy result is oz.
- Pre-made dough requires shorter cooking time than home- made dough.
- When making cake, quiche or ingredients with filling, use a baking tine or oven dish in the fryer basket.
Cleaning Your Air Fryer
- Clean the fryer after every use. Unplug the fryer. ALWAYS WAIT UNTIL THE FRYER HAS COOLED TO A SAFE TEMPERATURE BEFORE HANDLING.
- Wipe the outside of the fryer with a damp cloth.
- Clean the pan and basket with hot water, soap and non- abrasive sponge. You can remove any stuck-on food by using a degreasing liquid soap. For any hard-to-remove food, soak the pan in hot water.
- Clean the inside of the appliance with a lightly dampened non- abrasive sponge or cloth. Be careful not to get the inside of the appliance too wet and never submerge in water.
- Clean the heating element with a cleaning brush to remove any food debris.
Troubleshooting
The Fryer is not turning on
1. The appliance is not plugged in
- Plug the appliance into a grounded wall socket
2. You have not set the timer
- Set the timer using the knob for the correct time on the appliance
Ingredients for the fryer are not done
1. The basket has been over filled with ingredients
- Place smaller batches of ingredients in the basket. Smaller batches are fried more evenly
2. The set temperature is too low
- Increase the temp. control knob to the required temperature setting see temperature presets in this manual).
The ingredients are fried unevenly in the fryer
1. Ingredient position- ing or overflow
- Ingredients that lay on top or across from each other(e.g. fries) need to be shaken midway through cooking
Fried snacks are not crispy after frying
1. Some snacks are are crispier when traditionally fried
- Use oven snacks or lightly brush some oil onto the snacks for a crispier result
Pan does not slide into fryer properly
1. Over filled basket
- Do not fill the basket beyond the MAX fill indicator line
White smoke comes out from the fryer
1. It's normal for white smoke to appear when prepping greasy ingredients
- When frying greasy ingredients a large amount of oil will leak into the pan. The oil produces white smoke and the pan may heat up more than usual. This does not affect the appliance or end food result
2. The pan is still greasy
- Clean pan properly after each use
Fresh fries are fried unevenly in the fryer
1. Potatoes are not fresh
- Use fresh potatoes and make sure that they stay firm during frying
2. Potato sticks have not been rinsed properly prior to frying
- Make sure to rinse the potato sticks properly to remove the starch prior to frying
Fries are not crispy
1. Oil and water in fries
- Potato sticks should be dry prior to adding oil
- Add more oil for a crispier result
Warranty
General Warranty excludes refurbished / auction items.
GoWISE USA has a 1-year limited warranty for all products. Products are warrantied against defects in materials and workmanship for 1 year from the date of purchase, when used in accordance with the instructions provided. This warranty does not cover damages or wear resulting from accident, misuse, abuse, commercial use, or unauthorized adjustment and/or repair.
GoWISE USA shall not be liable for loss of use or any other incidental, consequential or indirect costs, expenses or damages.
There are no express warranties except as listed above. This warranty gives you specific legal rights and you may have other rights which vary from state to state.
CALL 855-233-9199 for RETURN INSTRUCTIONS
WE DO NOT SERVICE PRODUCTS OUTSIDE THE 48 CONTINENTAL UNITED STATES. WE WILL SHIP TO A FREIGHT FORWARDER FOR CUSTOMERS.
NOTE: Customers are responsible for all return shipping costs.
When item(s) are returned under warranty as being defective, they are thoroughly tested to verify manufacturer defect. If any item(s) are determined to be in proper working order after testing, all shipping cost to have the product returned to the customer will be the responsibility of the customer.
Return Period: 30 Days
All return requests must be made within 30 days from the date our customers purchase their product(s). Refunds are only applicable during the 30-day return period and may be subject to restocking fees up to 15% of the original purchase amount. If the product is defective within 30 days, GoWISE USA will cover the cost of return shipping. However, a photo and/or video from the customer is required to receive a pre-paid shipping label. If the product is missing any accessories that were included in the original packaging/shipment, or the product is damaged, altered or used, the item may no longer be eligible for a refund or replacement.
Any decision of refund and/or replacement will be decided at the discretion of GoWISE USA.
NOTE: Customers are responsible for all return shipping costs after days.
Defective/Freight Damaged:
Products that are within the 30-day return period and have been determined by customer service to be defective are qualified for a return label for the product to be returned to GoWISE USA for inspection and testing. GoWISE USA will provide a return shipping label for defective product(s) only. Customers must contact the carrier (shipping company) for products that have arrived damaged after initial transit. Clear photographic and video proof of damage and/or defective product(s) is REQUIRED prior to GoWISE USA authorizing the return of any product.
Purchase from 3rd Parties:
In order for the GoWISE USA customer service team to lookup the warranty information regarding the product(s), the original order information and/or proof of purchase is required. Without this information, GoWISE USA will be unable to move forward with providing a replacement under warranty, as we do not know the date or origin of the purchase. GoWISE USA does not have a working business relationship with 3rd party selling sites or services or individuals which are not listed below as one of our authorized retailers. GoWISE USA is not responsible for making inquiries to such 3rd parties for the purpose of obtaining documentation. It is the responsibility of the person(s) making the warranty claim to provide original documentation such as order information and/or a receipt so that customer service can process the request. Any claim made under GoWISE USA warranty guidelines must be made by original purchaser of the product(s). Any defective product(s) will be replaced as long as the issues with the device fall within warranty guidelines.