Loading ...
Loading ...

3
1. P REPARE INSTALLATION. . . . . . . . . . . . . . . . . . . . . . . . . . . . 3
2. SELECT INSTALLATION TYPE . . . . . . . . . . . . . . . . . . . . . . . . . 3
3. BUILD FRAMEWORK . . . . . . . . . . . . . . . . . . . . . . . . . . . . . . 4
4. I
NSTALL UPPER FLUE MOUNTING BRACKET (DUCTED INSTALLATION ONLY) 4
5. INSTALL PLENUM (NON-DUCTED INSTALLATION ONLY) . . . . . . . . . 4
6. REMOVE GREASE FILTERS . . . . . . . . . . . . . . . . . . . . . . . . . . 5
7. A DJUST THE HOOD MOUNTING BRACKETS . . . . . . . . . . . . . . . . 5
8. INSTALL THE HOOD. . . . . . . . . . . . . . . . . . . . . . . . . . . . . . . 5
9. CONNECT WIRING . . . . . . . . . . . . . . . . . . . . . . . . . . . . . . . 6
10. D
UCT CONNECTION . . . . . . . . . . . . . . . . . . . . . . . . . . . . . . 7
11. PREPARE THE DECORATIVE FLUE. . . . . . . . . . . . . . . . . . . . . . 8
12. INSTALL THE DECORATIVE FLUE. . . . . . . . . . . . . . . . . . . . . 8-9
13. R
EINSTALL GREASE FILTERS. . . . . . . . . . . . . . . . . . . . . . . . . 9
14. OPERATION . . . . . . . . . . . . . . . . . . . . . . . . . . . . . . . . . . 10
15. CARE . . . . . . . . . . . . . . . . . . . . . . . . . . . . . . . . . . . . . 10
16. REPLACEMENT PART S . . . . . . . . . . . . . . . . . . . . . . . . . . . . 11
17. WARRANTY . . . . . . . . . . . . . . . . . . . . . . . . . . . . . . . . . . 12
TABLE OF CONTENTS
NOTE: Before proceeding to the installation, check the contents of the box. If
items are missing or damaged, contact the retailer.
Make sure that the following items are included:
- Hood
- Decorative flue assembly (lower and upper flues)
- Upper flue mounting bracket
- Aluminum grease filters (2)
- Installation instructions
- Parts bag: 6 M4 x 38 Phillips 9 mm round head mounting screws,
2 M4 x 12 Phillips 9 mm round head screws, 2 washers and
3 wire connectors
Parts sold separately:
- Ducts, elbows, wall and roof caps.
- Optional flue extension for ceilings of 9 ft. or more: models AEEW46SS
(stainless steel).
- Non-duct kit model ARKEW46, mandatory for non-ducted installation.
NOTE: During installation, protect countertop and/or cooktop.
HR0227A
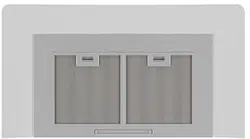
(2) GREASE FILTERS
(6) M4 X 38 PHILLIPS
ROUND HEAD SCREWS
(2) M4
X 12 PHILLIPS
ROUND HEAD SCREWS
(2) WASHERS
(3) WIRE CONNECTORS
(1) DECORATIVE FLUE
ASSEMBLY
(1) UPPER FLUE
MOUNTING
BRACKET
2. SELECT INSTALLATION TYPE
2.1 NON-DUCTED INSTALLATION
The ARKEW46 non-duct kit is required for a non-ducted installation.
2.2 DUCTED INSTALLATION
Plan where and how the ductwork will be installed.
A straight, short duct run will allow the hood to perform most efficiently. Long duct
runs, elbows and transitions will reduce the performance of the hood. Use as few
of them as possible. Larger ducting may be required for longer duct runs.
Install wall or roof cap. Connect 6” round metal ductwork to cap and work back
towards the hood location. Use 2” metal foil duct tape to seal the joints.
2.3 ALL INSTALLATIONS
The minimum hood distance above cooktop is 24”. A maximum of 30” above
cooktop is recommended for best capture of cooking impurities.
Distances over 30” are at the installer and users discretion providing that ceiling
height and decorative flue length allow it.
NOTE: Ceilings of 9 ft. or more require flue extension model AEEW46SS (stainless
steel).
6” ROUND
DUCT
ROOF CAP
6” ROUN
D
ELBOW
WALL
CAP
HOOD
DECORATIVE
FLUE
HH0283A
24” MINIMUM ABOVE
COOKING
SURFACE
WARNING
!
When performing installation, servicing or cleaning the unit, it is recommended to wear safety glasses and gloves.
1. PREPARE INSTALLATION
Loading ...
Loading ...
Loading ...