Loading ...
Loading ...
Loading ...
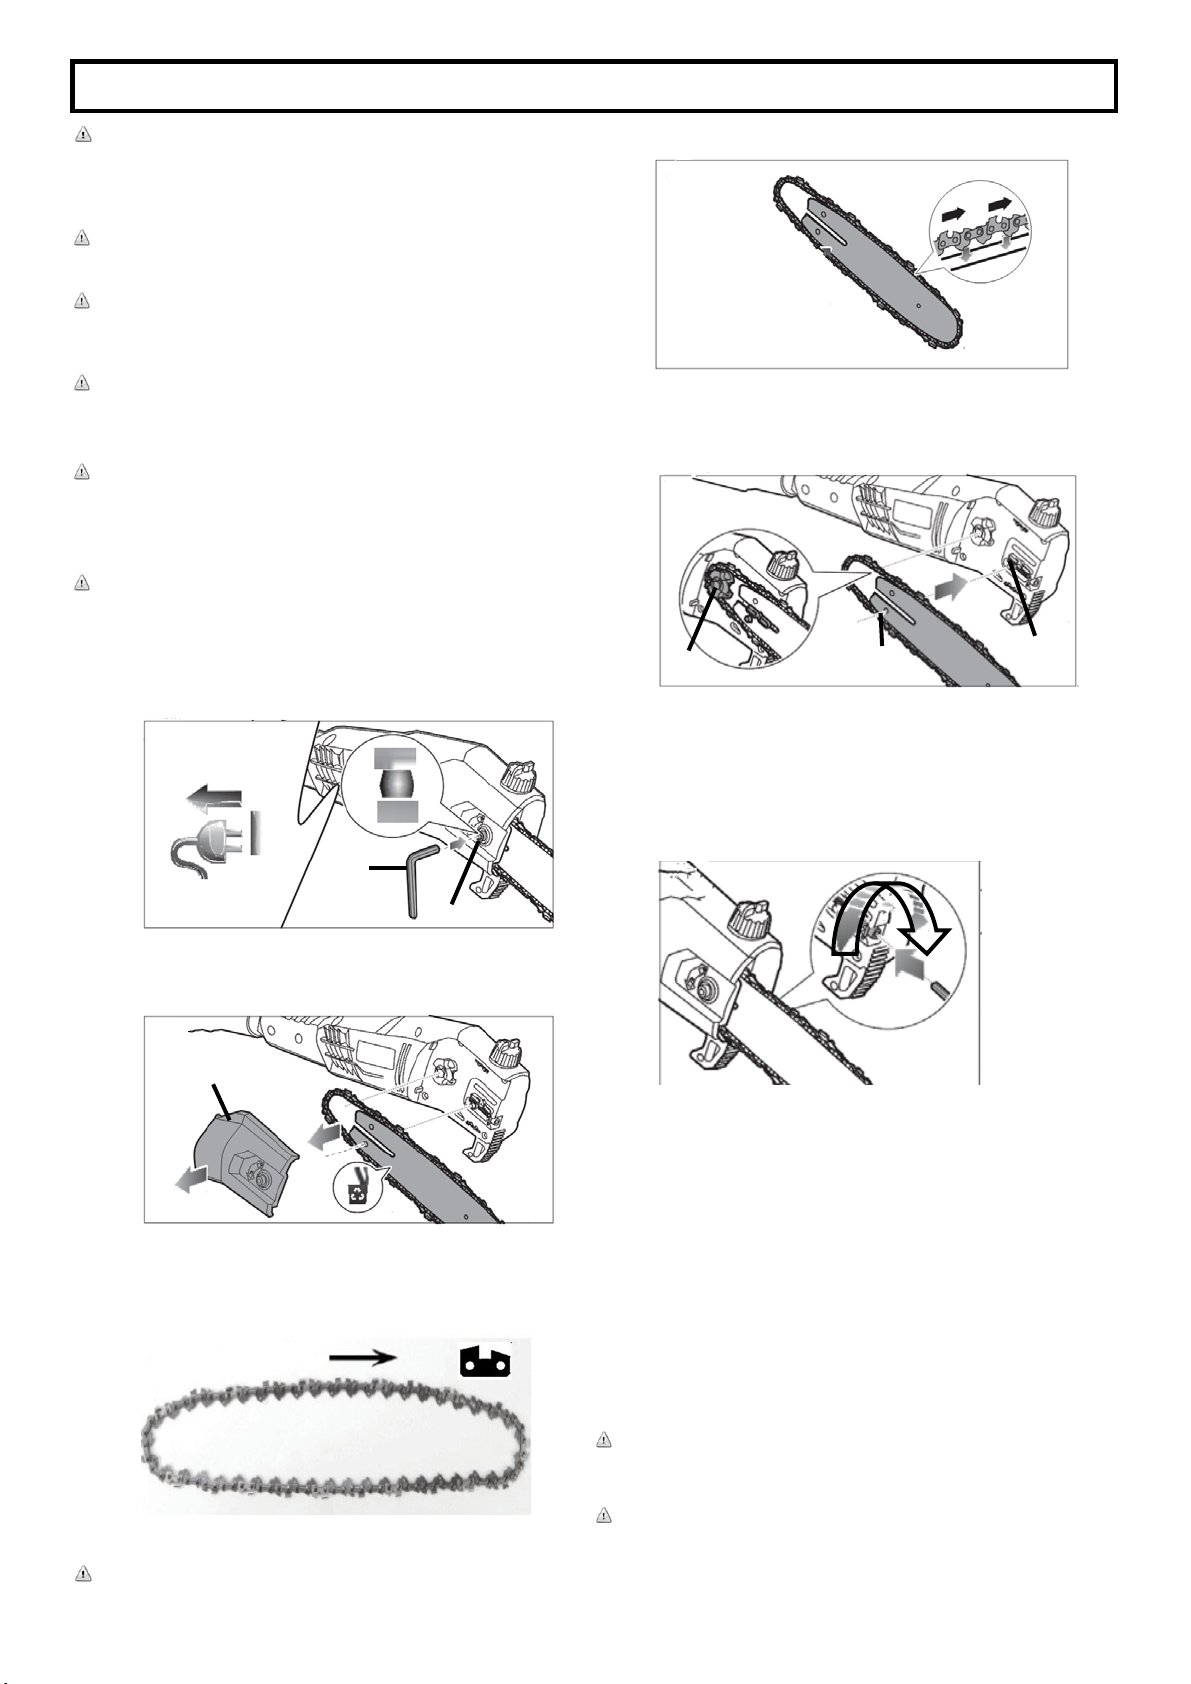
INSTALLING/REPLACING THE GUIDE BAR AND CHAIN
DANGER: Never start the motor before installing the guide bar,
chain, chain cover and tension knob. Without all these parts in
place, the clutch can fly off or explode, exposing the user to
possible serious injury.
WARNING: To avoid serious personal injury, read and
understand all the safety instructions provided.
WARNING: Before performing any maintenance, make sure
the tool is unplugged from the power supply. Failure to heed
this warning could result in serious personal injury.
CATUION: Always wear gloves when handling the bar and
chain; these components are sharp and may contain burrs,
which can cause serious injury.
WARNING: Never touch or adjust the chain while the motor
is running. The saw chain is very sharp. Always wear
protective gloves when performing maintenance to the chain
to avoid possible serious lacerations.
NOTE: When replacing the guide bar and chain, use only
identical replacement parts.
1. Disconnect pole saw from power supply.
2. Loosen the sprocket cover bolt by turning it
counter-clockwise with the hex key provided.
3. Remove the sprocket cover.
4. Remove the bar and chain from the mounting surface.
5. Remove the old chain from the bar.
6. Lay out the new saw chain in a loop and straighten any
kinks. The cutters should face in the direction of the chain
rotation. If they face backwards, turn the loop over.
7. Place the chain drive links into the bar groove.
NOTE: Make certain of the direction of chain.
8. Position the chain so there is a loop at the back of the bar.
9. Hold the chain in position on the bar and place the loop around
the sprocket.
10. Fit the bar flush against the mounting surface so that the
tensioning lug is in the slot of the bar.
11. Replace the sprocket cover.
12. Tighten cover bolt, but leave the bar free to move for tension
adjustment.
13. Remove all slack from the chain by turning the chain tensioning
bolt clockwise with the hex key provided until the chain seats
snugly against the bar with the drive links in the bar groove.
14. Tighten the sprocket cover bolt with the hex key provided.
TENSIONING THE SAW CHAIN
• Loosen the cover bolt counterclockwise with the hex key provided.
• To tighten the chain, turn the tensioning bolt clockwise. To loosen
the tension, turn the tensioning bolt counter-clockwise.
• Tighten the sprocket cover by turning the cover bolt clockwise with
the hex key provided.
• Re-adjust tension of the saw chain when necessary.
NOTE: The chain is correctly tensioned when there is no sag on the
underside of the guide bar, then chain is snug, but it can be turned by
hand without binding.
NOTE: A new chain tends to stretch, check chain tension
frequently and tension as required.
Cutter Direction
Sprocket
Tensioning
lug
Slot of bar
Sprocket cover
Sprocket cover
bolt
Hex key
6
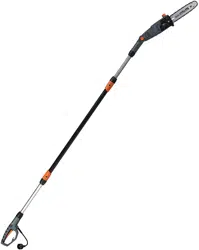
Model PS45010S
Loading ...
Loading ...
Loading ...