Loading ...
Loading ...
Loading ...
- 11 -
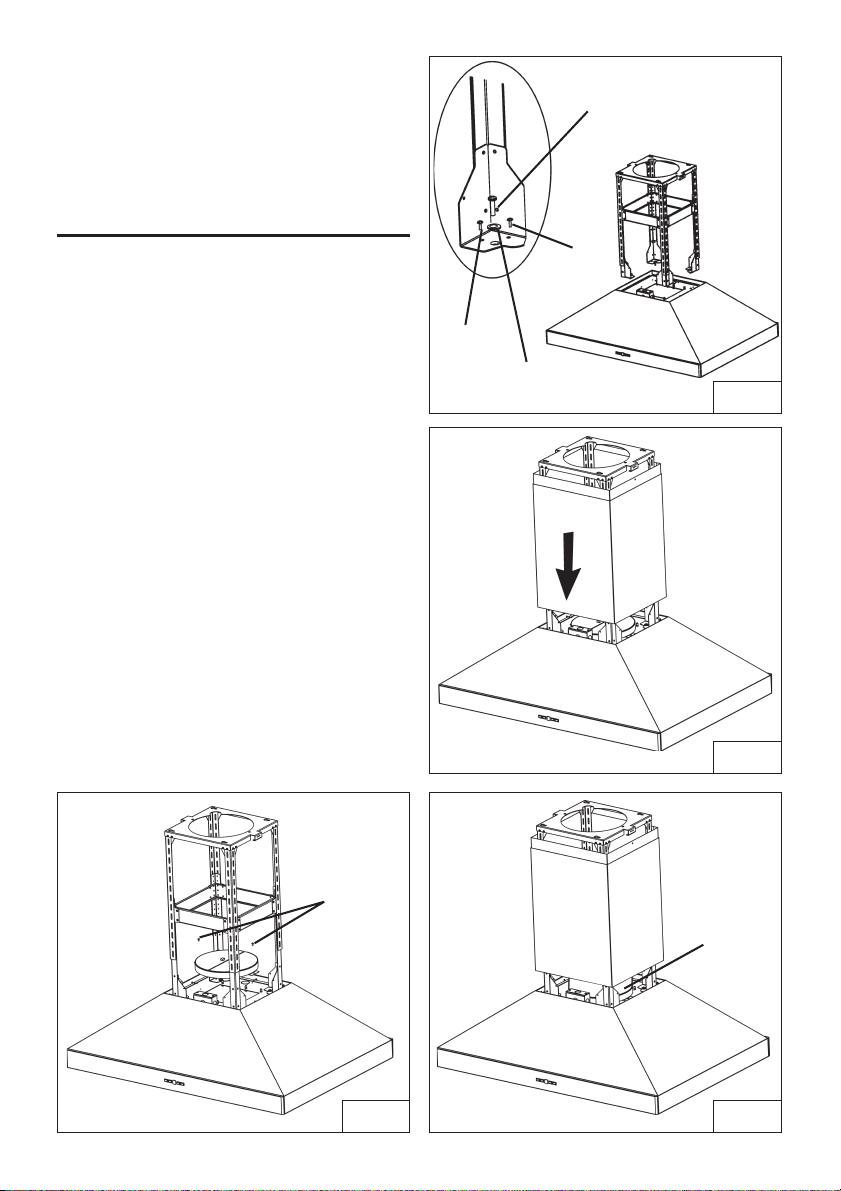
5. Adjust the overall height of the support
frame. Loosen and re-tighten the 4 screws
in the height adjustment slots as
necessary. Insert 8 screws (3.9x9.5mm), 4
screws (M5x20mm) and 4 washers
(D.5.2x15mm) located in the Hardware
Package (Fig. 8).
CONNECT DECORATIVE FLUE
DUCTED INSTALLATION ONLY
Note: Rooms with 10 or 11 foot ceilings
require flue extension model AEIPP9SB,
available from your local dealer. Discard
the upper flue supplied with the range
hood and replace it with the longer flue
extension.
1. Insert the upper flue and lower flue in the
support frame (Fig.9).
2. Mount the hood to the ceiling using the (4)
previously installed 6x70mm screws.
Tighten these screws. Install (2) additional
6x70mm screws as shown in the
illustration. Make sure all (6) screws are
secure.
3. Secure the hood to the ceiling and install
the (2) additional screws (6x70mm).
4. Fix the duct connector onto the hood using
2 screws (3.9x9.5mm) located in the
Hardware Package (Fig.10).
3. Use 10" round metal duct to connect the
duct collar on the hood to the ductwork
above (Fig.11).
4. Use duct tape to make all joints secure and
air tight.
WASHERS
Ø 5,2x15mm
MOUNTING
SCREWS
3,9x9,5mm
MOUNTING SCREWS M5x20mm
MOUNTING
SCREWS
3,9x9,5mm
FIG.8
FIG. 9
FIG.10
MOUNTING
SCREWS
3,9x9,5mm
FIG. 11
10” ROUND
METAL DUCT
Loading ...
Loading ...
Loading ...