Loading ...
Loading ...
Loading ...
13
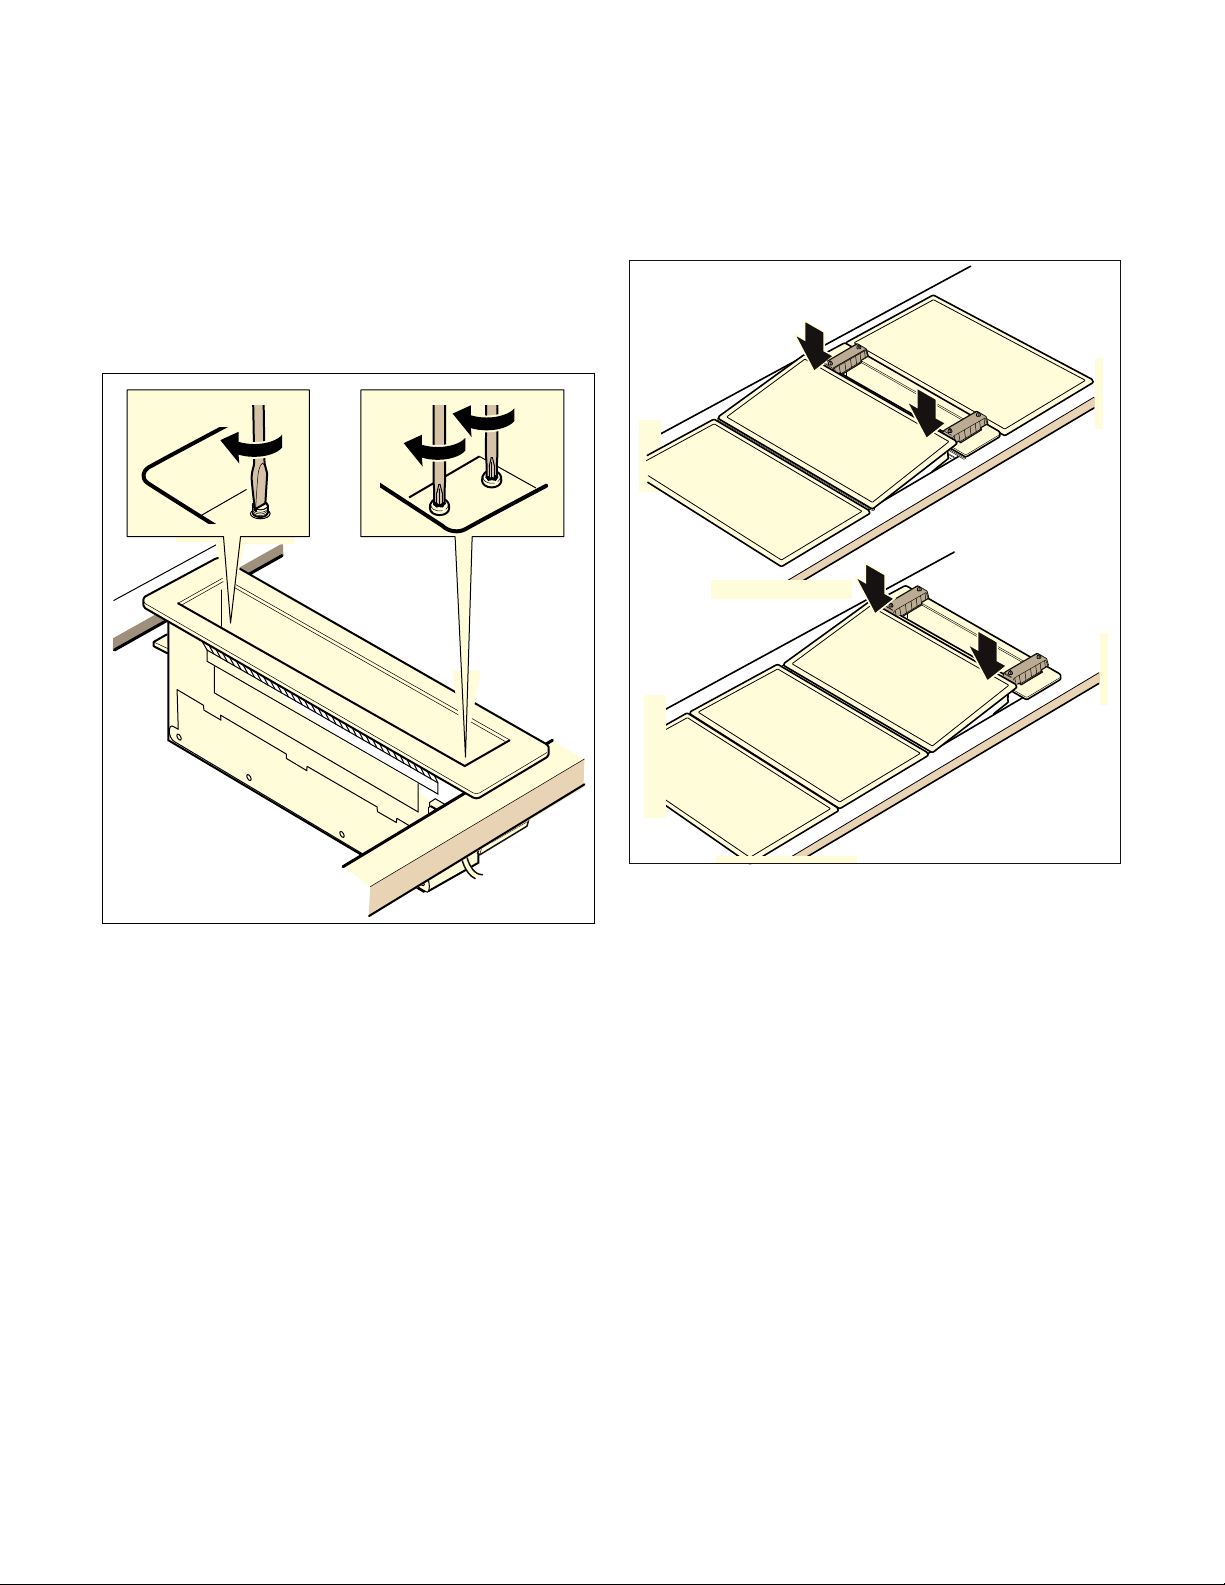
Horizontally insert the appliance in the recess
and align it. Tighten the cooktop clamp with the
screws in the interior of the appliance
.
Notes
‒ Do not tighten the cooktop clamp too tightly,
and pay attention to an even, all-round sealing
gap.
‒ The rear cooktop clamp swivels out on its own
when tightened.
‒ The appliance must not be adhered to the
worktop with silicone.
3 Use the installation aid
. Horizontally insert the
downdraft ventilation unit in the recess and align
it. Remove the sealing element. Insert the
installation aid at an angle into the ventilation
recess and align it vertically to the appliance.
Position the appliance at an angle in front of the
downdraft ventilation unit and press it into the
recess via the installation aid. Remove the
installation aid. Fasten the downdraft ventilation
unit as described above.
Notes
‒ You must use the included installation aid if
the downdraft ventilation unit is in a
combination with several Vario appliances in
the last or last but one position.
‒ The installation aid protects the appliance
edges from damage.
4 Fit the connection piece in the required position.
Notes
‒ Depending on the installation situation, the
exhaust air can be guided in three different
directions.
‒ Corresponding to the space conditions, the
connection piece can be turned by 180°.
‒ For details of exhaust air guidance, also refer
to the instructions for the remote fan unit.
Loading ...
Loading ...
Loading ...