Loading ...
Loading ...
1x
green
3x
red
Mastercode
For enhanced security, a
mastercode may be used
when adding and deleting user
codes. For more information
about the mastercode,
download the Programming
and Troubleshooting Guide
on the SmartCode 888
page at kwikset.com
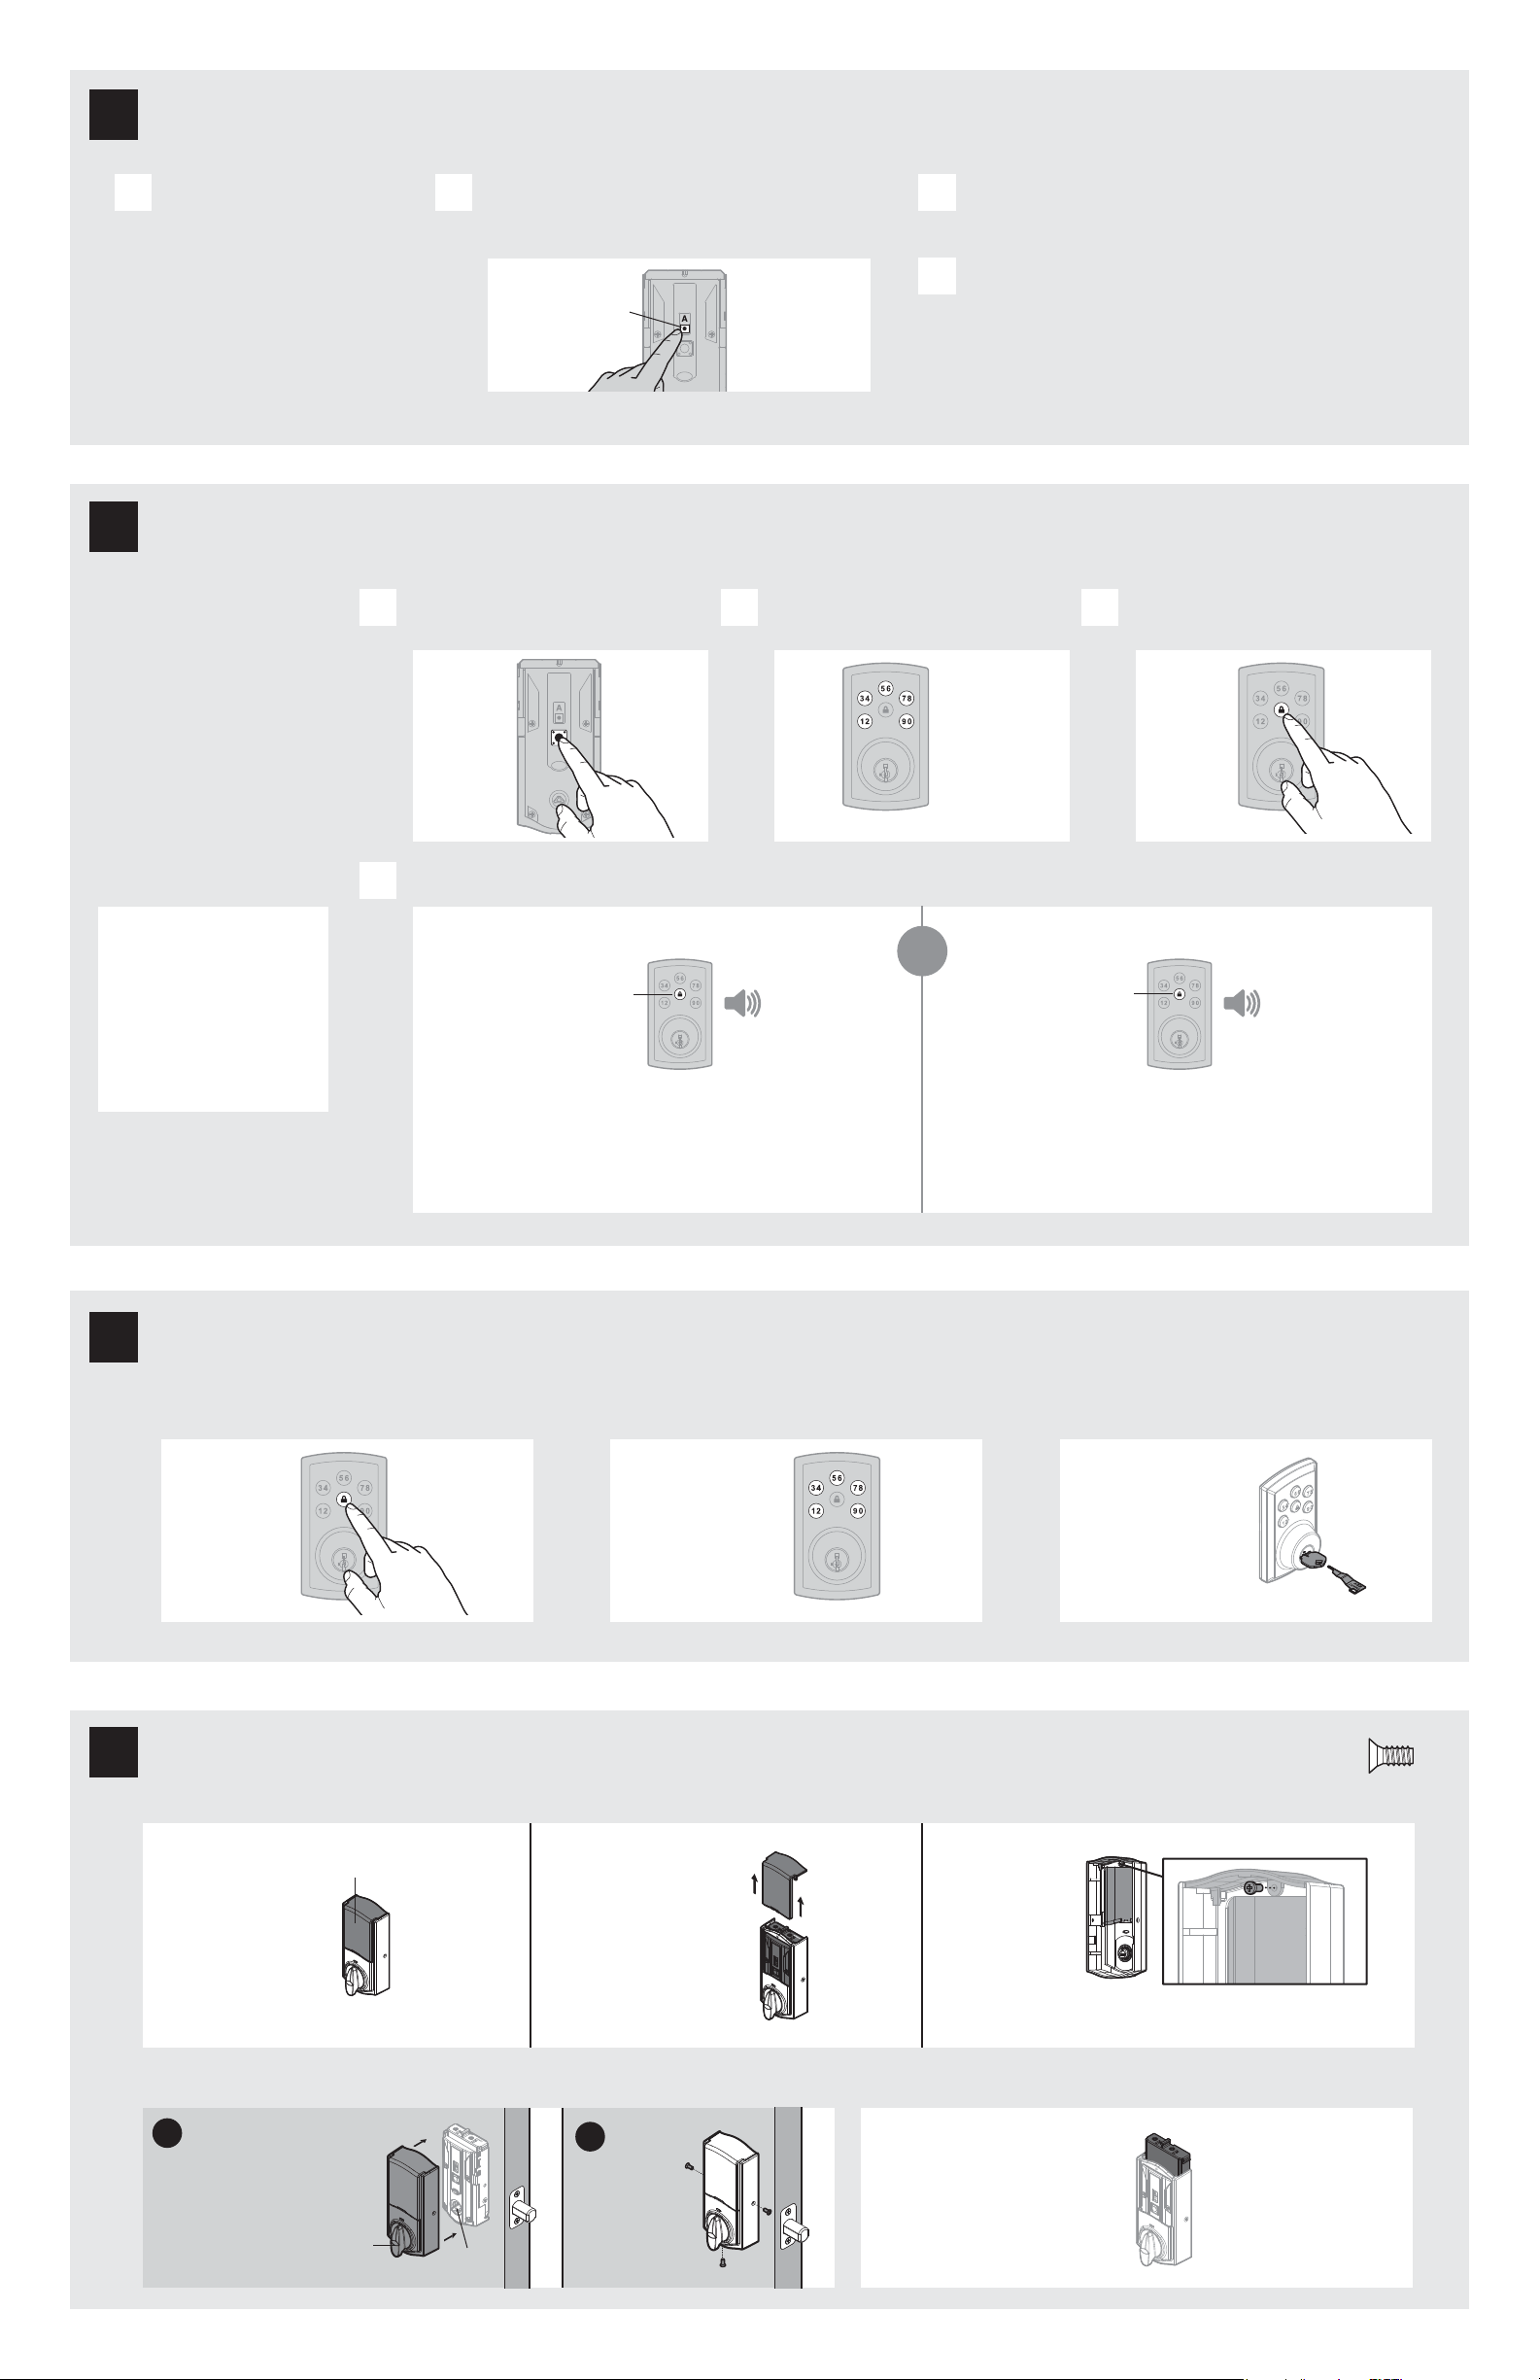
Add the lock to your smart home system
Initiate the process to add
the lock to your system at
your smart home controller.
Refer to your smart home
system instructions for
more information.
When prompted by your smart home system to add the
lock, press button “A” on the lock interior one time. The
red LED will illuminate when the lock enters Add Mode.
If successful, re-name the lock in your system (if applicable).
If unsuccessful, follow your system's instructions to remove
the lock from the controller and any other network, then press
button “A” on the lock one time.
Perform steps 6A6C again.
If still unsuccessful, consult the Programming
and Troubleshooting Guide on the
SmartCode 888 page at kwikset.com.
A B C
D
3 / 4
Conirm that the code(s) added in previous step can unlock the door.
Lock button lashes green once with one beep Lock button lashes three times with three beeps
or
Make sure the door is open. Press
the Program button once.
Locking the Door Unlocking the Door Re-Key with SmartKey
Enter user code. A total of 30 user
codes may be programmed.
Press Lock button once.
A B C
What lights and sounds does the lock produce?
D
Each user code
must be a unique
code between
4 and 8 digits,
depending on
your smart
home system.
Programming was successful. Programming was unsuccessful.
Make sure not to pause for more than 5 seconds during programming.
Make sure the user code is not a duplicate and that it is between 4 and 8 digits
during your next attempt. Make sure the lock has room for an additional code.
If all user code positions are illed, delete a code to make room for this one.
Press Lock
button once.
Enter user code.
It is recommended that you add and
delete all user codes through your smart
home control system. If your system
does not allow this, codes may be added
directly to the lock as shown here.
Programming Timeout
During programming, if no button is
pressed for ive seconds, the system will
time out (indicated by three beeps and
a red lashing lock button), and you will
need to restart the procedure.
actual
size
V
button “A”
Please allow time for the controller to add the lock.
H
Re-key the lock to work
with your existing key. See
the supplied SmartKey
Re-key instructions for
more information.
Note: If Auto-Lock is enabled
(see page 4), remove
the battery pack before
re-keying your lock.
V (3x)
M
M
M
If you wish
to unlock the
window, you can
slide it up for
more convenient
access to the
programming
buttons while the
cover is installed.
To unlock
the window,
remove the
security screw.
The window
on the interior
cover is locked
by default to
prevent someone
from tampering
with your lock's
settings.
Important Information about the interior cover
Cover Installation Battery Pack Access
Install cover.
Note: You may
need to rotate
the turnpiece to
align with the
turnpiece shaft.
turnpiece
turnpiece
shaft
Install
screws.
a
b
If the window is unlocked,
remove the window to
access the battery pack.
If the window is locked, remove
the interior cover and screws
to access the battery pack.
window
inside view of
interior cover
6
7
8
9
Add user codes (30 max)
Install the interior cover
Test the lock (review normal operation) and re-key the lock (if needed)
Loading ...