LED indicators
Buttons
Door openOverload
Overheat
Rev Fwd
Auto
SETTING UP YOUR SHREDDER
1 Push the wheel casters into the holes on the bottom of your shredder.
The wheels with the brake levers go into the front holes.
2 Place the wastebasket upright on a level surface.
3 Lock the wheel brakes (press the levers down with your foot) to keep
your shredder from moving.
Note: Your shredder must be at least 2 in. (5 cm) from any walls for ventilation
purposes.
4 Attach the shredder head to the basket. Make sure that it ts correctly.
5 Place the wastebasket securely in the shredder.
Note: Do not use plastic bags to line the wastebasket.
6 Connect the power cord to a power outlet. Do not use an extension
cord.
USING YOUR SHREDDER
1 Turn the shredder on by pressing the POWER switch on the back of the
unit to I.
2 Press the Auto button to turn on auto mode, the Auto button is blue
when activated.
3 Insert up to 10 sheets of paper or one credit card at a time into the
shredding slot. Your shredder automatically shreds what you insert.
Note: Don’t put envelopes, adhesive material, newsprint, transparencies,
laminated documents, continuous forms, cardboard, or hard plastic materials
(except credit cards) through the shredder. You can shred small staples and small
paper clips, if they are attached to the paper you are shredding.
4 If the shredder jams, press Rev to reverse the paper, then press the Auto
button. The shredder will operate normally again when the jam is
cleared.
5 When the wastebasket is 2/3 full, move the power button to O, unplug
the cord from the power outlet, then pull-out and empty the
wastebasket.
Note: For best performance, we recommend that you shred for 15 minutes, then
let your shredder cool for 20 minutes.
PACKAGE CONTENTS
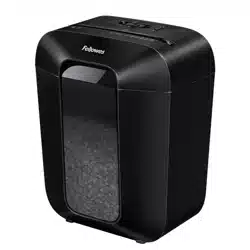
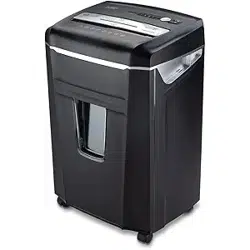
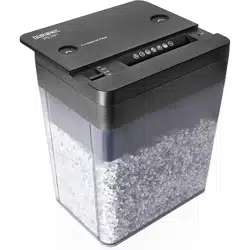
• Micro cut shredder with wastebasket
• Quick Setup Guide
FEATURES
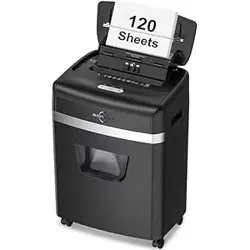
• Shreds up to 10 sheets of paper at one time
• Destroys credit cards, compact discs, small staples, and small paper clips
• Micro-cut size .16 × .5 in. (4 × 12 mm) protects sensitive data
• 5.3 gal (20 l) capacity wastebasket holds shredded waste and is easy to
empty
Before using your new product, please read these instructions to prevent any damage.
QUICK SETUP GUIDE
10-Sheet Micro
Cut Shredder
NS-S10MCBK2 / NS-S10MCBK2-C
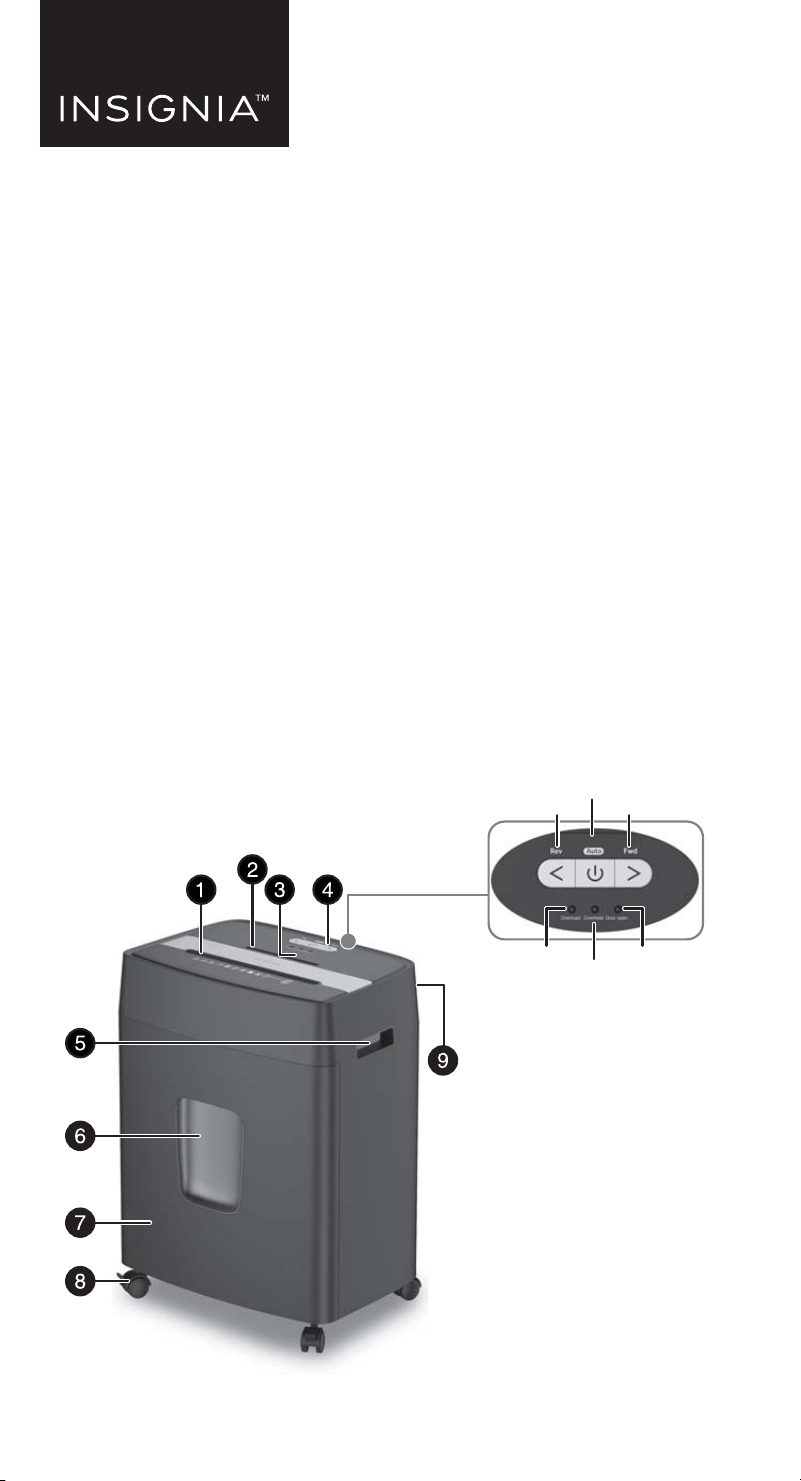
# ITEM
1 Shredding slot
2 Shredding slot (CD/DVD)
3 LED indicators
4 Button panel
5 Handles
6 Window
7 Wastebasket
8 Wheels
9 POWER switch
DESCRIPTION
Insert up to 10 sheets of paper or one credit card at a time.
Insert one credit card or one disc at a time.
Overload: Lights when trying to shred over the maximum 10
sheets or when the paper is folded. When overloaded, the cutter
turns o automatically.
Overheat: Lights when your shredder has overheated. When
overheated, the shredder stops shredding. After 20 minutes, the
indicator turns o and the shredder can shred again.
Door open: Lights when the shredder head is not on the
wastebasket or when the head is not in the correct position on the
wastebasket.
Rev: Press to reverse the shredder for ve seconds. Press and hold
to reverse the shredder until you release the button. Reverses the
paper in the slot to clear a jam or remove unshredded paper.
Auto: Automatically shreds an item when inserted into the
shredding slot. The POWER indicator lights blue. After shredding,
the shredding stops automatically.
The Auto indicator lights solid blue, then turns o when
shredding is complete.
Fwd: Press to shred for ve seconds. Press and hold to shred until
you release the button.
Note: When you press Fwd, the AUTO LED indicator will ash blue. Use
Fwd to make sure that the remaining paper in the slot gets shredded or
to clear the slot.
Let you easily lift up the shredder head to empty the paper inside
the wastebasket. Make sure that your shredder is turned o
before you move your shredder.
Lets you see how much shredded material is in the wastebasket.
Holds the paper, cards, and discs that you have shredded. Empty
the wastebasket when it is 2/3 full (to the top of the window).
Let you move your shredder to a new location. The brakes on the
front wheels prevent your shredder from moving.
Turns your shredder on and o. Located on the back of the
shredder.
Auto
Rev
LED indicators
Buttons
Door openOverload
Overheat
Rev Fwd
Auto
SETTING UP YOUR SHREDDER
1 Push the wheel casters into the holes on the bottom of your shredder.
The wheels with the brake levers go into the front holes.
2 Place the wastebasket upright on a level surface.
3 Lock the wheel brakes (press the levers down with your foot) to keep
your shredder from moving.
Note: Your shredder must be at least 2 in. (5 cm) from any walls for ventilation
purposes.
4 Attach the shredder head to the basket. Make sure that it ts correctly.
5 Place the wastebasket securely in the shredder.
Note: Do not use plastic bags to line the wastebasket.
6 Connect the power cord to a power outlet. Do not use an extension
cord.
USING YOUR SHREDDER
1 Turn the shredder on by pressing the POWER switch on the back of the
unit to I.
2 Press the Auto button to turn on auto mode, the Auto button is blue
when activated.
3 Insert up to 10 sheets of paper or one credit card at a time into the
shredding slot. Your shredder automatically shreds what you insert.
Note: Don’t put envelopes, adhesive material, newsprint, transparencies,
laminated documents, continuous forms, cardboard, or hard plastic materials
(except credit cards) through the shredder. You can shred small staples and small
paper clips, if they are attached to the paper you are shredding.
4 If the shredder jams, press Rev to reverse the paper, then press the Auto
button. The shredder will operate normally again when the jam is
cleared.
5 When the wastebasket is 2/3 full, move the power button to O, unplug
the cord from the power outlet, then pull-out and empty the
wastebasket.
Note: For best performance, we recommend that you shred for 15 minutes, then
let your shredder cool for 20 minutes.
PACKAGE CONTENTS
• Micro cut shredder with wastebasket
• Quick Setup Guide
FEATURES
• Shreds up to 10 sheets of paper at one time
• Destroys credit cards, compact discs, small staples, and small paper clips
• Micro-cut size .16 × .5 in. (4 × 12 mm) protects sensitive data
• 5.3 gal (20 l) capacity wastebasket holds shredded waste and is easy to
empty
Before using your new product, please read these instructions to prevent any damage.
QUICK SETUP GUIDE
10-Sheet Micro
Cut Shredder
NS-S10MCBK2 / NS-S10MCBK2-C
# ITEM
1 Shredding slot
2 Shredding slot (CD/DVD)
3 LED indicators
4 Button panel
5 Handles
6 Window
7 Wastebasket
8 Wheels
9 POWER switch
DESCRIPTION
Insert up to 10 sheets of paper or one credit card at a time.
Insert one credit card or one disc at a time.
Overload: Lights when trying to shred over the maximum 10
sheets or when the paper is folded. When overloaded, the cutter
turns o automatically.
Overheat: Lights when your shredder has overheated. When
overheated, the shredder stops shredding. After 20 minutes, the
indicator turns o and the shredder can shred again.
Door open: Lights when the shredder head is not on the
wastebasket or when the head is not in the correct position on the
wastebasket.
Rev: Press to reverse the shredder for ve seconds. Press and hold
to reverse the shredder until you release the button. Reverses the
paper in the slot to clear a jam or remove unshredded paper.
Auto: Automatically shreds an item when inserted into the
shredding slot. The POWER indicator lights blue. After shredding,
the shredding stops automatically.
The Auto indicator lights solid blue, then turns o when
shredding is complete.
Fwd: Press to shred for ve seconds. Press and hold to shred until
you release the button.
Note: When you press Fwd, the AUTO LED indicator will ash blue. Use
Fwd to make sure that the remaining paper in the slot gets shredded or
to clear the slot.
Let you easily lift up the shredder head to empty the paper inside
the wastebasket. Make sure that your shredder is turned o
before you move your shredder.
Lets you see how much shredded material is in the wastebasket.
Holds the paper, cards, and discs that you have shredded. Empty
the wastebasket when it is 2/3 full (to the top of the window).
Let you move your shredder to a new location. The brakes on the
front wheels prevent your shredder from moving.
Turns your shredder on and o. Located on the back of the
shredder.
Auto
Rev

TROUBLESHOOTING
My shredder isn’t working.
• Make sure that the power cord is plugged into a working power outlet. If the power
cord is damaged, replace it.
• Make sure that the shredder head and wastebasket are positioned correctly.
• If the Overheat indicator is on, let your shredder cool at least 20 minutes. When the
indicator turns o, you can use your shredder again.
• Change the position of the paper as you insert it.
• The paper may be too thin or crumpled for your shredder to recognize it. Fold the
paper, then reinsert it.
• Press Fwd.
• Make sure that you only send 10 sheets of paper, one credit card, or one disc
through your shredder at a time.
My shredder is jammed.
• Press Rev, remove the paper from the cutter, then press Auto and try again.
The cutter won’t stop.
• Turn your shredder o and unplug it, then push the shredded paper down to make
sure that it is away from the shredder head.
• Press Rev to remove the paper, disc, or credit card from your shredder.
My shredder is too noisy.
• Make sure that your shredder is on a at, level surface.
• Make sure that the shredder head and wastebasket are positioned correctly.
The Overheat indicator is lit.
• Let your shredder cool at least 20 minutes. When the indicator turns o, you can use
your shredder again.
The Overload indicator is lit.
• Make sure that you haven’t put too much paper into your shredder at one time.
Press Rev, remove the paper from the cutter, then try again with less paper.
SPECIFICATIONS
• Dimensions (H×W×D): 19.4 × 14.4 × 10.3 in.
(49.4 × 36.7 × 26.3 cm)
• Cutting style: Micro cut
• Entry width: 8.6 in. (22 cm)
• Shred capacity: 10 sheets (75 g/m2 A4 paper)
1 disc or credit card
• Shred size: .16 × .5 in. (4 × 12 mm)
• Shred media: Paper, staples, credit cards, and discs
• Shred speed: 1.8 m/min.
• Duty cycle: 15 minutes ON / 20 minutes OFF
• Net weight: 18.5 lbs. (8.4 kg)
• Basket capacity: 5.3 gal (20 l)
• Rated input: 120 V~, 60 Hz / 2.5 A
• Security level: P-4
• Noise level(db) @ Non-loading at 1 M distance: 65 dB
LEGAL NOTICES
FCC statement:
This device complies with part 15 of the FCC Rules. Operation is subject to the following two conditions:
(1) This device may not cause harmful interference, and (2) this device must accept any interference
received, including interference that may cause undesired operation.
Changes or modications not expressly approved by the party responsible for compliance could void the
user’s authority to operate the equipment.
Note: This equipment has been tested and found to comply with the limits for a Class B digital device,
pursuant to part 15 of the FCC Rules. These limits are designed to provide reasonable protection against
harmful interference in a residential installation. This equipment generates, uses, and can radiate radio
frequency energy and, if not installed and used in accordance with the instructions, may cause harmful
interference to radio communications. However, there is no guarantee that interference will not occur in a
particular installation. If this equipment does cause harmful interference to radio or television reception,
which can be determined by turning the equipment o and on, the user is encouraged to try to correct
the interference by one or more of the following measures:
• Reorient or relocate the receiving antenna.
• Increase the separation between the equipment and receiver.
• Connect the equipment into an outlet on a circuit dierent from that to which the
receiver is connected.
• Consult the dealer or an experienced radio/TV technician for help.
CAN ICES-003(B)/NMB-003(B)
ONE-YEAR LIMITED WARRANTY
Visit www.insigniaproducts.com for details.
CONTACT INSIGNIA:
For customer service, call 1-877-467-4289 (U.S. and Canada) or
01-800-926-3000 (Mexico)
www.insigniaproducts.com
INSIGNIA is a trademark of Best Buy and its aliated companies.
Distributed by Best Buy Purchasing, LLC
7601 Penn Ave South, Richeld, MN 55423 U.S.A.
©2021 Best Buy. All rights reserved.
V2 ENGLISH 21-0462
IMPORTANT SAFETY INFORMATION
Please read thoroughly
Before using the shredder, please read the guide and become familiar with the safety information, operating
instructions, and maintenance requirements. Follow all warnings and instructions in the guide and as marked on the
shredder. Do not attempt to service this unit by yourself. Doing so will void the manufacturer’s warranty and may
expose you to sharp cutting blades and/or high voltage electric shock that could cause serious injury. Any repairs must
be performed by qualied service personnel.
11. Keep in the OFF position when the shredder is not in use for prolonged periods of time.
12. Empty wastebasket frequently.
13. The document shredder must always be deactivated and disconnected from the electrical line prior to moving,
transporting, and cleaning the device and prior to emptying the wastebasket.
14. The device may not be operated with a damaged power cord.
15. For indoor use only.
16. To protect the machine, we suggest the user to operate it in this way: work 15 minutes then rest 20 minutes.
17. The machine allows a maximum shred 10 sheets paper (75 gsm) or 1 credit card or 1 CD at one time.
18. The socket-outlet must be installed near the equipment and must be easily accessible during use.
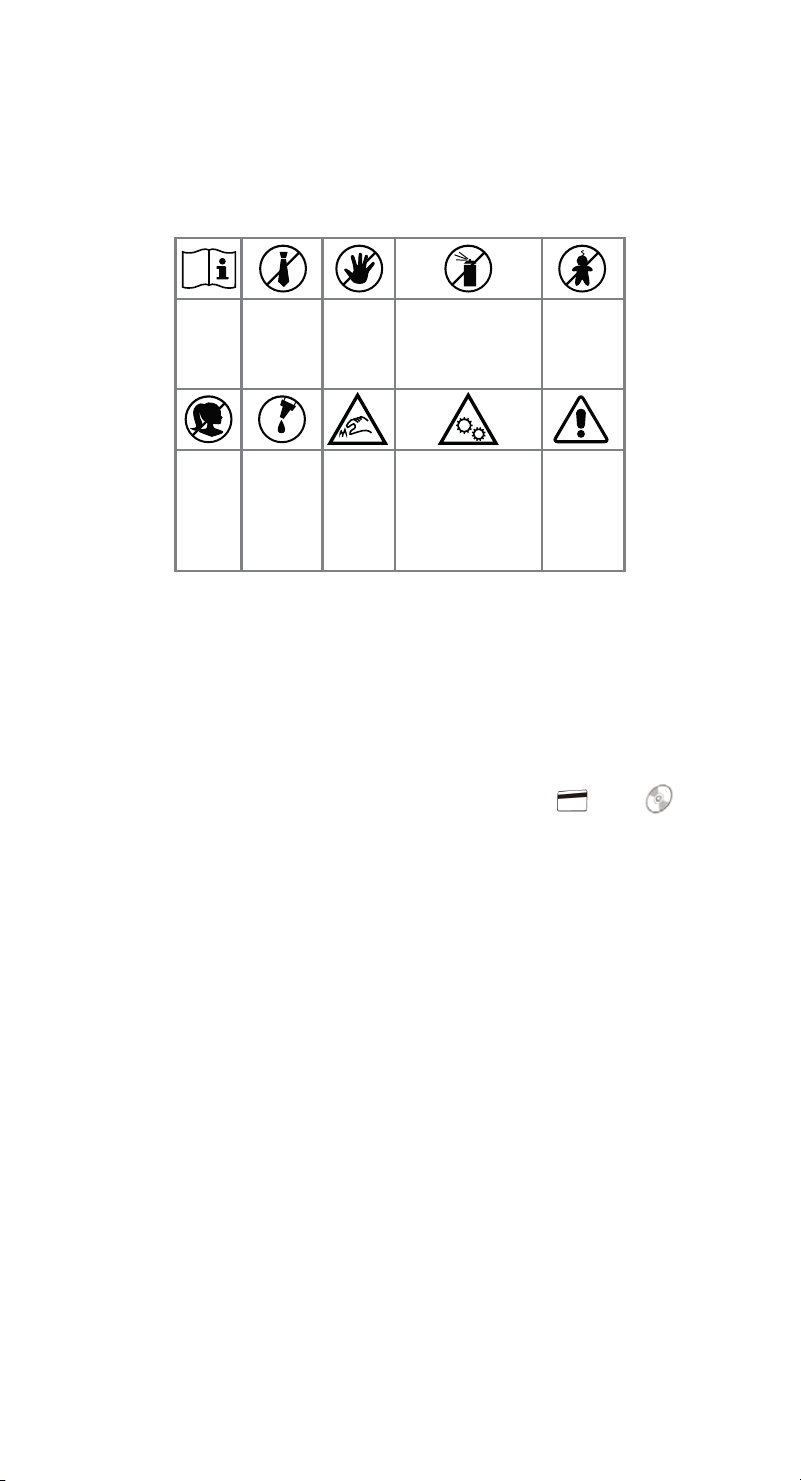
1. Read
instructions
before use
3. Avoid
touching the
document feed
opening with
hands
5. Product is not
intended for use
by children
(product is not a
toy)
4. Do not spray or keep any
aerosol products in or around
shredder
2. Avoid loose
clothing or
jewelry touching
the document
feed opening
7. Shredder
oil only
6. Avoid
getting hair
near the
document
feed opening
8. Sharp edges,
do not touch
9. This equipment is not
intended for use by children.
Avoid touching the media feed
opening with the hands,
clothing or hair. Unplug this
equipment when not in use of
an extended period of time.
10. Warning!
Before switching
the machine on,
make sure that
you observe all
safety
instructions
TROUBLESHOOTING
My shredder isn’t working.
• Make sure that the power cord is plugged into a working power outlet. If the power
cord is damaged, replace it.
• Make sure that the shredder head and wastebasket are positioned correctly.
• If the Overheat indicator is on, let your shredder cool at least 20 minutes. When the
indicator turns o, you can use your shredder again.
• Change the position of the paper as you insert it.
• The paper may be too thin or crumpled for your shredder to recognize it. Fold the
paper, then reinsert it.
• Press Fwd.
• Make sure that you only send 10 sheets of paper, one credit card, or one disc
through your shredder at a time.
My shredder is jammed.
• Press Rev, remove the paper from the cutter, then press Auto and try again.
The cutter won’t stop.
• Turn your shredder o and unplug it, then push the shredded paper down to make
sure that it is away from the shredder head.
• Press Rev to remove the paper, disc, or credit card from your shredder.
My shredder is too noisy.
• Make sure that your shredder is on a at, level surface.
• Make sure that the shredder head and wastebasket are positioned correctly.
The Overheat indicator is lit.
• Let your shredder cool at least 20 minutes. When the indicator turns o, you can use
your shredder again.
The Overload indicator is lit.
• Make sure that you haven’t put too much paper into your shredder at one time.
Press Rev, remove the paper from the cutter, then try again with less paper.
SPECIFICATIONS
• Dimensions (H×W×D): 19.4 × 14.4 × 10.3 in.
(49.4 × 36.7 × 26.3 cm)
• Cutting style: Micro cut
• Entry width: 8.6 in. (22 cm)
• Shred capacity: 10 sheets (75 g/m2 A4 paper)
1 disc or credit card
• Shred size: .16 × .5 in. (4 × 12 mm)
• Shred media: Paper, staples, credit cards, and discs
• Shred speed: 1.8 m/min.
• Duty cycle: 15 minutes ON / 20 minutes OFF
• Net weight: 18.5 lbs. (8.4 kg)
• Basket capacity: 5.3 gal (20 l)
• Rated input: 120 V~, 60 Hz / 2.5 A
• Security level: P-4
• Noise level(db) @ Non-loading at 1 M distance: 65 dB
LEGAL NOTICES
FCC statement:
This device complies with part 15 of the FCC Rules. Operation is subject to the following two conditions:
(1) This device may not cause harmful interference, and (2) this device must accept any interference
received, including interference that may cause undesired operation.
Changes or modications not expressly approved by the party responsible for compliance could void the
user’s authority to operate the equipment.
Note: This equipment has been tested and found to comply with the limits for a Class B digital device,
pursuant to part 15 of the FCC Rules. These limits are designed to provide reasonable protection against
harmful interference in a residential installation. This equipment generates, uses, and can radiate radio
frequency energy and, if not installed and used in accordance with the instructions, may cause harmful
interference to radio communications. However, there is no guarantee that interference will not occur in a
particular installation. If this equipment does cause harmful interference to radio or television reception,
which can be determined by turning the equipment o and on, the user is encouraged to try to correct
the interference by one or more of the following measures:
• Reorient or relocate the receiving antenna.
• Increase the separation between the equipment and receiver.
• Connect the equipment into an outlet on a circuit dierent from that to which the
receiver is connected.
• Consult the dealer or an experienced radio/TV technician for help.
CAN ICES-003(B)/NMB-003(B)
ONE-YEAR LIMITED WARRANTY
Visit www.insigniaproducts.com for details.
CONTACT INSIGNIA:
For customer service, call 1-877-467-4289 (U.S. and Canada) or
01-800-926-3000 (Mexico)
www.insigniaproducts.com
INSIGNIA is a trademark of Best Buy and its aliated companies.
Distributed by Best Buy Purchasing, LLC
7601 Penn Ave South, Richeld, MN 55423 U.S.A.
©2021 Best Buy. All rights reserved.
V2 ENGLISH 21-0462
IMPORTANT SAFETY INFORMATION
Please read thoroughly
Before using the shredder, please read the guide and become familiar with the safety information, operating
instructions, and maintenance requirements. Follow all warnings and instructions in the guide and as marked on the
shredder. Do not attempt to service this unit by yourself. Doing so will void the manufacturer’s warranty and may
expose you to sharp cutting blades and/or high voltage electric shock that could cause serious injury. Any repairs must
be performed by qualied service personnel.
11. Keep in the OFF position when the shredder is not in use for prolonged periods of time.
12. Empty wastebasket frequently.
13. The document shredder must always be deactivated and disconnected from the electrical line prior to moving,
transporting, and cleaning the device and prior to emptying the wastebasket.
14. The device may not be operated with a damaged power cord.
15. For indoor use only.
16. To protect the machine, we suggest the user to operate it in this way: work 15 minutes then rest 20 minutes.
17. The machine allows a maximum shred 10 sheets paper (75 gsm) or 1 credit card or 1 CD at one time.
18. The socket-outlet must be installed near the equipment and must be easily accessible during use.
1. Read
instructions
before use
3. Avoid
touching the
document feed
opening with
hands
5. Product is not
intended for use
by children
(product is not a
toy)
4. Do not spray or keep any
aerosol products in or around
shredder
2. Avoid loose
clothing or
jewelry touching
the document
feed opening
7. Shredder
oil only
6. Avoid
getting hair
near the
document
feed opening
8. Sharp edges,
do not touch
9. This equipment is not
intended for use by children.
Avoid touching the media feed
opening with the hands,
clothing or hair. Unplug this
equipment when not in use of
an extended period of time.
10. Warning!
Before switching
the machine on,
make sure that
you observe all
safety
instructions