Loading ...
Loading ...
Loading ...
34
ENGLISH
14
14
Fig. D
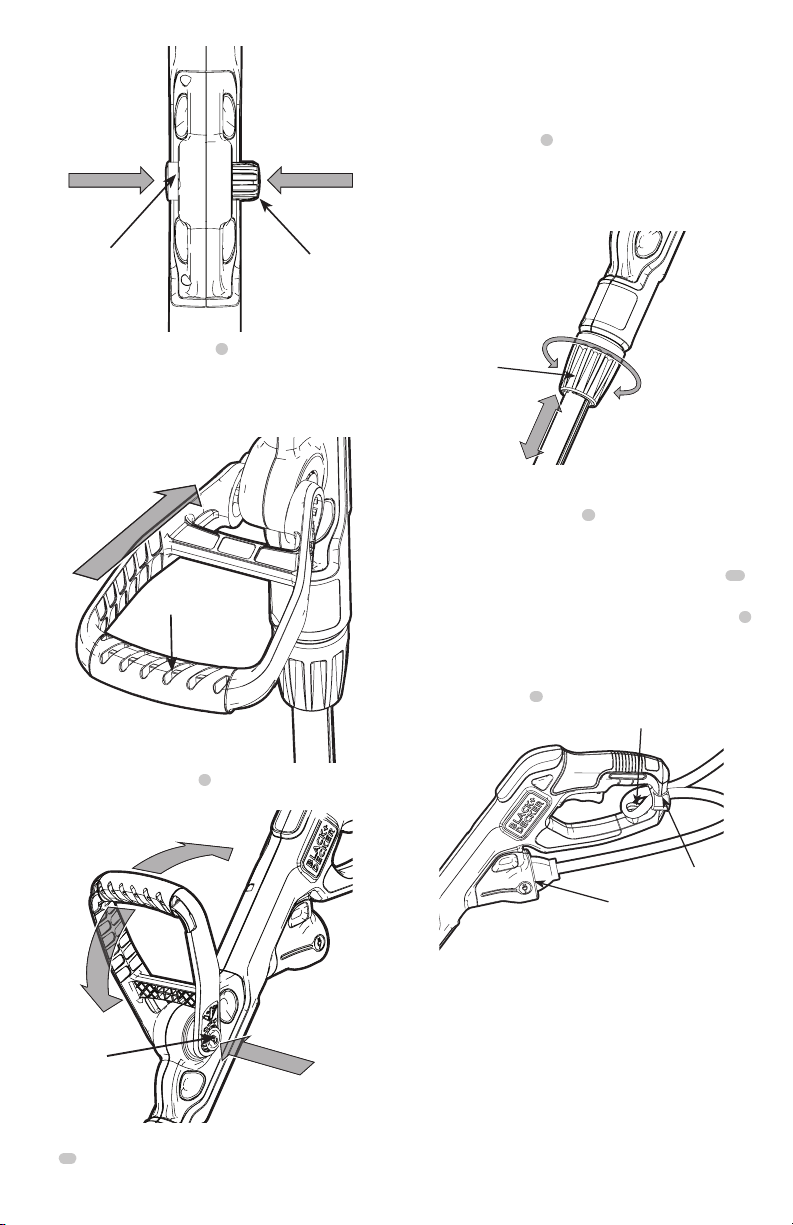
2. Position the auxiliary handle
4
as shown in Fig. E,
matching up the grooved side of the handle with the
grooved button. Partially push the handle on so that it
will hold the buttons in when you release them with
your hand.
4
Fig. E
3. Push the auxiliary handle
4
completely onto the housing
and position it slightly until it “snaps” into place (Fig. F).
14
Fig. F
4. To adjust the handle up or down, press in on the button
14
and raise or lower the handle.
5. The handle should be adjusted so that your front arm is
straight when the trimmer is in the working position.
Height Adjustment (Fig. G)
1. The overall height of the trimmer can be adjusted by
loosening the collar
5
and rotating it in the direction of the
arrow shown in Fig. G.
2. Move the upper housing straight up or down. When the
desired height is achieved, tighten the collar by rotating
it opposite of the direction shown in Fig. G.
5
Fig. G
Attaching Extension Cord (Fig. H)
1. An extension cord retaine
2
is built into the switch
handle that prevents the cord from coming unplugged.
2. To use this feature, simply double the extension cord about
8 in. (203 mm) from the end, and insert it into the slot
15
in the end of the handle area as shown in Fig. H.
3. Hook the loop formed by doubling the cord over the tab
2
.
Gently tug on the cord to insure that it is firmly retained
in the trimmer’s handle.
4. Plug the receptacle end of the extension cord into the
power cord plug
3
in the trimmer.
3
15
2
Fig. H
Releasing the Cutting Line
In transit, the cutting line is taped to the spool housing.
WARNING: Before assembly, disconnect from the
power supply.
1. Remove the tape holding the cutting line to the spool
housing.
2. See "Replacing the Spool" for instructions for removing
the spool.
Loading ...
Loading ...
Loading ...