
Loading ...
Loading ...
Loading ...
5
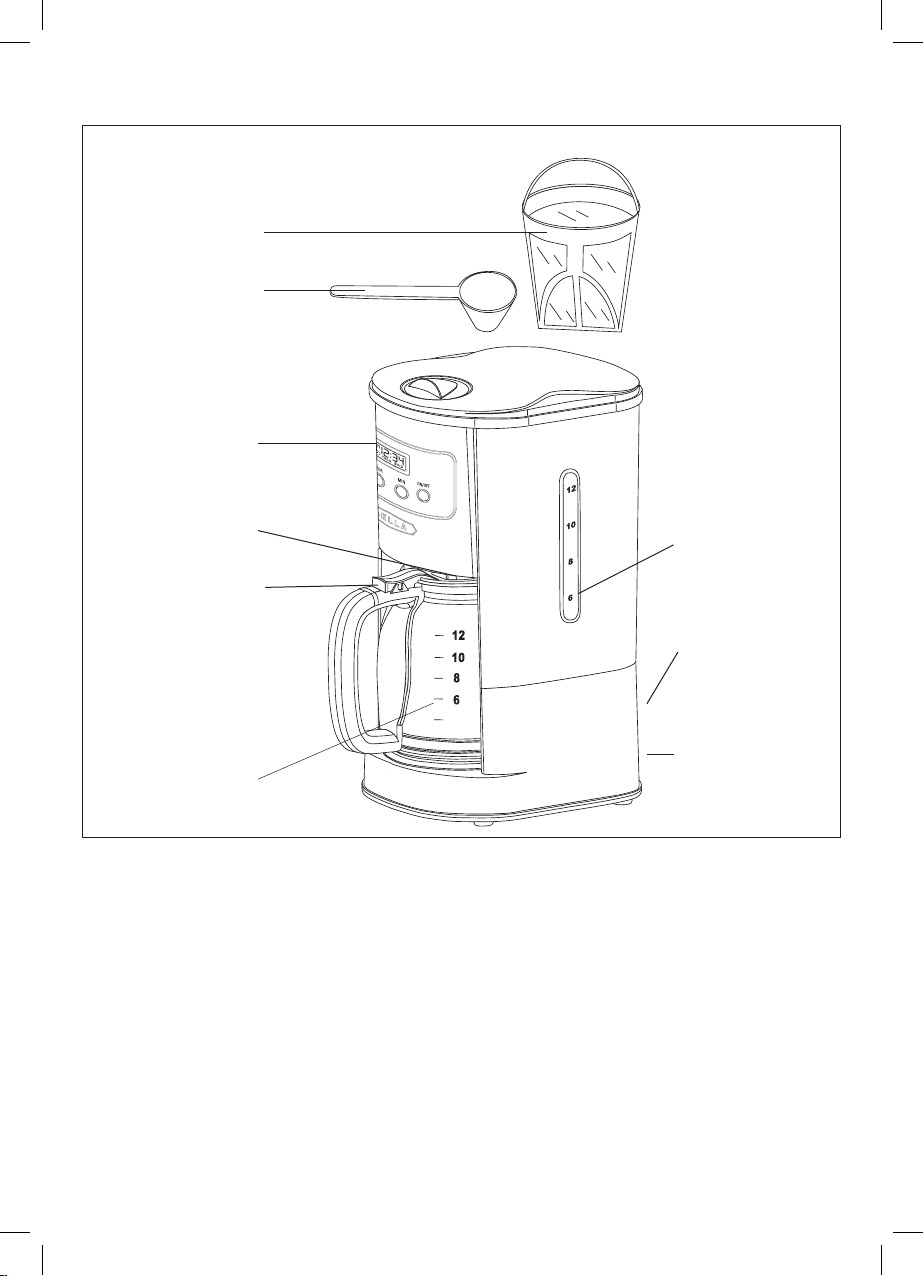
Getting To Know Your Coffee Maker
Product may vary slightly from illustration
4
Polarized Plug
(not shown)
Figure 1
Permanent
Filter
Scoop
Control Panel
Detachable
Carafe Lid
Carafe
Pause &
Serve Valve
(not shown)
Cord Storage
(not shown)
Water Gauge
Before Using for the First Time
CAUTION: To protect against electrical shock, do not immerse the Coffee Maker or allow power cord to come
intocontact with water or other liquids.
1. Remove all packing material and labels from the inside and outside of the Coffee Maker.
Place the unit on a at, clean surface.
2. Before preparing coffee, thoroughly clean the glass carafe with lid, removable lter holder and permanent
coffee lter in hot, sudsy water. Rinse and dry. Replace disassembled parts.
3. Clean the inside of the Coffee Maker by brewing 2 full carafes of tap water (see BREWING COFFEE
sectionfor instructions). Do not add the permanent coffee lter or ground coffee for this initial cleaning.
NOTE: At the end of the rst cycle, allow 15 minutes for the unit to cool.
4. Brew a second carafe of fresh water.
5. Wait an additional 15 minutes to allow the unit to cool before brewing your rst carafe of coffee.
Note: keep illustration
callouts aligned
SO-312565_14438_BELLA_12 cup CM Progra._Shopko_iM_R5.indd 5 2015-07-14 8:29 AM
Loading ...
Loading ...
Loading ...