
Loading ...
Loading ...
Loading ...
10
ASSEMBLY INSTRUCTIONS
(CONT’D)
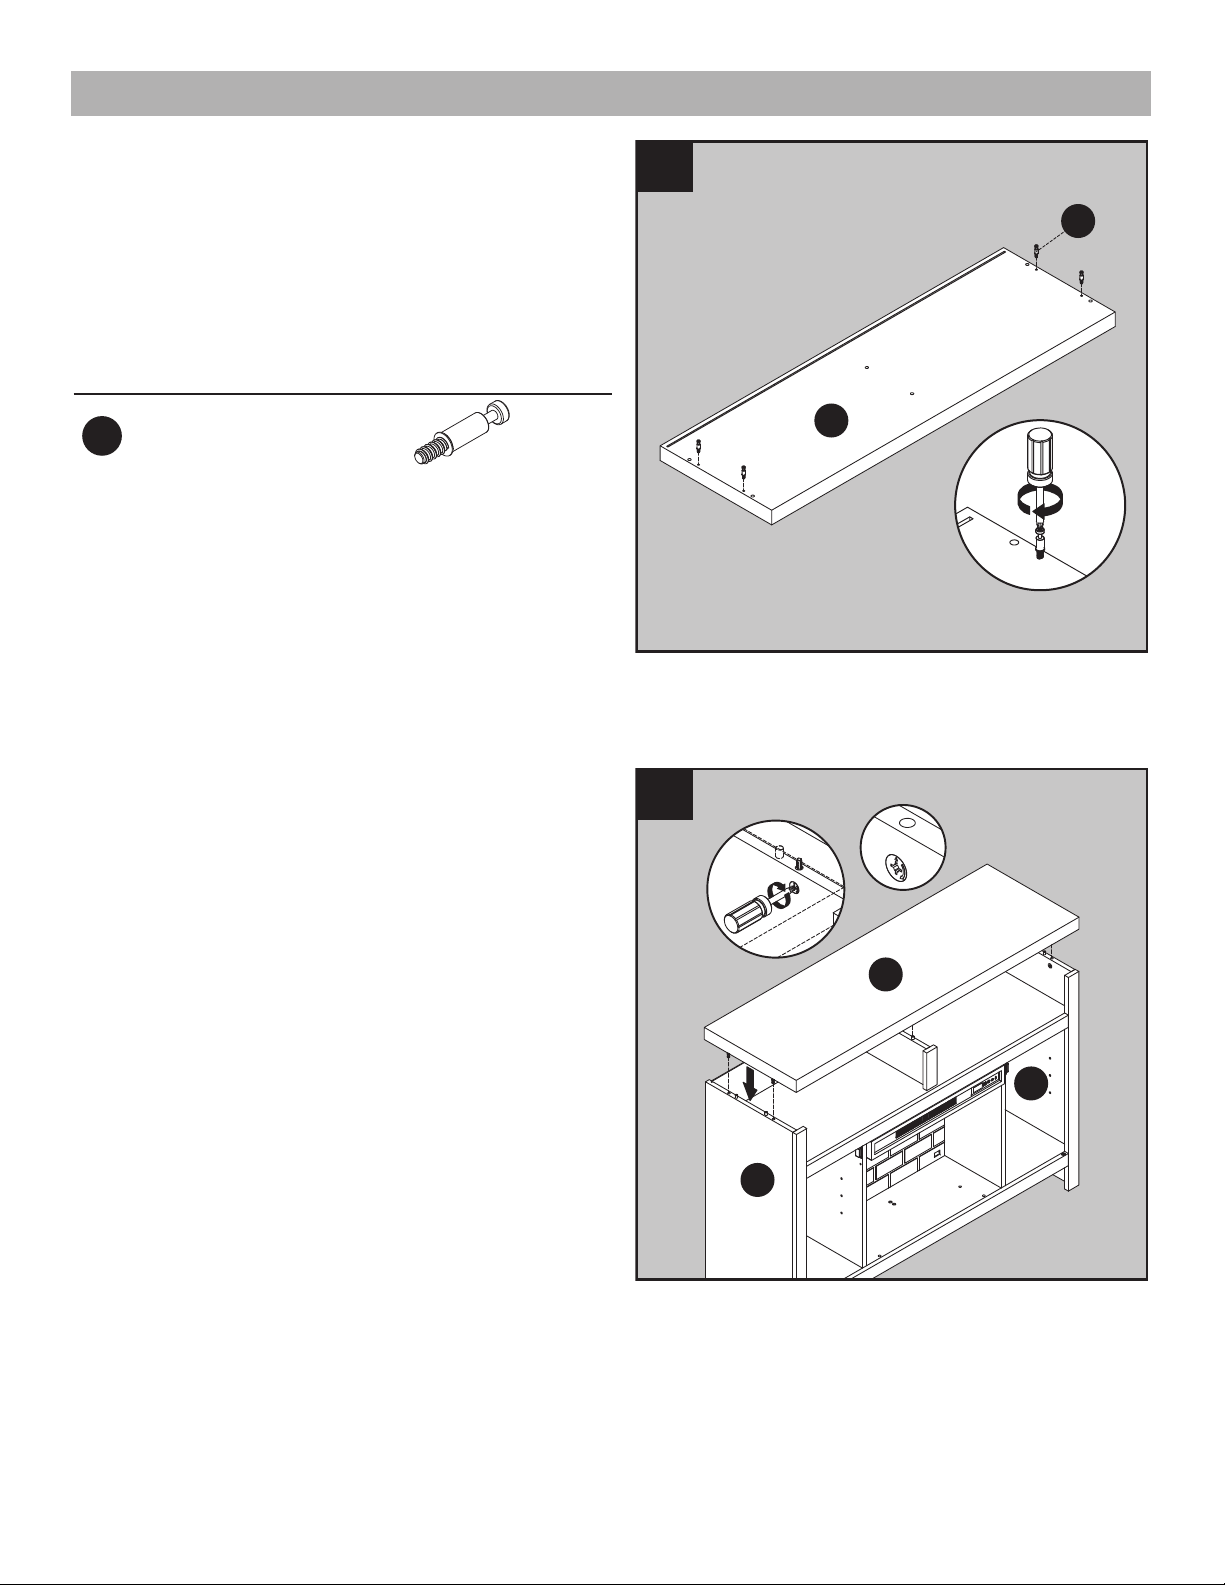
7. Screw four connecting rods (BB) into the holes
on the back of the top (A).
Hardware Used
BB
Connecting Rod
x 4
7
A
BB
8. Place the top (A) into the holes of the walls
(D,E).
Secure the top (A) by turning the locknut
clockwise.
A
D
E
8
Loading ...
Loading ...
Loading ...