Loading ...
Loading ...
Loading ...
9
liquids. The housing may be cleaned with a
soapy, damp, non-abrasive cloth.
Cleaning the Drip Tray
To remove the drip tray, simply slide it toward
you, keeping it level at all times in order to
prevent spills. The drip tray and drip tray plate
are top-shelf dishwasher safe. It may also be
cleaned with a soapy, damp, non-abrasive
cloth. Do not clean drip tray with cleansers,
steel wool pads or other abrasive materials.
Cleaning the Water Reservoir
Water reservoir is top-shelf dishwasher safe.
It is normal over time for discoloration, spotting
or staining to appear in the water reservoir. This
will vary depending on the mineral content of
the bottled or filtered water used, but will not
affect the operation of the machine. However,
be sure to clean the water reservoir regularly to
minimize buildup.
Cleaning the Milk Tank
Remove the milk tank by holding the tank
and cover and pulling them away from the
machine. Remove the cover and any excess
milk, then pour water into the tank. Replace the
cover, align the milk tank to the connector on
the side of the machine, and push to install.
Place a cup on the drip tray and position the
steam/frothing wand in the cup. Adjust the
length of the stainless steel sleeve on the wand
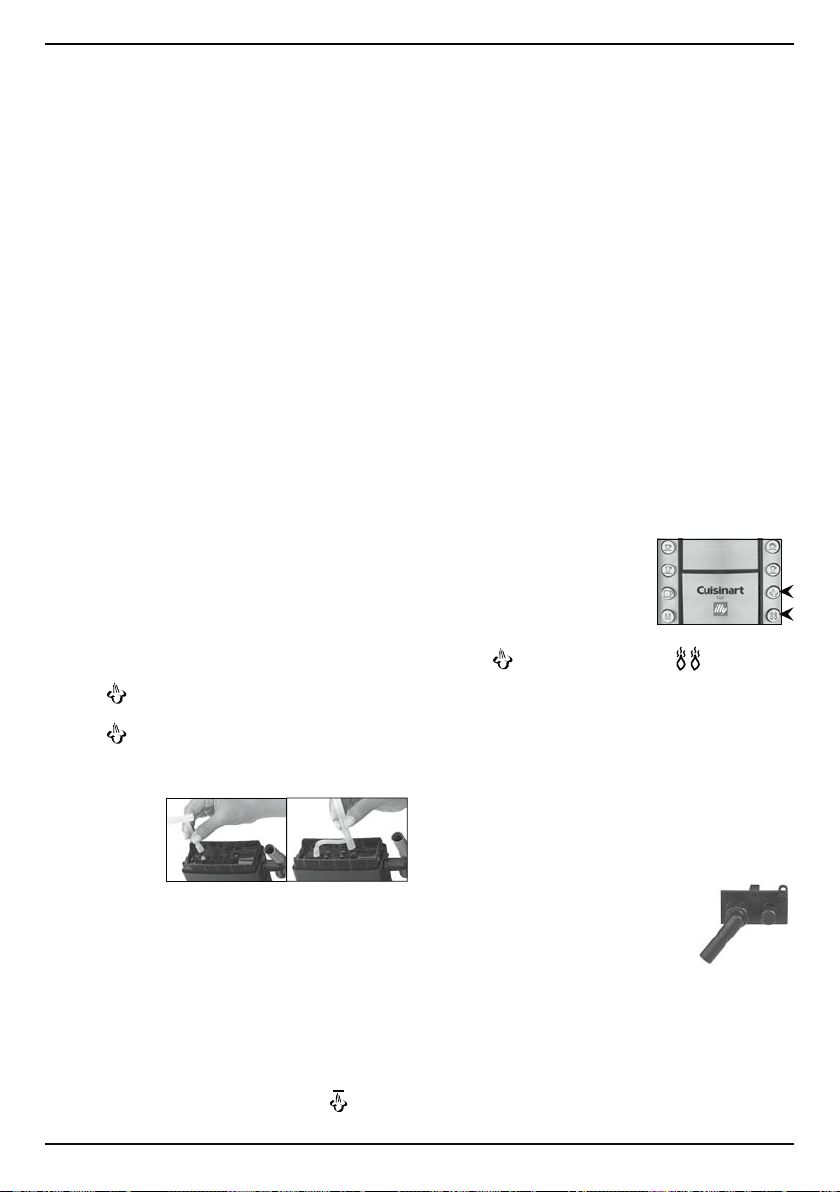
so it is the proper length for your cup. Press the
STEAM
button to start steaming water
through the tank and wand to clean. Press the
STEAM
button again to stop steaming
before your cup is full.
Follow by disassembling all of the removable
parts, and
wash by hand
or place in the
dishwasher.
Run water
through all the internal channels for thorough
cleaning. To remove the steam/frothing wand,
position it pointing straight down, then rotate
counterclockwise and pull straight out. To
replace, position steam/frothing wand pointing
up and rotate clockwise. To remove milk tube,
gently pull away from cover. To replace, fasten
short part of tube to clear stem and fasten long
part of tube to
black stem. To remove the steam control dial,
turn the dial left to the lowest setting (
) and
pull the knob straight out. To replace, position
the dial at the lowest setting and push in.
Note: For optimal cleaning we recommend that
you periodically disassemble all removable
parts, place them in warm soapy water and
soak for at least 15 minutes. Rinse well, dry and
assemble the parts as per above instructions.
Decalcification
Mineral content in water varies from place to
place. Depending on the mineral content of
the water in your area, calcium deposits or
scale may build up in your machine.
Though scale is non-toxic, it can hinder
performance. Descaling the machine will
help maintain the heating element and other
parts that come into contact with water.
For
optimal performance, descale your machine
every 3 to 6 months. It is possible with heavy
use and/or hard water for calcium to build up
faster, making it necessary to de-scale more
often. Some indications that it is time to
decalcify may be longer brewing times,
excessive steaming, lower coffee temperatures
and brews less than a full cup. If you
experience any of these,
decalcify immediately. If
you do not experience any
of the above, the unit will
notify you when it is time to
decalcify by flashing the
STEAM
and TEMPERATURE
LEDs
quickly for 10 seconds after preheat/ready
mode. This will happen every time you turn on
the unit or wake up the unit from sleep mode
until you decalcify. Note: The unit can still be
used until you decalcify.
To begin, you will need the following:
6 ounces distilled white vinegar
6 ounces water
2 large (12 ounces) ceramic mugs or
containers (do not use paper cups)
Step 1: Vinegar Rinse
r 'JMMXBUFSSFTFSWPJSXJUI
ounces of water and 6 ounces
of white vinegar and replace.
r 3FNPWFNJMLUBOLBOESFQMBDFXJUIDMFBOJOH
tool. DO NOT DECALCIFY WITH MILK
TANK IN PLACE.
r 1MBDFPOFDFSBNJDNVHPSDPOUBJOFSCFMPX
the cleaning tool and one on the drip tray.
r -JGUCSFXIFBEMFWFSUPNBLFTVSFUIFSFJT
no capsule inside.
Loading ...
Loading ...
Loading ...