Loading ...
Loading ...
Loading ...

14
Maintenance
Brush Cleaning And Maintenance
After each session of carpet cleaning, the brushes and
the brush housing should be cleaned. Before cleaning
or changing the brushes, always unplug the machine
from the power supply.
Brushes are removed without tools. After handle is in
locked position, tilt the machine back and rest on
handle. To release brush from spring clip pull spring clip
away from brush end cap. Lift brush out of machine.
The brushes may be soaked in warm or hot water using
mild detergent, and then rinsed with warm water.
Brushes with crushed bristles can often be restored to
original condition by soaking in hot water.
Keep brushes clean and free from debris. Rotate
brushes after every use as this will increase the life
span of the brushes and ensure even wear.
Before reinstalling brushes, clean out machine brush
housing and hopper by wiping with a clean damp cloth.
Motor Replacement & Grooved Belt
Tensioning
1. Disconnect machine power supply.
2. Detach quick disconnect hose from top of solution
tank.
3. Remove elastic straps and solution tank.
4. Remove two dome screws and dome assembly.
5. Remove the circuit breaker boot and push the
circuit breaker clear of cover.
NOTE: All directions mentioned in this manual are
from the operator’s point of view.
6. Mark left and right on the lift cams.
7. Remove the two cam bolts. This will also free the
lift cams.
NOTE: There are four plastic bushings that the
handle pivots on, leave them on the motor clamps.
8. Remove the handle assembly.
9. Unscrew the wiring grommet from the main cover,
and set retaining bracket and screw aside.
10. Remove the front and back screws and move the
main cover to the side.
NOTE: The handle assembly and cover are still
attached to the frame by wiring. Be careful not to
pinch wiring when reassembling.
11. Remove the (2) plastic finger guards.
12. Mark the tension set screws for reference when
reassembling.
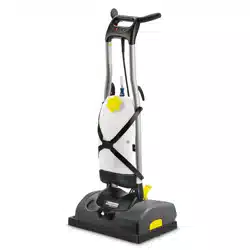
DOME
COVER
CIRCUIT
BREAKER
& BOOT
WIRING GROMMET
LIFTING CAM
LIFTING CAM
LEFT
RIGHT
LEFT SIDE
RIGHT SIDE
MOTOR CLAMP
MOTOR
LIFT BRACKET
PLASTIC FINGER
GUARD (2)
8.644-468.0 Manual Operator BRS 43/500C 115V
Loading ...
Loading ...
Loading ...