Loading ...
Loading ...
Loading ...

14
WP22BU-D Installation Guide pro.Bose.com
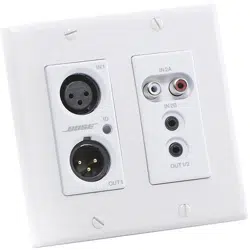
Note: The WP22BU-D has a label on the front of the metal housing
at the top that lists the last 6 digits of the MAC address. Important for
initial device identification, these digits are part of the device's default
network name when detected by ControlSpace Designer
software
. The
full MAC address is also given on the back of the unit.
What’s in the Box
The WP22BU-D comes supplied with the following:
• WP22BU-D device
• Mounting screws
• Decora plate
Mounting
A typical installation will involve mounting the wall plate into a 2-gang
junction box or low-voltage ring. Before starting, make sure the wall
box where the WP22BU-D is to be installed is pre-wired with a suitable
network cable back to a PoE enabled network switch or mid-span
injector. If a mid-span injector is being used, the cable should be
connected to the port that supplies both Ethernet and power (refer to
the devices manual if unsure which port is which).
Attach the network cable from the switch/mid-span injector to the
Dante network port of the Dante WP22BU-D. If the switch or mid-span
injector is already running and PoE is enabled, the unit should power
up and the green ID LED on the front of the device should turn on.
With the cable attached, place the WP22BU-D into the wall box taking
care to not trap the cabling. Once in place, secure it with the mounting
screws provided. Finally, fasten the Decora plate on top using the
screws provided with it.
Loading ...
Loading ...
Loading ...