Remove all packaging materials. Check that the Air Fryer has no visible damage and that no parts are missing. Before using the appliance for the first time or before using it after prolonged storage, wash and dry the appliance and any accompanying accessories. See “Cleaning & Maintenance” for instructions.
If you preheat the appliance before use, food will cook faster. To preheat, select desired temperature (see section “Temperature and Time Chart”) and turn the Timer Dial to 3 minutes; do not put any food in the Crisper Drawer. Wait until the Heating Light goes off (after approximately 3 minutes). Then fill the Crisper Drawer and turn the Timer Dial to the desired preparation time.
Place the appliance on a stable, flat, heat-resistant surface. Plug the Air Fryer into a wall socket. The Power Light will illuminate.
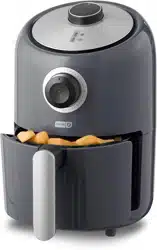
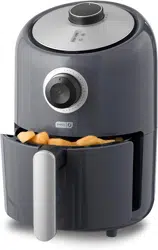
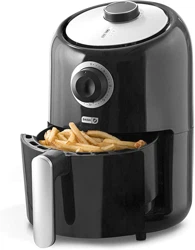
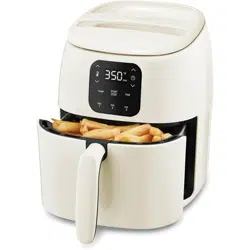
2. Remove the Crisper Drawer from the Air Fryer. Place food in the Crisper Drawer on the Crisper Tray. The Crisper Tray helps circulate air around your food and helps keep excess oil made by your food from pooling around your food. Slide the Crisper Drawer back inside the Air Fryer.
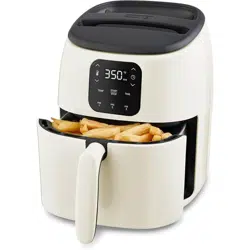
3. Refer to the Temperature & Time Chart (pg. 13) to determine the correct settings. Turn the Temperature Control Dial to your desired temperature setting.
4. Turn the Timer to the correct setting. When you set the Timer, the Air Fryer will automatically turn on. The Heating Light will automatically turn on. The Timer will begin to count down from the set time. The Heating Light will blink during the air frying process. This is normal and indicates that the heating element is controlling the temperature.
5. For even results, some foods require shaking halfway through the preparation time. See the Temperature & Time Chart for recommendations. Remove the Crisper Drawer from the appliance and shake it gently from side to side. Slide the Crisper Drawer back into the Air Fryer.
6. When you hear the Timer ring, the preparation time has elapsed. Pull the Crisper Drawer out of the appliance and place it on a heat-resistant surface. Check if the food is done. If the food is not ready, simply slide the Crisper Drawer back into the appliance and set the Timer for a few extra minutes.
7. To remove items from the Crisper Drawer use tongs. Don’t turn over the Crisper Drawer to prevent any oil that has collected on the bottom of the Crisper Drawer from being spilled onto the food. Excess oil from any foods will be collected at the bottom of the Crisper Drawer. Allow the appliance to cool before disposing of any excess oil.
tips & tricks
Air frying smaller items or fewer items will require a slightly shorter cooking time than larger items or more items.
Shaking smaller items halfway during the preparation time optimizes the end result and can help prevent unevenly fried foods.
Soak fresh potatoes in water for 30 minutes, then add a small amount of oil for a crispier result. Fry your potatoes in the air fryer within a few minutes of adding the oil.
Do not prepare extremely greasy items, such as sausages, in the Air Fryer.
Snacks like chicken nuggets and mozzarella sticks, that can be prepared in an oven can also be prepared in the Air Fryer.
Use store-bought dough to prepare filled snacks like calzones quickly and easily. Items made with store-bought dough will require a shorter preparation time than homemade dough.
Use a baking pan in the Crisper Drawer if you want to bake a cake or quiche or if you want to fry fragile or filled items.
You can also use the Air Fryer to reheat foods. To reheat food, set the temperature to 300℉ for up to 10 minutes.
Do not remove the silicone tabs.
TEMPERATURE & TIME CHART
Please keep in mind that these temperatures and times are merely guidelines. Actual cooking times may vary depending on the size, shape, and amount of food. When air frying a new item always make sure that your food is cooked properly before consumption. According to the USDA, the safe internal temperature for poultry is 165°F and for beef is 160°F.
*For even results, some foods require shaking halfway through the preparation time. See the chart below for recommendations.
cleaning & maintenance
Remove the plug from the wall socket and let the appliance cool down completely.
Remove the Crisper Drawer to allow the Air Fryer cool down quicker.
Clean the appliance after every use.
Do not clean the Crisper Drawer, or the inside of the appliance with metal kitchen utensils or abrasive cleaning materials as this may damage the non-stick coating.
Wipe the outside of the appliance with a moist cloth.
The Crisper Drawer and Crisper Tray are dishwasher safe.
The Crisper Tray removes from the Crisper Drawer to allow for easier cleaning.
Alternatively you can clean the Crisper Drawer with hot water, dish soap, and a non-abrasive sponge.
TIP: If the Crisper Drawer or Crisper Tray is dirty, fill the Crisper Drawer with hot water and dish soap, place the Crisper Tray in the Crisper Drawer and let it soak for about 10 minutes.
Clean the inside of the appliance with hot water and a non-abrasive sponge.
Clean the heating element with a cleaning brush to remove any food residue.
NOTE: Make sure the appliance has cooled down completely before cleaning the heating element.
Make sure that the appliance is unplugged and all parts are clean and dry before storage.
Do not remove silicone tabs on the prongs of your Air Fryer Crisper Tray.
TROUBLESHOOTING
PROBLEM
POSSIBLE CAUSE
SOLUTIONS
The Air Fryer does not work.
The appliance is not plugged in.
Plug the mains plug into a grounded wall socket.
You have not set the Timer.
Turn the Timer Dial to the required preparation time to switch the appliance on.
The food is not done after the recommended time is elapsed.
Too much food has been added to the Crisper Drawer.
Use less food and cook in batches if necessary. Your food will also cook more evenly.
The temperature was set too low.
Turn the Temperature Dial to the required temperature setting (see section “Settings”). Preheat for 5-10 minutes.
Food is fried unevenly in the Air Fryer.
Certain types of food need to be shaken halfway through the preparation time.
Items that lie on top of or across each other (e.g. fries) need to be shaken halfway through the preparation time (see section “Settings”).
Snacks are not crispy when they come out of the Air Fryer.
The food was not dry enough or needs a bit of oil.
Make sure to properly dry the food or lightly brush some oil onto the snacks for a crispier result.
I cannot slide the Crisper Drawer into the appliance properly.
There is too much food in the Crisper Drawer.
Do not fill the Crisper Drawer beyond the MAX line.
White smoke is coming out of the appliance.
Your food is too greasy.
When you fry greasy items in the Air Fryer, a large amount of fat will leak into the Crisper Drawer, the fat produces white smoke and the Crisper Drawer may heat up more than usual. This does not affect the appliance or the end result.
The Crisper Drawer still contains residue from previous use.
White smoke is caused by grease heating up in the Crisper Drawer. Make sure you clean the Crisper Drawer properly after each use.
Fresh fries are fried unevenly in the Air Fryer.
Certain types of food need to be shaken halfway through the preparation time.
Items that lie on top of or across each other (e.g. fries) need to be shaken halfway through the preparation time (see section “Settings”).
Fresh fries are not crispy when they come out of the Air Fryer.
The crispiness of the fries depends on the amount of oil and water in the fries.
Make sure you dry the potato sticks properly before you add the oil.
Cut the potato sticks smaller for a crispier result.
Add slightly more oil
IMPORTANT SAFEGUARDS
IMPORTANT SAFEGUARDS: PLEASE READ AND SAVE THIS INSTRUCTION AND CARE MANUAL.
When using electrical appliances, basic safety precautions should be followed, including:
Read all instructions.
Remove all bags and packaging from the appliance before use.
Make sure the appliance is cleaned thoroughly before using.
Never leave the appliance unattended when in use.
Do not use the appliance for other than its intended use.
For household use only. Do not use outdoors.
Close supervision is necessary when any appliance is used by or near children.
Do not touch hot surfaces. Use handles or knobs.
Do not fill the Crisper Drawer with oil to avoid a fire hazard.
During air frying, make sure all ingredients are kept in the Crisper Drawer.
Do not cover the Air Inlet or the Air Outlet when the appliance is functioning.
Do not place the appliance directly against a wall or against other appliances. Leave at least 4 inches of free space surrounding the appliance.
Do not place anything on top of the appliance.
During hot air frying, hot steam is released through the Air Outlet openings. Keep your hands and face at a safe distance from the steam and from the Air Outlet openings. Be careful of hot steam and air when you remove the Crisper Drawer from the appliance.
Immediately unplug the appliance if you see dark smoke coming out of it. Wait for the smoke emission to stop before you remove the Crisper Drawer from the appliance.
The appliance requires approximately 30 minutes to cool down before you can safely handle or clean it.
This appliance has a built-in timer and will automatically shut off when the Timer has finished. You can manually switch the appliance off by turning the Timer counterclockwise to zero.
Extreme caution must be used when moving an appliance containing hot oil or other hot liquids.
Turn the Timer and Temperature Dials to the “OFF” position before disconnecting the power cord from a wall outlet.
Do not operate this appliance with a damaged cord, damaged plug, or after the appliance malfunctions or is dropped or damaged in any manner. Return the appliance to the nearest authorized service facility for examination, repair, or adjustment.
For maintenance other than cleaning, please contact StoreBound directly at 1-800-898-6970 from 7AM-7PM PT Monday-Friday or by email at [email protected].
Do not place the appliance on or near a hot gas burner, hot electric burner, or in a heated oven.
Refrain from using attachments that are not recommended by the appliance manufacturer, as doing so can result in fire, electric shock, or personal injury.
Do not let the cord touch hot surfaces or hang over the edges of tables or counters.
This appliance is not intended for use by persons (including children) with reduced physical, sensory, or mental capabilities, or lack of experience and knowledge unless they are provided with supervision and instruction concerning use of the appliance by a person responsible for their safety.
Unplug from outlet when not in use and before cleaning. Allow to cool before putting on or taking off parts.
StoreBound shall not accept liability for damages caused by improper use of the appliance.
Improper use of the appliance can result in property damage or personal injury.
To protect against electrical shock, do not immerse cord, plugs or appliance in water or other liquid.
Make sure that the voltage indicated on the appliance matches the local mains voltage. Always make sure that the plug is inserted into a grounded wall socket properly.
This appliance has a polarized plug (one blade is wider than the other). To reduce the risk of electric shock, this plug will fit in a polarized outlet only one way. If the plug does not completely fit in the outlet, reverse the plug. If it still does not fit, contact a qualified electrician. Do not attempt to modify the plug in any way.
The power supply cord is short to reduce risk from becoming entangled in or tripping over a longer cord. An extension cord may be used if care is exercised in its use. If an extension cord is used, the marked electrical rating of the extension cord should be at least as high as the electrical rating of the appliance. The extension cord should be arranged so that it will not drape over the countertop or tabletop where it can be pulled on by children or tripped over unintentionally.
To disconnect, turn any control to “off”, then remove plug from wall outlet.