Loading ...
Loading ...
31-2000730 Rev. 0 3
Installation Instructions
CONTENTS
Safety Information .........................................................2
3URGXFW'LPHQVLRQV ......................................................3
$GGLWLRQDO3DUWV3URYLGHG ..............................................3
Tools and Materials Required .......................................3
Installation Clearances ..................................................4
$GYDQFH3ODQQLQJ .........................................................4
Unboxing .......................................................................4
Step 1, Determine Ductwork and Wiring Locations ......5
Step 2, Install Hood onto Wall .......................................6
Step 3, Install Hood Insert into Hood ............................7
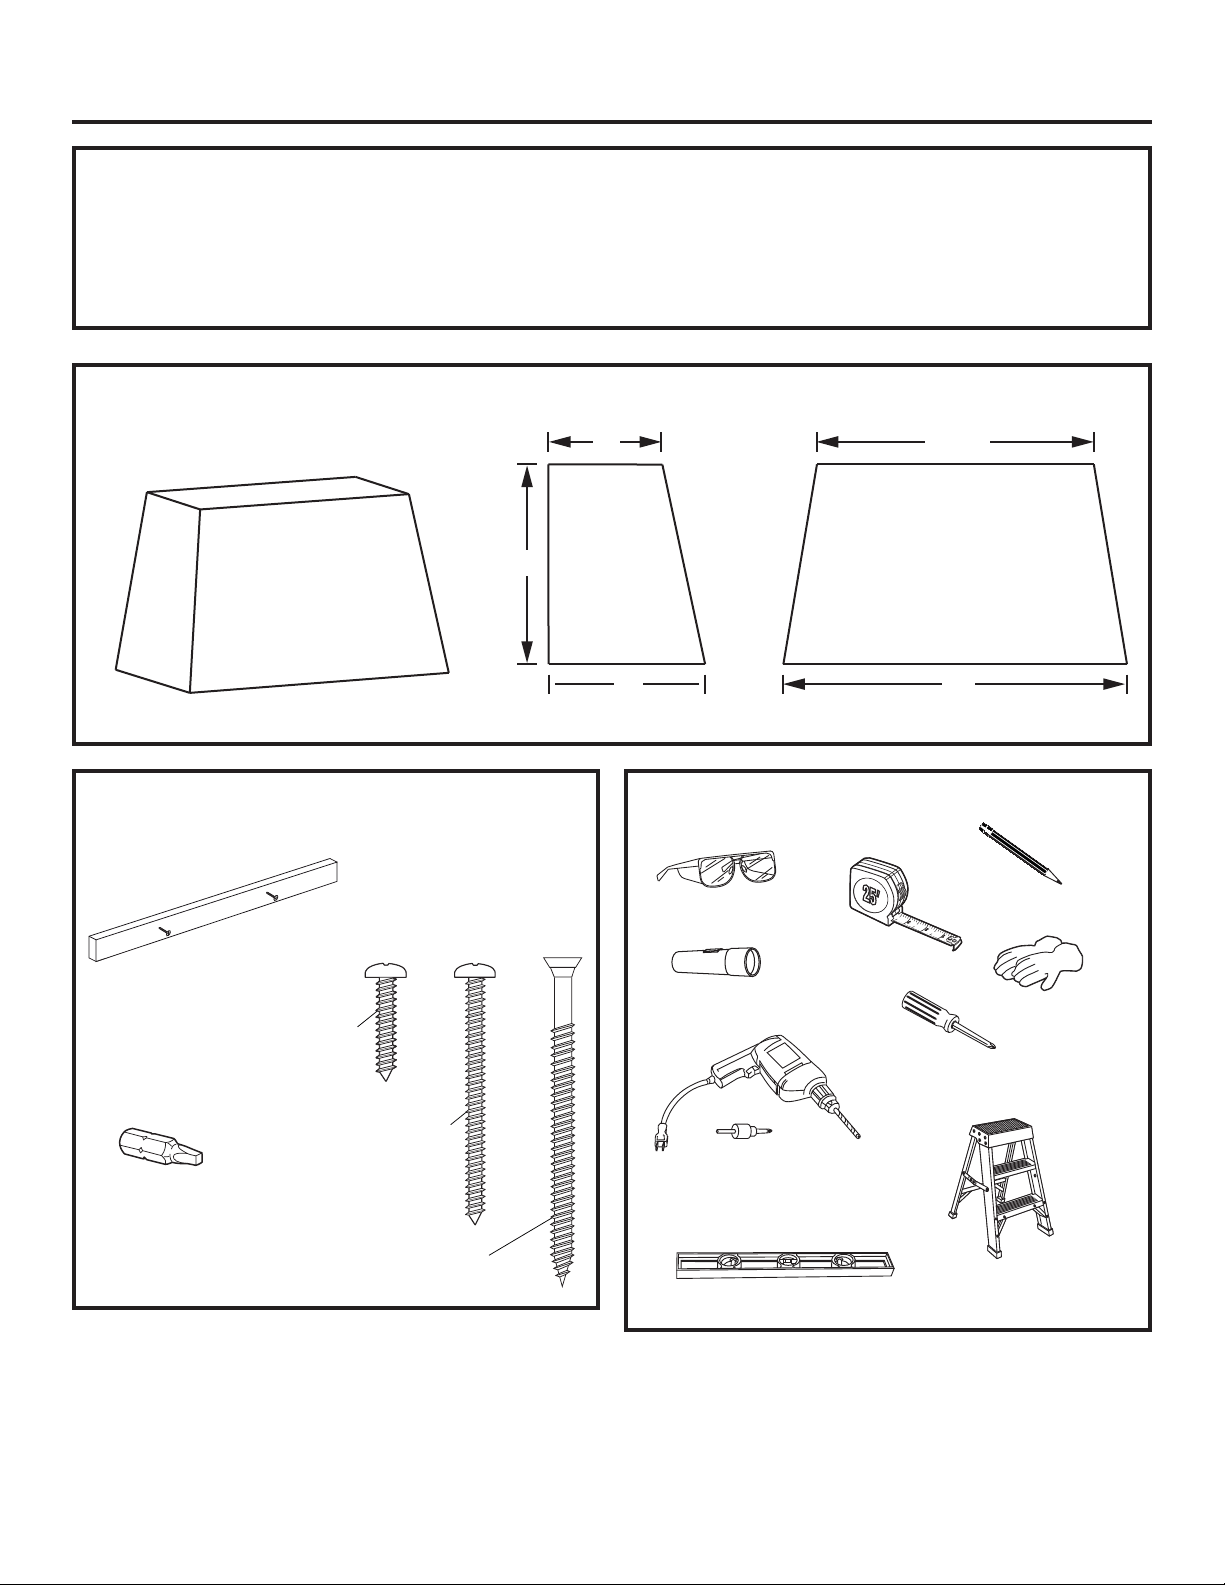
PRODUCT DIMENSIONS
ADDITIONAL PARTS PROVIDED
These parts are packed with the hood.
TOOLS AND MATERIALS REQUIRED
1RWVXSSOLHG
28”
16”
22”
SIDE VIEW FRONT VIEW
38-5/8”
48”
Phillips screwdriver
Flashlight
Safety glasses
Electric or battery operated drill.
1/8” drill bit. 3/16” drill bit.
Phillips driver.
Pencil
Level
Step ladder
Tape measure
Safety Gloves
Wood Support with
short Phillips head screws
2 long Square Drive flat head
screws to secure the wood
support to the wall
Square drive bit
2 short pan head Phillips screws to
secure the hood to the wood support.
There are 2 additional screws already
installed in the wood support.
4 medium pan head Phillips screws to
secure the hood to the wall.
Loading ...
Loading ...
Loading ...