OWNER’S MANUAL
MODE D’EMPLOI
BEDIENUNGSANLEITUNG
MANUALE UTENTE DEL DISPOSITIVO
SOUND
OF
SLEEP

SOUND
OF
SLEEP
ENGLISH 1–8
FRANÇAIS 9–16
DEUTSCH 17–24
ITALIANA 25–32
2
GETTING STARTED
Inside the package you’ll fi nd:
1. This Owner’s Manual
2. Sound Environments Guide
3. Sound+Sleep SE
4. AC Power Adapter and Cable
5. 3.5mm Audio Cable
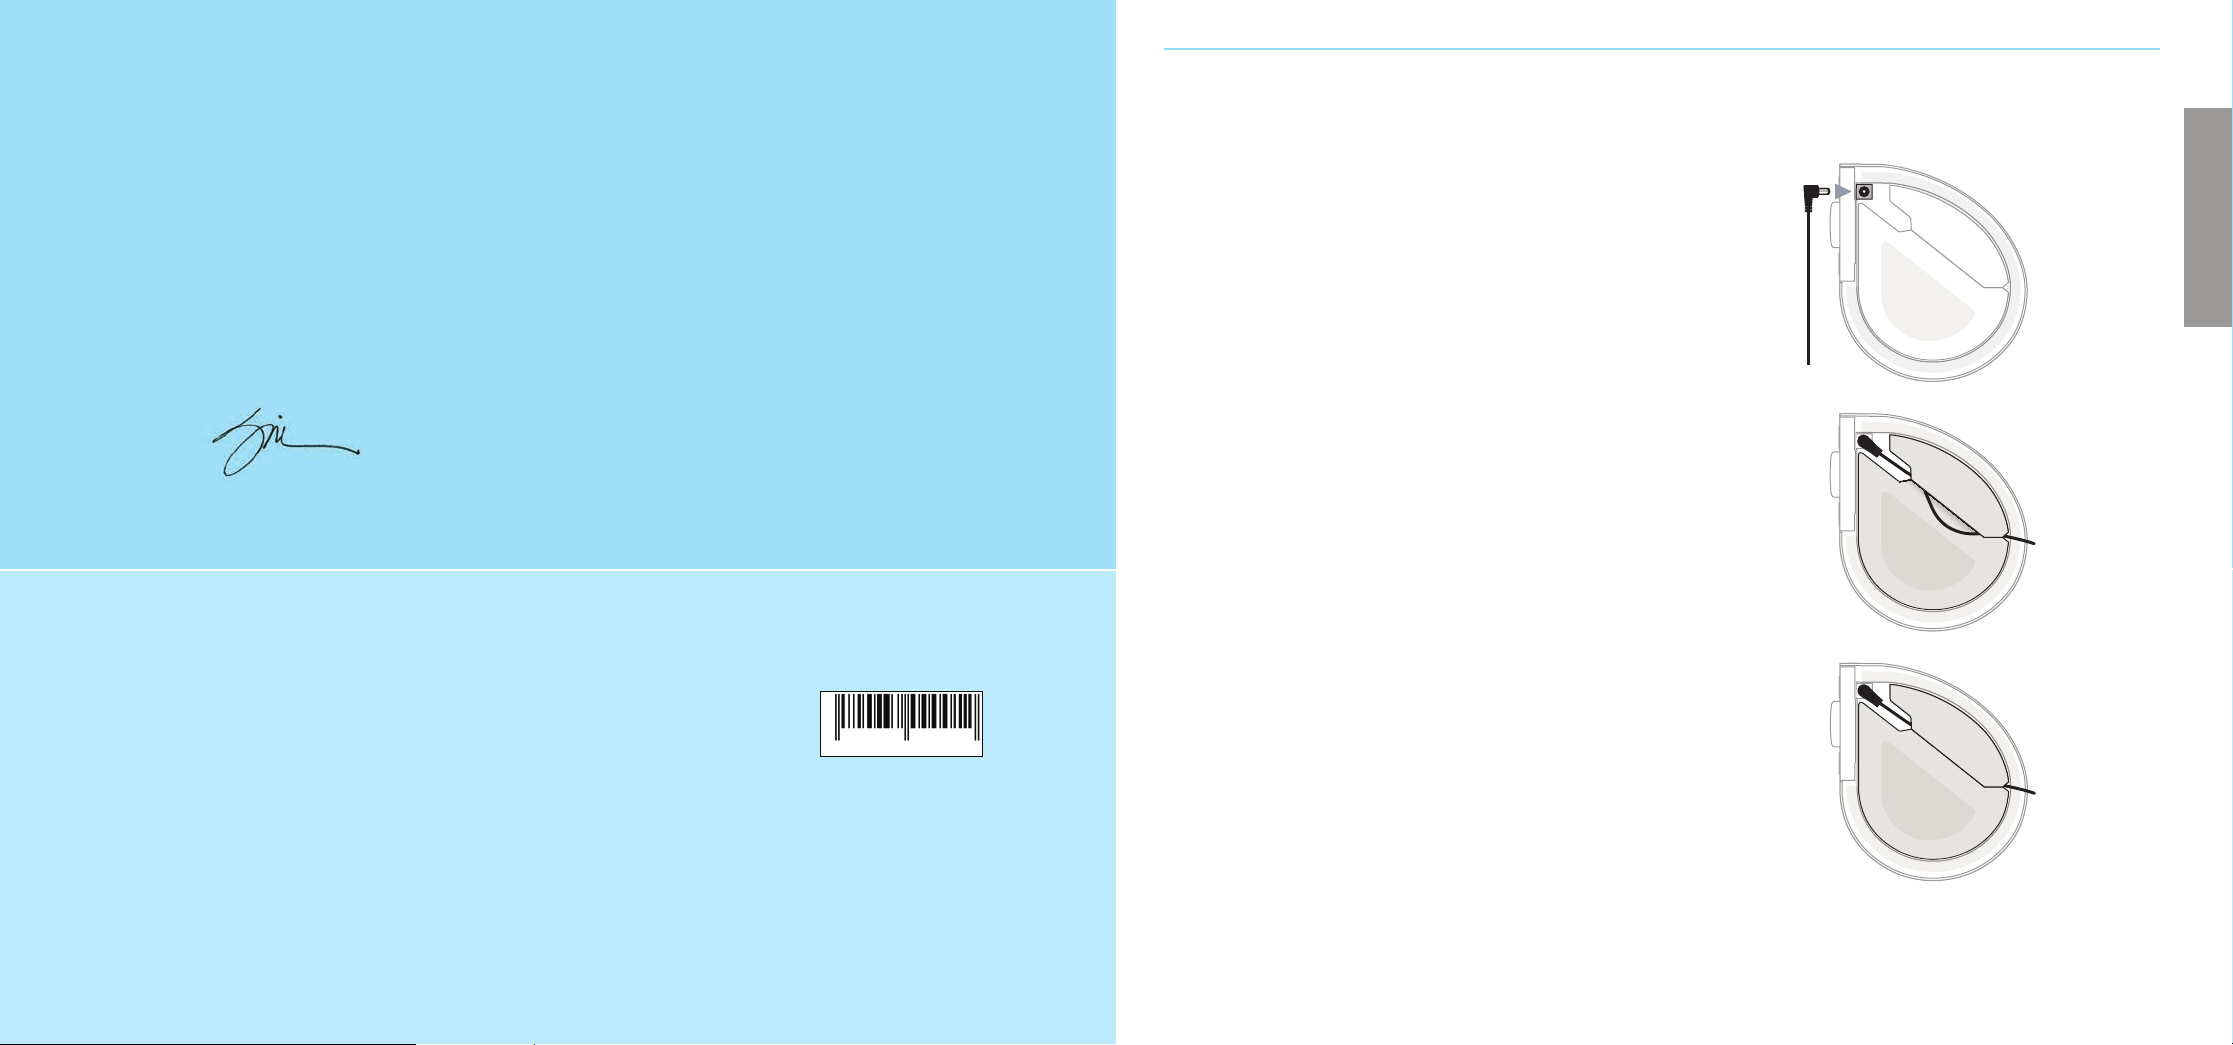
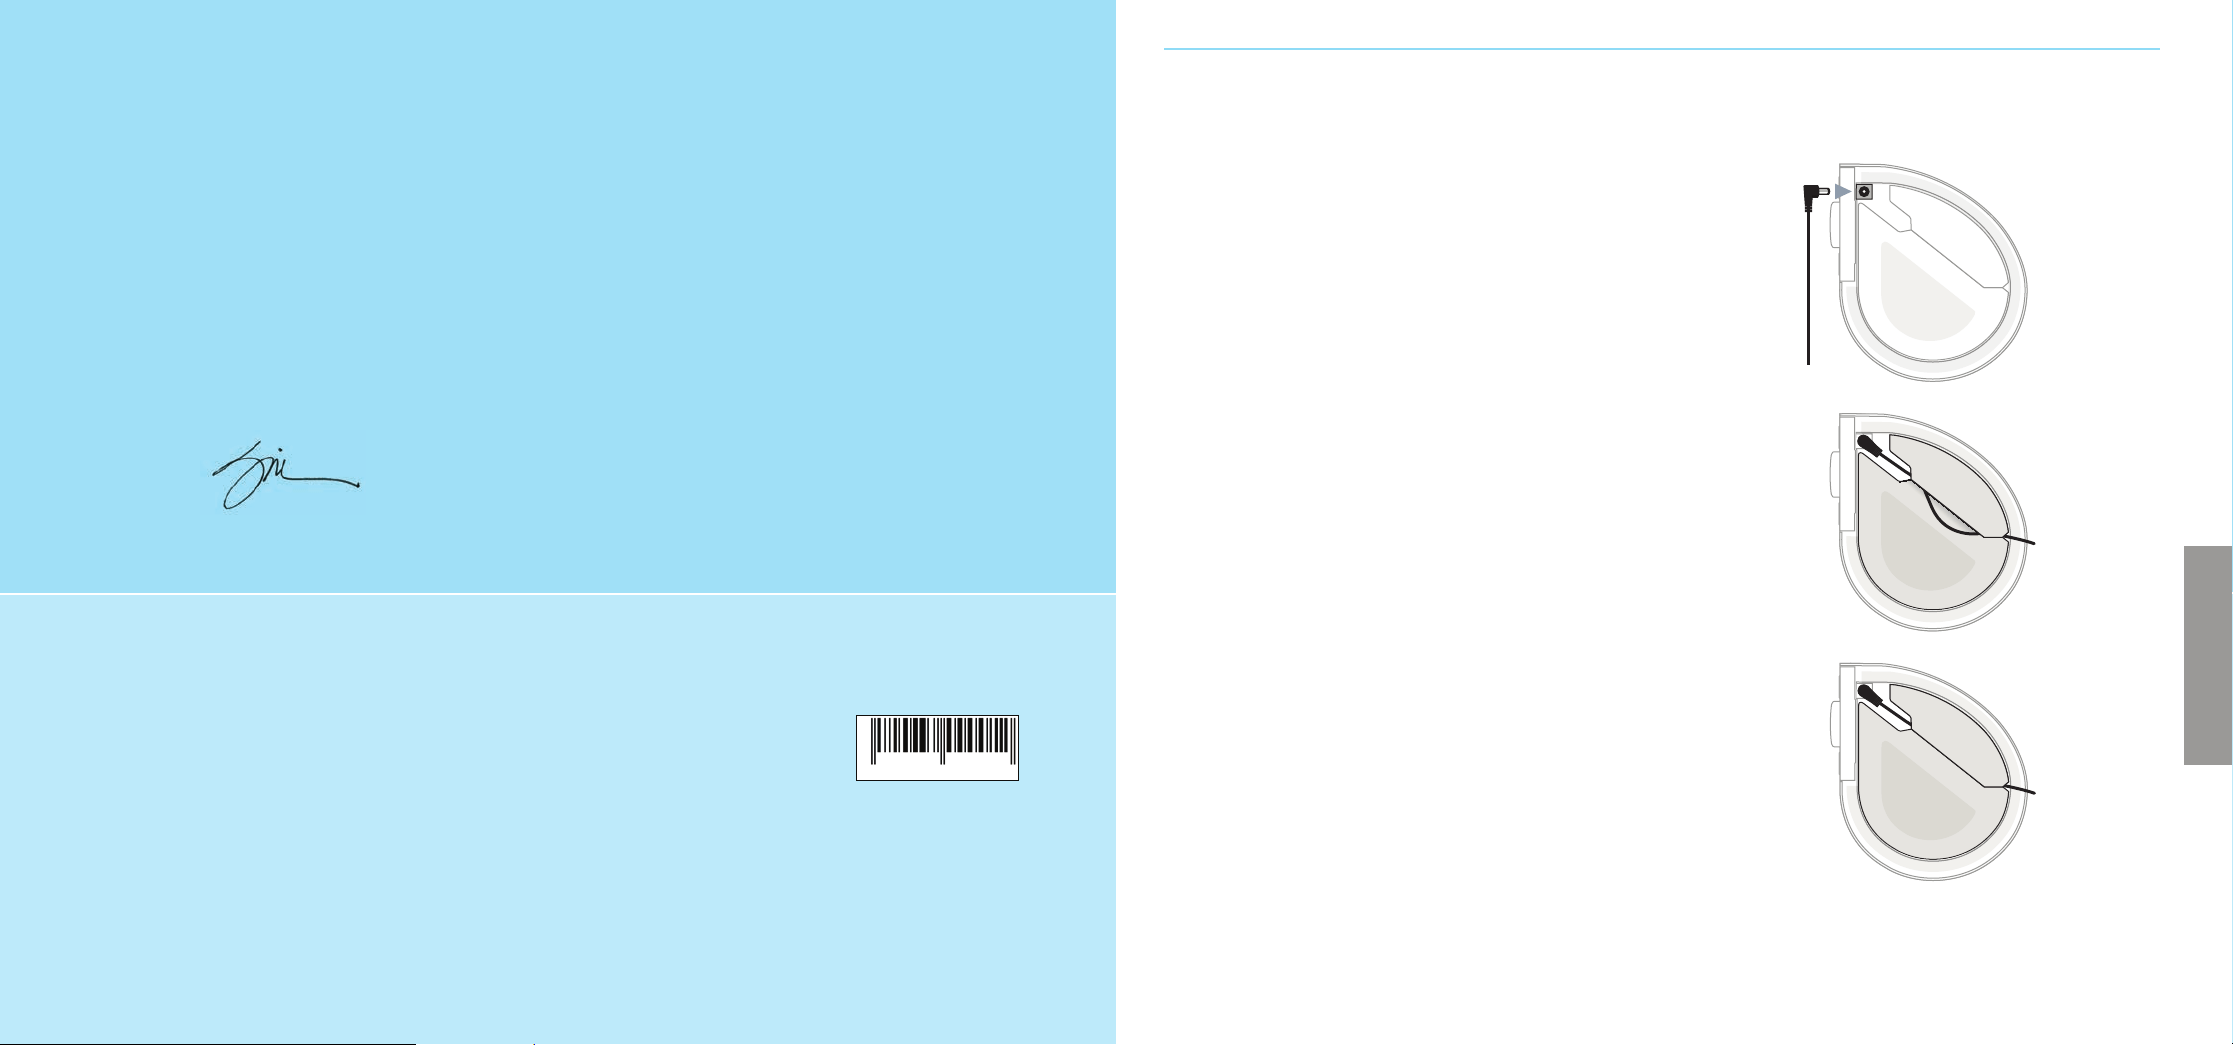
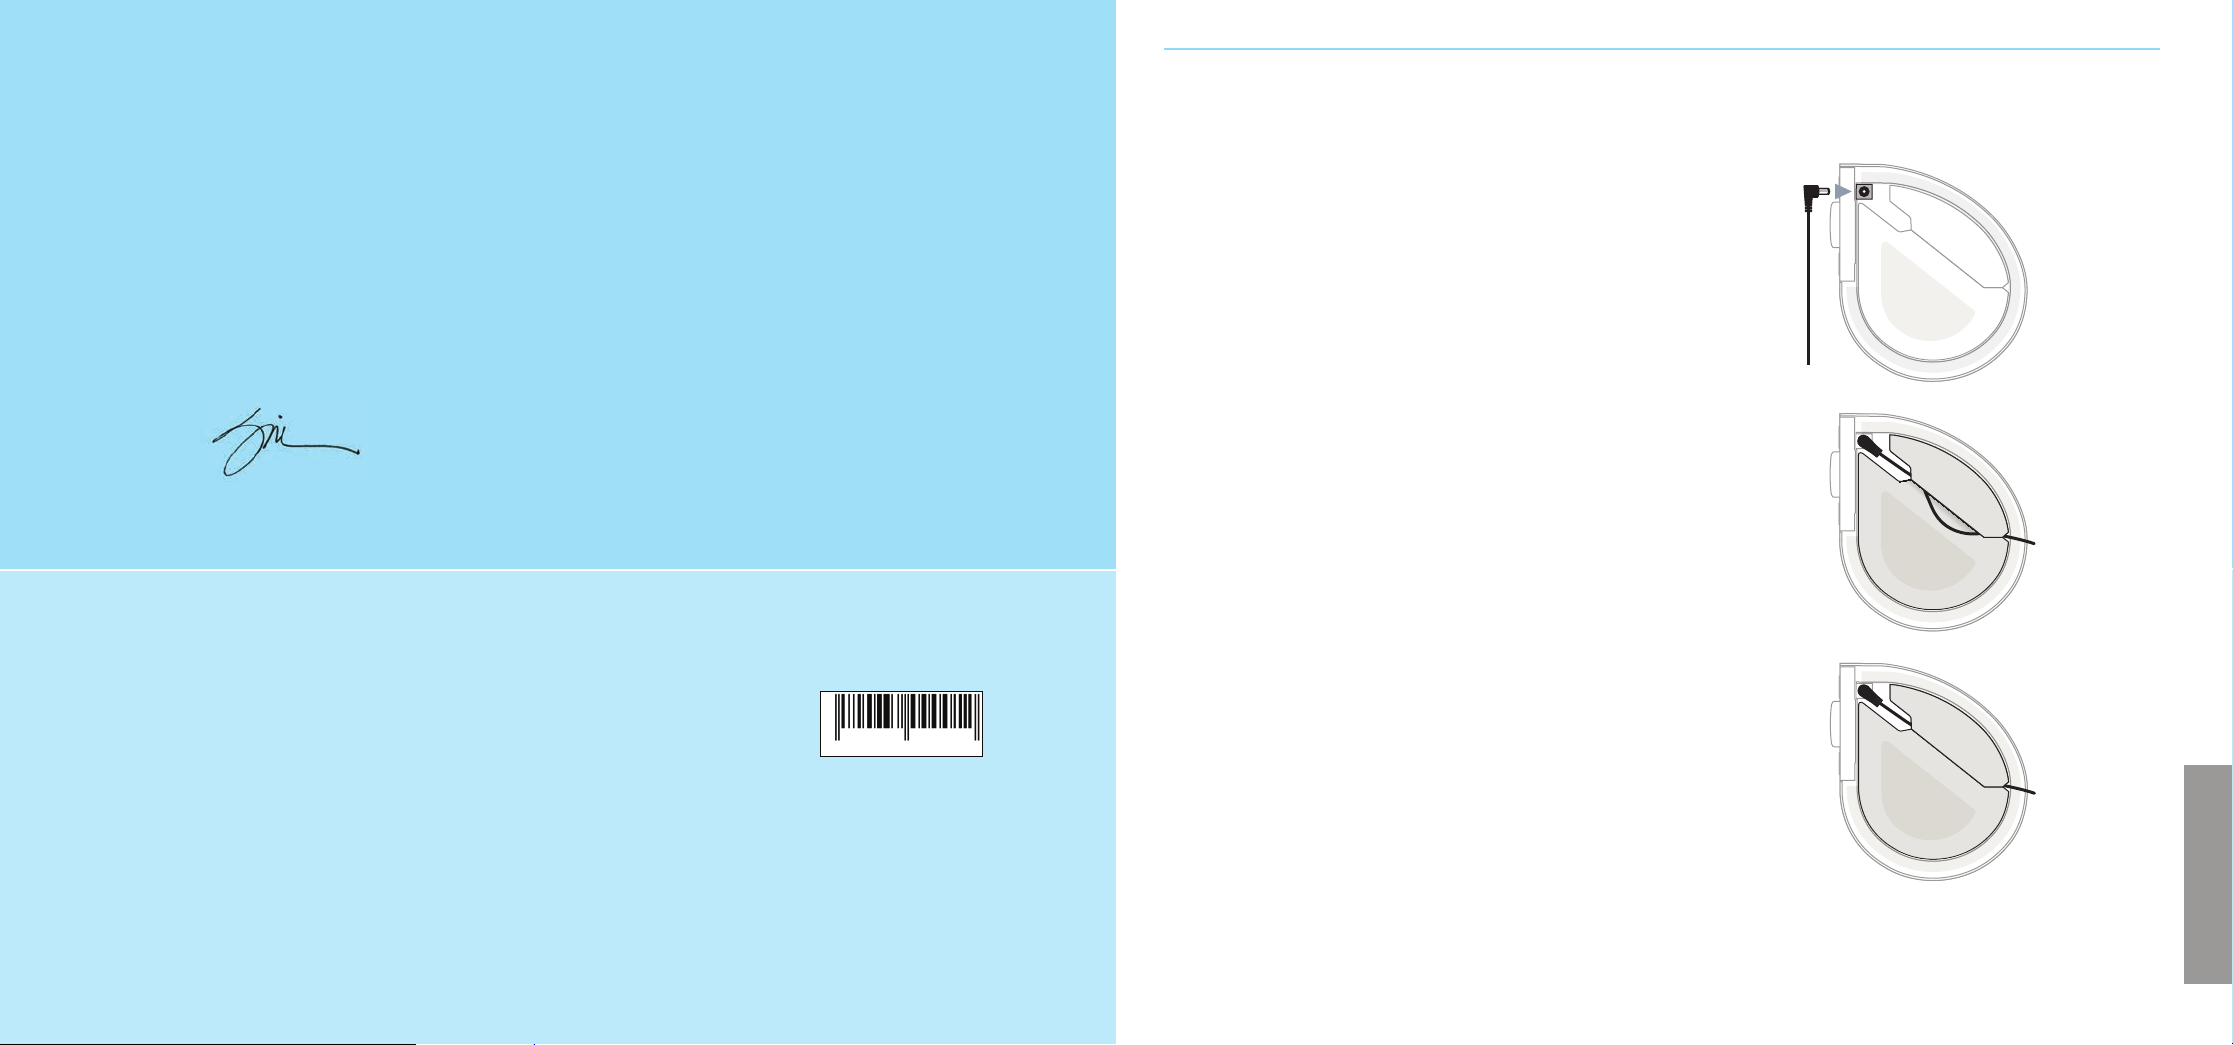
Connect to an AC Outlet
The power jack is located on the bottom of the SE.
1. Push the power adapter plug at the end of the cable
into the jack.
2. Slip the cord under the rubber foot by separating
the two pieces of the foot along the slit.
3. The machine should sit fl at on a table or nightstand
if the cord is installed correctly. The slit should easily
separate by running your fi nger down it. If not, you
can use a knife to cleanly open the slit.
Next, connect the AC plug into an un-switched wall
outlet. The fi rst time you plug it in, it may take up to
30 seconds to perform a self-test. Please note that the
sixteen painted dots around the dial do not light up.
We recommend that you do not use an outlet connected
to a switch. Your SE automatically remembers its
settings each time it’s turned o using the POWER
button, but it may not remember its settings if it
loses power.
You may use the SE internationally with any AC line
voltage from 100–240 Volts, at 50 or 60Hz, using
an AC plug adapter (available at many electronics
and travel stores).
ENGLISH
TO OUR CUSTOMERS,
Thank you and congratulations on your purchase of a Sound+Sleep SE from Adaptive Sound
Technologies. It is, quite simply, the best sleep sound machine on the market. It features natural
sounds recorded by our own team of audio professionals. These sounds are used to create multi-
layered sound environments, which are non-repeating and unique each time. With 64 dynamic
sound environments in 16 categories, you are certain to fi nd the perfect environment for rest,
relaxation, or better sleep.
If you have any suggestions on how we can make our products better please let us know.
Sam J. Nicolino Jr., President and CEO, ASTI
1.
2.
3.
WRITE DOWN YOUR SERIAL NUMBER AND REGISTER YOUR PRODUCT
Record your serial number here. You can fi nd it on the bottom of the product. MODEL NUMBER: ASM1005
You’ll need it when registering your product at astisupport.com, and you
should have it handy should you need to contact our support team.
Serial Number: __________________________________________________________________________
Date of Purchase: ________________________________________________________________________
X XXXXX XXXXX
SOUND
OF
SLEEP
43
USING YOUR SE THE FIRST TIME
Turn it on and select a sound
Press the POWER button and the SE will initialize and
start playing in about two seconds. The SE may be
turned o with the POWER button, or the TIMER button
(see Sleep Timer).
The SE will retain the last settings used when you last
powered it o using the POWER button. If you power it
o by unplugging the SE power adapter from the wall
outlet, the settings may not be saved.
Next, use the dial to select a sound category, and
then press the SELECTION button to choose between
the four sound environments in that category.
See the included Sound Environments Guide, or the
sound listings on pages 5–6, for a complete list of
sound environments.
Use the VOLUME buttons to adjust the volume to
your liking.
Not all the sound environments are designed for sleep.
Some environments are designed for relaxation, speech
privacy, meditation, or studying and reading.
Adaptive Mode
The SE can adapt to noise in your environment. It uses
its built-in microphone on the front panel to listen for
disruptive noises, and raises the volume and/or adds
enhancing sounds to the sound environment to
compensate. Press the ADAPTIVE button to turn it
on or o . The lamp next to the ADAPTIVE button will
indicate when it’s active.
When Adaptive Mode is not active, your SE will maintain
a steady volume level.
Adaptive Mode allows the SE to be customized to suit
your personal preferences and situation. You might
prefer a quiet, steady sound, especially if there is little
noise, or steady noise, in your environment. Or, you might
need the additional noise masking that Adaptive Mode
provides. Experiment to fi nd the setting you like best for
di erent situations.
Note: When setting the volume in Adaptive Mode you
are actually setting the maximum volume it can reach
when it detects a loud noise. If the sound seems too
low when it is quiet in your room, turn the volume up
to a higher base level.
MORE USEFUL FEATURES
Sleep Timer
The Sleep Timer can be used to set the SE to play for
a number of minutes and then shut o gradually and
automatically. The time interval can be set to 30, 60,
90, or 120 minutes by pressing the TIMER button.
Turning o the SE clears the Sleep Timer. Pressing the
TIMER button when the SE is o will turn it on and set
the Sleep Timer to 30 minutes. Pressing the TIMER
button again will advance the timer to the next interval.
After 120 minutes has been selected, pressing the TIMER
button again turns the timer o .
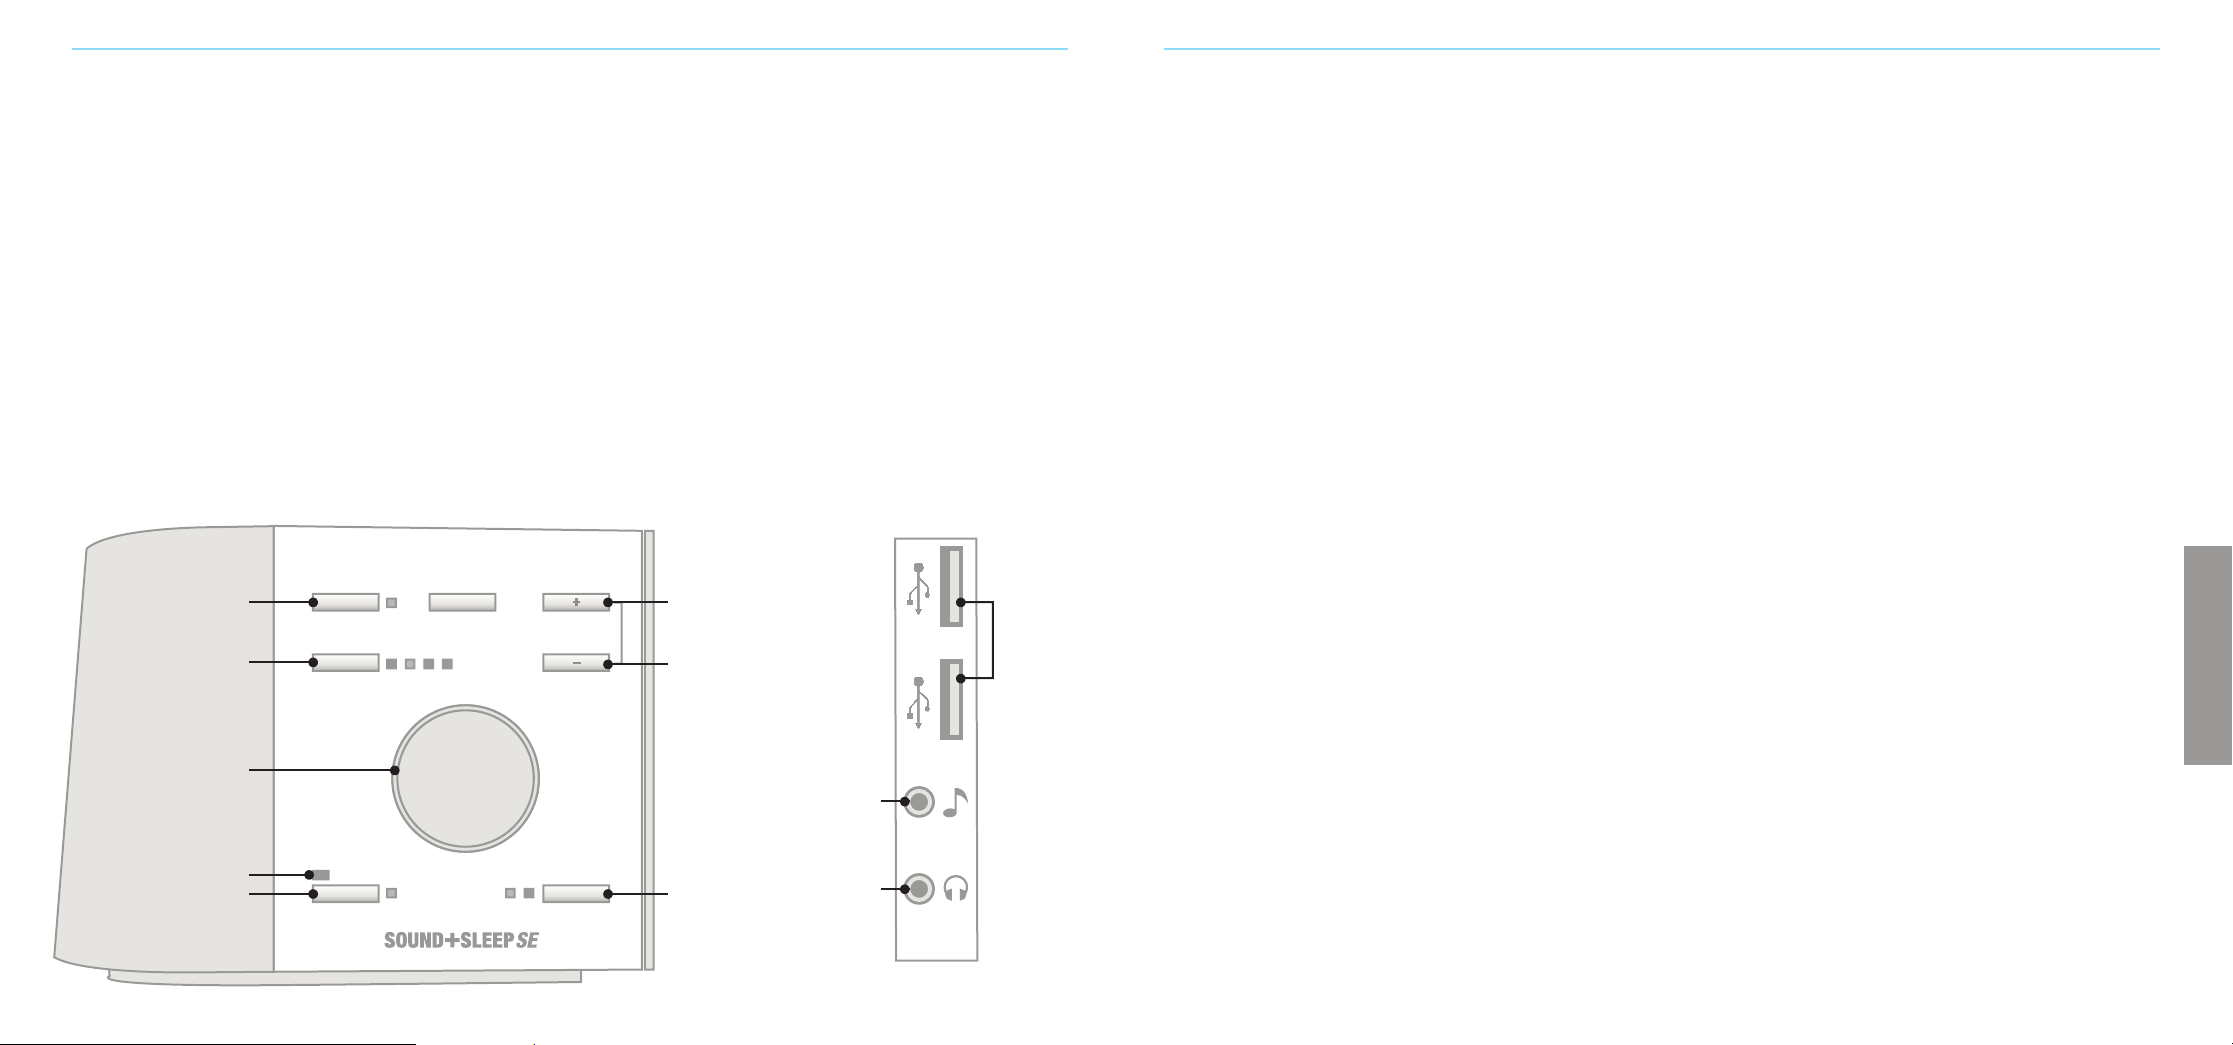
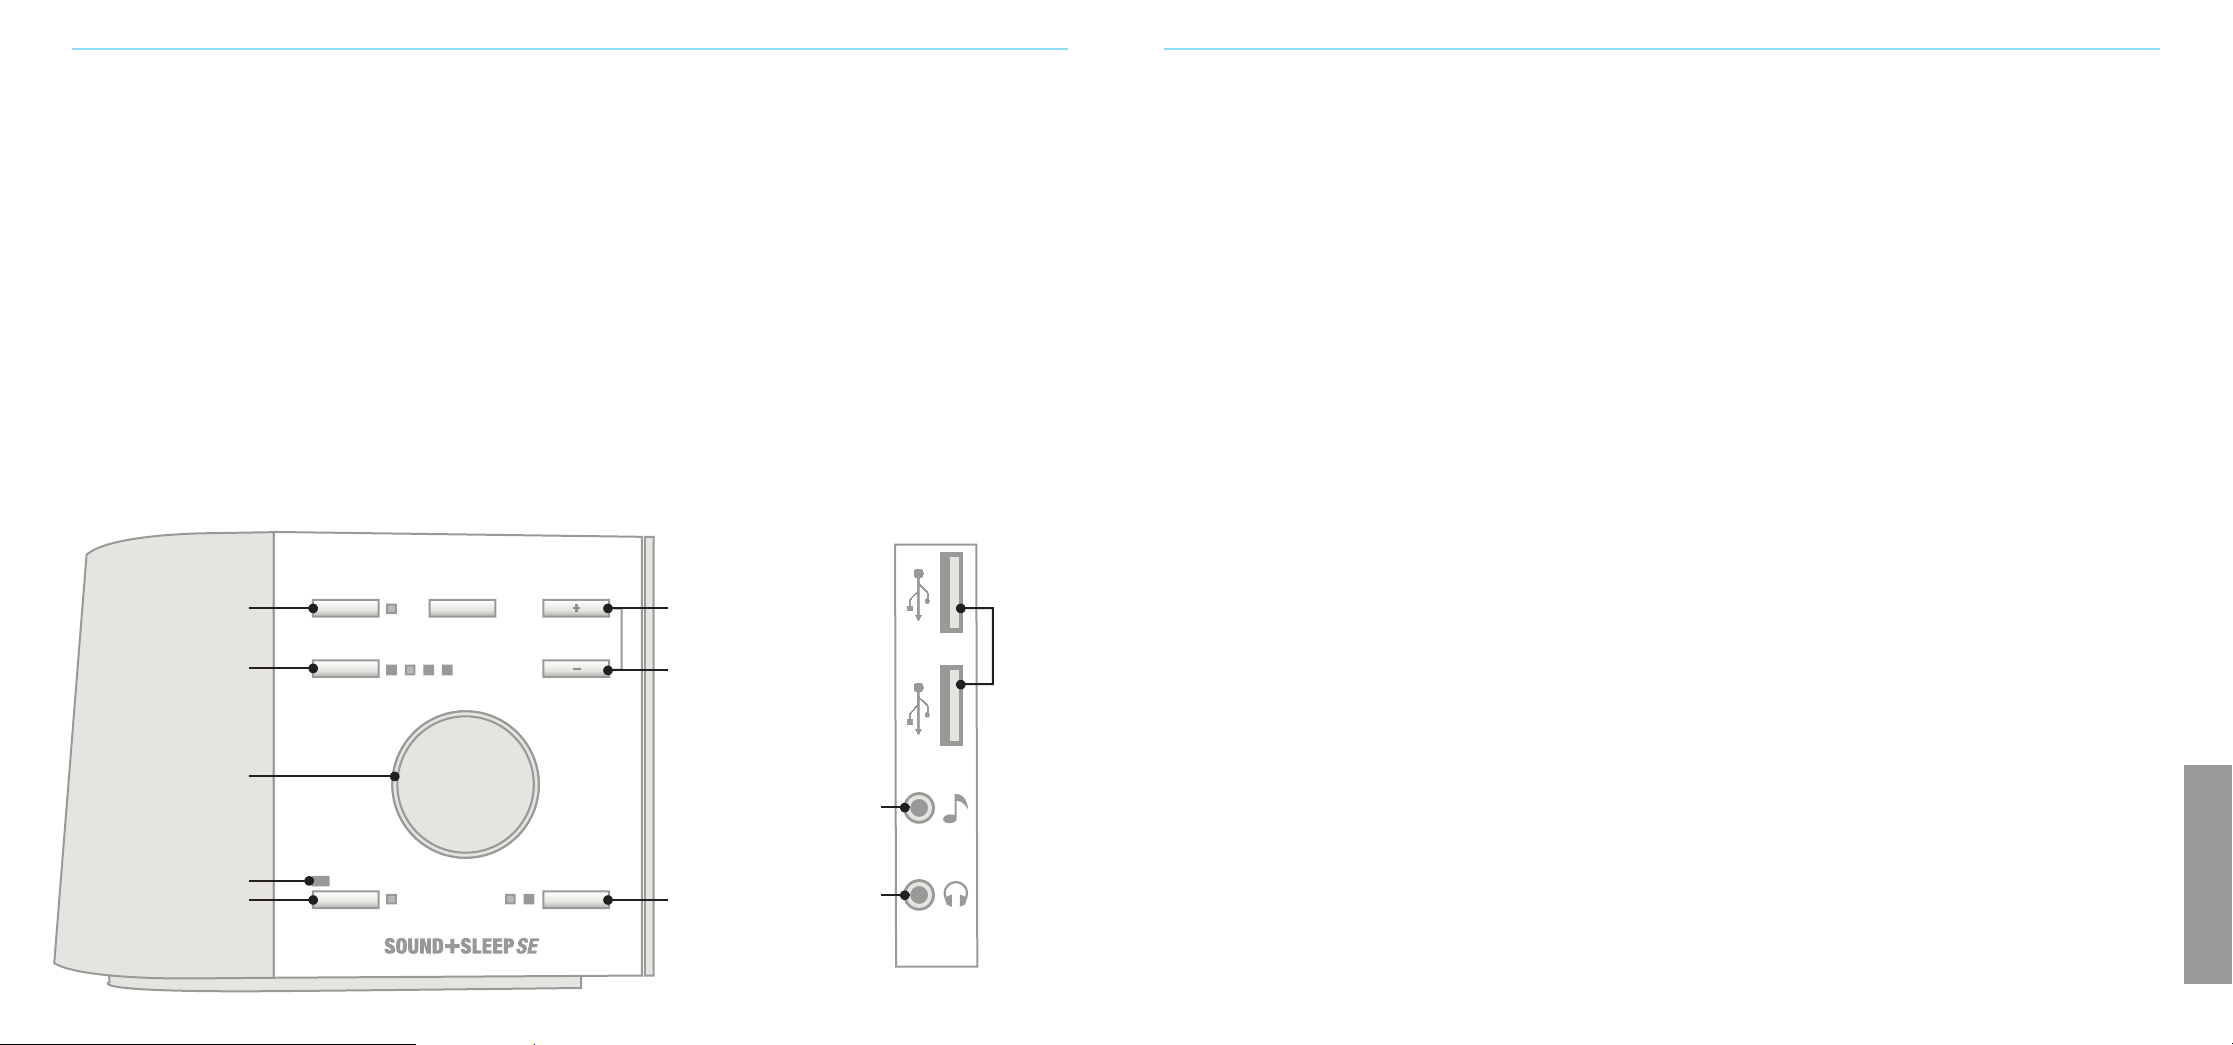
Headphone Jack
A standard 3.5mm stereo headphone jack is located on
the bottom of the connector panel. Any ordinary set
of headphones or earbuds with a 3.5mm connector may
be used. Connecting headphones or earbuds disables
the SE’s built-in speaker, so it’s a great way to use your
SE for private relaxation.
As with any product, use common sense when using
headphones. Avoid using them at high volume levels.
Prolonged exposure to loud volume levels may impair
your hearing.
External Audio Input
You may use the external audio input to listen to an
audio source from any device with a standard 3.5mm
headphone or line-out connector. An audio cable is
included, or you may use your own.
Some phones and other devices may generate noise
if they are simultaneously being charged and used as
an external audio source.
Caution: It is best to connect the audio source
with care:
1. Turn the volume down on your SE
2. Connect one end of the audio cable to your
sound source
3. Connect the other end of the audio cable to the
audio input jack on the SE
4. Adjust the SE volume to the desired listening level
USB Charging Ports
The SE connector panel has two USB-A charging ports.
Please note that these may be used for charging
a smartphone or similar device. The charging ports are
not used for data or audio.
Turning Off the Display
You may use the DISPLAY button to turn o the front
panel lamps if they’re a distraction. If you adjust any
settings while the display lamps are o , they will turn on
for 15 seconds and then dim again.
POWER
TIMER
30 60 90 120
DISPLAY VOLUME
+
–
ADAPTIVE SELECTION
•
•
•
•
•
•
•
•
•
•
•
•
•
•
•
•
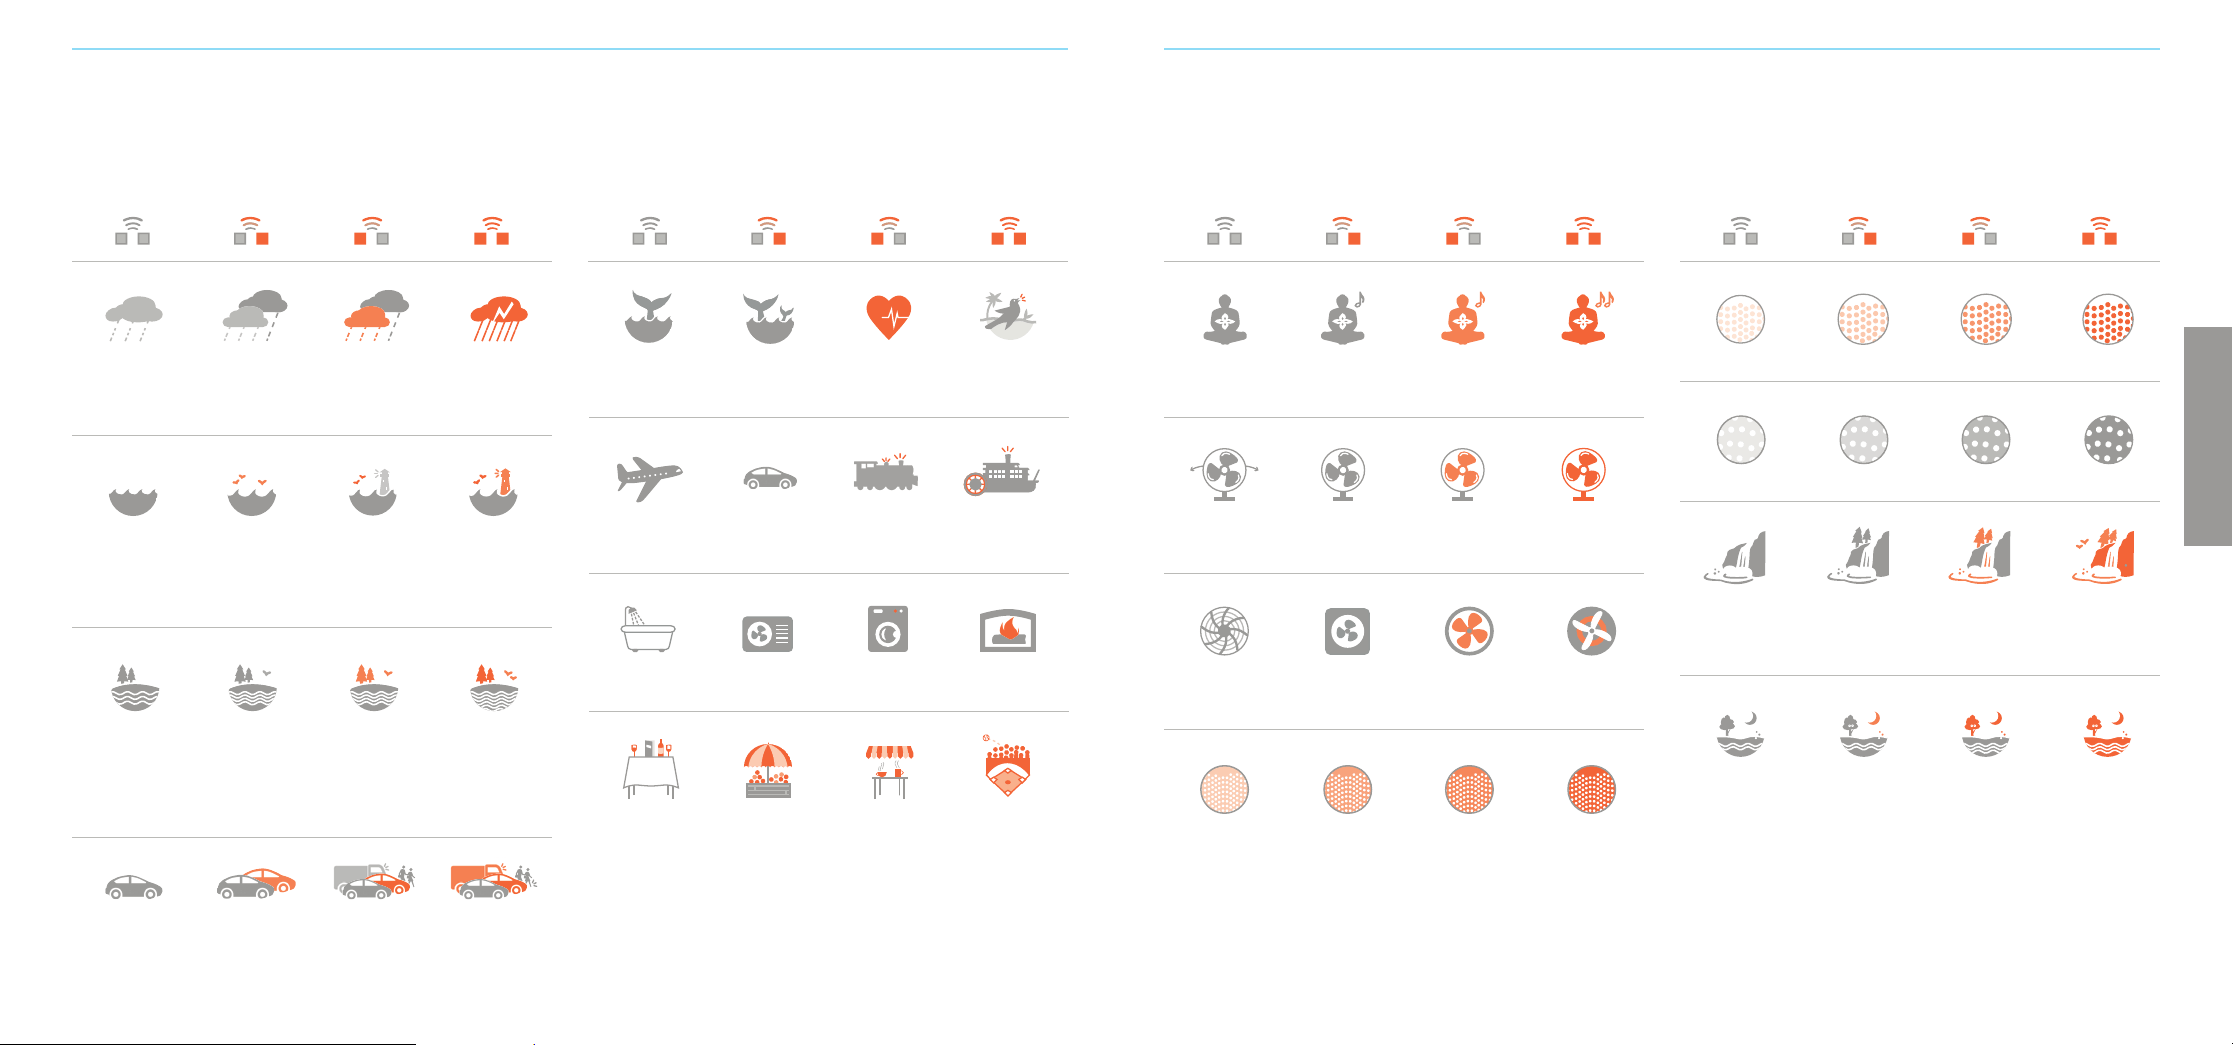
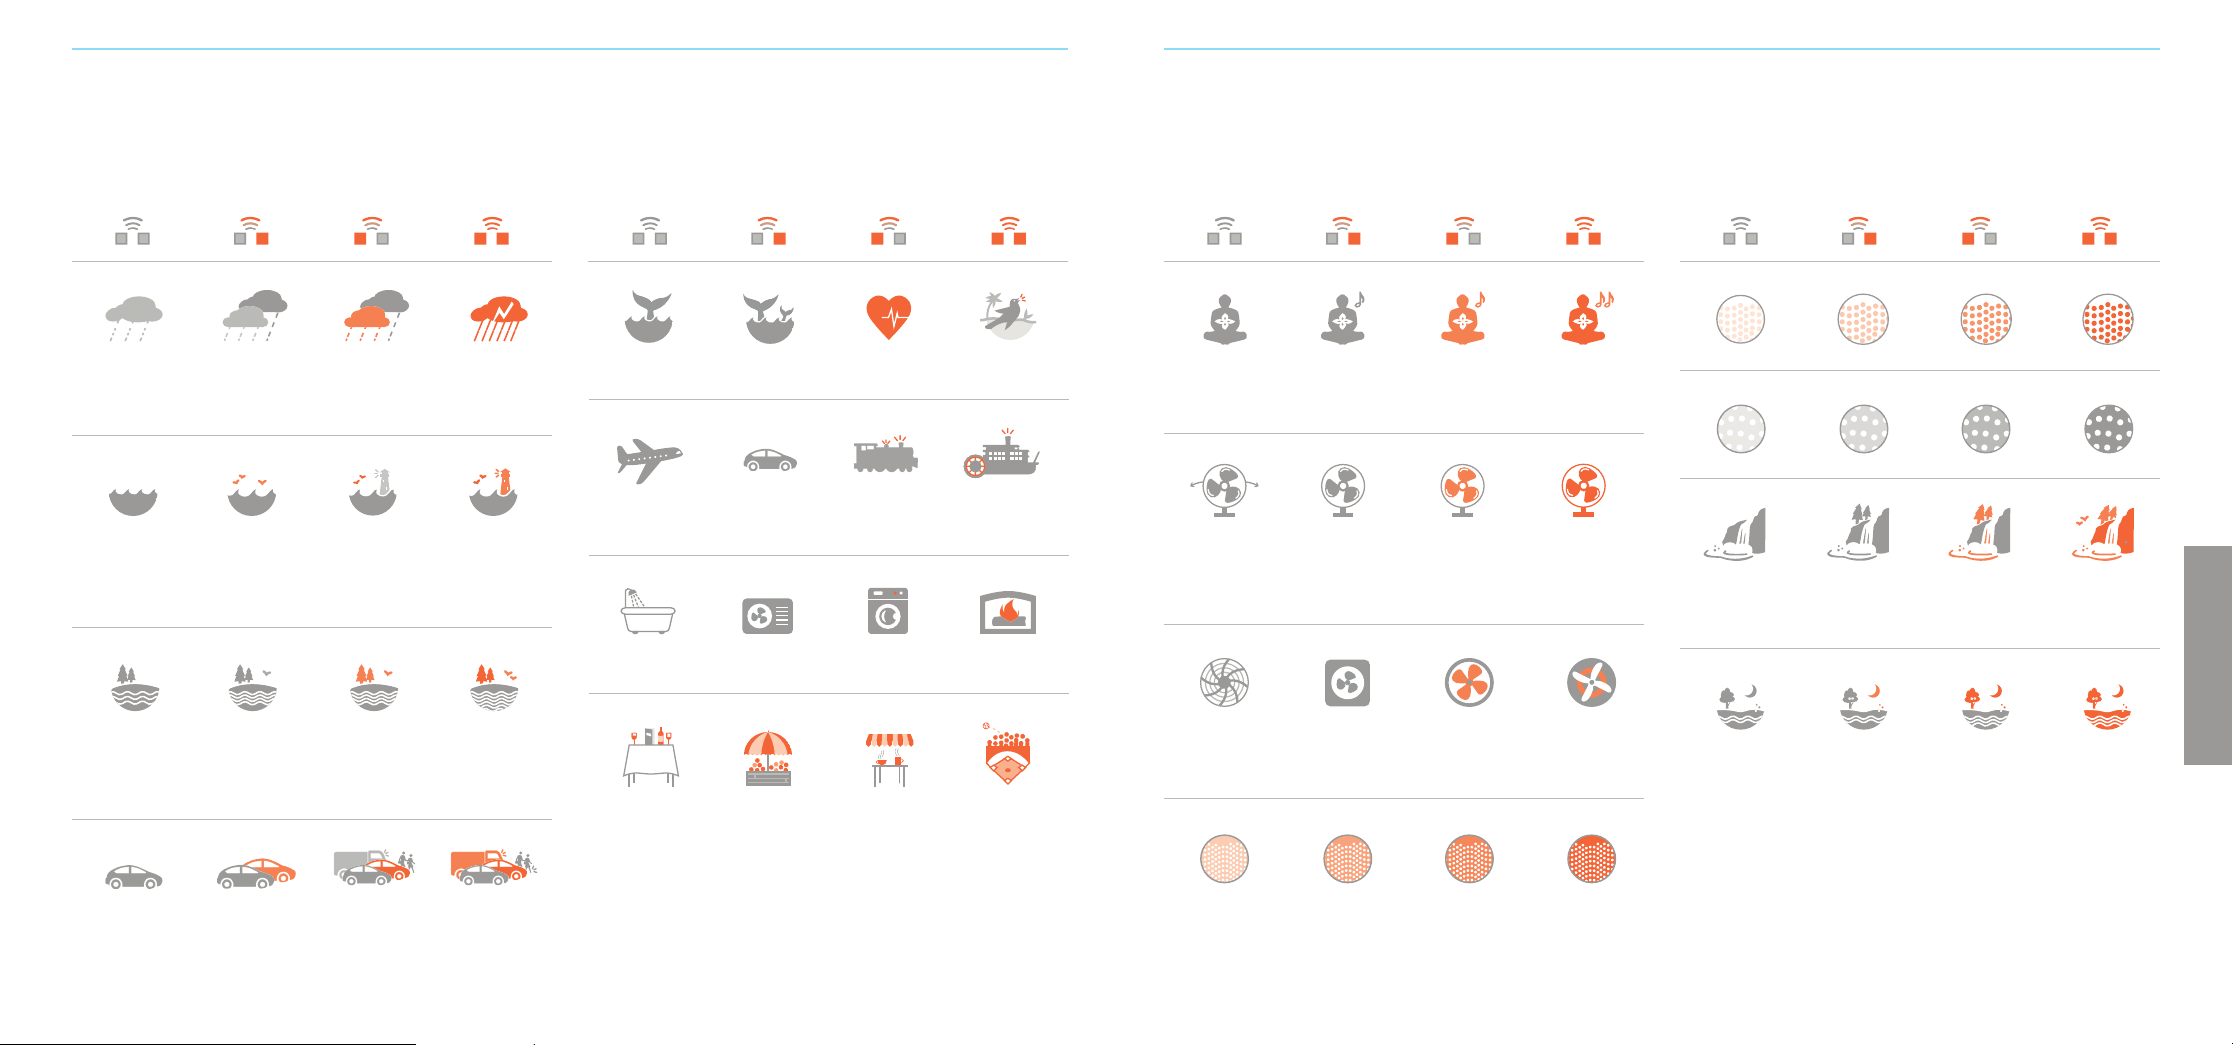
meditate
small fan
large fan
white noise
rides
home
crowds
rainfall
meadow
waterfall
brown noise
city
brook
ocean
baby
pink noise
ENGLISH
Power
On /O
Microphone
Adaptive Mode Button
Sleep Timer Button
External
Audio Input
Headphone
Jack
Selection
Button
Volume Button
Up
USB
Charging
Ports
Volume Button
Down
Sound Category Dial

65
Rainfall
Waterfall
Ocean
Rides
Meadow
Brook
Large Fan
Home
City
White Noise
Pink Noise
Brown Noise
Rainfall Add wind and
light thunder
Add more wind
and thunder
Add heavier
thunder
Waterfall Waterfall
and wind
Add more wind Also add
other sounds
Ocean waves
and lapping
water
Add gurgling
water
Also add
seagulls, seals,
buoy bells
Also add
foghorns
Plane ride Car ride Train ride Paddle boat ride
Crickets
and wind
Add bird
wings and
splashing water
Add song birds
and bees
Also add frogs
Flowing water
and wind
Add bird wings
and splashing
Also add song
birds and frogs
Add more
of everything
Attic fan Box fan Large fan Industrial fan
Bath Air conditioner Clothes washer Fireplace
City din City din and
passing cars
Also add
machinery and
copters
Add footsteps
and skates
Crowds
Restaurant Open air market Coee shop Ball game
SOUND ENVIRONMENTS
Use the dial to select a sound category, and then press the selection button to choose an environment.
Each sound category has four environments from which to choose.
Small Fan
Meditate
Box fan Mellow fan, low Exhaust fan Mellow fan, high
Om Om and Sitar Add Guitar Add other
sounds and
instruments
Baby
Undersea whales Whale party Heartbeat Aviary
ENGLISH
eeee

87
TROUBLESHOOTING
Symptom Possible Cause Solution
No operation when • Disconnected power plug Check the power connection on the bottom of the unit and
POWER button is pressed at the wall outlet. Make sure that both are firmly seated
• Unit is connected to a switched wall outlet Move the unit to an un-switched outlet
• Faulty wall outlet Move to a working outlet and power on again
• System needs to be reset First, power O the unit, then press and hold the POWER
button for 5 seconds
Unit is On, but no sound is heard • Volume is set too low Press or hold VOLUME-UP button to increase volume
• Cable plugged into external audio input? Remove cable from Audio Input Jack, or connect cable to
audio source
• Headphones plugged in? Remove headphones, speaker is muted when headphones
are connected
Unit is On, but volume is too low • Volume is set too low Press or hold VOLUME-UP button to increase volume
• In Adaptive Mode? In Adaptive Mode the sound will be low when there is no
noise in the room. If you prefer to maintain the sound on high
volume, turn Adaptive Mode O.
Volume is too high Press or hold the VOLUME-DOWN button to decrease volume
Other unexpected behavior • Try the "Factory Reset" procedure. 1. Unplug power adapter from the AC outlet
If this does not resolve the issue,
2. Press and hold the POWER button down while plugging
call Customer Support
power adapter back into AC outlet
3. Continue to hold POWER button down for 5 seconds
SAFETY, WARRANTY, AND CERTIFICATIONS
Safety Instructions
Read and adhere to all safety and operating instructions before use. Keep this
booklet for future reference.
1. WARNING: Do Not Operate Heavy Machinery or Motor Vehicles While Using
this Device.
2. The unit should be cleaned regularly with a soft, dry cloth. The grill may be
vacuumed to remove excessive dust or particle build-up. Do not use any liquids
or sprays (including solvents, chemicals or alcohol) or abrasives to clean.
3. The unit should not be used near water, such as a bathtub, swimming pool, faucet
or basin to avoid electrocution.
4.
Be careful to avoid dropping objects or spilling liquids onto the unit. If liquid is spilled
on the unit, unplug and turn it upside down immediately. Allow it to dry thoroughly
(one week) before plugging it into a wall outlet again. Following these instructions
does not ensure that the unit will be operational.
5. Do not reach for the unit if it has fallen into water. Unplug it immediately at
the wall outlet, and if at all possible drain water before retrieving the unit.
6. The unit should be situated away from heat sources such as radiators, heat
registers, stoves or other appliances (including amplifiers) that produce heat.
7. Avoid placing the unit in areas that are exposed to direct sunlight or close to
heat-radiating products such as electric heaters. Do not place unit on top of
stereo equipment that radiates heat.
8. Avoid placing in areas that are dusty, humid, moist, lack ventilation, or are
subject to constant vibration.
9. The unit may be subject to interference from external sources such as
trans-formers, electric motors or other electronic devices. To avoid distortion
from such sources, place the unit as far away from them as possible.
10. Do not apply excessive force when using any switches or controls.
11. The unit should only be used with the power adapter provided or AA batteries.
12. Power cords should be routed to avoid being walked on or pinched by items
placed on or against them.
13. Unplug the power adapter from the outlet when the unit is unused for long
periods of time or when moving the unit.
14. Do not attempt to service the unit yourself.
One Year Limited Warranty
Adaptive Sound Technologies, Inc., hereinafter referred to as ASTI, warrants this
product against defects in materials and/or workmanship under normal use for
a period of ONE (1) YEAR from the date of purchase by the original purchaser
(“Warranty Period”). If a defect arises and a valid claim is received within the
Warranty Period, at its option, ASTI will either 1) repair the defect at no charge,
using new or refurbished replacement parts, or 2) replace the product with a current
product that is close in functionality to the original product. A replacement product
or part, including a user-installable part installed in accordance with instructions
provided by ASTI, is covered by the remaining warranty of the original purchase.
When a product or part is exchanged, the replacement item becomes your property
and the replaced item becomes ASTI’s property.
Obtaining Service: To obtain warranty service please call, or email Adaptive
Sound Technologies.
ENGLISH
TECHNICAL INFORMATION
Specifications
Sound Categories 16
Sound Environments: 64
Speaker Compensation: Five-band parametric EQ
Headphone Jack: 3.5mm stereo
Audio input jack: 3.5mm stereo
USB-A charging ports: 900 mA max (each)
Power requirements: 5 Volts, 2.5 Amps DC max.
when charging other devices
Power consumption while o: < 0.25 Watts
(typically 0.1 Watts)
Restore Factory Settings
This procedure will reset the unit to its original
“out of the box” settings.
1. Turn o the Sound+Sleep SE
2. Press and hold the POWER button for about five
seconds, until you hear a small popping sound.
Customer Support
If you have problems or questions, please visit:
www.astisupport.com
Limits and Exclusions: This Limited Warranty applies only to the ASTI Sound+Sleep
SE unit, ASTI power adapter, ASTI power cable, and ASTI audio cable. It does NOT
apply to any bundled non-ASTI components or products.
This warranty does not apply to: a) damage caused by failure to follow instructions
relating to the product’s use or to the installation of components; b) damage
caused by accident, abuse, misuse, fire, floods, earthquake or other external causes;
c) damage caused by service performed by anyone who is not a representative of
ASTI; d) accessories used in conjunction with a covered product; e) a product or part
that has been modified to alter functionality or capability; f) items intended to be
periodically replaced by the purchaser during the normal life of the product including,
without limitation, batteries or light bulbs; or g) any and all pre-existing conditions that
occur prior to the eective date of this Limited Warranty relating to any product sold
“as is” including, without limitation, floor demonstration models and refurbished items.
ADAPTIVE SOUND TECHNOLOGIES, INC. SHALL NOT BE LIABLE FOR INCIDENTAL
OR CONSEQUENTIAL DAMAGES RESULTING FROM THE USE OF THIS PRODUCT, OR
ARISING OUT OF ANY BREACH OF THIS WARRANTY. TO THE EXTENT PERMITTED
BY APPLICABLE LAW, ASTI DISCLAIMS ANY AND ALL STATUTORY OR IMPLIED
WARRANTIES, INCLUDING, WITHOUT LIMITATION, WARRANTIES OF MERCHANTA-
BILITY, FITNESS FOR A PARTICULAR PURPOSE AND WARRANTIES AGAINST HIDDEN
OR LATENT DEFECTS. IF ASTI CANNOT LAWFULLY DISCLAIM STATUTORY OR
IMPLIED WARRANTIES, THEN TO THE EXTENT PERMITTED BY LAW, ALL SUCH
WARRANTIES SHALL BE LIMITED IN DURATION TO THE DURATION OF THIS
EXPRESS WARRANTY.
Some geographic areas disallow the exclusion or limitation of incidental or
consequential damages or the length of an implied warranty. As a consequence,
some of the above exclusions or limitations may not apply to buyers residing in
those areas. This warranty grants specific legal rights to buyers, but other rights
may also be granted, which vary from country to country, state to state, etc.
FCC Declaration
This equipment has been tested and found to comply with the limits for a Class B
Digital Device, pursuant to Part 15 of the FCC Rules. These limits are designed to
provide reasonable protection against harmful interference in a residential installation.
This equipment generates, uses, and can radiate radio frequency energy, and if not
installed and used in accordance with the instructions, may cause harmful interference
to radio communications. However, there is no guarantee that interference will not
occur in a particular installation.
If this equipment does cause harmful interference to radio or television reception,
which can be determined by turning the equipment o and on, the user is encouraged
to try to correct the interference by one or more of the following measures:
• Reorient or relocate the receiving antenna.
• Increase the separation between the equipment and receiver.
• Connect the equipment to an outlet on a circuit dierent from
the one to which the receiver is connected.
• Consult the dealer or an experienced radio/TV technician for help.
© Adaptive Sound Technologies, Inc. All Rights Reserved. Sound+Sleep, Adaptive Sound,
and the ASTI logo are trademarks of Adaptive Sound Technologies, Inc. All other marks
are trademarks or registered trademarks of their respective owners. Use of this product
is protected by US patents #8,243,937, #8,379,870, #8,280,068 and #8,280,067. Additional
patents pending.

109
CHERS CLIENTS,
Merci et félicitations pour votre achat d’une Sound+Sleep SE d’Adaptive Sound Technologies.
Il s’agit tout simplement de la meilleure machine de sonorisation du sommeil sur le marché.
Elle dispose de sons naturels enregistrés par notre propre équipe de professionnels de l’audio.
Ces sons sont utilisés pour créer des environnements sonores à couches multiples à la fois non
répétitifs et uniques à chaque écoute. Avec 64 environnements sonores dynamiques répartis
en 16 catégories, vous serez certain de trouver l’environnement parfait pour vous reposer, vous
détendre, ou mieux encore, pour dormir.
Si vous avez des suggestions pour améliorer nos produits, n’hésitez pas à nous le faire savoir.
Sam J. Nicolino Jr., président-directeur général d’ASTI
BIEN COMMENCER
Contenu du carton :
1. Ce mode d’emploi
2. Le guide des environnements sonores
3. La Sound+Sleep SE
4. L’adaptateur secteur et le câble assorti
5. Le câble audio de 3,5 mm
Brancher le produit sur une prise secteur
La prise d’alimentation est située au bas de la SE.
1. Enfoncez la fi che de l’adaptateur secteur à l’extrémité
du câble dans la prise.
2. Glissez le cordon sous le pied en caoutchouc en
écartant les deux parties du pied le long de la fente.
3. La machine doit pouvoir rester à plat sur une table
ou une table de chevet si le cordon est installé
correctement. La fente devrait s’écarter facilement
en faisant descendre votre doigt le long de l’arête.
Si ce n’est pas le cas, vous pouvez utiliser un couteau
pour ouvrir la fente proprement.
Ensuite, branchez la fi che secteur sur une prise murale
qui n’est pas reliée à un interrupteur. La première fois que
vous brancherez la SE, celle-ci lancera un auto-test qui
pourra lui prendre jusqu’à 30 secondes. Veuillez noter que
les seize points peints autour du cadran ne s’allument pas.
Nous vous recommandons de ne pas utiliser de prise reliée
à un interrupteur. Votre SE se souvient automatiquement
de ses paramètres à chaque fois que vous la désactivez
à l’aide du bouton de POWER, mais il se peut qu’elle ne
s’en souvienne pas si elle perd son alimentation.
Vous pouvez utiliser la SE dans le monde entier avec
n’importe quelle ligne en CA, avec une tension de
100 à 240 volts, à 50 ou 60 Hz, à l’aide d’un adaptateur
secteur (disponible dans de nombreux magasins
d’appareils électroniques et de voyage).
FRANÇAIS
1.
2.
3.
NOTEZ VOTRE NUMERO DE SERIE ET ENREGISTREZ VOTRE PRODUIT
Notez votre numéro de série ici. Vous le trouverez au bas du produit. NUMERO DE MODELE : ASM1005
Vous en aurez besoin pour enregistrer votre produit sur astisupport.com,
et vous devriez pouvoir le retrouver rapidement si vous contactez notre
service client.
Numéro de série : ________________________________________________________________________
Date d’achat : ___________________________________________________________________________
X XXXXX XXXXX
SOUND
OF
SLEEP
1211
Allumez-la et sélectionnez un son
Appuyez sur le bouton de POWER ; la SE va s’initialiser et
commencer à émettre un son dans environ deux secondes.
La SE peut être éteinte via le bouton d’e POWER, ou le
bouton de TIMER (voir la rubrique minuterie de sommeil).
La SE conservera les derniers paramètres utilisés la
dernière fois que vous l’aurez éteinte à l’aide du bouton
de POWER. Si vous l’éteignez en débranchant l’adaptateur
secteur du SE de la prise murale, les réglages risquent de
ne pas être enregistrés.
Ensuite, utilisez le cadran pour sélectionner une catégorie
de son, puis appuyez sur le bouton de SELECTION pour
faire votre choix parmi les quatre environnements sonores
de cette catégorie.
Consultez le guide des environnements sonores fourni ou
les listes des sons aux pages 13 et 14 pour obtenir une liste
complète des environnements sonores.
Utilisez les boutons du VOLUME pour régler le volume
comme bon vous semble.
Tous les environnements sonores ne sont pas conçus
pour le sommeil. Certains environnements sont conçus
pour se détendre, discuter sans être entendu, méditer,
étudier ou lire.
Mode adaptatif
La SE peut s’adapter au bruit dans votre environnement.
Elle utilise son micro intégré sur son panneau avant pour
écouter les bruits perturbateurs ; elle augmente alors
le volume et / ou ajoute des sons destinés à améliorer
l’environnement sonore en conséquence. Appuyez sur
le bouton ADAPTIVE pour l’activer ou le désactiver. Le
voyant à côté du bouton ADAPTIVE indiquera s’il est actif.
Si le mode adaptatif est désactivé, votre SE conservera
un niveau sonore constant.
Le mode adaptatif permet de personnaliser la SE en
fonction de vos préférences et de la situation. Vous
pourriez préférer un son calme et régulier, surtout si votre
environnement est relativement silencieux ou s’il présente
un bruit constant. Vous pourriez également avoir besoin
de la fonctionnalité de masquage supplémentaire des
bruits fournie par le mode adaptatif. Faites vos propres
essais pour trouver le réglage que vous préférez dans
di érentes situations.
Remarque : lorsque vous réglez le volume en mode
adaptatif, vous réglez en réalité le volume maximum qu’il
peut atteindre lorsque la SE détecte un bruit fort. Si le son
vous paraît trop faible quand votre pièce est silencieuse,
montez le volume à un niveau de base plus élevé.
PLUS DE FONCTIONNALITES UTILES
Minuterie de sommeil
La minuterie de sommeil peut être utilisée pour que la SE
soit active pendant un certain nombre de minutes, puis
qu’elle s’éteigne progressivement et automatiquement.
Cet intervalle de temps peut être défi ni sur 30, 60, 90 ou
120 minutes en appuyant sur le bouton de TIMER.
La minuterie sera désactivée si vous éteignez la SE. Si vous
appuyez sur le bouton de TIMER alors que la SE est éteinte,
celle-ci s’allumera et réglera la minuterie de sommeil sur
30 minutes. Appuyez à nouveau sur le bouton de TIMER
pour la régler sur l’intervalle de temps suivant. Après avoir
sélectionné 120 minutes, appuyez à nouveau sur le bouton
de TIMER pour l’éteindre
Prise casque
Une prise casque stéréo standard de 3,5 mm se trouve au
bas du panneau de connexion. N’importe quels casque ou
écouteurs avec un connecteur de 3,5 mm peuvent être
utilisés. Brancher un casque ou des écouteurs désactivera
le haut-parleur intégré de la SE ; c’est un excellent moyen
d’utiliser votre SE pour vous détendre en privé.
Comme avec tout produit, faites preuve de bon sens
lorsque vous utilisez un casque. Évitez de l’utiliser à un
volume élevé. Une exposition prolongée à des volumes
sonores élevés peut nuire à votre audition.
Entrée audio externe
Vous pouvez utiliser l’entrée audio externe pour écouter
une source audio depuis n’importe quel appareil doté d’une
sortie de ligne ou de casque standard de 3,5 mm. Un câble
audio est fourni, mais vous pouvez aussi utiliser le vôtre.
Certains téléphones et autres appareils peuvent générer
du bruit s’ils sont à la fois en train d’être chargés et utilisés
comme source audio externe.
Attention : il est préférable de connecter la source audio
avec soin en procédant comme suit :
1. Baissez le volume de votre SE
2. Branchez une extrémité du câble audio sur votre
source sonore
3. Branchez l’autre extrémité du câble audio à la prise
d’entrée audio de la SE
4. Réglez le volume de la SE au niveau d’écoute souhaité
Ports de charge USB
Le panneau de connexion de la SE dispose de deux ports
de charge USB-A. Veuillez noter que ceux-ci peuvent
être utilisés pour charger un smartphone ou un appareil
similaire. Les ports de charge ne sont pas utilisés pour le
transfert de données ou l’audio.
Éteindre l’affi chage
Vous pouvez utiliser le bouton de DISPLAY pour éteindre
les voyants du panneau avant s’ils vous dérangent. Si
vous réglez n’importe quel paramètre lorsque les voyants
de l’a chage sont éteints, ils s’allumeront pendant
15 secondes puis s’assombriront à nouveau.
POWER
TIMER
30 60 90 120
DISPLAY VOLUME
+
–
ADAPTIVE SELECTION
•
•
•
•
•
•
•
•
•
•
•
•
•
•
•
•
meditate
small fan
large fan
white noise
rides
home
crowds
rainfall
meadow
waterfall
brown noise
city
brook
ocean
baby
pink noise
UTILISER VOTRE SE POUR LA PREMIERE FOIS
Alimentation
Marche /Arrêt
Microphone
Mode adaptatif
Minuterie
Entrée audio
externe
Prise casque
Sélection
La volume
Monter
Ports
de charge
USB
La volume
Baisser
Type de composition
sonore
FRANÇAIS
1413
Pluie
Cascade
Océan
Promenades
Prairie
Ruisseau
Grand ventilateur
Maison
Ville
Bruits blancs
Bruit rose
Bruit marron
Pluie Ajouter
du vent et un
tonnerre léger
Ajouter plus
de vent et
de tonnerre
Ajouter
un tonnerre
plus lourd
Cascade Cascade et vent Ajouter plus
de vent
Ajoutez
également
d’autres sons
Voyage en avion Promenade
en voiture
Voyage en train Promenade en
bateau à aubes
Grillons et vent Ajouter des
battements d’ailes
d’oiseaux et des
éclaboussures
Ajouter le chant
des oiseaux
et des arbres
Ajoutez aussi
des grenouilles
Eau qui s’écoule
et vent
Ajouter des
battements d’ailes
d’oiseaux et des
éclaboussures
Ajouter
également
des oiseaux
chanteurs et des
grenouilles
Ajouter plus
de tout
Ventilateur
de grenier
ventilateur
de boîte
Grand ventilateur Ventilateur
industriel
Bain Climatisation Lave-linge Cheminée
Bruits de
la ville
Bruits de
la ville et voitures
qui passent
Ajouter également
des machines et
des hélicoptères
Ajouter
des bruits de pas
et de patins
Foules
Restaurant Marché en
plein air
Café Jeu de ballon
ENVIRONNEMENTS SONORES
Utilisez le cadran pour sélectionner une type de composition sonore, puis appuyez sur la touche de SELECTION pour
choisir un environnement. Chaque catégorie sonore comporte quatre environnements qui peuvent être choisis.
Petit ventilateur
Méditation
Ventilateur
portable
Ventilateur
calme, bas
Ventilateur
d’échappement
Ventilateur
calme, élevé
Om Om et cithare Ajouter
une guitare
Ajouter d’autres
sons et instruments
Bébé
Baleines
sous-marines
Banc
de baleines
Battements
de cœur
Volière
FRANÇAIS
eeee
Vagues
océaniques
et clapotis
Ajouter de l’eau
gargouillante
Ajouter également
des mouettes,
des phoques, des
cloches de bouées
Ajouter
également des
cornes de brume

1615
SÉCURITÉ, GARANTIE ET CERTIFICATIONS
Consignes de sécurité
Veuillez lire toutes les instructions d’utilisation et respecter toutes les consignes
de sécurité avant d’utiliser l’appareil. Veuillez conserver ce livret pour toute
référence ultérieure.
1. AVERTISSEMENT : vous ne devez PAS utiliser cet appareil à proximité
d’équipements lourds ou d’un véhicule à moteur en marche.
2. L’unité doit être nettoyée régulièrement avec un chion sec et doux. Vous pouvez
nettoyer la grille avec un aspirateur afin d’enlever la poussière ou l’accumulation
de particules. N’utilisez pas de produits liquides ou des aérosols (y compris les
solvants, les produits chimiques ou l’alcool) ou de produits abrasifs pour nettoyer
l’appareil.
3. Vous ne devriez pas utiliser l’unité près d’une source d’eau, comme une baignoire,
une piscine, un robinet ou un bassin afin d’éviter une électrocution.
4. Veillez à ne pas laisser tomber d’objets ou renverser de liquides sur l’unité. Si
vous renversez du liquide sur l’appareil, débranchez-le et tournez-le à l’envers
immédiatement. Laissez-le sécher complètement (pendant une semaine) avant
de le rebrancher à une prise murale. Le fait de suivre ces instructions ne constitue
pas une garantie que cette unité sera opérationnelle.
5. N’essayez pas de récupérer une unité qui serait tombée dans l’eau. Débranchez-la
immédiatement de a prise murale et, si la situation le permet, évacuez toute l’eau
qui l’entoure avant de récupérer l’unité.
6. L’unité doit être placée loin des sources de chaleur comme des radiateurs,
des bouches de chaleur, des poêles ou de tout autre appareil (y compris les
amplificateurs) dégageant de la chaleur.
7. Évitez de placer l’unité dans des zones exposée à la lumière directe du soleil ou
près d’équipements produisant un rayonnement de chaleur comme des radiateurs
électriques. Ne placez pas l’unité au-dessus de tout équipement électronique
pouvant dégager de la chaleur.
8. Évitez de placer l’unité dans des zones poussiéreuses, humides, mouillées, peu
ventilées ou soumises à des vibrations constantes.
9. L’unité pourrait subir des interférences provenant de sources externes comme
les transformateurs, les moteurs électriques ou d’autres appareils électroniques.
Pour éviter toute distorsion provenant de telles sources, placez l’unité aussi loin
d’elles que possible.
10. Évitez d’appliquer une force excessive lors de l’utilisation de l’un des interrupteurs
de commande.
11. L'appareil ne doit être utilisé qu'avec l'adaptateur secteur fourni ou des piles AA.
12. Vous devriez arranger les cordons électriques de manière à éviter qu’ils soient
écrasés ou pincés par des objets posés sur ou près d’eux.
13. Vous devriez débrancher le cordon d’alimentation de la prise murale lorsque
vous ne comptez pas utiliser l’appareil pendant de longues périodes de temps
ou lors du déplacement de l’unité.
14. Vous ne devez pas tenter de réparer l’appareil vous-même au-delà de ce qui est
décrit dans la notice d’instructions.
Garantie limitée à 1 an
La garantie ne s’applique uniquement qu’aux machines achetées auprès des revendeurs
ASTI Sound+Sleep SE agréés.
ASTI garantit ce produit contre tout défaut de matériaux et/ou de fabrication sous des
conditions normales d’utilisation, pour une période d’un (1) an, à compter de la date
d’achat par l’acheteur d’origine (ci-après la «Période de garantie»). Si un défaut survient
et qu’une réclamation valide est reçue durant la période de garantie, ASTI s’engage, de son
plein gré, à 1) eectuer une réparation sans frais en utilisant des pièces neuves ou remises à
neuf ou à 2) remplacer le produit par un produit actuel équipé de fonctionnalités similaires
au produit d’origine. Un produit ou une pièce de remplacement, y compris toute pièce
installable par l’utilisateur, qui serait installé conformément aux instructions indiquées par
ASTI, est couvert par la garantie restante de l’achat d’origine.
Lors d’un échange de produit ou de pièce, l’élément de rechange devient votre
propriété et l’élément remplacé devient la propriété de ASTI.
FRANÇAIS
Obtention d’un service de garantie : Pour obtenir un service de garantie, veuillez
appeler ou envoyer un courriel à votre revendeur. Soyez prêt à décrire le produit qui
doit faire l’objet d’un service de garantie et la nature du problème. Toutes les répara-
tions et les remplacements doivent être autorisés au préalable par votre revendeur.
Tous les retours devront être accompagnés d’une preuve d’achat. Les options de
service, la disponibilité des pièces et les temps de réponse varient selon les régions.
Limites et exclusions : cette garantie limitée ne s’applique uniquement qu’à l’unité
Sound+Sleep SE et à l’adaptateur d’alimentation. Elle ne s’applique PAS aux câbles
fournis ni à des séries de composants ou produits non-ASTI. Cette garantie ne s’ap-
plique pas : a) aux dommages causés par le non-respect des instructions relatives à
l’utilisation du produit ou à l’installation de composants ; b) aux dommages causés par
accident, abus, mauvaise utilisation, incendies, inondations, tremblement de terre ou
autres causes externes ; c) aux dommages causés par une réparation eectuée par
une personne non agréée par ASTI ; d) aux accessoires utilisés en conjonction avec
un produit couvert par la garantie ; e) à un produit ou une pièce qui aurait été modifié
dans le but d’en changer la fonctionnalité ou la capacité ; f) aux produits destinés à
être remplacé périodiquement par l’acheteur au cours de la durée de vie normale du
produit, notamment les piles et les ampoules électriques ; ou g) à tout produit vendu
«en l’état» ayant des problèmes préexistants et survenant avant la date d’entrée en
vigueur de la présente garantie limitée, notamment les modèles de démonstration et
les unités remises à neuf.
ASTI NE SAURAIT ÊTRE TENUE RESPONSABLE DES DOMMAGES DIRECTS OU
INDIRECTS RÉSULTANT DE L’UTILISATION DE CE PRODUIT OU D’UNE VIOLATION
QUELCONQUE DE LA PRÉSENTE GARANTIE. DANS LA MESURE PERMISE PAR
LA LOI APPLICABLE, ASTI DÉCLINE TOUTE GARANTIE IMPLICITE OU STATUTAIRE,
NOTAMMENT LES GARANTIES DE CONFORMITÉ ET D’USAGE NORMAL ET TOUTE
GARANTIE CONTRE DES DÉFAUTS CACHÉS OU LATENTS. AU CAS OÙ ASTI
NE SERAIT PAS EN MESURE DE DÉCLINER LÉGALEMENT TOUTE GARANTIE
IMPLICITE OU STATUTAIRE, ALORS ET DANS LA MESURE PERMISE PAR LA LOI,
TOUTES CES GARANTIES SERONT LIMITÉES À LA DURÉE
Certains pays interdisent l’exclusion ou la limitation des dommages accessoires ou
indirects ou la durée d’une garantie implicite. En conséquence, certaines des exclu-
sions ou des limitations citées ci-dessus pourraient ne pas s’appliquer aux acheteurs
résidant dans ces régions. Cette garantie octroie des droits juridiques spécifiques aux
acheteurs, mais ceux-ci pourraient bénéficier de droits supplémentaires qui varient
d’un pays ou d’un état ou d’une région à l’autre.
Déclaration de la FCC
Cet équipement a été testé et déclaré conforme aux limitations relatives à un appareil
numérique de classe A, en vertu de la section 15 des règlements de la FCC. Ces limites
sont destinées à fournir une protection aisonnable contre les interférences nuisibles
dans une habitation résidentielle. Cet équipement génère, utilise et peut émettre de
l’énergie radio électrique et, s’il n’est pas installé et utilisé conformément aux directives
du manuel d’instructions, peut provoquer des interférences nuisibles aux commu-
nications radiophoniques. Toutefois, rien ne peut garantir que des interférences se
produisent dans certaines installations particulières.
Si cet équipement provoque des interférences nuisibles à la réception d’un appareil
radio ou d’une télévision, et qui seraient confirmées en allumant et en éteignant
l’équipement, l’utilisateur est invité à essayer de corriger les interférences en eectuant
l’une ou plusieurs des actions suivantes :
• Réorientez ou déplacez l’antenne de réception.
• Augmentez la distance entre l’équipement et le récepteur.
• Connectez l’équipement à une prise qui ne soit pas reliée au circuit sur lequel
le récepteur est branché.
• Contactez un revendeur autorisé ou un technicien radio/TV expérimenté pour
obtenir de l’aide.
© Adaptive Sound Technologies, Inc. All Rights Reserved. Sound+Sleep, Adaptive Sound,
and the ASTI logo are trademarks of Adaptive Sound Technologies, Inc. All other marks
are trademarks or registered trademarks of their respective owners. Use of this product
is protected by US patents #8,243,937, #8,379,870, #8,280,068 and #8,280,067. Additional
patents pending.
RESOLUTION DE PROBLEMES
Symptôme Cause possible Solution
Aucun fonctionnement en appuyant • Prise d’alimentation débranchée Vérifiez la connexion d’alimentation au bas de l’appareil et
sur le bouton de POWER à la prise murale. Assurez-vous que les deux sont bien en place
• L’appareil est branché sur une prise Déplacez l’appareil sur une prise sans interrupteur murale
à interrupteur
• Prise murale défectueuse Déplacez l’appareil sur une prise en état de marche et rallumez-le
• Le système doit être réinitialisé Éteignez l’appareil puis maintenez le bouton de POWER enfoncé
pendant 5 secondes
L’appareil est allumé mais ne • Le volume est réglé à un niveau trop faible Appuyez sur le bouton de VOLUME-UP ou maintenez-le enfoncé
produit aucun son pour augmenter le volume
• Un câble est-il branché sur l’entrée Débranchez le câble de la prise d’entrée audio ou branchez
audio externe ? le câble sur la source audio
• Un casque est-il branché ? Débranchez le casque ; le haut-parleur se coupe lorsqu’un casque
ou des écouteurs sont branchés
L’appareil est allumé mais le volume • Le volume est réglé à un niveau trop faible Appuyez sur le bouton de VOLUME-UP ou maintenez-le enfoncé
est trop faible pour augmenter le volume
• L’appareil est-il en mode adaptatif ? En mode adaptatif, le son sera faible en l’absence de bruit dans
la pièce. Si vous préférez maintenir le volume à un niveau élevé,
désactivez le mode adaptatif.
Le volume est trop élevé Appuyez sur le bouton de VOLUME-DOWN ou maintenez-le
enfoncé pour réduire le volume
Autre comportement inattendu • Essayez la procédure de réinitialisation 1. Débranchez l’adaptateur secteur de la prise secteur d’usine.
aux paramètres Si cela ne résout pas le problème,
2. Maintenez le bouton de POWER enfoncé tout en branchant
appelez le service client l’adaptateur secteur sur la prise secteur
3. Maintenez encore le bouton de POWER enfoncé pendant
l5 secondes
INFORMATIONS TECHNIQUES
Caractéristiques techniques
Catégories sonores : 16
Environnements sonores : 64
Compensation du haut-parleur : Égalisateur paramétrique à cinq bandes
Prise casque : Stéréo 3,5 mm
Prise d’entrée audio: Stéréo 3,5 mm
Ports de charge USB-A : 900 mA max. (chacun)
Puissance requise : 5 volts, 2,5 ampères max. en CC
lors du chargement d’autres appareils
Consommation électrique < 0,25 Watt en mode veille :
(typiquement, 0,1 Watt)
Réinitialiser aux paramètres d’usine
Cette procédure réinitialisera l’appareil à ses
paramètres d’origine et son état « prêt à l’emploi ».
1. Éteignez la Sound+Sleep SE
2. Maintenez le bouton de POWER enfoncé
pendant environ cinq secondes, jusqu’à ce
que vous entendiez un petit bruit sec.
Service client
Si vous avez des problèmes ou des questions,
rendez-vous sur : www.astisupport.com
1817
DEUTSCH
AN UNSERE KUNDEN:
Vielen Dank und herzlichen Glückwunsch zum Kauf Ihrer Sound+Sleep SE von Adaptive Sound
Technologies. Es ist ganz einfach die beste akustische Einschlafhilfe auf dem Markt. Sie nutzt
natürliche Geräusche, die von unseren eigenen Audioexperten aufgenommen wurden. Mit diesen
Geräuschen werden vielschichtige Geräuschkulissen erzeugt, die sich nicht wiederholen und jedes
Mal einzigartig sind. Mit 64 dynamischen Geräuschkulissen in 16 Kategorien, fi nden Sie sicher die
perfekte Umgebung für Ruhe, Entspannung oder besseren Schlaf.
Wenn Sie Vorschläge haben, wie wir unsere Produkte verbessern können, dann teilen
Sie uns diese bitte mit.
Sam J. Nicolino Jr., Präsident und CEO von ASTI
EINSTIEG
In diesem Paket fi nden Sie:
1 Diese Bedienungsanleitung
2 Sound Environments-Handbuch
3. Sound+Sleep SE
4 AC-Netzadapter und Kabel
5 3,5 mm Audiokabel
An eine Steckdose anschließen.
Der Netzanschluss befi ndet sich an der Unterseite der SE.
1. Stecken Sie den Netzadapterstecker am Ende des
Kabels in den Netzanschluss.
2. Führen Sie das Kabel durch den Gummiboden, indem
Sie das Gummi entlang des Spalts trennen.
3. Wenn das Kabel richtig installiert ist, sollte das Gerät
eben auf einem Tisch oder Nachttisch stehen. Der
Spalt sollte durch leichten Druck mit einem Finger
einfach zu ö nen sein. Falls nicht, können Sie ihn
mit einem Messer sauber ö nen.
Verbinden Sie dann den Netzstecker mit einer nicht
geschalteten Steckdose. Beim erstmaligen Einstecken
kann es bis zu 30 Sekunden dauern bis das Gerät einen
Selbsttest durchgeführt hat. Bitte beachten Sie, dass die
sechzehn Punkte um das Zi erblatt nicht erleuchten.
Wir empfehlen, keine geschaltete Steckdose zu
verwenden. Ihr SE merkt sich jedes Mal automatisch
die Einstellungen wenn Sie es per POWER-Taste
ausschalten. Dies ist möglicherweise nicht der Fall,
wenn die Stromversorgung unterbrochen wird.
Sie können die SE international mit jeder AC-Leitung
verwenden Spannung von 100–240 Volt bei 50 oder
60 Hz mit einem Netzsteckeradapter (erhältlich in
vielen Elektronik- und Reiseläden).
1.
2.
3.
NOTIEREN SIE SICH IHRE SERIENNUMMER UND REGISTRIEREN SIE IHR PRODUKT
Notieren Sie hier Ihre Seriennummer. Sie fi nden sie auf der Unterseite des Produkts. MODEL NUMBER: ASM1005
Die benötigen Sie, wenn Sie Ihr Produkt bei astisupport.com registrieren, und sie
sollte auch gri bereit sein, falls Sie Fragen an unser Support-Team haben.
Seriennummer: __________________________________________________________________________
Kaufdatum: _____________________________________________________________________________
X XXXXX XXXXX
SOUND
OF
SLEEP
2019
ERSTMALIGE VERWENDUNG IHRER SE
Schalten Sie die SE ein und wählen Sie ein Geräusch.
Drücken Sie die POWER-Taste und in etwa zwei Sekund-
en fährt die SE hoch und fängt an zu spielen. Die SE kann
per POWER-Taste oder per TIMER-Taste (siehe Sleep
Timer) ausgeschaltet werden.
Der SE behält die letzten Einstellungen bei, die Sie beim
letzten Ausschalten mit der POWER-Taste verwendet
haben. Wenn sie die SE ausschalten, indem Sie den
SE-Netzadapter aus der Steckdose ziehen, werden die
Einstellungen möglicherweise nicht gespeichert.
Suchen Sie dann mit der Wählscheibe eine Geräusch-
kategorie aus und drücken Sie dann die SELECTION-
Taste zur Auswahl der vier Geräuschkulissen in dieser
Kategorie. Im Sound Environments Guide, oder in
den Soundlisten auf den Seiten 21–22 fi nden Sie eine
vollständige Liste der Geräuschkulissen.
Mit den VOLUME Tasten können Sie die Lautstärke nach
Ihren Bedürfnissen regeln.
Nicht alle Geräuschkulissen sind für den Schlaf gedacht.
Einige Geräuschkulissen sind zur Entspannung, für die
Sprach-Privatsphäre, Meditation oder zum Studieren
und Lesen konzipiert.
Anpassungsmodus
Die SE kann sich an die Geräusche in Ihrer Umgebung
anpassen. Mit dem in das Front-Panel integrierten
Mikrofon nimmt sie störende Geräusche war und erhöht
die Lautstärke und / oder fügt der Geräuschkulisse
verstärkende Elemente hinzu, um diese zu kompensieren.
Drücken Sie die ADAPTIVE-Taste, um diesen Modus
ein- oder auszuschalten. Die Lampe neben der
ADAPTIVE-Taste an, wann der Modus aktiviert ist.
Wenn der Anpassungsmodus nicht aktiviert ist, hält die
SE eine gleichbleibende Lautstärke.
Im Anpassungsmodus kann die SE an Ihre persönlichen
Vorlieben und Situationen angepasst werden. Vielleicht
bevorzugen Sie ruhige, gleichmäßige Geräusche,
besonders wenn Ihre Umgebung entweder wenige
oder stetige Geräusche hergibt. Oder Sie benötigen
möglicherweise die zusätzliche Geräuschmaskierung,
die der Anpassungsmodus bietet. Experimentieren Sie,
um die Einstellung zu fi nden, die Ihnen in verschiedenen
Situationen am besten gefällt.
Hinweis: Wenn Sie die Lautstärke im Anpassungs-
modus einstellen, stellen Sie tatsächlich die maximale
Lautstärke ein, die bei einem lauten Geräusch erreicht
werden kann. Wenn das Geräusch in einem leisen
Raum zu gedämpft wirkt, stellen Sie die Lautstärke
auf einen höheren Basispegel.
WEITERE NÜTZLICHE FUNKTIONEN
Sleep Timer
Mit dem Sleep Timer können Sie die SE so einstellen, dass
sie mehrere Minuten lang spielt und sich dann schritt-
weise und automatisch abstellt. Sie können Zeitfenster
von 30, 60, 90, oder 120 Minuten eistellen, indem sie die
TIMER-Taste drücken.
Durch Ausschalten der SE wird der Sleep-Timer gelöscht.
Durch Drücken der TIMER-Taste am ausgeschalteten
Ge-rät, schaltet sich die SE ein und stellt den Sleep Timer
auf 30 Minuten ein. Durch erneutes Drücken der TIMER-
Taste wählen Sie das nächste Zeitfenster aus. Nach dem
120 Minuten ausgewählt wurden, können Sie den Timer
durch erneutes Drücken der TIMER-Taste ausschalten.
Kopfhöreranschluss
Eine standardmäßige 3,5-mm-Stereo-Kopfhörerbuchse
befi ndet sich auf der Unterseite des Anschlussfeldes.
Sie können Jeden gewöhnlichen Satz Kopfhörer oder
Ohrhörer mit 3,5-mm-Anschluss verwenden. Das
Anschließen von Kopfhörern oder Ohrhörern de-aktiviert
die eingebauten Lautsprecher der SE, so dass Sie Ihr
Gerät hervorragend zur privaten Entspannung nutzen
können.
Wie bei jedem Produkt sollten Sie bei der Verwendung
von Kopfhörern vernünftig sein. Verwenden Sie sie nicht
bei hohen Lautstärken.
Eine längere Einwirkung von hohen Lautstärken kann Ihr
Gehör beeinträchtigen.
Externer Audioeingang
Mit dem externen Audioeingang können Sie sich
Audio von einem beliebigem Gerät mit standardmäßiger
3,5 mm Kopfhörer- oder Line-Out-Verbindung anhören.
Ein Audiokabel ist enthalten, oder Sie können Ihre
eigenen verwenden.
Einige Telefone und andere Geräte können Störungen
verursachen wenn sie gleichzeitig aufgeladen und als
externer Tonträger verwendet werden.
Achtung: Seien Sie beim anschließen des Tonträgers
vorsichtig:
1. Verringern Sie die Lautstärke an Ihrem SE
2. Verbinden Sie ein Ende des Audiokabels mit Ihrem
Tonträger
3. Verbinden Sie das andere Ende des Audiokabels
mit dem Audioeingang der SE
4. Stellen Sie die SE-Lautstärke auf den gewünschten
Hörpegel ein
USB-Ladeanschlüsse
Das Anschlussfeld der SE verfügt über zwei USB-A-
Ladeanschlüsse. Bitte beachten Sie, dass diese zum Au-
fl aden eines Smartphones oder ähnlicher Geräte verwen-
det werden können. Die Ladeanschlüsse werden nicht für
Daten oder Audio verwendet.
Anzeige ausschalten
Sie können die DISPLAY-Taste zum Ausschalten der
Front Panel-Lampen nutzen, falls diese Sie stören sollten.
Wenn Sie etwaige Einstellungen vornehmen während
die Anzeigelampen ausgeschaltet sind, schalten sie sich
für 15 Sekunden ein und dimmen dann erneut.
POWER
TIMER
30 60 90 120
DISPLAY VOLUME
+
–
ADAPTIVE SELECTION
•
•
•
•
•
•
•
•
•
•
•
•
•
•
•
•
meditate
small fan
large fan
white noise
rides
home
crowds
rainfall
meadow
waterfall
brown noise
city
brook
ocean
baby
pink noise
Power-Taste
On /O
Mikrofon
Anpassungsmodus-
Taste
Sleep Timer-Taste
Externer
Audioeingang
Kopfhörer-
anschluss
Auswahl
Volume-Taste
Up
USB-
Ladean-
schlüsse
Volume-Taste
Down
Drehregler für Auswahl
der Sound-Kategorie
DEUTSCH
2221
DEUTSCH
Menschenmengen
Regen
Wasserfall
Ozean
Fahrten
Wiese
Bach
Zuhause
Stadt
Rosa Rauschen
Braunes Rauschen
Regen Wind und
leichten Donner
hinzufügen
Mehr Wind
und Donner
hinzufügen
Heftigeren
Donner
hinzufügen
Wasserfall Wasserfall
und Wind
Mehr Wind
hinzufügen
Außerdem
andere Sounds
hinzufügen
Meereswellen
und Wasser-
plätschern
Wasserblubbern
hinzufügen
Zusätzlich
Möwen, Robben,
Bojenglocken
hinzufügen
Zusätzlich
Nebelhörner
hinzufügen
Flug Autofahrt Zugfahrt Fahrt mit dem
Paddelboot
Grillen
und Wind
Vogelflügel und
plätscherndes
Wasser
hinzufügen
Singvögel
und Bäume
hinzufügen
Außerdem
Frösche
hinzufügen
Fließendes
Wasser
und Wind
Vogelflügel und
-Geplätscher
hinzufügen
Zusätzlich
Singvögel
und Frösche
hinzufügen
Mehr von allem
hinzufügen
Bad Klimaanlage Waschmaschine Kamin
Stadtgeräusche Stadtgeräusche
und
vorbeifahrende
Autos
Zusätzlich
Maschinen und
Hubschrauber
hinzufügen
Schritte
und Skates
hinzufügen
Restaurant Straßenmarkt Café Ballspiel
GERÄUSCHKULISSEN:
Wählen Sie mit dem Drehregler eine Sound-Kategorie aus und drücken Sie dann die Auswahltaste,
um eine Umgebung auszuwählen. Für jede Sound-Kategorie stehen vier Umgebungen zur Auswahl.
Kleiner Ventilator
Meditieren
Kastenventilator Sanfter
Ventilator,
niedrige
Tonfrequenz
Abluftventilator Sanfter
Ventilator, hohe
Tonfrequenz
Om Om und Sitar Gitarre
hinzufügen
Weitere Sounds
und Instrumente
hinzufügen
Baby
Unterwasserwale Walparty Herzschlag Voliere
Großer Ventilator
weißes Rauschen
Dachboden-
ventilator
Kastenventilator Grosser
Ventilator
Ventilator für
den industriellen
Einsatz
eeee

2423
DEUTSCH
FEHLERBEHEBUNG
Symptom Mögliche Ursache Lösung
Kein Betrieb bei Drücken der • Netzstecker gezogen. Überprüfen Sie die Stromverbindung an der Unterseite des Geräts
POWER-Taste und an der Steckdose. Stellen Sie sicher, dass beide fest sitzen.
• Das Gerät ist an eine geschaltete Schließen Sie das Gerät an eine nicht geschaltete Steckdose an.
Steckdose angeschlossen
• Fehlerhafte Steckdose. Wechseln Sie zu einer funktionierenden Steckdose, erneut einschalten.
• Das System muss Schalten Sie zuerst das Gerät aus und halten Sie dann die
zurückgesetzt werden. POWER-Taste für 5 Sekunden gedrückt.
Das Gerät ist eingeschaltet, • Die Lautstärke ist zu niedrig eingestellt. Drücken oder halten Sie die VOLUME-UP-Taste zum Erhöhen
aber es ist kein Ton zu hören der Lautstärke.
• Kabel an externen Audioeingang Kabel von der Audioeingangsbuchse abziehen oder Kabel an einen
angeschlossen? Tonträger anschließen.
• Kopfhörer angeschlossen? Kopfhörer entfernen, Lautsprecher ist bei angeschlossenen
Kopfhörern stummgeschaltet.
Das Gerät ist an, aber die • Die Lautstärke ist zu leise eingestellt. Durch Drücken oder Halten der VOLUME-UP-Taste, die
Lautstärke ist zu niedrig. Lautstärke erhöhene
• Im Anpassungsmodus? Geräusche im Raum zu hören sind. Wenn Sie eine höhere Lautstärke
bevorzugen, schalten Sie den Anpassungsmodus aus.
Zu hohe Lautstärke Lautstärke durch Drücken oder Halten von VOLUME-DOWN verringern.
Sonstige unerwartete • Versuchen Sie das "Factory Reset"- 1. Trennen Sie das Netzteil von der Steckdose Wenn das Problem
Vorkommnisse Verfahren. Wenn das Problem dadurch dadurch nicht behoben wird,
nicht behoben wird, wenden Sie sich 2. Halten Sie die POWER-Taste gedrückt während Sie das Netzteil wieder
an den Kundendienst. in die Steckdose stecken.
3. Halten Sie die POWER-Taste weitere 5 Sekunden lang gedrückt.
SICHERHEIT, GARANTIE UND ZERTIFIKATE
Sicherheitshinweise
Lesen und befolgen Sie vor dem Gebrauch alle Sicherheits- und Betriebsanweisungen.
Behalten Sie diese Broschüre zum Nachschlagen.
1. WARNHINWEIS: Betätigen Sie kein schweres Gerät oder Kraftfahrzeuge,
während Sie dieses Gerät benutzen.
2 Das Gerät sollte regelmäßig mit einem weichen, trockenen Tuch gereinigt werden.
Sie können die Kühlrippen absaugen, um übermäßigen Staub- oder Partikelan-
satz zu entfernen. Verwenden Sie keine Flüssigkeiten oder Sprays (einschließlich
Lösungsmittel, Chemikalien oder Alkohol) oder Scheuermittel zum Reinigen.
3. Das Gerät sollte nicht in der Nähe von Wasser wie einer Badewanne, einem Pool,
einem Wasserhahn oder einem Becken verwendet werden, um Stromschläge
zu vermeiden.
4 Achten Sie darauf, dass keine Gegenstände auf Ihr SE fallen oder Flüssigkeiten auf
das Gerät gelangen. Wenn Flüssigkeit auf dem Gerät verschüttet wurde, ziehen
Sie sofort den Netzstecker und stellen Sie das Gerät auf den Kopf. Lassen Sie es
gut trocknen (eine Woche), bevor Sie es wieder an eine Steckdose anschließen.
Das Be-folgen dieser Anweisungen stellt keine Garantie da, dass das Gerät
betriebsbereit ist.
5. Greifen Sie nicht nach dem Gerät, wenn es ins Wasser gefallen ist. Trennen Sie
sofort den Netzstecker aus der Steckdose und lassen Sie, falls irgend möglich,
das Wasser ablaufen bevor Sie das Gerät bergen.
6 Das Gerät sollte nicht in der Nähe von Wärmequellen wie Heizkörpern,
Heizregistern, Öfen oder anderen Geräten (einschließlich Verstärkern), die
Wärme erzeugen, platziert werden.
7. Stellen Sie das Gerät nicht an Orten auf, an denen es direkter Sonneneinstrahlung
ausgesetzt ist, oder in der Nähe von Produkten, die Wärme abstrahlen wie
z.B. Elek-troheizungen. Stellen Sie das Gerät nicht auf Stereoanlagen auf, die
Wärme abstrahlen.
8. Vermeiden Sie das Aufstellen an staubigen, feuchten, schwülen oder unzure-
ichend belüfteten Orten, oder solchen, die ständigen Vibrationen ausgesetzt sind.
9. Das Gerät kann durch externe Quellen wie z.B. Transformatoren, Elektromotoren
oder andere elektronische Geräte beeinträchtigt werden. Um Verzerrungen durch
solche Geräte zu vermeiden, stellen Sie Ihr SE so weit wie möglich von diesen
entfernt auf.
10. Wenden Sie keine übermäßige Kraft auf, wenn Sie Schalter oder Bedienelemente
verwenden.
11. Das Gerät sollte nur mit dem mitgelieferten Netzteil oder AA-Batterien verwendet
werden.
12 Die Netzkabel sollten so verlegt sein, dass man nicht auf sie tritt und sie nicht von
Gegenständen auf oder neben ihnen eingeklemmt werden.
13 Ziehen Sie den Netzadapter aus der Steckdose, wenn das Gerät längere Zeit nicht
verwendet wird oder beim Bewegen des Geräts.
14. Versuchen Sie nicht, das Gerät selbst zu warten.
1 Jahr begrenzte Garantie
Adaptive Sound Technologies, Inc., nachstehend als ASTI bezeichnet, gewährleistet dies
Produkt gegen Material - und / oder Verarbeitungsfehler bei normaler Verwendung für
ein Zeitraum von EINEM (1) JAHR ab dem Datum des Kaufs durch den ursprünglichen
Käufer ("Garantiezeit"). Wenn ein Mangel auftritt und eine gültige Reklamation innerhalb
der Garantiezeit bei ASTI eingeht, wird ASTI wahlweise entweder 1) den Mangel kostenlos
beheben, unter Verwendung neuer oder aufgearbeiteter Ersatzteile oder 2) Das Produkts
durch ein aktuelles Produkt, dessen Funktionalität dem ursprünglichen Produkt nahe
kommt, ersetzen. Ein Ersatzprodukt oder ein Teil, einschließlich eines vom Benutzer
installierbaren Teils, das gemäß den von ASTI bereitgestellten Anweisungen installiert
wird, , ist durch die verbleibende Garantie des ursprünglichen Kaufs abgedeckt.
Wenn ein Produkt oder ein Teil ausgetauscht wird, wird der Ersatzartikel Ihr Eigentum
und der ersetzte Artikel wird Eigentum von ASTI.
Serviceanfragen: Um den Garantieservice in Anspruch zu nehmen, rufen Sie an oder
senden Sie eine E-Mail an Adaptive Sound Technologies.
TECHNIK
Technische Daten
Geräuschkategorien 16
Geräuschkulissen: 64
Lautsprecherkompensation: 5-Band parametrischer Equalizer
Kopfhöreranschluss: 3,5 mm Stereo
Audioeingangsbuchse: 3,5 mm Stereo
USB-A-Ladeanschlüsse: 900 mA max. (jeweils)
Leistungsbedarf: 5 Volt, 2,5 A Gleichstrom max.
beim Laden anderer Geräte
Stromverbrauch im <0,25 Watt
ausgeschalteten Zustand: (typischerweise 0,1 Watt)
Werkseinstellungen wiederherstellen
Diese Schritte setzten das Gerät auf die originalen
Werkseinstellungen zurück.
1. Schalten Sie Ihr Sound+Sleep SE aus.
2. Halten Sie die POWER-Taste für etwa fünf Sekunden
gedrückt, bis Sie ein kleines Knallgeräusch hören
Kundendienst
Bei Problemen oder Fragen besuchen Sie bitte:
www.astisupport.com
Grenzen und Ausschlüsse: Diese eingeschränkte Garantie gilt nur für ASTI Sound+
Sleep SE-Geräte, das ASTI-Netzteil, das ASTI-Netzkabel und das ASTI-Audiokabel.
Sie gilt NICHT für etwaige gebündelte Komponenten oder Produkte, die nicht von
ASTI vertrieben werden.
Diese Garantie gilt nicht für: a) Schäden, die durch Nichtbeachtung der Anweisungen
bezüglich der Verwendung des Produkts und der Installation von Komponenten
verursacht wurden; b) Schäden,
die durch Unfall, Missbrauch, unsachgemäße Nutzung, Feuer, Überschwemmungen,
Erdbeben oder andere äußere Ursachen entstehen; c) Schäden, die durch Serviceleis-
tungen von Personen verursacht wurden, die nicht Vertreter von ASTI sind;
d) Zubehör, das in Verbindung mit einem abgedeckten Produkt verwendet wird; e) ein
Produkt oder Teil, das modifiziert wurde, um Funktionsweise oder Leistungsfähigkeit
zu verändern; f) Gegenstände, die vom Käufer während der normalen Lebensdauer
des Produkts regelmäßig ersetzt werden sollten, einschließlich und vollumfänglich
Batterien oder Glühlampen; oder g) etwaige vorbestehende Schäden, die vor
dem Inkrafttreten dieser eingeschränkten Garantie in Bezug auf alle Produkte, die
"wie besehen" verkauft werden, eintreten, einschließlich und vollumfänglich
Demonstrationsmodelle und überholte Artikel.
ADAPTIVE SOUND TECHNOLOGIES, INC. HAFTET NICHT FÜR BEGLEIT- ODER
FOLGESCHÄDEN, DIE SICH AUS DER VERWENDUNG DIESES PRODUKTS ERGEBEN
ODER AUS JEGLICHER VERLETZUNG DIESER GARANTIE. SO WEIT NACH GELTEN-
DEM RECHT ZULÄSSIG, LEHNT ASTI ALLE GESETZLICHEN ODER STILLSCHWEI-
GENDEN GARANTIEN AB, EINSCHLIESSLICH, UND VOLLUMFÄNGLICH, GARANTIEN
DER MARKTGÄNGIGKEIT, DER EIGNUNG FÜR EINEN BESTIMMTEN ZWECK UND
GARANTIEN BEZÜGLICH VERSTECKTER ODER RUHENDER MÄNGEL. SOLLTE ASTI
GESETZLICHE ODER STILLSCHWEIGENDE GARANTIEN NICHT RECHTMÄSSIG
ABLEHNEN KÖNNEN, SO SIND ALL DIESE GARANTIEN, SOWEIT GESETZLICH
ZULÄSSIG, AUF DIE DAUER DIESER AUSDRÜCKLICHEN GARANTIE BESCHRÄNKT.
In einigen geografischen Gebieten ist der Ausschluss oder die Beschränkung von
Begleit- oder Folgeschäden oder der Dauer einer stillschweigenden Garantie nicht
zulässig. Daher können einige der vorstehenden Ausschlüsse und Einschränkungen
möglicherweise nicht für Käufer mit Wohnsitz in diesen Gebieten gelten. Diese Ga-
rantie gewährt den Käufern bestimmte Rechte, doch es können auch andere Rechte
gewährt werden, die sich von Land zu Land, von Staat zu Staat, usw. unterscheiden.
Federal Communications Commission-Erklärung
Dieses Gerät wurde getestet und erfüllt die Grenzwerte für Klasse B Digitales Gerät
gemäß Abschnitt 15 der FCC-Bestimmungen. Diese Grenzwerte sind dafür ausgelegt,
einen angemessenen Schutz gegen schädliche Interferenzen in einer Wohnumge-
bung zu bieten. Dieses Gerät erzeugt und verwendet Hochfrequenzenergie und kann
diese auch ausstrahlen, und kann bei unsachgemäßer Installation und Verwendung,
zu Interferenzen führen, die für den Funkverkehr schädlich sind. Es kann jedoch nicht
garantiert werden, dass bei einer konkreten Installation keine Interferenzen auftreten.
Wenn dieses Gerät schädliche Interferenzen beim Radio- oder Fernsehempfang
verursacht, was durch Aus- und Einschalten des Geräts festgestellt werden kann,
sollte der Benutzer versuchen, die Interferenz durch eine oder mehrere der folgenden
Maßnahmen zu korrigieren:
• Empfangsantenne neu ausrichten.
• Abstand zwischen Gerät und Empfänger vergrößern.
• Gerät an eine Steckdose eines anderen Stromkreises anschließen, an den der
Empfänger nicht angeschlossen ist.
• Beratung durch Händler oder einen erfahrenen Radio- / Fernsehtechniker.
© Adaptive Sound Technologies, Inc. Alle Rechte vorbehalten. Sound+Sleep, Adaptive Sound,
und das ASTI-Logo sind Marken von Adaptive Sound Technologies, Inc. Alle anderen Marken
sind Marken oder eingetragene Marken ihrer jeweiligen Eigentümer. Die Verwendung dieses
Produkts ist durch die US-Patente Nr. 8.243.937, Nr. 8.379.870, Nr. 8.280.068 und Nr. 8.280.067
geschützt. Weitere Patente sind angemeldet.
2625
ITALIANA
AI NOSTRI CLIENTI,
grazie e congratulazioni per l'acquisto del dispositivo Sound + Sleep SE di Adaptive Sound
Technologies. È, molto semplicemente, il migliore generatore di suoni per la cura del sonno disponibile
sul mercato. È caratterizzato da suoni registrati dal nostro team di professionisti dell'audio. Questi
suoni sono usati per creare ambienti sonori stratifi cati, che non sono ripetitivi, ma unici ogni volta.
Con 64 ambienti sonori dinamici suddivisi in 16 categorie, sei certo di trovare l'ambiente perfetto
per il riposo, il rilassamento, o un sonno migliore.
Per suggerimenti su come possiamo migliorare i nostri prodotti, non esitare a contattarci.
Sam J. Nicolino Jr., presidente e amministratore delegato di ASTI
GUIDA INTRODUTTIVA
All'interno del pacchetto troverai:
1. Questo manuale di istruzioni
2. Guida agli ambienti sonori
3. Sound+Sleep SE
4. Alimentatore CA e cavo
5. Cavo audio da 3,5 mm
Connettersi a una presa CA.
Il jack di alimentazione si trova sulla parte inferiore
del dispositivo.
1. Spingere la spina dell'adattatore di alimentazione
all'estremità del cavo nel jack.
2. Far scivolare il cavo sotto il piedino in gomma
separando i due pezzi del piedino lungo la fessura.
3. La macchina dovrebbe essere appoggiata su un tavolo
o comodino se il cavo è installato correttamente.
La fessura dovrebbe separarsi facilmente facendo
scorrere il dito verso il basso. Altrimenti, è possibile
usare un coltello per aprire la fessura in modo pulito.
Quindi, collegare la spina CA a una presa a muro
non commutata. La prima volta che la si collega,
potrebbero essere necessari fi no a 30 secondi per
eseguire un auto-test. Si noti che i sedici punti dipinti
attorno al quadrante non si accendono.
Si consiglia di non utilizzare una presa collegata a un
interruttore. Il tuo dispositivo ricorda automaticamente
le impostazioni memorizzate ogni volta che viene spento
utilizzando il tasto POWER, ma potrebbe non ricordare
le sue impostazioni, se rimane senza alimentazione.
Puoi utilizzare il dispositivo a livello internazionale con
qualsiasi tensione di linea CA da 100-240 Volt, a 50 o
60Hz, usando un adattatore per spine a CA (disponibili
presso negozi di elettronica e di viaggio).
1.
2.
3.
ANNOTA IL NUMERO SERIALE E REGISTRA IL TUO PRODOTTO
Registra qui il tuo numero seriale. Puoi trovarlo sulla parte inferiore del NUMERO DI MODELLO: ASM1005
prodotto. Ti servirà quando registri il tuo prodotto su astisupport.com
e dovresti averlo a portata di mano se dovessi contattare il nostro
servizio di assistenza.
Numero di serie: ________________________________________________________________________
Data di acquisto: ________________________________________________________________________
X XXXXX XXXXX
SOUND
OF
SLEEP
2827
ITALIANA
Accendere il dispositivo e selezionare un suono
Premere il tasto POWER e il dispositivo si avvierà e
inizierà la riproduzione in circa due secondi. Il dispositivo
può essere spento con il tasto POWER, oppure TIMER
pulsante (vedere Timer di spegnimento).
Il dispositivo manterrà le impostazioni più recenti che
sono state utilizzate quando è stato spento l'ultima volta
u-sando il tasto POWER. Se viene spento scollegando
l'adattatore di alimentazione dalla presa a muro, le
impostazioni potrebbero non essere salvate.
Quindi, utilizzare la manopola per selezionare una
categoria di suoni e quindi premere il tasto SELECTION
per scegliere tra i quattro ambienti sonori di quella
categoria. Consultare la Guida agli ambienti sonori
che è stata inclusa o gli elenchi dei suoni nelle pagine
UTILIZZO DI SOUND + SLEEP SE PER LA PRIMA VOLTA
29–30, per un elenco completo degli ambienti sonori.
Utilizzare i tasti VOLUME per regolare il volume secondo
i tuoi gusti.
Non tutti gli ambienti sonori sono progettati per dormire.
Alcuni ambienti sono progettati per il rilassamento,
riser-vatezza delle conversazioni, meditazione, oppure
studio e lettura.
Modalità adattativa
Il dispositivo può adattarsi al rumore nel proprio
ambiente. Usa il proprio microfono integrato sul pannello
frontale per ascoltare i rumori di disturbo e alza il
volume e/o aggiunge suoni rilassanti per compensare
l'ambiente sonoro. Premere il tasto ADAPTIVE per
attivare o disattivare la modalità. La spia accanto
al tasto ADAPTIVE indicherà quando è attiva.
Quando la modalità Adaptive (adattativa) non è attiva,
il tuo dispositivo manterrà un livello di volume costante.
La modalità adattativa consente di personalizzare il
dispositivo in base alle proprie preferenze e situazioni
personali. Potresti preferire suoni tranquilli e costanti,
specialmente se c'è poco rumore, o un rumore costante
nel tuo ambiente. Oppure, potrebbe servirti il mascher-
amento del rumore aggiuntivo fornito dalla modalità
adattativa. Sperimenta per trovare l'impostazione che
ti piace di più in situazioni diverse.
Nota: Quando si imposta il volume in modalità
adattativa, si sta e ettivamente impostando il volume
massimo che può raggiungere quando rileva un
rumore forte. Se il suono sembra troppo basso
quando c'è silenzio nella stanza, aumenta il volume
fi no a raggiungere un livello di base più alto.
FUNZIONI PIÙ UTILI
Timer di spegnimento
Il timer di spegnimento può essere utilizzato per
impostare la riproduzione del dispositivo per un
determinato numero di minuti e poi lo spegnimento
in maniera graduale ed automatica. L'intervallo di
tempo può essere impostato su 30, 60, 90 o 120 minuti
premendo il tasto TIMER.
Se si spegne il dispositivo viene cancellato il timer di
spegnimento. La pressione del tasto TIMER quando
il dispositi-vo è spento lo farà accendere e imposterà il
timer di spegnimento su 30 minuti. Una nuova pressione
del tasto TIMER farà avanzare il timer all'intervallo
successivo. Una nuova pressione del tasto TIMER
dopo che è stato selezionato l'intervallo di 120 minuti,
cancellerà il timer.
Jack per cuffi e
Un jack per cu e stereo standard da 3,5 mm si trova nel-
la parte inferiore del pannello del connettore. Può essere
utilizzata qualsiasi tipologia di cu e o auricolari con un
connettore da 3,5 mm. Il collegamento di cu e o aurico-
lari disabilita l'altoparlante incorporato del dispositivo, è
quindi un ottimo modo per rilassarsi in maniera privata
con il proprio dispositivo.
Come con qualsiasi prodotto, usare il buon senso quando
si usano le cu e. Evitare di usarli a livelli di volume ele-
va-ti. L'esposizione prolungata a livelli di volume elevati
può compromettere l'udito.
Ingresso audio esterno
È possibile utilizzare l'ingresso audio esterno per
ascoltare una sorgente audio da qualsiasi dispositivo
con connettore standard per cu e da 3,5 mm o line-out.
È incluso un cavo audio, oppure puoi usare il tuo.
Alcuni telefoni e altri dispositivi potrebbero generare
rumore se vengono ricaricati e usati contemporanea-
mente come una sorgente audio esterna.
Attenzione: è preferibile collegare la sorgente audio
con cura:
1. Abbassare il volume sul proprio dispositivo
Sound+Sleep SE
2. Collegare un'estremità del cavo audio alla propria
sorgente sonora
3. Collegare l'altra estremità del cavo audio al jack
di ingresso audio sul dispositivo Sound+Sleep SE
4. Regolare il volume sul dispositivo Sound+Sleep SE
secondo le proprie preferenze
Porte di ricarica USB
Il pannello connettori del dispositivo ha due porte di
ricarica USB-A. Tenere presente che questi possono
essere uti-lizzati per la ricarica di uno smartphone o di
un dispositivo simile. Le porte di ricarica non vengono
utilizzate per dati o audio.
Spegnimento del display
Puoi usare il tasto DISPLAY per spegnere le spie del
pannello anteriore se rappresentano una distrazione.
Se viene regolata qualsiasi impostazione quando le spie
del display sono spente, si accenderanno per 15 secondi
e quindi si oscureranno nuo-vamente.
POWER
TIMER
30 60 90 120
DISPLAY VOLUME
+
–
ADAPTIVE SELECTION
•
•
•
•
•
•
•
•
•
•
•
•
•
•
•
•
meditate
small fan
large fan
white noise
rides
home
crowds
rainfall
meadow
waterfall
brown noise
city
brook
ocean
baby
pink noise
Accensione
On /O
Microfono
Modalità adattativa
Timer di spegnimento
Ingresso audio
esterno
Jack per
cuffi e
Selezione
Tasto del volume
Su
Porte di
ricarica
USB
Tasto del volume
Giù
Quadrante
categoria suono
3029
ITALIANA
Pioggia
Cascata
Oceano
Cavalcate
Prato
Ruscello
Ventilatore grande
Casa
Città
Rumore bianca
Rumore rosa
Rumore marrone
Pioggia Aggiungi vento
e qualche
debole tuono
Aggiungi più
vento e tuoni
Aggiungi tuoni
più forti
Cascata Cascata
e vento
Aggiungi
più vento
Aggiungi anche
altri suoni
Onde dell'oceano
e lo sciabordio
dell'acqua
Aggiungi
acqua
gorgogliante
Aggiungi anche
gabbiani, foche,
boe a campana
Aggiungi
anche sirene
Giro in aereo Giro in
macchina
Viaggio
in treno
Giro in pedalò
Grilli e vento Aggiungi ali
di uccello e
spruzzi d'acqua
Aggiungi
uccelli canterini
e alberi
Aggiungi anche
le rane
Acqua corrente
e vento
Aggiungi ali
di uccello
e spruzzi
Aggiungi anche
cinguettii di
uccelli e rane
Aggiungi un
po' di tutto
Bagno Condizionatore Lavatrice Camino
Chiasso
cittadino
Chiasso cittadino
e auto in transito
Aggiungi anche
macchinari
ed elicotteri
Aggiungi passi
e pattini
Folle
Ristorante Mercato
all'aperto
Caetteria Partita
a pallone
AMBIENTI SONORI:
Utilizzare il selettore per selezionare una categoria di suoni, quindi premere il pulsante di selezione per scegliere un
ambiente. Ogni categoria di suono ha quattro ambienti che puoi scegliere.
Ventilatore piccolo
Medita
Ventilatore
con griglia
Ventilatore
rilassante, basso
Ventola
di scarico
Ventilatore
rilassante, alto
Om Om e Sitar Aggiungi chitarra Aggiungi
altri suoni
e strumenti
Bambino
Balene
sott'acqua
Canto delle
balene
Battito
cardiaco
Voliera
Ventola
di areazione
Ventilatore
con griglia
Ventilatore
grande
Ventilatore per
uso industriale
eeee

3231
ITALIANA
RISOLUZIONE DEI PROBLEMI
Sintomo Causa possibile Soluzione
Nessun funzionamento • Spina di alimentazione scollegata Controllare la connessione di alimentazione sul fondo dell'unità e viene
quando POWER alla presa premuto il tasto. assicurarsi che entrambi siano ben posizionati
a muro
• L'unità è collegata a una presa Spostare l'unità su una presa non commutata
a muro commutata
• Presa a muro difettosa Spostarsi a una presa funzionante e accendere di nuovo
• Il sistema deve essere ripristinato Per prima cosa, spegnere l'unità, quindi premere e tenere premuto il tasto
POWER per 5 secondi
L'unità è accesa, ma • Il volume è impostato su un valore Pre mere o tenere premuto il tasto VOLUME-UP per aumentare il volume
il volume è troppo basso troppo basso
• Il dispositivo è in modalità adattativa? In modalità adattativa il suono sarà basso quando non c'è rumore nella
stanza. Se si preferisce mantenere il suono ad alto volume, disattivare la
modalità adattativa
• Le cue sono collegate? Rimuovere le cue. Quando le cue sono collegate, l'altoparlante
viene silenziato
L'unità è accesa, ma • Il volume è troppo basso Premere o tenere premuto il tasto VOLUME-DOWN per
il volume è troppo alto diminuire il volume
• Il dispositivo è in modalità adattativa? In modalità adattativa il suono viene tenuto basso quando non c'è rumore
nella stanza. Se si preferisce mantenere il suono ad alto volume, disattivare
la modalità adattativa
Il volume è troppo alto Tenere premuto il tasto VOLUME DOWN per abbassare il volume
Altro comportamento • Provare la procedura “Ripristino alle 1. Scollegare l'adattatore di alimentazione dalla presa CA
inaspettato impostazioni di fabbrica”. Se questo risolve il problema,
non risolve il problema, chiamare 2. Premere e tenere premuto il tasto POWER mentre si ricollega
l'Assistenza Clienti l'adattatore di alimentazione alla presa CA
3. Continuare a tenere premuto il tasto POWER per 5 secondi
SICUREZZA, GARANZIA E CERTIFICAZIONI
Istruzioni di sicurezza
Leggere e rispettare tutte le istruzioni di sicurezza e operative prima dell'uso.
Conservare il presente libretto per consultarlo in futuro.
1. ATTENZIONE: non utilizzare macchinari pesanti o veicoli a motore durante
l'utilizzo del presente dispositivo.
2. L'unità deve essere pulita regolarmente con un panno morbido e asciutto.
Aspirare la griglia per rimuovere la polvere eccessiva o l'accumulo di particelle.
Non usare liquidi, spray (inclusi solventi, sostanze chimiche o alcol) o sostanze
abrasive per eseguire le pulizie.
3. L'unità non deve essere utilizzata vicino all'acqua, ad esempio una vasca da
bagno, una piscina, un rubinetto o un lavandino, al fine di evitare la folgorazione.
4. Prestare attenzione a non far cadere oggetti o versare liquidi sull'unità. Se si
versa del liquido sull'unità, scollegarla e capovolgerla immediatamente. Lasciarla
asciuga-re completamente (una settimana) prima di collegarla nuovamente a una
presa a muro. Il rispetto di queste istruzioni non garantisce l'operatività dell'unità.
5. Non raggiungere l'unità se è caduta in acqua. Scollegalo immediatamente
dalla presa a muro e, se possibile, drenare l'acqua prima di recuperare l'unità.
6. L'unità deve essere posizionata lontano da fonti di calore come radiatori,
ventole di areazione, stufe o altri apparecchi (compresi gli amplificatori) che
producono calore.
7. Evitare di posizionare l'unità in aree esposte alla luce diretta del sole o vicino
a prodotti che irradiano calore come stufe elettriche. Non posizionare l'unità
sopra impianti stereo che irradiano calore.
8. Evitare di collocare il dispositivo in aree polverose, umide, prive di ventilazione
o soggette a vibrazioni costanti.
9. L'unità potrebbe essere soggetta a interferenze da sorgenti esterne come
trasformatori, motori elettrici o altri dispositivi elettronici. Per evitare distorsioni
provenienti da tali sorgenti, posizionare l'unità il più lontano possibile da esse.
10. Non applicare forza eccessiva quando si usano interruttori o controlli.
11. L'unità deve essere utilizzata soltanto con l'adattatore di alimentazione fornito
o batterie AA.
12. I cavi di alimentazione devono essere instradati per evitare di essere calpestati
o schiacciati da oggetti posizionati sopra o contro di essi.
13. Scollegare l'adattatore di alimentazione dalla presa quando l'unità non viene
utilizzata per molto tempo o quando si sposta l'unità.
14. Non tentare di riparare l'unità da soli.
Garanzia limitata di un anno
Adaptive Sound Technologies, Inc., di seguito denominata ASTI, garantisce questo
prodotto contro difetti dei materiali e/o di lavorazione in condizioni normali di utilizzo
per un periodo di UN (1) ANNO dalla data di acquisto da parte dell'acquirente originale
("Periodo di garanzia"). Se si verifica un difetto e viene ricevuta una richiesta valida
entro il Periodo di garanzia, ASTI potrà a sua discrezione 1) riparare il difetto senza
alcun costo, utilizzando parti di ricambio nuove o ricondizionate, oppure 2) sostituire
il prodotto con un prodotto corrente che si avvicini in funzionalità al prodotto
originale. Un prodot-to o una parte sostitutivi , compresa una parte installabile
dall'utente installata secondo le istruzioni fornite da ASTI, sono coperti dalla
restante garanzia dell'acquisto originale.
Quando un prodotto o una parte vengono sostituiti, l'articolo sostitutivo diventa
di tua proprietà e l'articolo sostituito diventa di proprietà di ASTI.
Ricezione dell'assistenza: per ricevere il servizio di assistenza in garanzia, si prega
di chiamare o inviare un'e-mail ad Adaptive Sound Technologies.
INFORMAZIONI TECNICHE
Specifiche
Categorie sonore: 16
Ambienti sonori: 64
Compensazione degli altoparlanti: EQ parametrico a cinque bande
Jack per cue: stereo da 3,5 mm
Jack di ingresso audio: stereo da 3,5 mm
Porte di ricarica USB-A: max 900 mA (ciascuna)
Requisiti di alimentazione: 5 Volt, max. 2,5 A CC quando si
ricaricano altri dispositivi
Consumo energetico < 0,25 Watt
quando è spento: (in genere 0,1 Watt)
Ripristino delle impostazioni di fabbrica
Questa procedura ripristina l'unità alle impostazioni
preconfigurate originali.
1. Spegnere il dispositivo Sound+Sleep SE
2. Premere e tenere premuto il tasto POWER per
circa cinque secondi, fino a quando non si sente
un piccolo rumore.
Servizio Clienti
Per problemi o domande, consultare la pagina:
www.astisupport.com
Limiti ed esclusioni: la presente garanzia limitata si applica soltanto all'unità
Sound + Sleep SE di ASTI, all'adattatore di alimentazione ASTI, al cavo di
alimentazione ASTI e al cavo audio ASTI. NON si applica a nessun componente
o prodotto aggiuntivo che non siano di ASTI.
La presente garanzia non si applica a: a) danni causati dalla mancata osservanza
delle istruzioni relative all'uso del prodotto o all'installazione di componenti; b) danni
causati da incidenti, abuso, uso improprio, incendi, alluvioni, terremoti o altre cause
esterne; c) danni causati dall'assistenza prestata da chiunque non sia un rappresen-
tante di ASTI; d) accessori utilizzati in combinazione con un prodotto coperto;
e) un prodotto o una parte che è stata modificata per alterare funzionalità o capacità;
f) articoli destinati a essere sostituiti periodicamente dall'acquirente durante la normale
vita del prodotto, comprese, a titolo esemplificativo, batterie o lampadine; oppure
g) qualsiasi e tutte le con-dizioni preesistenti che si verificano prima della data
di validità della presente Garanzia limitata relativa a qualsiasi prodotto venduto
“così com'è” inclusi, a titolo esemplificativo, i modelli dimostrativi esposti e gli
articoli ricondizionati.
ADAPTIVE SOUND TECHNOLOGIES, INC. NON SARÀ RESPONSABILE PER DANNI
ACCIDENTALI O CONSEQUENZIALI DERIVANTI DALL'USO DI QUESTO PRODOTTO,
O DERIVANTI DA QUALSIASI VIOLAZIONE DELLA PRESENTE GARANZIA. NELLA
MISURA CON-SENTITA DALLA LEGGE APPLICABILE, ASTI DECLINA QUALSIASI
GARANZIA LEGALE O IMPLICITA , INCLUSE, SENZA LIMITAZIONI, GARANZIE DI
COMMERCIA BILITÀ, IDONEITÀ PER UN PARTICOLARE SCOPO E GARANZIE CON-
TRO DIFETTI NASCOSTI O LATENTI. SE ASTI NON PUÒ LEGITTIMAMENTE DECLIN-
ARE GARANZIE LEGALI O IMPLICITE, ALLORA NELLA MISURA CONSENTITA
DALLA LEGGE, TUTTE LE GARANZIE SOPRA MENZIONATE SARANNO LIMITATE IN
DURATA ALLA DURATA DI QUESTO GARANZIA ESPLICITA.
Alcune aree geografiche non consentono l'esclusione o la limitazione di danni acci-
dentali o consequenziali o la durata di una garanzia implicita. Come conseguenza,
alcune delle esclusioni o limitazioni di cui sopra potrebbero non essere applicabili
agli acquirenti residenti in quelle aree. Questa garanzia concede diritti legali specifici
agli acquirenti, ma possono anche essere concessi altri diritti, che variano da paese a
paese, stato a stato, ecc.
Dichiarazione di conformità FCC
Questa apparecchiatura è stata testata e trovata conforme ai limiti per un dispositivo
digitale di classe B, ai sensi della Sezione 15 delle Normative FCC. Questi limiti sono
progettati per fornire una protezione ragionevole contro interferenze dannose in
un'installazione residenziale. Questa apparecchiatura genera, utilizza e può irradiare
energia in forma di frequenze radio e nel caso in cui non venga installato e utilizzato in
conformità con le istruzioni fornite, potrebbe causare interferenze dannose alle comu-
nicazioni radio. Tuttavia, non vi è alcuna garanzia che non si verifichino interferenze in
una particolare installazione.
Nel caso in cui la presente apparecchiatura causi interferenze dannose alla ricezione
radio o televisiva, che possono essere determinate con lo spegnimento e la riaccen-
sione dell'apparecchio, l'utente è incoraggiato a provare a correggere l'interferenza
adottando una o più delle seguenti misure:
• Riorientare o riposizionare l'antenna ricevente.
• Aumentare la separazione tra l'apparecchiatura e il ricevitore.
• Collegare l'apparecchiatura a una presa su un circuito diverso da quello a cui
è collegato il ricevitore.
• Consultare il rivenditore o un tecnico radio/TV esperto per assistenza.
© Adaptive Sound Technologies, Inc. Tutti i diritti riservati. Sound+Sleep, Adaptive Sound,
e il logo ASTI sono marchi registrati di Adaptive Sound Technologies, Inc. Tutti gli altri marchi
sono marchi commerciali o marchi commerciali registrati dei rispettivi proprietari. L'uso di
questo prodotto è protetto dai brevetti statunitensi n. 8.243.937, n. 8.379.870, n. 8.280.068
e n. 8.280.067. In attesa di ulteriori brevetti.
33
Declaration of Conformity
Trade Name: Sound+Sleep SE
Model Name: ASM1005
Responsible Party: Adaptive Sound Technologies, Inc.
Address: 1475 South Bascom Avenue, Campbell, CA 95008 USA
Telephone Number: 1-408-377-3411
This device complies with Part 15 of the FCC Rules. Operation is subject to the
following two conditions: (1) This device may not cause harmful interference, and
(2) this device must accept any interference received, including interference that
may cause undesired operation.
Changes or modifications not expressly approved by the party responsible for
compliance could void the user’s authority to operate the equipment.
Déclaration de Conformité
Nom commercial : Sound+Sleep SE
Nom du modèle: ASM1005
Partie responsable: Adaptive Sound Technologies, Inc.
Adresse: 1475 South Bascom Avenue, Campbell, CA 95008 USA
Numéro de téléphone: 1-408-377-3411
Cet appareil est conforme à la Partie 15 des directives FCC. Son fonctionnement
est soumis aux deux conditions suivantes : (1) Cet appareil ne doit pas provoquer
d’interférence nuisible, et (2) cet appareil doit accepter toute interférence reçue,
dont toute interférence pouvant provoquer un fonctionnement non désiré.
Tout changement ou modification apporté à cet appareil sans l’approbation
expresse de la partie responsable de sa conformité risque d’annuler le droit de
l’utilisateur à se servir de cet équipement.
Adaptive Sound Technologies
1475 S. Bascom Ave., Suite 116
Campbell, California 95008
Phone: 408-377-3411
Fax: 408-558-9502
SoundofSleep.com
ASTI
Sound+Sleep SE
ASM1005
Konformitätserklärung
Handelsname: Sound+Sleep SE
Modellname: ASM1005
Verantwortliche Partei: Adaptive Sound Technologies, Inc.
Adresse: 1475 South Bascom Avenue, Campbell, CA 95008 USA
Telefonnummer: 1-408-377-3411
Dieses Gerät entspricht Abschnitt 15 der FCC-Bestimmungen. Die Bedienung
unterliegt den folgenden zwei Bedingungen: (1) Dieses Gerät darf keine
schädlichen Interferenzen verursachen (2) Dieses Gerät muss alle empfangenen
Interferenzen akzeptieren, einschließlich Interferenzen, die zu unerwünschtem
Betrieb führen können.
Änderungen oder Modifikationen, die nicht ausdrücklich durch die für Compliance
zuständige Partei genehmigt sind, können die Befugnis des Nutzers, das Gerät zu
benutzen, unwirksam machen.
Dichiarazione di conformità
Denominazione Sound+Sleep SE
commerciale:
Nome del modello: ASM1005
Responsabile: Adaptive Sound Technologies, Inc.
Indirizzo: 1475 South Bascom Avenue, Campbell, CA 95008 USA
Numero di telefono: 1-408-377-3411
Questo dispositivo è conforme alla Sezione 15 delle Normative FCC. Il
funzionamento è soggetto alle seguenti due condizioni: (1) questo dispositivo
non può causare interferenze dannose e (2) questo dispositivo deve accettare
qualsiasi interferenza ricevuta, incluse le interferenze potrebbe causare un
funzionamento indesiderato.
Cambiamenti o modifiche non espressamente approvati dalla parte
responsabile della conformità potrebbero invalidare l'autorizzazione
dell'utente a utilizzare l'apparecchiatura.
UG-4L-ASM1005