Loading ...
Loading ...
Loading ...
©2017 Hestan Commercial Corporation
13
EN
CART & GRILL ASSEMBLY
(continued)
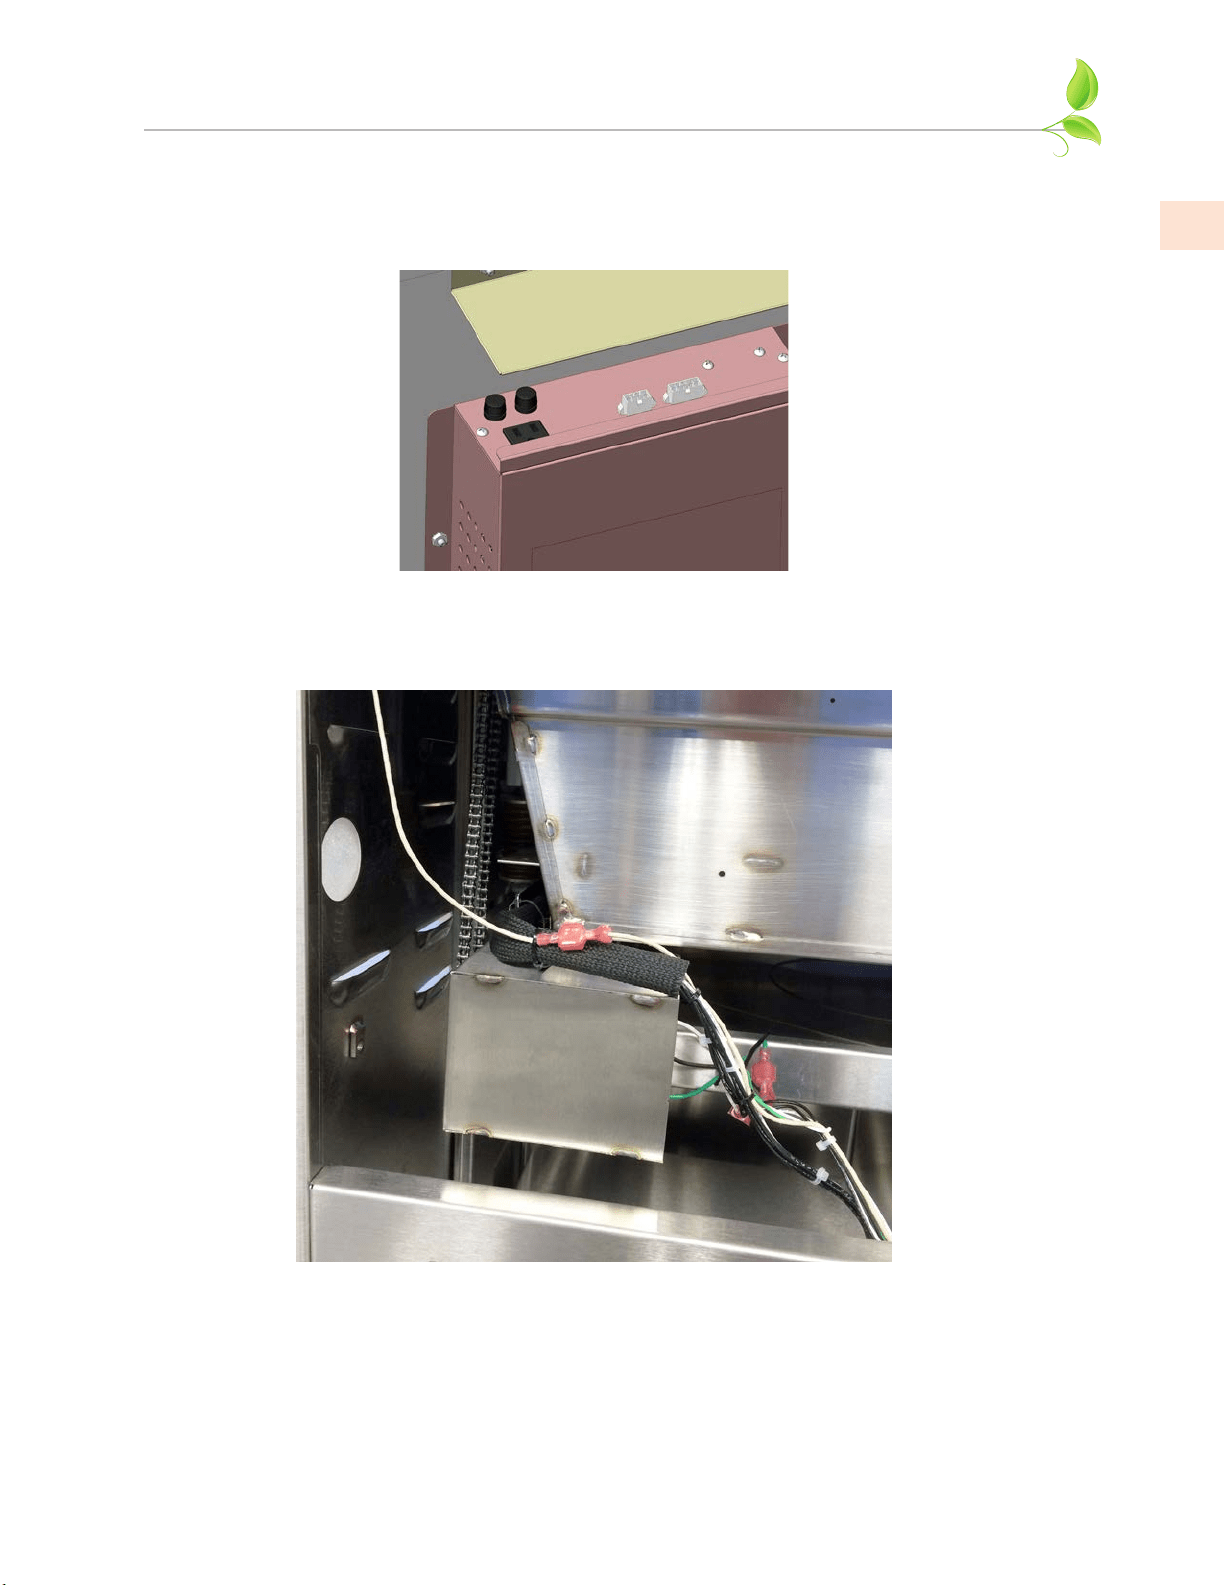
13. Reconnect all wires you disconnected in step 10. Reach inside the cart and connect the 8-pin
and 10-pin connectors from the grill wire harness to the sockets on top of the electrical box.
Make sure the wires are not touching any parts of the grill which get hot.
Note: The wires to the ROTIS MOTOR switch are clearly labeled with a red 110V sticker.
14. At the rear of the cart, verify wires are not touching any parts of the grill which get hot, or
could get caught in the chain drive, or the fan area of the motor. Also check the metal box
covering the fan blades is not interfering with the rotation of the fan.
15. At this time, you can install the side shelves which came with your cart. Please see the
instruction sheet supplied with the shelves.
16. Proceed with the remainder of the grill installation as documented in the Use & Care Manual
that came with your Hestan grill. Follow all instructions for regulator installation, gas
connections, leak testing, burner adjustment, etc. before using your grill. After all these steps
are completed, you can re-install the control panel and knobs, and the rear access panel on
the cart.
Loading ...
Loading ...
Loading ...