INSTRUCTION BOOKLET
Model: 12921
3.5 LITRE
SLOW COOKER

2
LAKELAND 3.5 LITRE SLOW COOKER
Thank you for choosing the Lakeland 3.5 Litre Slow Cooker.
Please take a little time to read this booklet before getting started and keep it in a safe
place for future reference.
Just right when cooking for two to four people, our slow cooker is economical on power
and space, and saves time and effort in the kitchen. Transforming cheaper cuts of meat
into mouth-watering delicacies with long, slow cooking, it produces the most succulent
soups, stews and casseroles.
Here at Lakeland, our award-winning family-owned business still offers the same excellent
quality, value for money and exceptional customer service as when we founded the
company back in the 1960s.
Our products are hand-picked and thoroughly tested so you can be sure that everything
you purchase will be a pleasure to use for many years to come.
CONTENTS
Product features ............................................................................................................. 3
Safety cautions ............................................................................................................ 4-5
Using your Slow Cooker for the first time ....................................................................... 6
The control dial and cooking times ................................................................................. 6
Instructions for use ......................................................................................................... 7
A guide to ingredients and hints and tips ....................................................................... 8
Adapting your hop top recipes for slow cooking ............................................................. 8
Recipes ..................................................................................................................... 9-12
Frequently asked questions ........................................................................................... 13
Care and cleaning ........................................................................................................ 14
Electrical connections ................................................................................................... 15
Recycling your electricals .............................................................................................. 15
3
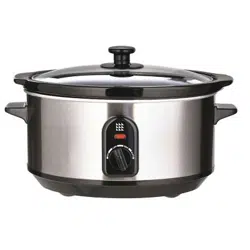
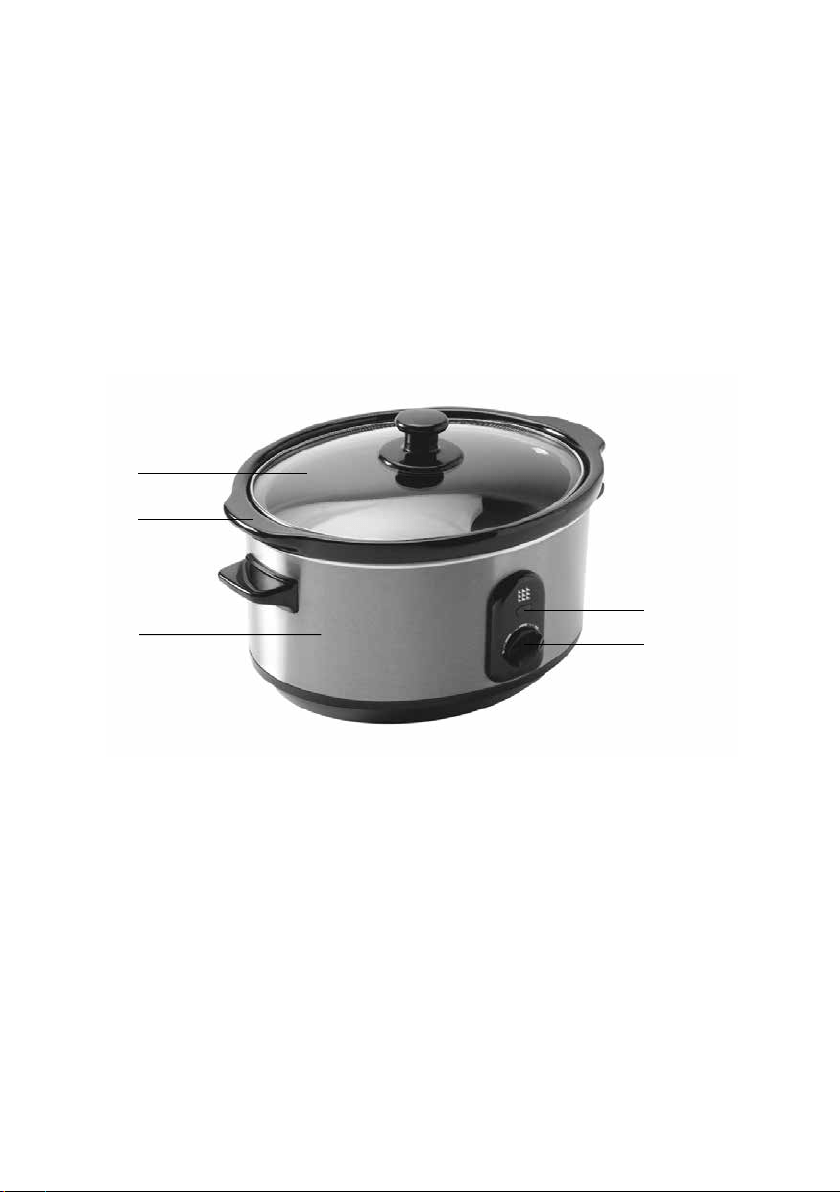
PRODUCT FEATURES
1. Tempered glass lid with handle
2. Ceramic cooking pot with handles
3. Base unit with handles
4. Power indicator light
5. Control dial
1
2
3
4
5

4
SAFETY CAUTIONS
Carefully read all the instructions before using the appliance and keep in a safe place
for future reference. Always follow these safety cautions when using the appliance to
avoid personal injury or damage to the appliance. This appliance should be used only as
described in this instruction book.
• This appliance can be used by children aged from 8 years and
above and persons with reduced physical, sensory or mental
capabilities or lack of experience and knowledge if they have
been given supervision or instruction concerning use of the
appliance in a safe way and understand the hazards involved.
Children shall not play with the appliance. Cleaning and user
maintenance shall not be done by children unless they are older
than 8 and supervised.
• Make sure your electricity supply matches the voltage shown on the appliance.
• Ensure all packaging materials and any promotional labels or stickers are removed from
the appliance before the first use.
• Always inspect the appliance before use for noticeable signs of damage. Do not use if
damaged or has been dropped. In the event of damage, or if the appliance develops a
fault, contact the Lakeland customer care team on 015394 88100.
• Do not use this appliance if the lead is damaged. If the lead is damaged it must be
replaced with a special lead, contact Lakeland customer care team on 015394 88100.
• Always use the appliance on a dry, level, heat resistant surface.
• Unplug from the mains when not in use and before cleaning. Allow to cool before
cleaning the appliance. To disconnect, turn the socket to ‘off‘ and remove the plug from
the mains socket.
• Do not use any accessories or attachments with this appliance other than those
recommended by Lakeland.
• To protect against fire, electric shock or personal injury, do not immerse cord, plug or
outer unit in water or other liquids.
• Do not leave the lead hanging over the edge of a kitchen table or worktop. Avoid
contact between the lead and hot surfaces.
• For indoor use only.
• For domestic use only.
• This appliance should be used for preparation of food as described within the
instructions for use that accompany it.
• Always ensure that your hands are dry before removing the plug from the mains socket.
Never pull the plug out of the mains socket by its lead.
• To avoid injury or possible fire, do not cover the appliance when in use.
5
• Do not connect this appliance to an external timer or remote control system.
• An extension cable may be used with care. The electrical rating of the cable should be
at least as great as the appliance. Do not allow the cable to hang over the edge of the
worktop or touch any hot surfaces.
• This appliance complies with the basic requirements of Directives 04/108/EC
(Electromagnetic Compatibility) and 06/95/EC (Safety of Domestic Electrical Appliances).
• WARNING: A cut off plug inserted into a 13amp socket is a serious safety (shock)
hazard. Ensure the cut off plug is disposed of safely.
• CAUTION: The plastic bags used to wrap this appliance or the packaging may be
dangerous. To avoid risk of suffocation, keep these bags out of reach of babies
and children. These bags are not toys.
• To switch off the slow cooker, turn the dial to OFF and unplug from the socket. Always
unplug before lifting out the cooking pot, and when not in use. Let the slow cooker
cool down before moving or cleaning.
• The slow cooker should be unplugged from the mains supply before filling or emptying
the cooking pot. Do not heat the slow cooker when the cooking pot is empty.
• Do not place the slow cooker or the cooking pot directly on a gas or electric hob or
other heat source.
• To avoid electric shock or damage, never put food directly into the slow cooker base.
Always use the cooking pot.
• Be careful when putting the cooking pot on work surfaces, the bottom of the cooking
pot may scratch and damage tables and worktops. Always place the cooking pot on a
heat resistant mat.
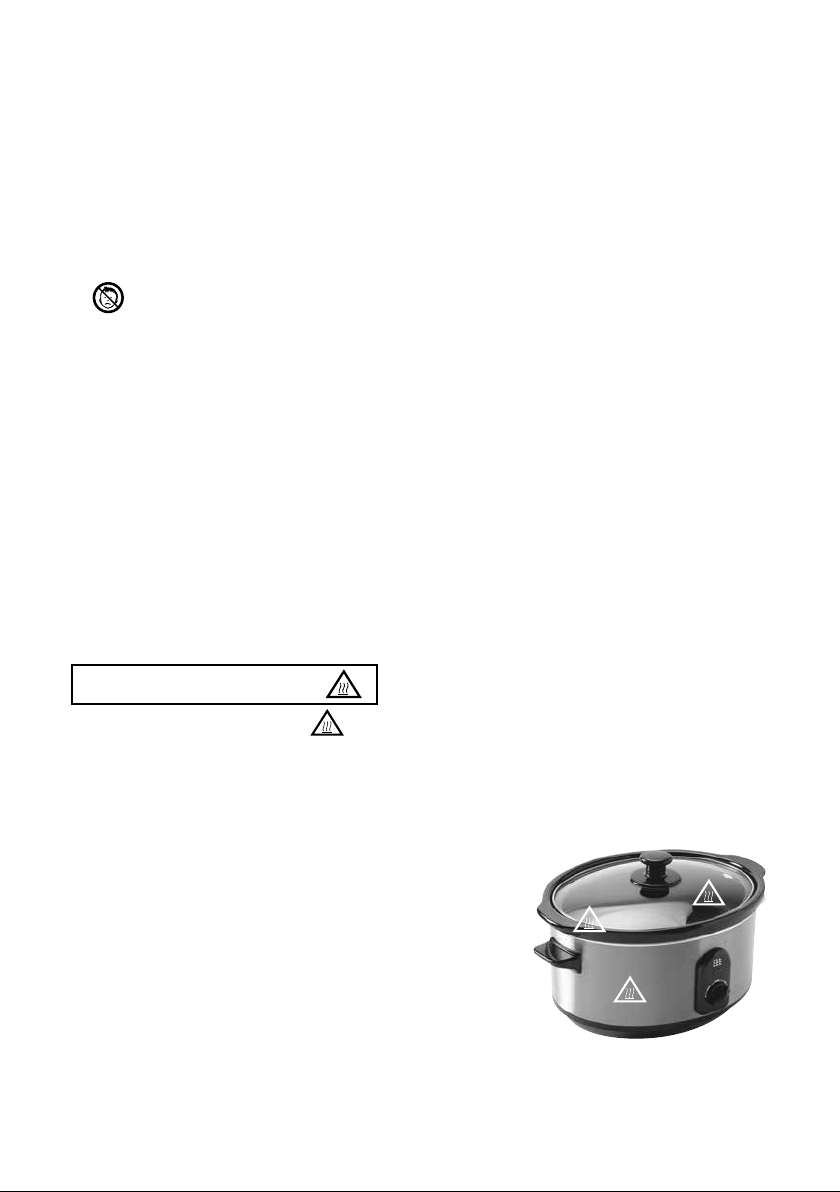
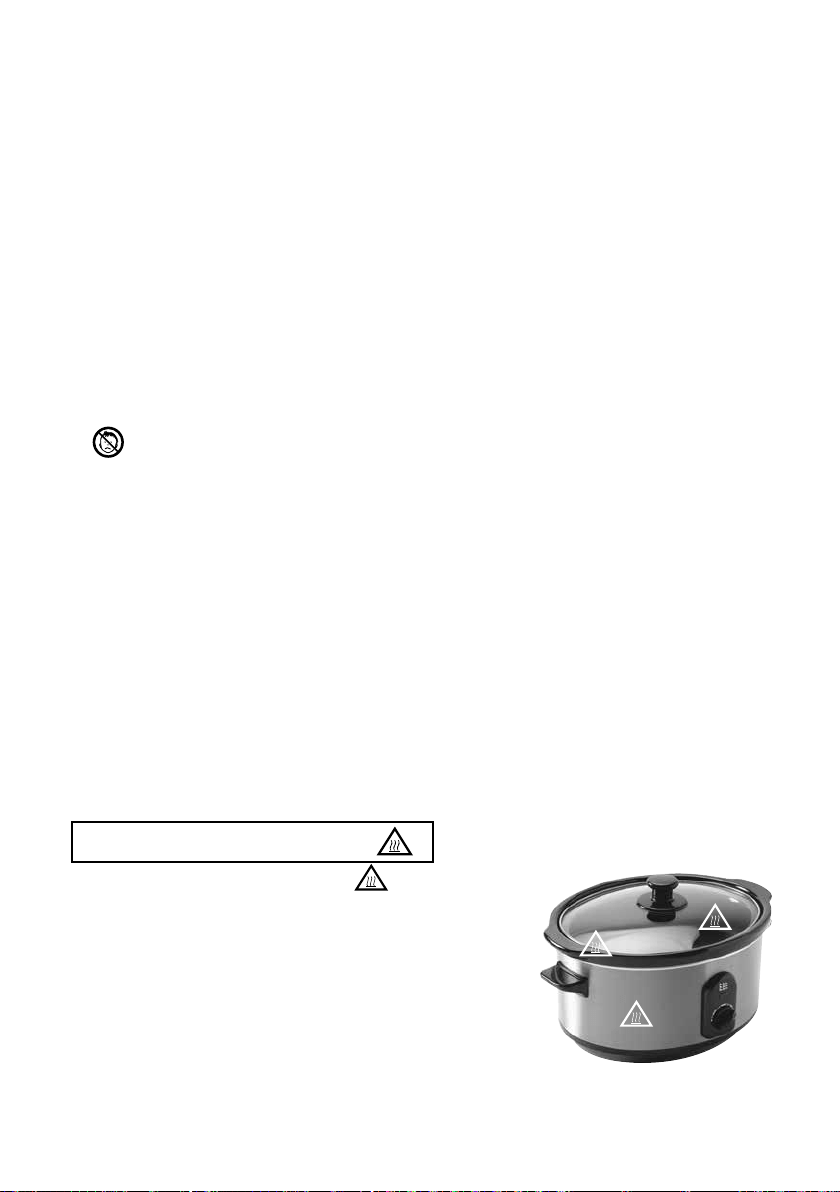
WARNING – HOT SURFACES
The surfaces marked with this symbol will get very
hot during use. To prevent injury, DO NOT TOUCH.
Let the product cool completely before touching these
surfaces, and always use the handles to move the
appliance or lift the lid.
Take care when removing the lid, tilt it away from you to
prevent being scalded by hot steam.
Always use oven gloves. Take care when lifting the cooking
pot out of the slow cooker with hot food inside.

6
USING YOUR THE SLOW COOKER FOR THE FIRST TIME
• When you switch on the slow cooker for the first time there may be a slight burning
smell, this is normal for a new heating element and will stop after a few uses.
• Unpack the slow cooker, remove all the packaging materials.
• Before first use, wipe the outside of the slow cooker with a clean, damp cloth. Wash
the lid and cooking pot in hot, soapy water, rinse and dry thoroughly.
• Make sure that all parts are clean and dry before putting the cooking pot inside the
slow cooker.
THE CONTROL DIAL AND COOKING TIMES
• The slow cooker has three temperature settings so cooking times can be adapted.
Meals can be slowly simmered all day long, or can be ready in just a few hours. Over
time you will develop a feel for how long your favourite recipes take.
• The final temperature of the food is about 120ºC whether it has been cooked on the
low or high setting. The only difference between these settings is the amount of time
the cooking process takes.
• Use ‘LOW’: If you wish to extend the cooking time.
• Use ‘HIGH’: If you wish to shorten the cooking time.
• AUTO: Is a standard setting, with an average cooking time of 6-8 hours. This setting
cooks food on HIGH until the correct temperature is reached, then keeps it warm until
ready to serve.
All cooking times are approximate, and will vary according to your recipe and choice of
ingredients.
COOK ON LOW COOK ON HIGH COOK ON AUTO
Temperature 77°C 84°C 69°C
Wattage 90W 120W 120W, then to 60W
Recipe cooking time 6-8 hours 3-4 hours 4-6 hours
8-10 hours 5-6 hours 6-8 hours
10-12 hours 7-8 hours 8-10 hours
PLEASE NOTE: Lifting the lid of the slow cooker during cooking results in temperature
loss and adds about 25 minutes to the cooking time. Avoid lifting the lid.

7
INSTRUCTIONS FOR USE
• This slow cooker has a working capacity of 2.5 litres, to allow for bubbling and
simmering.
• Prepare your ingredients. Put them inside the cooking pot and add the lid.
• The slow cooker should be at least 1/3 full.
• Plug in and switch on the slow cooker at the socket.
• Select the temperature setting according to your recipe.
• Please handle the cooking pot and lid with care, and avoid extremes of temperature.
Once the cooking pot is warm, do not add further chilled ingredients. This may crack
the pot.
• When you have finished cooking, turn the control dial to ‘OFF’, switch off at the socket
and unplug. Always use oven gloves before lifting out the cooking pot. You can take
the cooking pot straight to the table and serve. Always use a mat when placing the pot
down to protect your table and work surfaces from heat and scalding. Take care when
removing the lid, tilt it away from you to prevent being scalded by hot steam.
• Let the base unit cool completely before moving.
WARNING: The cooking pot is oven safe up to 150°C, the glass lid is NOT oven safe.
DO NOT put the cooking pot or glass lid in the microwave, or place directly on a gas or
electric hob or other heat source.

8
A GUIDE TO INGREDIENTS AND HINTS AND TIPS
• To ensure even cooking, cut meat and vegetables into similar sized pieces so they cook
evenly. Root vegetables often take longer to cook than meat, so they should be diced
or chopped more finely.
• Brown your meat before adding it to the slow cooker. This adds flavour to the final
dish.
• When using frozen meat, defrost thoroughly before adding to the slow cooker. Never
cook from frozen.
• Add enough liquid e.g. stock, to cover the ingredients inside the cooking pot before
switching on the slow cooker.
• Slow cooking does not need stirring, but you may like to give your food an occasional
stir if cooking on HIGH.
• Put food which may need longer to cook in the bottom of the cooking pot. It will be
nearer the heat source and will sit in the liquid, which will help it to cook.
• Fish and seafood tend to dry out quickly, so they are best added to dishes near the end
of cooking time.
• If you find there is too much liquid at the end of cooking remove the lid and cook on
high for about 30 minutes until the liquid reduces.
• Fresh herbs are best added near the end of cooking; dried herbs can be added along
with the main ingredients.
ADAPTING YOUR HOB TOP RECIPES FOR
SLOW COOKING
• Recipes will require far less liquid than their equivalents cooked on the hob: reduce the
liquid in hob recipes by half, you can always top up during cooking if it seems too dry.
• Reduce salt in recipes, as slow cooking and reduced liquid means flavours are more
enhanced and less salt is required.
• Recipes often say, ‘Bring to boil, and then turndown‘. In slow cookers this is not
necessary. Simply set the cooker on low.
TIMINGS
• If recipe suggests to cook for 15-30 minutes, it will need up to 2 hours on the high
setting in the slow cooker.
• If recipe suggests to cook for 30-45 minutes, it will need up to 4 hours on the high
setting in the slow cooker.
• If recipe suggests to cook for 2-3 hours, it will need up to 6 hours on the high setting
in the slow cooker.

9
RECIPES
PLEASE NOTE: That all spoon measurements are standard metric, so 1 tsp is 5ml and
1 tbsp is 15ml. We recommend using measuring spoons for accurate results.
CHILLI CON CARNE – Serves 2 to 4
Ingredients Quantity
Oil 2 tbsp
Large onion 1, peeled and chopped
Clove garlic 1, peeled and crushed
Green pepper 1, deseeded and chopped
Button mushrooms 100g, sliced
Lean minced beef 450g
Canned chopped tomatoes 400g
Salt and freshly ground black pepper
Tomato purée 2 tbsp
Beef stock 450ml
Chilli powder 3 tsp
Canned red kidney beans 400g, drained and rinsed
AUTO: 5-7 hours.
WHAT YOU DO
Heat the oil in a saucepan, add the onion, garlic and green pepper and cook for
2-3 minutes.
Add the mushrooms and minced beef and cook for 3-4 minutes until browned.
Stir in the tomatoes, tomato purée, stock, chilli powder, salt and pepper.
Bring to the boil, then transfer to the cooking pot and cook as recommended.
Stir in the beans 30-45 minutes before the end of cooking.

10
HAWAIIAN PORK CASSEROLE – Serves 2 to 4
Ingredients Quantity
Oil 1 tbsp
Onion 1, peeled and chopped
Clove garlic 1, peeled and crushed
Green pepper 1, deseeded and sliced
Button mushrooms 100g, sliced
Pork fillet 750g, cubed
Plain flour 25g
Pork or chicken stock 600ml
Dry sherry 2 tbsp
Canned pineapple chunks 432g
Salt and freshly ground pepper
AUTO: (if you pre-cook the ingredients, as below): 6-9 hours.
AUTO: (without pre-cooking): 8-10 hours.
WHAT YOU DO
Heat the oil in a saucepan, add the onion and garlic and cook for 2-3 minutes.
Add the green pepper and mushrooms and cook for 1-2 minutes.
Toss the pork in the flour, add to the pan and cook until browned.
Add the remaining ingredients and bring to the boil.
Transfer to the cooking pot and cook as recommended.

11
COQ AU VIN – Serves 2 to 4
Ingredients Quantity
Oil 1 tbsp
Butter 15g
Bacon 100g, chopped
Shallots 175g, peeled
Clove garlic 1, peeled and crushed
Button mushrooms 225g, sliced
Chicken breasts 4, boneless and skinned
Plain flour 25g
Red wine 300ml
Chicken stock 450ml
Bay leaf 1
Bouquet garni 1
Dried thyme ½ tsp
Salt and freshly ground pepper
AUTO: (if you pre-cook the ingredients, as below): 4-6 hours.
AUTO: (without pre-cooking): 6-9 hours.
WHAT YOU DO
Place the oil and butter in a saucepan and heat until melted.
Add the bacon, shallots, garlic and mushrooms and cook for 3-4 minutes.
Remove and place in a bowl.
Coat the chicken in the flour, add to the pan and cook for 3-4 minutes.
Return the bacon and vegetables to the pan.
Stir in the remaining ingredients and bring to the boil.
Transfer to the cooking pot and cook as recommended.

12
POACHED PEARS WITH CARAMEL SAUCE – Serves 2 to 4
Ingredients Quantity
Ripe pears 4, medium
Caster sugar 75g
Cold water 1.5 litre
Lemon juice 1 tbsp
For the sauce:
Butter 50g
Soft light brown sugar 75g
Granulated sugar 50g
Golden syrup 150g
Single cream 124ml
Vanilla extract Few drops
LOW: (if you pre-cook the ingredients, as below): 3½-5½ hours.
AUTO: (without pre-cooking): 3-5 hours.
WHAT YOU DO
Peel the pears, leaving the stalk intact.
Cut a small slice off the base of each pear so it sits upright.
Switch on the slow cooker.
Place the caster sugar, water and lemon juice in the cooking pot and stir until
the sugar dissolves.
Add the pears, cover with the lid and cook as recommended.
Drain and remove the pears.
For the sauce:
Place the butter, sugar and syrup in a saucepan and heat gently until the sugar dissolves.
Boil for 4-5 minutes.
Stir in the cream and vanilla extract and serve with the pears.

13
FREQUENTLY ASKED QUESTIONS
Question: Why does the finished recipe have so much liquid?
Answer: Slow cooking keeps in liquid. Remove the lid from the slow cooker and cook
on the high setting for 30 minutes. Next time reduce the liquid in your recipe
by half.
Question: Why do the vegetables seem crunchy but the meat is well cooked?
Answer: The vegetable pieces are too large. Next time cut the vegetables into smaller
pieces. Place them on the bottom of the slow cooker and the meat on top.
Question: Why does the meat seem colourless?
Answer: The meat has been cooked from raw with the other ingredients in the slow
cooker. Brown the meat off before adding to the slow cooker to enhance
appearance and flavour.
Question: Why does a favourite hob top recipe seem very salty when cooked in the
slow cooker?
Answer: Reduced liquid and the long slow cooking time can make dish flavours
develop more and seem saltier. Reduce the amount of salt used in the recipe.
Question: Why do the herb flavours not come through in the recipe?
Answer: Fresh herbs can become overcook because of the long cooking time. Use
dried herbs at the beginning of the cooking process.
Add fresh herbs near the end to retain flavour.

14
CARE AND CLEANING
• Unplug the slow cooker and allow to cool completely before cleaning.
• Clean thoroughly before using for the first use and after every use.
• Check the parts for wear or damage after every few uses.
• Do not use abrasive cleaners or steel wool.
• Never immerse the base in water or any other liquid.
• To clean the outer surfaces, wipe with a clean damp cloth and dry thoroughly before
storing.
• Wash the cooking pot and the lid in hot, soapy water. Rinse and dry thoroughly.
• The cooking pot and lid are dishwasher safe.
• Store the slow cooker with the power cable loosely coiled. Never wrap it tightly around
the unit.

15
ELECTRICAL CONNECTIONS
THIS APPLIANCE MUST BE EARTHED
This appliance is fitted with a fused three-pin plug to BS1363 which is suitable for use
in all homes fitted with sockets to current specifications. If the fitted plug is not suitable
for your socket outlets, it should be cut off and carefully disposed of. To avoid an electric
shock, do not insert the discarded plug into a socket.
FITTING A NEW PLUG
If for any reason you need to fit a new plug, the flexible mains lead must be connected
as shown here. The wires in the mains lead fitted to this appliance are coloured in
accordance with the following code:
Connect BLUE to Neutral (N)
Connect GREEN/YELLOW to Earth (E)
Connect BROWN to Live (L)
3 amp fuse to be used
If the colours of the wires in the mains lead of this appliance do not correspond with the
coloured markings identifying the terminals in your plug, proceed as follows. The wire
which is coloured green and yellow MUST be connected to the terminal which is marked
with the letter E (Earth). The wire which is coloured blue MUST be connected to the
terminal which is marked with the letter N (Neutral). The wire which is coloured brown
MUST be connected to the terminal which is marked with the letter L (Live).
Before refitting the plug cover, check that there are no cut or stray strands of wire inside
the plug. Use a 3 amp BS1362 fuse. Only BSI or ASTA approved fuses should be used. If
you are at all unsure which plug or fuse to use, always refer to a qualified electrician.
Note: After replacing or changing a fuse on a moulded plug which has a fuse cover, the
cover must be refitted to the plug; the appliance must not be used without a fuse cover.
If lost, replacement fuse covers can be obtained from an electrical shop. This appliance
complies with the following EU Directives: 2006/95/EC (Low Voltage Directive) and
2004/108/EC (EMC Directive).
RECYCLING YOUR ELECTRICALS
Along with many other high street retailers, Lakeland has joined a
scheme whereby customers can take their unwanted electricals to
recycling points set up around the country.
Visit www.recycle-more.co.uk to find your nearest recycling point.
3 amp fuse
BS1362
3 amp fuse
BS1362

16
3,5-LITER-SCHMORTOPF
17
GEBRAUCHSANWEISUNG
Modell: 19263
3,5-LITER-SCHMORTOPF

18
3,5-LITER-SCHMORTOPF VON LAKELAND
Vielen Dank, dass Sie sich für den Kauf des 3,5-Liter-Schmortopfs von Lakeland
entschieden haben.
Bitte lesen Sie sich diese Anleitung vor der Inbetriebnahme Ihres neuen Geräts aufmerksam
durch und bewahren Sie sie gut auf, falls Sie später auf die hier enthaltenen Informationen
zurückgreifen möchten.
Unser kompakter Schmortopf eignet sich perfekt zum Zubereiten von Speisen für
2-4 Personen. Er verbraucht wenig Strom, spart Zeit, ist einfach in der Anwendung
und benötigt nicht viel Platz. Ob schmackhafte Suppen, Eintöpfe oder Fleischgerichte:
Mit unserem kompakten Schmortopf zaubern Sie durch langes Garen selbst aus
preisgünstigeren Fleischstücken unwiderstehliche Gaumenfreuden.
Unser mehrfach ausgezeichneter Familienbetrieb legt heute genauso viel Wert auf ein
Höchstmaß an Qualität, ein gutes Preis-Leistungs-Verhältnis und einen hervorragenden
Kundenservice wie damals in den 1960er Jahren, als Lakeland gegründet wurde.
Unsere Artikel werden mit größter Sorgfalt ausgewählt und gründlich geprüft. So haben
Sie die Gewähr, dass Ihnen jeder Artikel, den Sie bei uns kaufen, jahrelang Freude bereiten
wird.
CONTENTS
Ausstattungsmerkmales ................................................................................................ 19
Sicherheitshinweise ................................................................................................. 20-21
Vor dem ersten Gebrauch Ihres Schmortopfs ................................................................ 22
Drehregler und Kochzeiten ........................................................................................... 22
Gebrauchsanweisung .................................................................................................... 23
Zutaten, Tipps und Tricks .............................................................................................. 24
Wie Sie aus Ihren Rezepten Schmortopf-Rezepte machen ............................................. 24
Häufig gestellte Frage ................................................................................................... 25
Pflege und Reinigung ................................................................................................... 26

19
1
2
3
4
5
AUSSTATTUNGSMERKMALE
1. Hartglasdeckel mit Griff
2. Keramiktopf mit Griffen
3. Heizelement mit Griffen
4. Kontrollleuchte
5. Thermostatregler

20
SICHERHEITSHINWEISE
Lesen Sie sich diese Bedienungsanleitung vor der ersten Inbetriebnahme Ihres Geräts
sorgfältig durch und bewahren Sie sie für den weiteren Gebrauch sicher auf. Befolgen Sie
beim Gebrauch des Produkts stets diese Sicherheitshinweise, um Körperverletzungen oder
Schäden am Produkt zu vermeiden. Dieses Produkt ist nur für den vorgesehenen Zweck
gemäß der Beschreibung in dieser Gebrauchsanweisung bestimmt.
• Dieses Gerät darf von Kindern ab 8 Jahren und Personen mit
verminderter körperlicher, sensorischer oder geistiger Fähigkeit
oder mit fehlenden Erfahrungen und Kenntnissen nur dann
verwendet werden, wenn sie von einer Person, die für ihre
Sicherheit verantwortlich ist, beaufsichtigt werden und sie im
Gebrauch und hinsichtlich der potentiellen Gefahren des Geräts
unterwiesen wurden. Dieses Gerät ist kein Spielzeug. Das Gerät
darf nicht von Kindern unter 8 Jahren benutzt werden. Kinder
ab 8 Jahren dürfen das Gerät nur unter Aufsicht benutzen und
reinigen.
• Stellen Sie sicher, dass Ihre Stromversorgung mit der auf dem Gerät angegebenen
Spannung übereinstimmt.
• Entfernen Sie vor der ersten Ingebrauchnahme alle Verpackungsmaterialien sowie
Werbeetiketten vom Gerät.
• Vergewissern Sie sich stets vor Gebrauch des Geräts, dass es keine erkennbaren Schäden
aufweist. Verwenden Sie das Produkt nicht, falls es Schäden aufweist oder versehentlich
fallen gelassen wurde. Wenden Sie sich im Falle von Schäden oder Defekten am Gerät
an den Kundenservice von Lakeland unter der Rufnummer 0800 444 1500.
• Verwenden Sie das Produkt nicht, falls das Netzkabel beschädigt ist. Falls das Netzkabel
beschädigt ist, muss es durch ein Spezialkabel ersetzt werden. Wenden Sie sich in
diesem Fall bitte unter der Rufnummer 0800 444 1500 an den Kundenservice von
Lakeland.
• Stellen Sie das Gerät zum Gebrauch stets auf einer trockenen, ebenen und
hitzebeständigen Fläche auf.
• Ziehen Sie den Netzstecker bei Nichtgebrauch und vor der Reinigung des Geräts aus der
Netzsteckdose. Lassen Sie das Gerät vor der Reinigung vollständig abkühlen. Um das
Gerät auszuschalten, drehen Sie den Regler auf „Off “ und ziehen Sie den Netzstecker
aus der Netzsteckdose.
• Verwenden Sie nur die von Lakeland empfohlenen Zubehörteile oder Einsätze.
• Tauchen Sie Netzkabel, Netzstecker oder Gehäuse nicht in Wasser oder andere
Flüssigkeiten ein. Es besteht Brand-, Stromschlag- und Verletzungsgefahr!
• Lassen Sie das Netzkabel nicht vom Küchentisch oder von der Arbeitsplatte
herunterhängen. Achten Sie darauf, dass das Netzkabel nicht mit heißen Oberflächen in
Berührung kommt.
• Nur für den Gebrauch in Innenräumen.
• Nur für den häuslichen Gebrauch.
• Dieses Gerät ist nur für die Zubereitung von Lebensmitteln gemäß der Beschreibung in
der mitgelieferten Gebrauchsanweisung vorgesehen.
21
• Ziehen Sie den Netzstecker ausschließlich mit trockenen Händen aus der Netzsteckdose.
Ziehen Sie den Netzstecker nie am Netzkabel aus der Netzsteckdose heraus.
• Decken Sie das Gerät während des Gebrauchs nicht ab. Es besteht Verletzungs- und
möglicherweise Brandgefahr!
• Schließen Sie das Gerät nicht an eine externe Zeitschaltuhr oder an ein System mit
Fernbedienung an.
• Lassen Sie bei der Verwendung von Verlängerungskabeln Vorsicht walten. Die
elektrischen Anschlussdaten des Kabels müssen mindestens so hoch wie die des Geräts
sein. Achten Sie darauf, dass das Kabel nicht von der Arbeitsplatte herunterhängt und
nicht mit heißen Flächen in Berührung kommt.
• Dieses Gerät entspricht den Grundanforderungen der EMV-Richtlinie 2004/108/EG
(Elektromagnetische Verträglichkeit) und der Niederspannungsrichtlinie 2006/95/EG
(Sicherheit elektrischer Betriebsmittel).
• WARNHINWEIS: Bei einem abgeschnittenen Stecker in einer 13A-Netzsteckdose
besteht schwere Verletzungsgefahr durch Stromschlag! Sorgen Sie dafür, dass der
abgeschnittene Stecker ordnungsgemäß entsorgt wird.
• ACHTUNG: Die Kunststoff-Verpackungsmaterialien stellen eine Gefahr dar. Sie
dürfen nicht in die Hände von Babys und Kindern gelangen, da Erstickungsgefahr
besteht. Diese Verpackungsmaterialien sind kein Spielzeug.
• Den Schmortopf schalten Sie aus, indem Sie den Regler auf die Aus-Position (OFF)
stellen und den Netzstecker aus der Netzsteckdose ziehen. Ziehen Sie immer zuerst den
Netzstecker aus der Netzsteckdose, bevor Sie den Kochtopf aus dem Heizelement heben
oder wenn das Gerät nicht in Gebrauch ist. Lassen Sie den Schmortopf immer erst
vollständig abkühlen, bevor Sie ihn reinigen oder bewegen.
• Ziehen Sie den Netzstecker des Schmortopfes aus der Netzsteckdose, bevor Sie den
Kochtopf füllen oder leeren. Heizen Sie den Schmortopf nicht auf, wenn der Kochtopf
leer ist.
• Stellen Sie den Schmortopf oder den Kochtopf nicht direkt auf einen Gas- oder
Elektroherd oder andere Wärmequellen.
• Zum Schutz vor Stromschlag oder sonstigen Schäden dürfen Zutaten niemals direkt in
das Heizelement gegeben werden. Verwenden Sie ausschließlich den Kochtopf.
• Seien Sie vorsichtig, wenn Sie den Kochtopf auf Arbeitsflächen abstellen, da der
Topfboden Tische und Arbeitsflächen zerkratzen und beschädigen kann. Verwenden Sie
zum Abstellen des Topfes immer einen hitzebeständigen Untersetzer.
ACHTUNG – HEISSE OBERFLÄCHEN
Oberflächen, die mit diesem Symbol gekennzeichnet
sind, heizen sich während des Gebrauchs stark auf. NICHT
BERÜHREN! Es besteht Verletzungsgefahr! Lassen Sie
das Gerät immer erst vollständig abkühlen, bevor Sie die
gekennzeichneten Oberflächen anfassen, und verwenden
Sie stets die Griffe, um das Gerät zu bewegen oder den
Deckel anzuheben.
Achten Sie beim Abnehmen des Deckels darauf, dass Sie ihn
immer von sich weghalten. Es besteht Verbrühungsgefahr
durch heißen Dampf!
Tragen Sie stets Ofenhandschuhe. Seien Sie vorsichtig, wenn
Sie den Topf mit heißem Essen aus dem Heizelement heben.

22
VOR DEM ERSTEN GEBRAUCH IHRES SCHMORTOPFS
• Wenn Sie den Schmortopf das erste Mal verwenden, vernehmen Sie gegebenenfalls
einen leichten verbrannten Geruch. Dies ist bei einem neuen Heizelement völlig normal
und legt sich nach wenigen Anwendungen.
• Packen Sie den Schmortopf aus und entfernen Sie sämtliche Verpackungsmaterialien.
• Wischen Sie die Außenseite des Heizelements vor dem ersten Gebrauch mit einem
sauberen feuchten Tuch ab. Reinigen Sie den Deckel und den Kochtopf in heißem
Spülwasser, waschen Sie sie danach mit klarem Wasser ab und trocknen Sie sie
sorgfältig.
• Achten Sie darauf, dass alle Teile sauber und trocken sind, bevor Sie den Kochtopf in
das Heizelement geben.
DREHREGLER UND KOCHZEITEN
• Der Schmortopf hat drei Temperatureinstellungen für unterschiedliche Garzeiten. Das
Gargut kann entweder den ganzen Tag lang sanft köcheln, oder der Garvorgang kann
in nur wenigen Stunden abgeschlossen sein. Mit der Zeit werden Sie ein Gespür dafür
entwickeln, wie lange verschiedene Lieblingsgerichte garen müssen.
• Das Gargut hat nach Ablauf der Garzeit eine Temperatur von ca. 120 ºC, unabhängig
von der Gartemperatur (LOW oder HIGH). Der einzige Unterschied zwischen diesen
beiden Garfunktionen ist die jeweils benötigte Garzeit.
• Verwenden Sie „LOW“: Wenn Sie die Garzeit verlängern möchten.
• Verwenden Sie „HIGH“: Wenn Sie die Garzeit verkürzen möchten.
• AUTO: Ist die Standardeinstellung mit einer durchschnittlichen Garzeit von
6-8 Stunden. Bei dieser Einstellung wird das Gargut auf der höchsten Stufe (HIGH)
gegart, bis die korrekte Temperatur erreicht ist, und wird dann bis zum Servieren
warmgehalten.
Alle Garzeiten sind ungefähre Angaben, die je nach Rezept und Wahl der Zutaten
abweichen können.
LOW HIGH AUTO
Temperatur 77 °C 84 °C 69 °C
Wattleistung 90W 120W 120W, danach 60W
Kochzeiten 6-8 Stunden 3-4 Stunden 4-6 Stunden
8-10 Stunden 5-6 Stunden 6-8 Stunden
10-12 Stunden 7-8 Stunden 8-10 Stunden
HINWEIS: Mit jedem Anheben des Schmortopfdeckels während des Garvorgangs sind ein
Temperaturverlust und eine um 25 Minuten längere Garzeit verbunden. Vermeiden Sie es
daher, den Deckel während des Garens anzuheben.

23
GEBRAUCHSANWEISUNG
• Dieser Schmortopf hat ein Fassungsvermögen von 2,5 Liter, damit das Gargut Platz zum
Sieden und Aufwallen hat.
• Messen Sie Ihre Zutaten ab und geben Sie diese in den Kochtopf. Setzen Sie den Deckel
auf den Topf.
• Der Schmortopf sollte mindestens zu einem Drittel gefüllt sein.
• Stecken Sie den Netzstecker in die Steckdose und schalten Sie den Schmortopf ein.
• Wählen Sie eine für Ihr Rezept geeignete Temperatureinstellung aus.
• Gehen Sie vorsichtig mit Kochtopf und Deckel um und vermeiden Sie extreme
Temperaturschwankungen. Sobald der Topf warm ist, sollten Sie keine weiteren kalten
Zutaten hinzufügen, da dies den Topf beschädigen kann.
• Schalten Sie den Schmortopf nach dem Gebrauch aus, indem Sie den Regler auf
„OFF“ stellen und den Netzstecker aus der Steckdose ziehen. Tragen Sie stets
Ofenhandschuhe, wenn Sie den Kochtopf aus dem Heizelement heben oder bewegen.
Sie können den Kochtopf zum Servieren direkt auf den Esstisch stellen. Stellen Sie den
Topf immer auf einen hitzebeständigen Untersetzer, um Tisch und Arbeitsflächen vor
Hitze und Verbrennungen zu schützen. Achten Sie beim Abnehmen des Deckels darauf,
dass Sie ihn immer von sich weghalten. Es besteht Verbrühungsgefahr durch heißen
Dampf!
• Lassen Sie das Heizelement immer erst vollständig abkühlen, bevor sie es bewegen.
WARNHINWEIS: Der Kochtopf ist bis zu 150 °C ofenfest. Der Glasdeckel ist jedoch
NICHT ofenfest.
Kochtopf und Deckel sind NICHT für die Verwendung in der Mikrowelle geeignet. Halten
Sie Kochtopf und Deckel von Gas- und Elektroherden sowie anderen Hitzequellen fern.

24
ZUTATEN, TIPPS UND TRICKS
• Um einen gleichmäßigen Garprozess zu gewährleisten, sollten Fleisch und Gemüse
in gleich große Stücke geschnitten werden, damit sie gleichmäßig garen. Da
Wurzelgemüse oftmals länger garen muss als Fleisch, sollte es in kleinere Würfel oder
Stücke geschnitten werden.
• Braten Sie Fleisch erst an, bevor Sie es in den Schmortopf geben. Dadurch verleihen Sie
Ihrem Gericht ein tolles Aroma.
• Lassen Sie eingefrorenes Fleisch erst vollständig auftauen, bevor Sie es in den
Schmortopf geben. Garen Sie niemals Fleisch, das noch gefroren ist.
• Fügen Sie ausreichend Flüssigkeit wie Brühe hinzu, bis alle Zutaten im Topf bedeckt
sind, setzen Sie den Deckel auf den Topf und schalten Sie den Schmortopf ein.
• Beim Schmoren müssen die Zutaten in der Regel nicht umgerührt werden; wenn Sie die
Zutaten allerdings auf höchster Stufe (HIGH) garen, können Sie gelegentlich umrühren.
• Geben Sie die Zutaten, die am längsten garen müssen, immer ganz unten in den
Kochtopf, da diese so näher an der Hitzequelle sind und in der Flüssigkeit besser garen
können.
• Da Fisch und Meeresfrüchte schnell austrocknen, geben Sie diese am besten gegen
Ende der Garzeit in den Topf.
• Ist Ihr Gericht nach abgelaufener Garzeit dennoch zu flüssig, nehmen Sie den Deckel ab
und garen alles ca. 30 Minuten auf höchster Stufe, bis die Flüssigkeit eingedickt ist.
• Frische Kräuter geben Sie man am besten kurz vor Garende hinzu; getrocknete Kräuter
können zusammen mit den Hauptzutaten hinzugefügt werden.
WIE SIE AUS IHREN REZEPTEN SCHMORTOPFREZEPTE
MACHEN
• Generell gilt, dass wesentlich weniger Flüssigkeit als beim herkömmlichen Kochen
auf dem Herd erforderlich ist: Reduzieren Sie die Garflüssigkeit bei herkömmlichen
Rezepten auf die Hälfte. Sollte Ihr Gericht beim Garen zu trocken wirken, können Sie
immer noch weitere Flüssigkeit hinzufügen.
• Verwenden Sie weniger Salz als im Rezept angegeben, da das Gericht durch das
Garen und die geringere Flüssigkeitsmenge geschmacksintensiver ist und weniger Salz
erfordert.
• In Rezepten heißt es häufig: „Zum Kochen bringen und dann die Temperatur
herunterschalten“. In einem Schmortopf ist dies nicht erforderlich. Stellen Sie Ihren
Schmortopf einfach auf die niedrigste Stufe.
KOCHZEITEN
• Bei einer in einem Rezept angegebenen Garzeit von 15-30 Minuten ist im Schmortopf
eine Garzeit von bis zu 2 Stunden auf höchster Stufe erforderlich.
• Bei einer in einem Rezept angegebenen Garzeit von 30-45 Minuten ist im Schmortopf
eine Garzeit von bis zu 4 Stunden auf höchster Stufe erforderlich.
• Bei einer in einem Rezept angegebenen Garzeit von 2-3 Stunden ist im Schmortopf
eine Garzeit von bis zu 6 Stunden auf höchster Stufe erforderlich.

25
HÄUFIG GESTELLTE FRAGEN
Frage: Warum ist in der fertig gekochten Speise noch so viel Flüssigkeit enthalten?
Antwort: Beim Garen im Schmortopf bleibt Flüssigkeit übrig. Entfernen Sie den Deckel
vom Topf und kochen Sie Ihre Speise weitere 30 Minuten auf der höchsten
Temperaturstufe. Verwenden Sie beim nächsten Mal nur die Hälfte der
Flüssigkeit.
Frage: Warum ist das Gemüse noch knackig und das Fleisch hingegen gar?
Antwort: Die einzelnen Gemüsestücke sind zu groß. Schneiden Sie das Gemüse das
nächste Mal in kleinere Stücke und geben Sie diese unten in den Schmortopf
und das Fleisch obendrauf.
Frage: Warum ist das Fleisch farblos?
Antwort: Das rohe Fleisch wurde zusammen mit den anderen Zutaten im Schmortopf
gegart. Braten Sie das Fleisch vorher leicht an und geben es dann in den
Schmortopf – dadurch verleihen Sie dem Gericht ein tolles Aussehen und
Aroma.
Frage: Warum schmecken einige meiner Lieblingsrezepte aus dem Schmortopf zu
salzig?
Antwort: Durch weniger Flüssigkeit und lange Garzeiten kann ein Gericht intensiver und
salziger schmecken. Reduzieren Sie die im Rezept angegebene Menge Salz.
Frage: Warum kommen Kräuter im Rezept nicht richtig zur Geltung?
Antwort: Frische Kräuter können im Schmortopf aufgrund der langen Garzeiten
verkochen. Verwenden Sie zu Beginn des Garprozesses getrocknete Kräuter.
Um den Geschmack von frischen Kräutern beizubehalten, geben Sie diese erst
kurz vor Garende hinzu.

26
PFLEGE UND REINIGUNG
• Ziehen Sie den Netzstecker des Schmortopfes aus der Steckdose und lassen Sie das
Gerät vor der Reinigung vollständig abkühlen.
• Reinigen Sie das Gerät vor der ersten Inbetriebnahme und nach jedem Gebrauch
gründlich.
• Überprüfen Sie die einzelnen Teile regelmäßig auf Verschleiß oder Schäden.
• Verwenden Sie keine Scheuermittel oder metallenen Scheuerschwämme.
• Tauchen Sie das Heizelement niemals in Wasser oder andere Flüssigkeiten ein.
• Sie können das Gerät außen mit einem sauberen, feuchten Tuch abwischen. Trocken Sie
es gründlich ab, bevor Sie es verstauen.
• Reinigen Sie den Kochtopf und den Deckel in heißem Spülwasser. Gut abspülen und
abtrocknen.
• Kochtopf und Deckel sind spülmaschinenfest.
• Verstauen Sie den Schmortopf so, dass das Netzkabel lose um das Gerät
herumgewickelt ist. Wickeln Sie es nie fest um das Gerät.

27

28
Lakeland
Alexandra Buildings, Windermere, Cumbria, UK LA23 1BQ
Tel: +44(0)15394 88100 www.lakeland.co.uk
Tel: 0800 444 1500 www.lakeland.de
D