
Loading ...
Loading ...
Loading ...
13
remote blower
knockout
electrical
knockout
7/8”
1-7/8”
9-15/16”
C/L
10. Attach wall bracket to wall by (3) M4*1-1/2” screws with washers. NOTE: Wood blocking may need to be
added behind the drywall if no studs are present. Wall anchors may also be used but check with local codes
for compliance. Failure to use suitable wall anchors and screws to hold the weight of the hood could result in
personal injury or damage to the cooking surface or counter.
11. Lift hood onto wall bracket. The lip at the back of the hood body will rest between the wall and the top lip
of the wall bracket. Secure hood body in place by (2) M4*1-1/2” screws though bottom section of interior of
hood body. FIG. 4
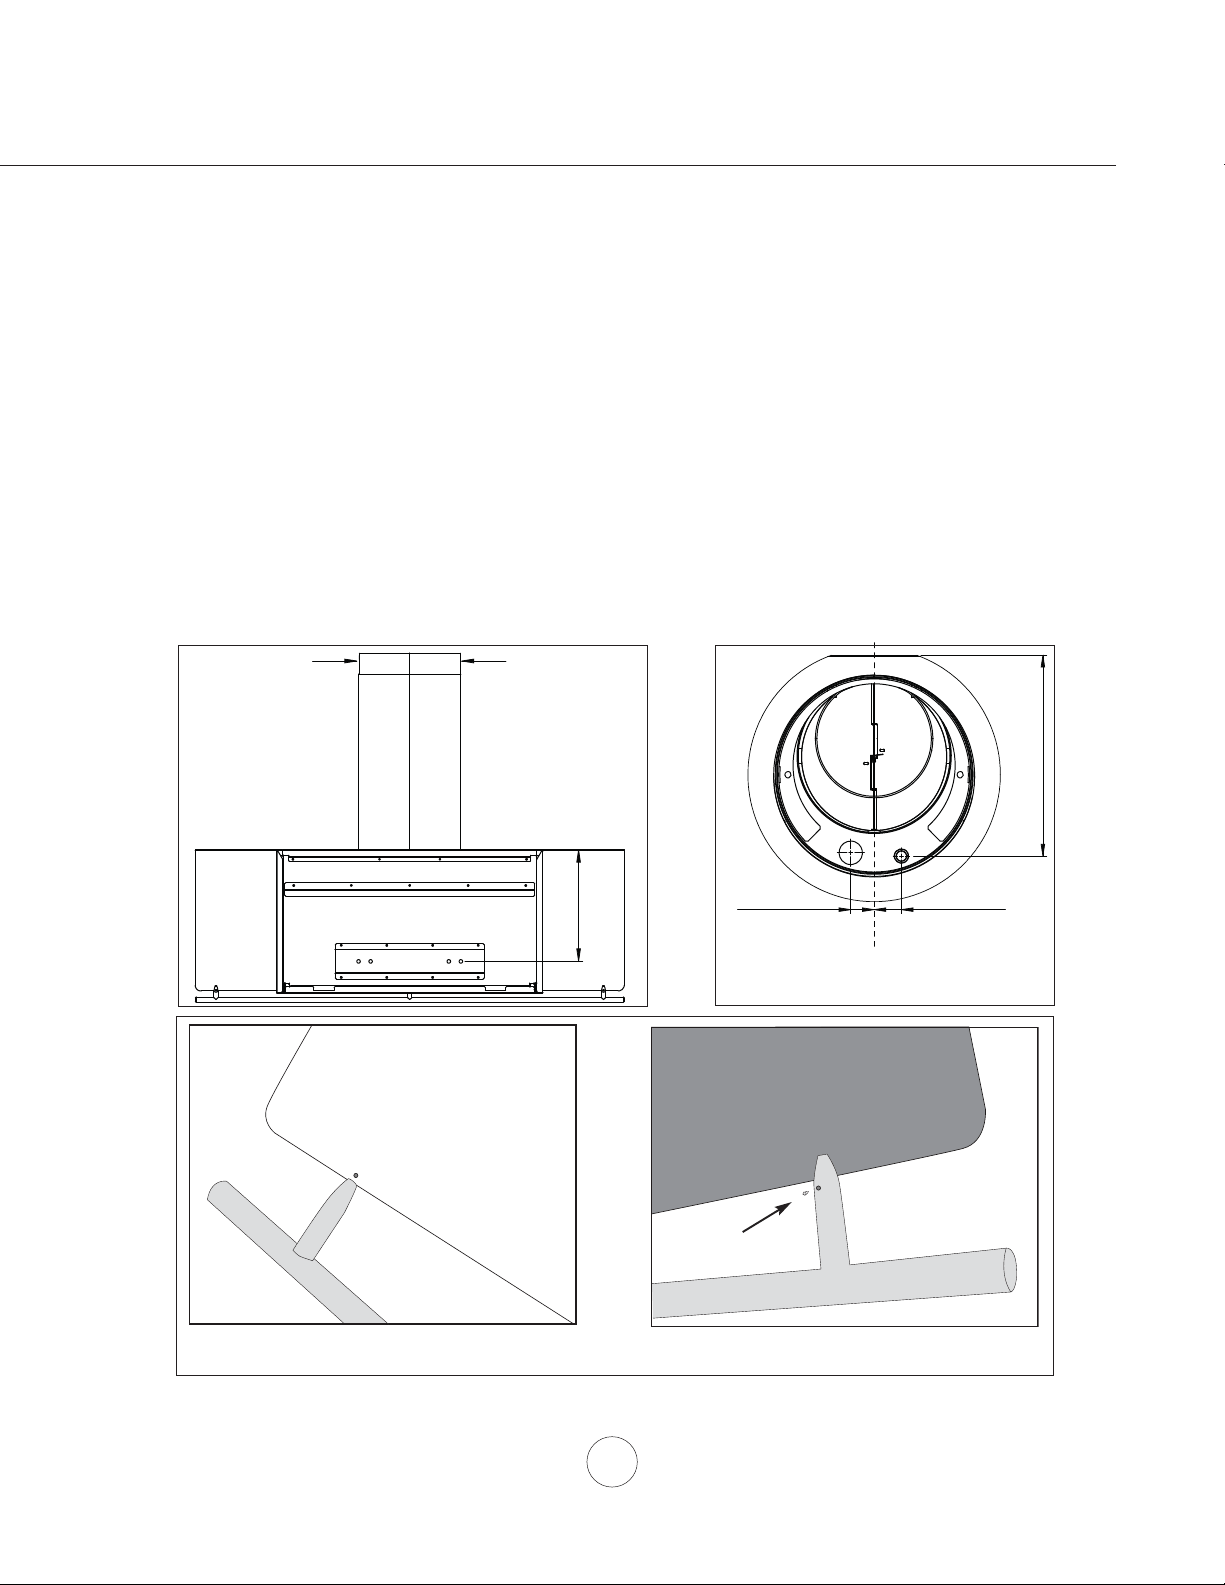
12. Place telescopic duct covers on top of hood.
13. Run duct work from ceiling to motor collar and seal all joints with certifi ed aluminum duct tape.
14. Install electrical wiring. FIG. 5
15. Attach upper (inner) duct cover to ceiling bracket by (2) M4*8 screws. FIG. 4
16. Attach utensil rail to hood canopy by 3 set screws (pre-installed into rail) using the provided allen key. FIG.
6. A small hole has been pre-drilled into the canopy to provide a starting point to attach the fi rst utensil rail
post. After the fi rst post is lined up with the hole, gently slide the rest of the rail onto the canopy. Be careful
not to scratch the stainless of the canopy while installing the utensil rail.
kcaBtnorF
Set
screw
10-9/16”
Upper duct cover
attachment screw
locations
Back View
FIG. 5
FIG. 4
FIG. 6
Installation – Mounting the Range Hood
Loading ...
Loading ...
Loading ...