USERGUIDE
CoatingThicknessTester
ModelCG204
CG204-en-GB_v2.3 5/15
2
Introduction
CongratulationsonyourpurchaseoftheExtechCG204CoatingThicknessTester.TheCG204isaportable
meterdesignedfornon‐invasivecoatingthicknessmeasurements.Themeterusestwomeasurement
methods:magneticinduction(forferrousmetalsubstrates)andeddycurrent(fornon‐ferrousmetal
substrates).Properuseandcareofthismeter
willprovidemanyyearsofreliableservice.
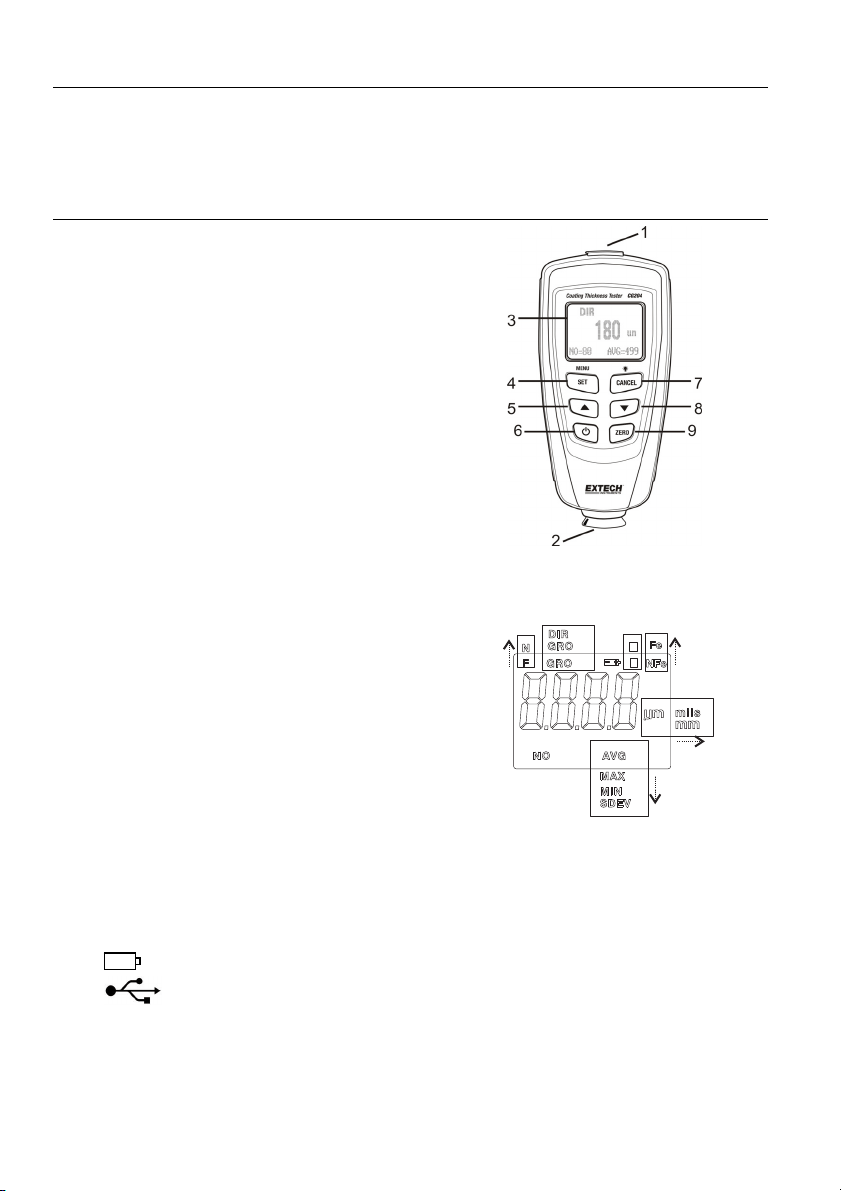
Description
MeterDescription
1. USBjackforPCinterface
2. Measurementprobe
3. BacklitLCDdisplay
4. SET/OK/YES/MENU/SELECTbutton
5. UP/LEFTARROWbutton
6. PowerON/OFFbutton
7. CANCEL/ESC/NO/BACKbutton(menumode)and
BacklightON/OFF(normalmode)
8. DOWNARROW/RIGHTbutton
9. ZEROcalibrationbutton
Note:Batterycompartmentonrearofmeter
DisplayIconDescription
NFeNon‐ferrousmetals
FeFerrousmetals
AUTO Automaticsubstraterecognition
ForN Calibrationicons
DIRDIRECTmode
GRO1…4 GROUPMode
µmMicrometersunitofmeasure
milsmils=millimeters*2.54/100
mmMillimetersunitofmeasure
AVGAveragereading
MINMinimumreading
MAXMaximumreading
SDEVStandardDeviation
reading
NONumberofdatapoints
Lowbattery
USBConnection
Note:TheunitofmeasureiconflasheswhenintheCONTINUOUSmodeofoperation.Theunitof
measureiconisstablewhenintheSINGLEmodeofoperation.
L
H
1
=
=
[AUT
O]
[NO ALRRM]
cal no(1or2)
zero n o(yes)
CG204-en-GB_v2.3 5/15
3
QuickStartInstructions
MeterPower
PressthepowerbuttontoswitchthemeterON.ThedisplaywillswitchON.Ifthedisplaydoesnotswitch
ON,replacethebatteries.
Measurements
Usethesuppliedfilmreferencesandzeroreferencemetalsubstratestolearnhowthemeteroperates
beforemovingtoaprofessionalapplication.Theroundmetalsubstrateistheferrous(magnetic)substrate
andtherectangularshapedmetalsubstrateisthenon‐ferrous(non‐magnetic)substrate.Themeter
automaticallysensesferrousornon
‐ferroussubstrates.
1. Placeareferencefilm(250µm,forexample)ontheround,ferroussubstrate.
2. Placethespring‐loadedmetersensoragainstthereferencefilm.
3. Inthesinglemodethemeterwillemitanaudibletoneindicatingthatthemeasurementhasbeen
taken.
4. Inthecontinuousmodethedisplaywillcontinuallymeasureandupdatethedisplay
5. TheLCDwillshowthereading(250µm)atthecenterofthedisplayarea.
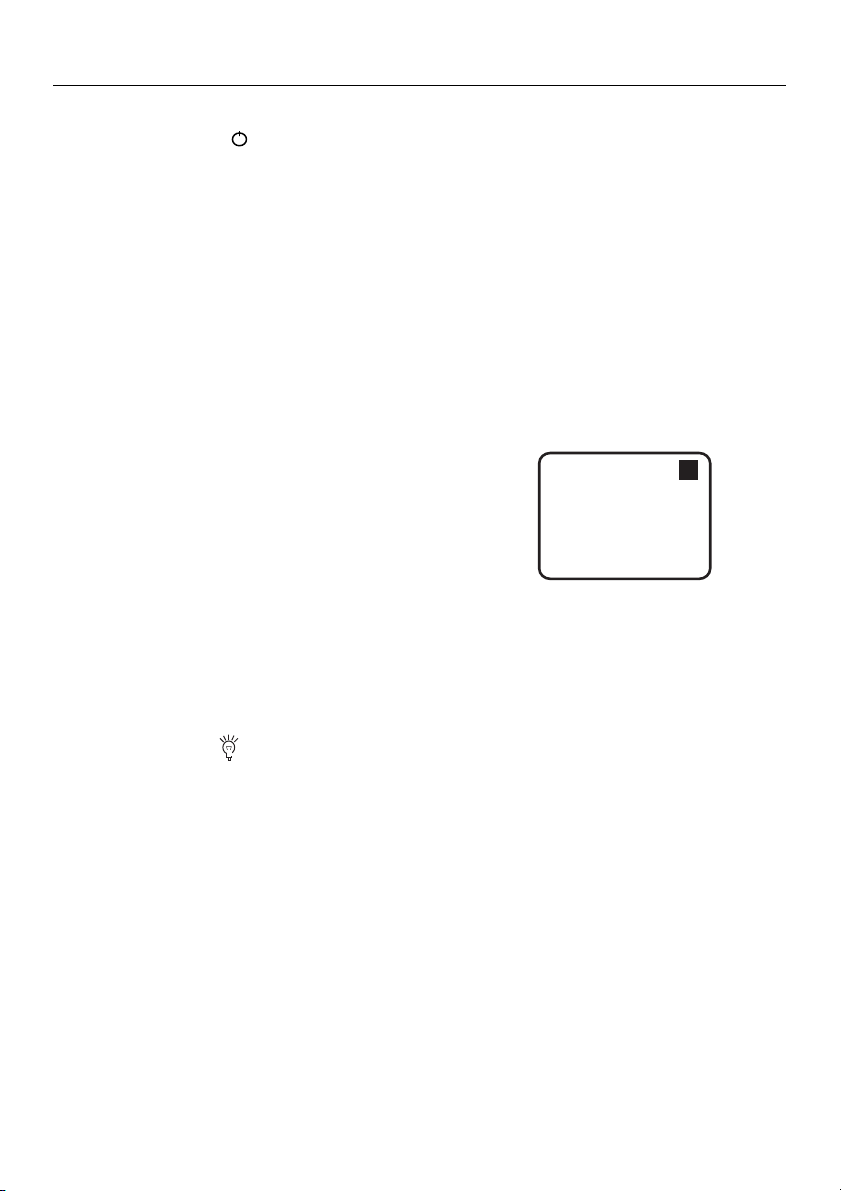
6. Atypicaldisplaywillalsoshowthefollowing:
NO=1(readingnumberone)onthelowerleftofthe
LCD
AVG
=250µm(runningaverage)onthelowerright
DIR=DIRmodeofoperationontheupperleft
Fe=FerroussubstrateontheupperrightoftheLCD
Experimentwiththeremainingreferencefilmsandthesubstratebeforeusingthemeterprofessionally.
AutomaticPowerOFF
Inordertoconservebatterylife,themeterwillautomaticallyturnoffafterapproximately3minutes.To
defeatthisfeatureusetheprogrammingmenudetailedinthenextsection(menuparameterAUTOPOWER
OFFunderOPTIONS).
LCDBacklightButton
TheLCDisequippedwithbacklightingforeasierviewing,especiallyindimlylitareas.Pressthebacklight
buttontoturnthebacklighton.Pressagaintoturnthebacklightoff.Toenable/disabletheLCDbacklighting,
usetheBACKLIGHTparameterunderOPTIONSintheprogrammingmenu.
FactoryDefaultReset
Torestorethemetertoitsoriginalfactorydefaultsettings:
1. TurnthemeterOFF.
2. PressandholdtheZERObuttonwhileswitchingthemeterON.
3. Whenthemeterpowersup,thedisplaywillpromptforaYESorNO.
4. PresstheSETbuttonforYESorthe
CANCELbuttonforNO.
5. Notethatalldatainallmemorylocationswillbeerased,inadditiontostatistics,calibrationvalues,
andalarmlimits.
DIR
um
AVG=250
NO=1
250
Fe
CG204-en-GB_v2.3 5/15
4
ProgrammingMenu
Themetercanbeconfiguredandcalibratedthroughsimplebuttonpressesintheprogrammingmenu.Press
theMENUbuttontoaccessthemenuandrefertothemenu‘tree’below.ThemenuusesUP/DOWN,
SELECT,BACK,&ESCpressesfornavigationandselection.Inthetablebelowthefactorydefaultsettings
are
inboldwithanasterisk.Eachparameterisexplainedindetailinthesubsequentsections.
Toplevel Sublevel1 Sublevel2 Notes
STATISTICALVIEW
AVG* Averageofaseriesofreadings
MIN Lowestofaseriesofreadings
MAX Highestofaseriesofreadings
NONumberofsampledreadings
SDEV Standarddeviationofaseries
OPTIONS
Measuremode
Single* Onereadingatatime
Continuous Continuousmeasurements
Workingmode
Direct* Readingsarenotstoredingroups
Group1…4 Storereadingsingroups
Probeused
Auto* Meterautomaticallyselectsmode
Fe Ferrousmeasurementmode
NoFe Non‐ferrousmeasurementmode
Unitsettings
µm*
Micrometers
mils Mils=mm*2.54/100
mm Millimeters
Backlight
ON* Enablesbacklightoperation
OFF Disablesbacklightoperation
LCDStatistics
AVG* Averageofaseriesofreadings
MAX Lowestofaseriesofreadings
MIN Highestofaseriesofreadings
SDEV Standarddeviationofaseries
AutoPowerOFF
Enable* Allowsautopowerofftooperate
Disable Defeatstheautopowerofffeature
LIMIT
Limitsettings
HighLimit HighAlarmalertsuserwhenreached
LowLimit LowAlarmalertsuserwhenreached
DeleteLimits Clearthealarmlimitvalues
DELETE
CurrentData Deletecurrentdata
AllData Deleteallstoreddata
GroupData
Deletedatastoreddataplusalarmand
calibrationdata
MEASUREMENTVIEW
Viewstoreddatainallgroups
CALIBRATION
Enable Allowcalibrationaccess
Disable Lockoutthecalibrationmode
DeleteZeroN Clearthezerocal.data(non‐ferrous)
DeleteZeroF Clearthezerocal.data(ferrous)
NOTE:DisabletheAutoPowerOFFfeaturebeforelengthyprogrammingtoavoidinconvenientautomatic
powerdownwhileprogramming.

CG204-en-GB_v2.3 5/15
5
STATISTICALVIEWSMenu
1. PresstheMENUbuttontoaccesstheprogrammingmenu
2. PressSELECTtochooseSTATISTCALVIEW
3. UsetheUPandDOWNbuttonstoscrollthroughtheAVERAGE,MINIMUM,MAXIMUM,NUMBEROF
DATA,andSDEV(StandardDeviation)valuesforthestoredreadings.
4. ‘NODATA’willdisplayifnoreadings
areavailableforthemetertoanalyze.Storedreadingswillclear
whenthemeterpowersdownunlesstheGROUPfeatureisused(refertoGROUPfunctionexplanation
laterinthissection).
5. PresstheBACKandthentheESCsoft‐keystoreturntothenormaloperatingmode.
OPTIONSMenu
1. PresstheMENUbuttontoaccesstheprogrammingmenu
2. UsetheDOWNARROWbuttontoscrolldowntoOPTIONS
3. PressSELECTtochooseOPTIONS
4. UsetheUPandDOWNbuttonstoscrolltotheMEASUREMODE,WORKINGMODE,PROBEUSED,UNIT
SETTINGS,BACKLIGHT,LCDSTATISTICS,ANDAUTO
POWEROFFparameters.UsetheSELECTsoft‐keyto
selectthedesiredparameter.Eachparameterisdetailedbelow:
a. MeasureModes
SelectCONTINUOUSorSINGLEunderMEASUREMODESintheOPTIONSMenuusingthearrowbuttons
andtheSELECTsoft‐key.
IntheCONTINUOUSmeasurementmodethemeterdisplaysarunningaverageofreadi ngsastheyare
taken.Notethattheaudiblemeasurement‘beep’isnotactiveinthismode.
Inthe
SINGLEmeasurementmodemeasurementsaretakenoneatatime.Singlemodemeasurement
readingsareaccompaniedbyanau dibletone.
b. WorkingModes
SelectDIRECTorGROUP1,2,3,or4underWORKINGMODESintheOPTIONSMenuusing thearrow
buttonsandtheSELECTsoft‐key.
InDIRECTmode,individualreadingsareloggedtomemory.Whenpowerisswitchedofforifthemeter
isswitchedtoGROUPmode,allDIRECTreadings
willbecleared.However,thestatisticalanalysisdata
willremain.Thestatisticalanalysisutilitycanevaluateupto80readings.Whenthememoryisfilled,
newreadingswillreplaceoldreadings.Lastly,thismodehasitsowncalibrationandalarmlimitvalues.
InGROUPmodeeachgroupmemorycanstore
amaximumof80readingsand5statisticalvalues.
Calibrationandalarmlimitvaluescanbeindividuallysetandstoredforeachgroup.Whenthememory
isfilled,measurementswillcontinuetobetakenbutreadingswillnolongerlog(previouslylogged
readingsarenotaffected);inaddition,statisticaldatawill
nolongerupdate.Ifdesired,thegroupdata,
statisticalvalues,calibrationdata,andalarmlimitvaluescanbedeletedusingDeleteunderthe
programmingmenu.

CG204-en-GB_v2.3 5/15
6
c. ProbeUsed
SelectAUTO,Fe,orNoFeunderPROBEUSEDintheOPTIONSMenuusingthearrowbuttonsandthe
SELECTsoft‐key.
IntheAUTOmode,themeterautomaticallyactivatestheprobemeasurementmethod(ferrousornon‐
ferrous)basedonthemetalsubstratethatisbeingmeasured.Whentheprobeis
placedonamagnetic
substrateitwillworkinthemagneticinductionmode.Iftheprobeisplacedonanon‐ferrousmetalit
willworkintheeddycurrentmode.
IntheFerrous(Fe)ModetheMagneticinductionmeasurementmodeisactivated.
IntheNon‐Ferrous(NoFe)Mode
theeddycurrentmeasurementmodeisactivated.
d. Unitsofmeasureselections
Selectmm,µm,ormilsunderUNITSETTINGintheOPTIONSMenuusingthearrowbuttonsandthe
SELECTsoft‐key(mm=millimeters;µm=micrometers;mils=mm*2.54/100)
e. Backlight
SelectONorOFFunderBACKLIGHTintheOPTIONSMenuusingthearrowbuttonsandtheSELECTsoft‐
key.IfOFFisselectedtheLCDbacklightingwillbecompletelydisabled.IfONisselected,theusercan
turnthelightonoroffusingthebacklightbutton(CANCELbutton).
f. LCDStatistics
SelectAVERAGE,MINIMUM,MAXIMUM,orSDEV(StandardDeviation)underLCDSTATISTICSinthe
OPTIONSMenuusingthearrowbuttonsandtheSELECTsoft‐key.Thisselectiondetermineswhich
statisticisshownasdefaultontheLCDdisplay.
g. AutoPowerOFF
SelectENABLEorDISABLEunderAUTOPOWEROFFintheOPTIONSMenuusingthearrowbuttonsand
theSELECTsoft‐key.Whenenabled,themeterautomaticallyswitchesOFFafter3minutesofinactivity.
Whendisabled,themeterwillonlyswitchOFFwithabuttonpressorwhenthebatterypoweris
weak.
LIMITMenu
HighandLowAlarmLimitscanbesetwhenanAlarmLimitisreachedthemeterdisplaysanAlarmAlerticon
(HforHighAlarmandLforLowAlarm).
1. PresstheMENUbuttontoaccesstheprogrammingmenu
2. UsertheDOWNARROWbuttontoscrolldownto
LIMITandpressSELECT
3. PressSELECTagaintochooseLIMITSETTING
4. PressSELECTagaintochooseHIGHLIMIT
5. UsertheARROWBUTTONStosetaHighAlarmvalue
6. PressOKtostorethelimitandpressBACKtoreturntothemenu
7. Performthesamesteps
fortheLOWLIMIT
8. UsetheDELETELIMITparametertoclearAlarmLimitvalues

CG204-en-GB_v2.3 5/15
7
DELETEMenu
TheDELETEmenusallowsfordeletingcurrentdata,alldata,andgroupdata.Thefollowingparametersare
availableintheDELETEMenu:
DeleteCurrentdata:Deletesthecurrentreadingandupdatesthestatistics(AVG,MIN,MAX,etc.)
DeleteAlldata:Deleteallreadingandstatisticaldata.
DeleteGroupdata:Thisfunction
duplicatesthe“Deletealldata”functionwithadditional,deletionsofHigh
alarm,Lowalarm,andone‐andtwo‐pointcalibrations.
1. PresstheMENUbuttontoaccesstheprogrammingmenu.
2. UsertheDOWNARROWbuttontoscrolldowntoDELETE.
3. PressSELECTtoopentheDELETEfunction.
4.
UsertheARROWkeystoscrolltoCURRENT,ALL,orGROUP.
5. PressSELECTagaintochooseCURRENT,ALL,orGROUP.
6. Themeterwillpromptwithan‘areyousure?”confirmation.
7. PressYESorNOasdesired.
MEASUREMENTVIEWMenu
TheMeasurementViewmenuallowsforscrollingthroughthereadingsinallofthegroups.
1. PresstheMENUbuttontoaccesstheprogrammingmenu.
2. UsertheDOWNARROWbuttontoscrolldowntoMEASUREMENTVIEW.
3. PressSELECTtoopentheMEASUREMENTVIEWparameter.
4. UsertheARROWbuttons
toscrollthroughthestoredreadings.
CALIBRATIONMenu
TheCalibrationmenuallowstheusertoenable/disablethecalibrationutility.TheCalibrationmenualso
allowstheusertodeleteZerocalibrationdataforbothferrous(ZeroF)andnon‐ferrous(ZeroN)modes.
1. PresstheMENUbuttontoaccesstheprogrammingmenu.
2. UsertheDOWNARROWbuttonto
scrolldowntoCALIBRATION.
3. PressSELECTtoopentheCALIBRATIONparameter.
4. UsertheARROWtoscrollthroughtheavailableparametersdetailedbelow.
ENABLE:Enablethecalibrationmode
DISABLE:Disablethecalibrationmode.
DELETEZERON:DeleteZEROcalibrationdatafornon‐ferrousprobe
DELETE
ZEROFDeleteZEROcalibrationdataforferrousprobe
MeasurementConsiderations
1. Aftercalibration,measurementsshouldmeetthepublishedaccuracyspecifications.
2. Strongmagneticfieldscanaffectthereadings.
3. Whenusingthestatisticalanalysisfunctionsforobtainingameanvalue,takeseveralreadingsofthe
samemeasurementarea.Falsereadingsoroutlierscanthenberemoved(deleted)usingthe
programmingmenu.
4. Thefinalreadingisderivedfromastatisticalcalculationwithregardtothemeter’spublishedaccuracy
specifications.

CG204-en-GB_v2.3 5/15
8
Calibration
CalibrationTypes
Performazerocalibrationandamulti‐pointcalibrationbeforeanycriticalmeasurementsaretaken.The
calibrationoptionsarelistedbelow.Readthedescriptionforeachandselectthebestmatc h foragiven
application.
1. ZeroPointCalibration:Performbeforeeachmeasurementsession.
2. OnePointCalibration:Useforhigh
accuracywithrepeatedtestsonaconstantcoatingthickness.
3. Multi‐PointCalibration:Useforhighaccuracywithinaknownrangeofcoatingthickness.
4. Calibrationforshot‐blastedsurfaces.
CalibrationConsiderations
Thecalibrationsamplemustcorrespondtotheproductsampleinthefollowingways:
Curvatureradius
Substratematerialproperties
Substratethickness
Sizeofmeasurementarea
Thepointatwhichthecalibrationismadeonthecalibrationsamplemustalwaysbeidenticalwith
thepointofmeasurementon
theproductitself,especiallyinthecaseofcornersandedgesof
smallparts.
Toachievethehighestmeasurementaccuracy,performseveralcalibrationsinsuccession(forzerovalues
andcalibrationfilmvalues).
Preparingforcalibration
1. Cleantheprobetip(grease,oil,metalscrap,andtheslightestimpuritywillaffectmeasurementand
distortreadings).
2. SwitchthemeterON(ata10cm[4”]minimumdistancefromanymetal).
3. Readythesuppliedmetalsubstratesamplesandnecessaryfilms(suppliedcalibrationreference
films).
4. Setthemeter
to:
a. DIR:(MENU‐OPTIONS‐WorkingMode‐Direct)
b. CONTINUOUS:(MENU‐OPTIONS‐MeasureMode‐Continuousmode[flashingunitsindicator])
c. MAX:(MENU‐OPTIONS‐LCDStatistic‐Maximum).
5. Themeterisnowreadyforcalibration.
6. YoushouldperformaZerocalibrationpriortoathicknesscalibration.
CG204-en-GB_v2.3 5/15
9
Zerocalibration
1. Placethemeteronanuncoatedsectionofthematerialtobe
measuredoronthereferencesubstrateprovided.Useeitherthe
FerrousorNon‐Ferrousreferenceasrequiredbythemeasurement
application.
2. PlacetheprobeontheuncoatedsubstrateandwatchtheLCD
readings.
3. Whenthereadings
appearstable,liftthemeteroffthesubstrate
4. PressandHoldtheZerobuttonfor2seconds(2beeps).
5. Repeatthisprocedureatleast5timestocreateanaccuratemeanvalue.
6. Themeterisnowreadyforthicknesscalibrationormeasurements.
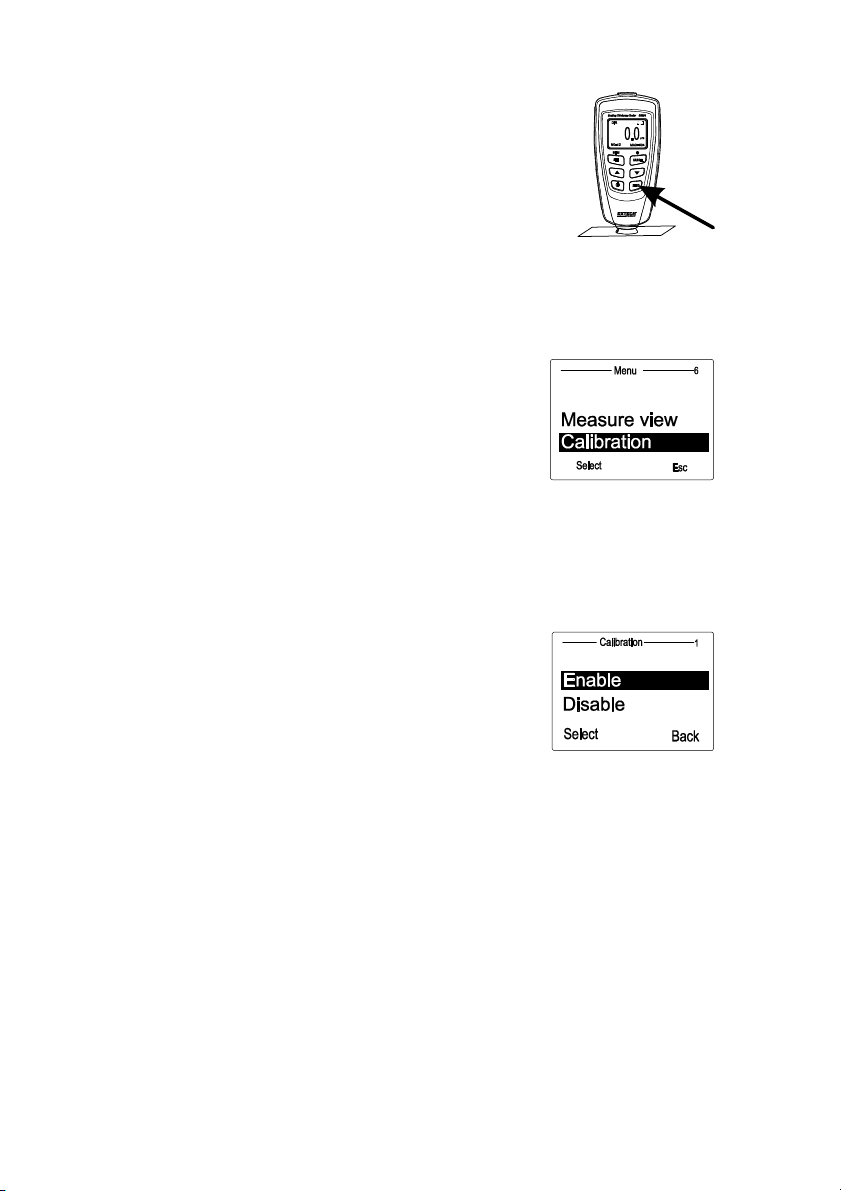
Calibration
Themeter’saccuracycanbeenhancedbyperformingacalibrationusingthereferencefilmssupplied.
1. Performazerocalibrationasstatedabove
2. Performarangecalibrationusingareferencefilm.
a. Press“MENU”andthenscrolldown “▼”to
“Calibration”.
b. Press“Select”tohighlight
the“Enable”functionand
thenpress“Select”.
c. Press“ Esc”andthemeterwillenterthecalibrationmode.
d. Adjustthereadingtomatchtheknownvalueofthereferencefilmusingthe▲and▼
buttons.
e. Placeoneofthereferencefilmsonthesubstrate.
f. PlacethemeteronthecalibrationreferencefilmandwatchtheLCDreadings.
g. Whenthereadingsappearstable,liftthemeteroffthesubstrate.
h. PresstheUporDownarrowtosetthedisplayedvalue
tothereferencefilmvalue.
i. Placethemeterbackdownonthe
referencefilmand
watchtheLDCreadings.
j. Whenthereadingsappearstable,liftthemeteroffthe
substrate.
k. PresstheUporDownarrowstosetthedisplayedvaluetothereferencefilmvalue.
l. Repeatupto5timestoestablishameanaveragereading.
m. Turn
themeterOFFtoexitandsavethecalibrationdata.
3. Themeterisnowcalibratedtothebasematerialandthicknessused.
4. ForaTwo‐pointcalibrationrefertothatsectionbelow.
Notes:
1. Calibrationdataisstoredintomemoryitisnoterasedwhenthemeteristurned
OFF.
2. Frequentlywipethesensorcontactwithacleanlintfreeclothtoremoveanyparticlesonthesensor
tip.
3. Duringcalibrationthe▲and▼buttonsadjusttheinternalcalibrationfactorswithhighresolution.
Thedisplayresolutionmaybesuchthatitmaytakeupto10presses
toseea1digitchangeonthe
display.

CG204-en-GB_v2.3 5/15
10
Two-point calibration
This method requires the use of two films. The thicker film should be, if possible, 1.5 times as thick
as the thinner one. For best results, the expected thickness should be between the two calibration
values.
This method is especially suitable for taking high-precision readings. It is advisable to take a mean
several times. This considerably reduces the effect of scattering which occurs during calibration of
the upper and lower values.
1. Perform a Zero-point calibration (previously described)
2. Enable Calibration mode in the Options Programming Menu.
3. Perform a One-point calibration (as previously described) on the thin calibration film reference.
4. Repeat step 3 using a thicker calibration film (997m for example).
5. Turn off the meter to save the measured values.
Calibration Notes:
1. The thickness of the calibration films should be roughly equivalent to the estimated coating
thickness to be measured.
2. Calibration can be performed as often as necessary. Old calibration data will be overwritten
but the ZERO calibration data remains in memory until another zero point calibration is
made.
CalibratingforShot‐blastedsurfaces
Thephysicalnatureofshot‐blastedsurfacesresultsinhigherthannormalcoatingthicknessreadings.The
meanthicknessoverthepeakscanbedeterminedasfollows:
1. Themetershouldbecalibratedaccordingtothecalibrationinstructions.Useasmoothcalibration
samplewiththesamecurvatureradiusandthesamesubstrate
asthedevicetobetested.
2. Takeapprox.10readingsontheuncoated,shot‐blastedsampletoproducethemeanvalueXo.
3. Takeanadditional10readingsonthecoated,shotblastedtestsampletoproducethemeanvalueXm
4. Thedifferencebetweenthetwomeanvalues
isthemeancoatingthicknessXeffoverthepeaks.The
greaterstandarddeviation‘S’ofthetwovaluesXmandXoshouldalsobetakenintoconsideration:Xeff
=(Xm‐Xo)±S
NOTE:Forcoatingsthickerthan300µm,theinfluenceofroughnessgenerallyisofnoimportanceand
thereforeitisnotnecessarytoapplytheabovecalibrationmethods.

CG204-en-GB_v2.3 5/15
11
nxx /
StatisticalAnalysisConsiderations
Themetercalculatesstatisticsfromamaximumof80readings(ForGroup1throughGroup4,amaximum
of400readingscanbestored).NotethatreadingscannotbestoredwheninDIRECTmode.However,
statisticsonthesereadingscanstillbecalculated.Whenthemeterispoweredofforif
theworkingmodeis
changed(intheprogrammingmenu),theDIRECTmodestatisticswillbelost.Thefollowingstatisticalvalues
canbecalculated:
NO.:Numberofreadings
AVG:Averagevalue
Sdev.:Standarddeviation(squarerootofadataset’svariance)
MAX:Maximumreading
MIN:
Minimumreading
StatisticalTerms
Averagevalue( x )isthesumofreadingsdividedbythenumberofreadings.
StandardDeviation(Sdev)
Thesamplestandarddeviationisastatisticthatmeasureshowthesamplevalueisdistributedaround
thesamplemean.ThestandarddeviationofasetofnumbersistherootmeansquareofthevarianceS
2
Thevarianceofalististhesquareofthestandarddeviationofthelist,thatis,theaverageofthe
squaresofthedeviationsofthenumbersinthelistfromtheirmeandividedbythe(numberofreadings‐
1)
Variance:S
2
=
)1/()(
2
nxx
Standarddeviation:S=
2
S
NOTE:
UsetheDELETEparameterfromtheprogrammingmenuimmediatelyafteranoutlierorerraticreading
hasbeentaken.RefertotheDeletefunctioninProgrammingMenu.
StorageCapacityOverflow
InGROUPmode,ifthestoragecapacityisexceeded,stat istics will not beupdated,although
measurementscanstillbemade.Ifthememoryisfull,subsequentreadingswillnotbeincludedinthe
statistics.Themeter’sdisplaywillshow“FULL”(intheSINGLEmeasurementmode).
InDIRECTmode,whenthememory
isfull,thenewestreadingwillreplacetheoldestreadingandthe
statisticswillbeupdated.

CG204-en-GB_v2.3 5/15
12
PCInterface
ThismeterhasthecapabilitytoconnecttoandcommunicatewithaPC.Toinstallandusethe
software,pleaserefertotheinstructionsprovidedonthesuppliedCD‐ROMand/ortheinstructions
providedintheHELPUtilitywithinthesoftwareprogram.
Checkthesoftwaredownloadpageofthewebsitewww.extech.comforthelatestversionofthePC
softwareanditsoperatingsystemcompatibility.
ErrorMessages
Thefollowingerrormessageswillappearonthemeter’sLCDifaproblemarises.
Err1:Eddycurrentprobeerror
Err2:Magneticinductionprobeerror
Err3:EddycurrentandMagneticinductionerrors
Err4,5,6:Unusederrordisplays
Err7:Thicknesserror
PleasecontactExtechInstrumentsifaproblemexists.
Maintenance
CleaningandStorage
Periodicallywipethemeterhousingwithadampclothandmilddetergent;donotuseabra‐sivesorsolvents.
Ifthemeterisnottobeusedfor60daysormore,removethebatteriesandstorethemseparately.
BatteryReplacement/Installationinstructions
1. RemovethePhillipsheadscrewthatsecurestherearbatterydoor
2. Openthebatterycompartment
3. Replace/installthetwo1.5V‘AAA’batteries
4. Securethebatterycompartment
You,astheenduser,arelegallybound(Batteryordinance)toreturnallusedbatteriesand
accumulators;disposalinthehousehold
garbageisprohibited!
Youcanhandoveryourusedbatteries/accumulatorsatcollectionpointsinyourcommunityor
whereverbatteries/accumulatorsaresold!
Disposal:Followthevalidlegalstipulationsinrespectofthedisposalofthedeviceattheendof
itslifecycle

CG204-en-GB_v2.3 5/15
13
Specifications
Sensorprobe Ferrous Non‐Ferrous
Measurement
principle
Magneticinduction Eddycurrentprinciple
Measuringrange
ofcoatingthickness
0~1250μm
0~49.21mils
0~1250μm
0~49.21mils
Accuracy
1
(%ofreading)
0~850μm:±(3%+1μm)
850μm~1250μm:(±5%)
0~33.46mils:±(3%+0.039mils)
33.46mils~49.21mils:(±5%)
0~850μm:±(3%+1.5μm)
850μm~1250μm:(±5%)
0~33.46mils:±(3%+0.059mils)
33.46mils~49.21mils:(±5%)
Resolution 0~50μm:(0.1μm)
50μm~850μm:(1μm)
850μm~1250μm:(0.01μm)
0~1.968mils:(0.001mils)
1.968mils~33.46mil:s(0.01mils)
33.46mils~49.21mils:(0.1mils)
0~50μm:(0.1μm)
50μm~850μm:(1μm)
850μm~1250μm:(0.01μm)
0~1.968mils:(0.001mils)
1.968mils~33.46mils:(0.01mils)
33.46mils~49.21mils:(0.1mils)
Min.curvatureradius
ofsubstrate
1.5mm(59.06mils) 3mm(0.004mils)
DiameterofMin.
areaofsubstrate
7mm(275.6mils) 5mm(196.9mils)
Basiccritical
thicknessof
substrate
0.5mm(19.69mils) 0.3mm(11.81)
Industrialstandards ConformstoGB/T4956‐1985,GB/T4957‐1985,JB/T8393‐1996,JJG889‐
95,andJJG818‐93
Operating
Temperature
32°F~104°F(0°C~40°C)
OperatingRelative
Humidity(R.H.)
20%~90%RelativeHumidity
Dimensions 4.3x2.0x1.0”(110x50x23mm)
Weight 3.9oz.(100g)
Accuracystatementappliesonaflatsurface,withazeroandacalibrationperformednearthe
thicknessofthefilmtobemeasured,withanidenticalbasemetalandwiththemeterstabilized
atambienttemperature.Theaccuracyofthereferencefilmsoranyreferencestandardsshould
beaddedtomeasurement
results.
Copyright©2013‐2015FLIRSystems,Inc.
Allrightsreservedincludingtherightofreproductioninwholeorinpartinanyform
ISO‐9001Certified
www.extech.com