Loading ...
Loading ...
Loading ...
5
NOTICE Regarding MacOS Catalina
With the release of MacOS Catalina, Apple has introduced restrictions on using non-Apple software. Unless the recording
application is ocially supported to run under MacOS Catalina, you will not be able to access the microphone even if it
shows up as a sound input device!
If you are using an older version of MacOS, your computer will automatically recognize the USB device
and install the appropriate driver.
If you are using MacOS Mojave, you must enable software access to the microphone, using the security and privacy settings.
1. Connect the ATR2100x-USB microphone to an open USB port on the Mac (Type A or Type C).
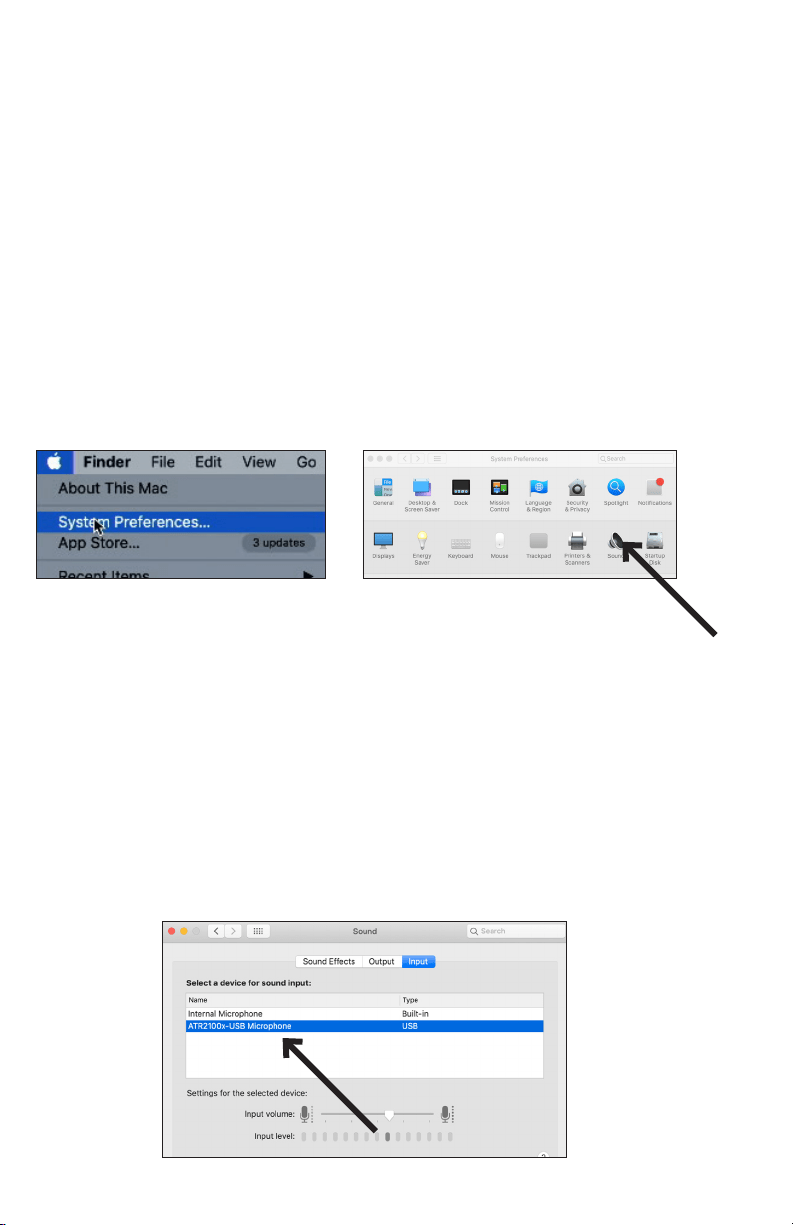
Open the system preferences by clicking the Apple logo in the upper left corner of the menu bar and selecting
System Preferences. Alternatively, you can click on the gear icon in the dock. Click the Loudspeaker icon to open
the sound preferences.
2. By default the Mac selects the internal microphone as the sound input device. When the ATR2100x-USB is
plugged in, the Mac assumes that it is the desired input device and automatically selects it.
Verify that the ATR2100x-USB is highlighted.
The input volume for the microphone can be adjusted by moving the input slider and watching the level meter
while speaking into the microphone. Setting the level too low will not provide enough input signal to your
recording application. Setting it too high can overload the input to the recording application resulting in clipping or
distortion.
Note: The output volume slider controls the Mac’s speaker or headphone jack output and does not affect the input
sound level. This slider replicates the volume control associated with the small speaker icon in the menu bar and
the volume controls on the keyboard.
Preliminary setup with MacOS Mojave
Click the Apple Logo and select System Preferences Click the Loudspeaker icon to open the
sound preferences
Loading ...
Loading ...
Loading ...