
Loading ...
Loading ...
Loading ...
6
Unpacking
Carton Contents
• Electric grass trimmer assembly with support bracket
• Safety guard
• Partial thread screw (1)
• ST4x16 screws (4)
• Manuals with registration card
1. Carefully remove the electric grass trimmer and check to
see that all of the above items are supplied.
2. Inspect the product carefully to make sure no breakage or
damage occurred during shipping. If you nd damaged or
missing parts, DO NOT return the unit to the store. Please
call the Snow Joe
®
+ Sun Joe
®
customer service center at
1-866-SNOWJOE (1-866-766-9563).
NOTE: Do not discard the shipping carton and packaging
material until you are ready to use the electric grass
trimmer. The packaging is made of recyclable materials.
Properly dispose of these materials in accordance with
local regulations.
IMPORTANT! The equipment and packaging material are not
toys. Do not let children play with plastic bags, foils, or small
parts. These items can be swallowed and pose a suocation risk!
Assembly
m
WARNING! Do not connect to power supply until
assembly is complete. Failure to comply could result in
accidental starting and possible serious personal injury.
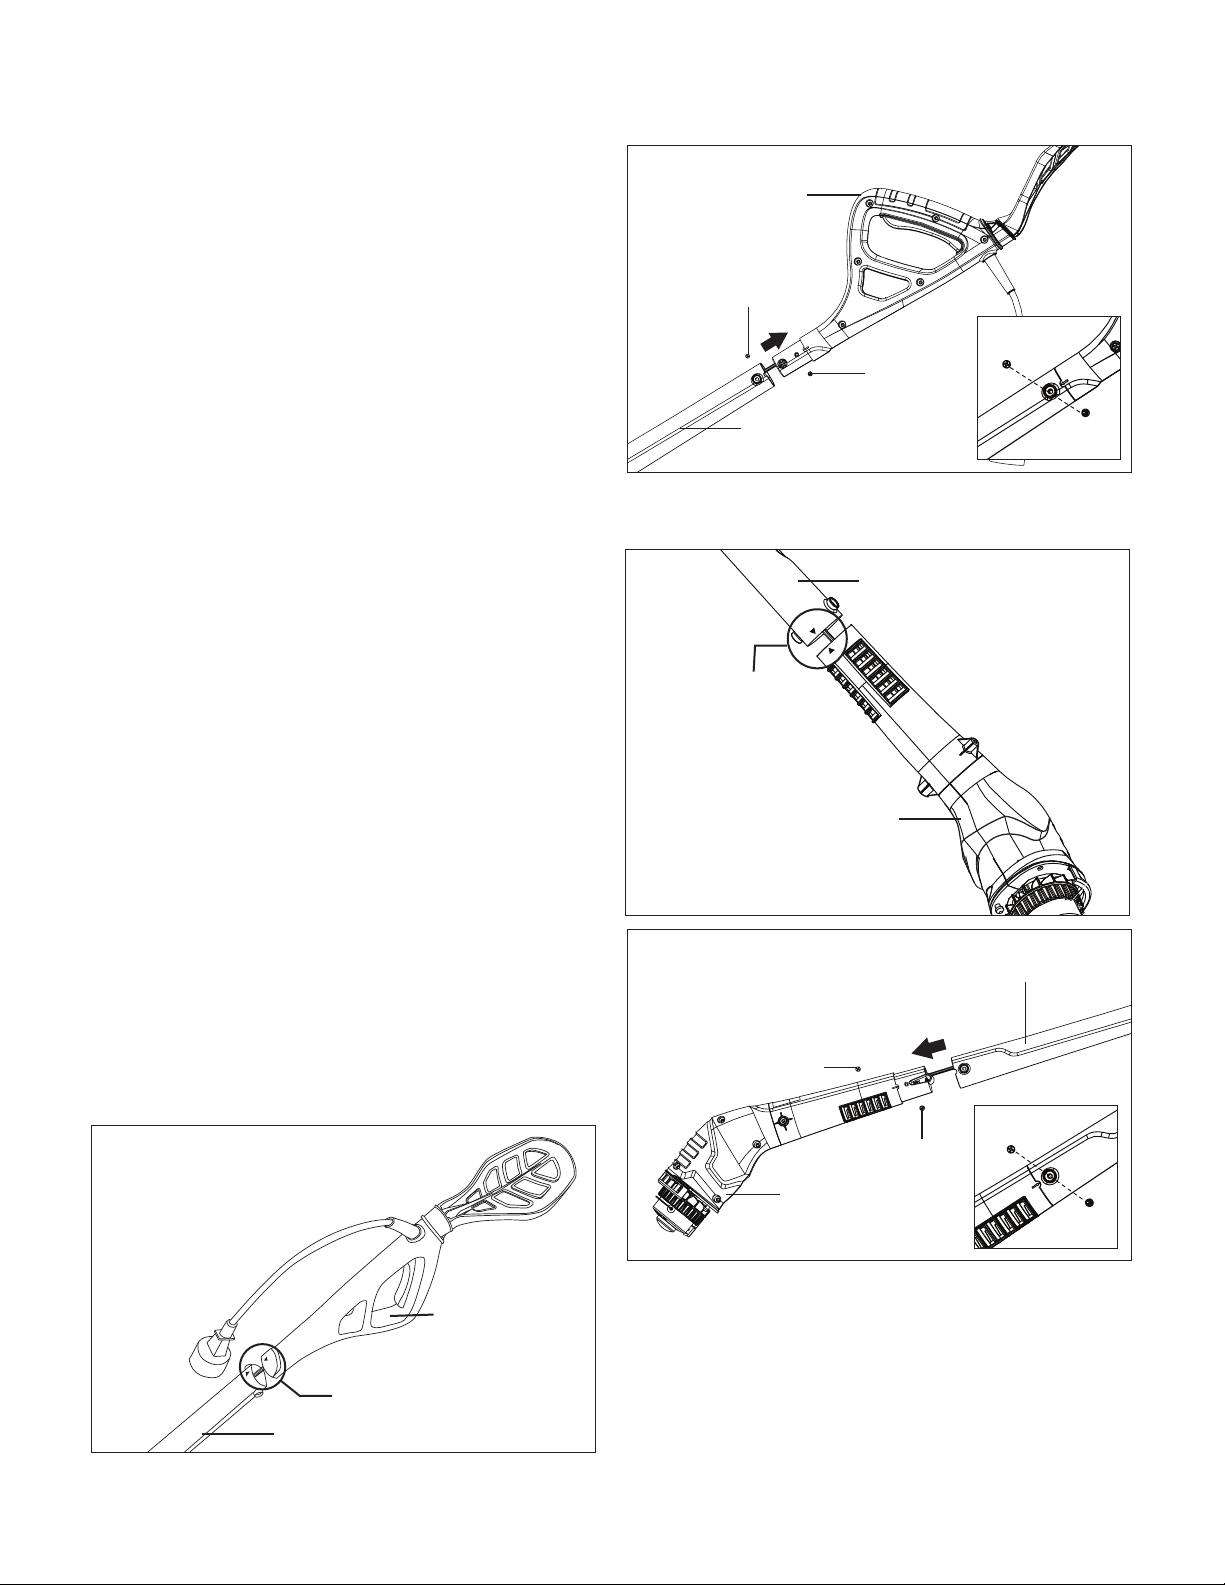
Fitting the Handle + Pole
1. Aligning the two removable arrows on the back, as shown,
insert the trimmer pole into the handle until it locks
securely in place. Secure with 2 screws provided
(Figs. 1 – 2).
NOTE: You may have to carefully move the wiring inside
the pole to one side if it blocks the path of the screw.
2. Aligning the two removable arrows on the back, as shown,
install the trimmer pole assembly to the trimmer head and
secure with the 2 remaining screws provided (Fig. 3 - 4).
Fitting the Safety Guard
mWARNING! The safety guard must be properly installed.
The guard provides the operator and other bystanders with
some protection from thrown objects.
1. Fix the safety guard to the trimmer head, making sure the
sides are located along the grooves on the trimmer head,
as shown (Fig. 5).
Fig. 1
Align the arrows
Trimming pole
Handle
Trimmer pole
ST4x16 screw
ST4x16
screw
Handle
Fig. 2
Fig. 3
Align the arrows
Trimmer head
Trimmer pole assembly
Trimmer pole
Trimmer head
ST4x16 screw
ST4x16 screw
Fig. 4
Loading ...
Loading ...
Loading ...