Loading ...
Loading ...
Loading ...
7
Questions? We’re here to help!
Visit: www.maxi-matic.com for support on this product.
HOW TO USE
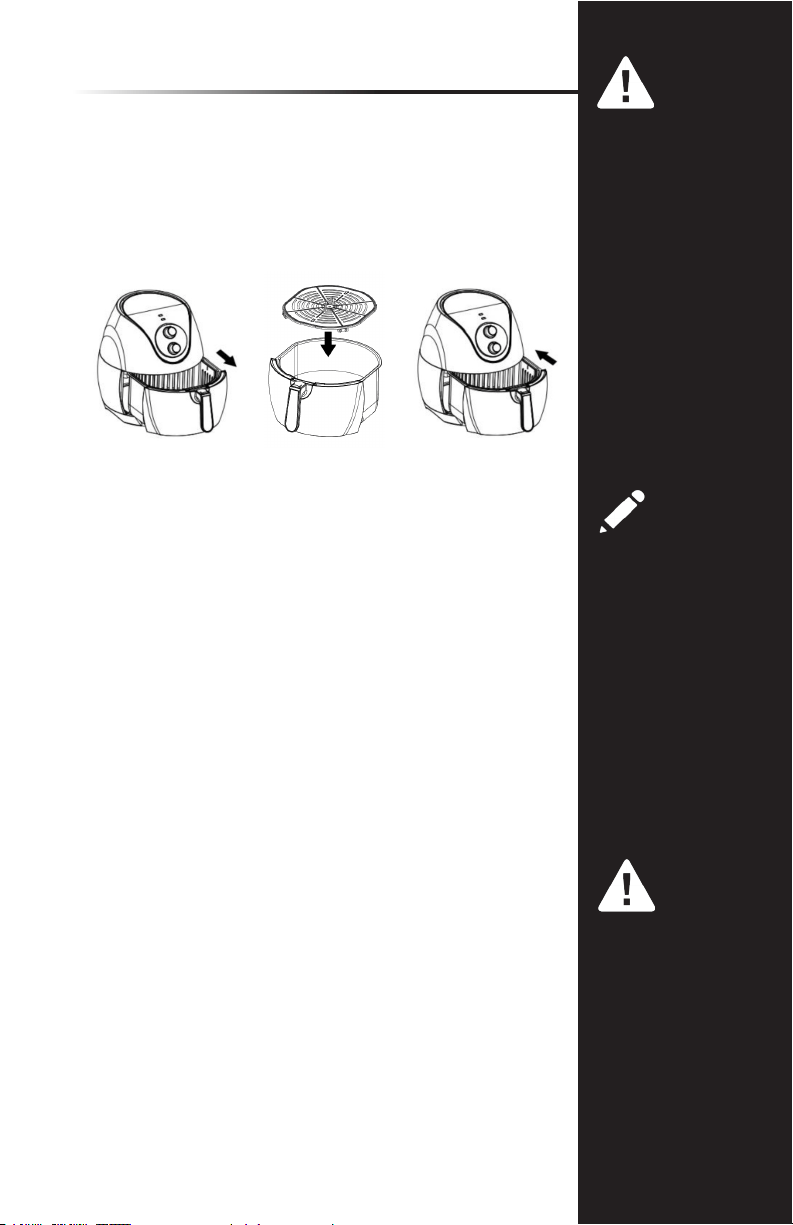
1. Carefully pull out the Drawer Pan (B) from the Main Fryer
Body by pulling forward on the Handle (C) (Figure 4).
2. Place the Frying Rack (A) into the Drawer Pan (B) (Figure 5).
3. Place ingredients onto Frying Rack (A).
4. Slide Drawer Pan (B) back into the Main Fryer Base (Figure
6). Once in place, the Air Fryer will beep to let you know it
is in position.
CAUTION:
Never place anything
on top of the Main
Body, for this will block
the air ow and reduce
the effect of hot air
heating.
NOTE:
During the hot air
frying process, the
Heating Indicator will
come on and go out
from time to time.
This indicates that
the heating element
is maintaining the set
temperature.
CAUTION:
Do not touch the
Drawer Pan (B) during
and immediately after
use, as it gets very hot.
Only hold the Drawer
Pan (B) by the Handle
(C).
Any excess oil from
food will collect at the
bottom of the Drawer
Pan (B).
-
-
HOW TO PROGRAM FRYING TIME AND TEMPERATURE:
1. Plug Power Cord (I) into an electrical outlet.
2. Turn the Temperature Control Knob (I) to the desired
temperature and then turn the Timer Control Knob (F) to
the desired time setting (the Timer must be set in order
for the unit to begin heating).
TIP:
Preheat the air fryer on empty for 3 minutes if the
appliance is cold or you can add 3 minutes to your desired
time setting in order to preheat. The initial 15 minutes of use
may result in minimal smell and smoke. This is normal and
harmless and comes from the protective substance applied
to the heating elements during manufacturing.
3. The Power Indicator (D) and Heating Indicator Lights (E)
will illuminate.
4. The Air Fryer will automatically Pause if the Drawer Pan (B)
is removed during the cooking cycle. Once replaced back
into the fryer, the unit will continue its cooking cycle.
7
Figure 4 Figure 6Figure 5
Loading ...
Loading ...
Loading ...