Loading ...
Loading ...
Loading ...

Courses
You can send a course from your Garmin Connect account to
your device. After it is saved to your device, you can navigate
the course on your device.
You can follow a saved course simply because it is a good
route. For example, you can save and follow a bike friendly
commute to work.
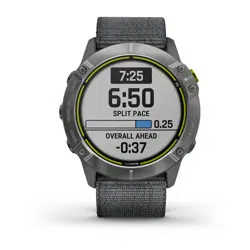
You can also follow a saved course, trying to match or exceed
previously set performance goals. For example, if the original
course was completed in 30 minutes, you can race against a
Virtual Partner trying to complete the course in under 30
minutes.
Creating and Following a Course on Your Device
1
From the watch face, press .
2
Select an activity.
3
Hold MENU.
4
Select Navigation > Courses > Create New.
5
Enter a name for the course, and select .
6
Select Add Location.
7
Select an option.
8
If necessary, repeat steps 6 and 7.
9
Select Done > Do Course.
Navigation information appears.
10
Press to begin navigation.
Creating a Course on Garmin Connect
Before you can create a course on the Garmin Connect app,
you must have a Garmin Connect account (Garmin Connect,
page 11).
1
From the Garmin Connect app, select or .
2
Select Training > Courses > Create Course.
3
Select a course type.
4
Follow the on-screen instructions.
5
Select Done.
NOTE: You can send this course to your device (Sending a
Course to Your Device, page 29).
Sending a Course to Your Device
You can send a course you created using the Garmin Connect
app to your device (Creating a Course on Garmin Connect,
page 29).
1
From the Garmin Connect app, select or .
2
Select Training > Courses.
3
Select a course.
4
Select > Send to Device.
5
Select your compatible device.
6
Follow the on-screen instructions.
Viewing or Editing Course Details
You can view or edit course details before you navigate a
course.
1
From the watch face, press .
2
Select an activity.
3
Hold MENU.
4
Select Navigation > Courses.
5
Press to select a course.
6
Select an option:
• To begin navigation, select Do Course.
• To view the course on the map and pan or zoom the map,
select Map.
• To begin the course in reverse, select Do Course in
Reverse.
• To view an elevation plot of the course, select Elevation
Plot.
• To change the course name, select Name.
• To edit the course path, select Edit.
• To view a list of ascents in the course, select View
Climbs.
• To delete the course, select Delete.
Using ClimbPro
The ClimbPro feature helps you manage your effort for the
upcoming climbs on a course. You can view climb details,
including gradient, distance, and elevation gain, before or in real
time while following a course. Cycling climb categories, based
on length and gradient, are indicated by color.
1
Hold MENU.
2
Select Activities & Apps.
3
Select an activity.
4
Select the activity settings.
5
Select ClimbPro > Status > On.
6
Select an option:
• Select Data Field to customize the data field that appears
on the ClimbPro screen.
• Select Alert to set alerts at the start of a climb or at a
certain distance from the climb.
• Select Descents to turn descents on or off for running
activities.
7
Review the climbs and course details for the course (Viewing
or Editing Course Details, page 29).
8
Start following a saved course (Navigating to a Destination,
page 28).
Marking and Starting Navigation to a Man
Overboard Location
You can save a man overboard (MOB) location, and
automatically start navigation back to it.
TIP: You can customize the hold function of the keys to access
the MOB function (Customizing the Hot Keys, page 39).
1
From the watch face, press .
2
Select an activity.
3
Hold MENU.
4
Select Navigation > Last MOB.
Navigation information appears.
Navigating with Sight 'N Go
You can point the device at an object in the distance, such as a
water tower, lock in the direction, and then navigate to the
object.
1
From the watch face, press .
2
Select an activity.
3
Hold MENU.
4
Select Navigation > Sight 'N Go.
5
Point the top of the watch at an object, and press .
Navigation information appears.
6
Press to begin navigation.
Navigation 29
Loading ...
Loading ...
Loading ...
