Loading ...
Loading ...
3 Installer Guide
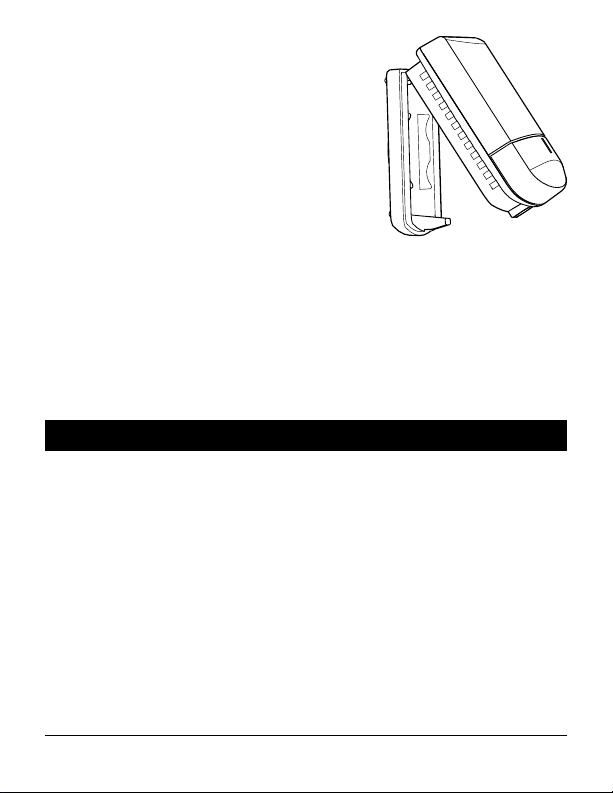
1. Remove the front cover of the remote sensor.
Using a small phillips blade screwdriver, loosen
the screw located in the bottom center portion
of the sensor housing. Gently swing the sensor
housing in an upward motion and remove it
from the top hinges.
2. Place the small sub-base against the wall in the
desired location and mark placement of the two
mounting holes. Remove sub-base and carefully
drill your marked areas with a 3/16” drill bit.
3. If needed, gently tap supplied plastic anchors into
the holes in the wall and fasten the remote sensor sub-base to the wall using
the two supplied screws.
4. Install the 2 supplied AA alkaline batteries into the sensor housing. The blue and
red LED will each flash once to indicate the sensor has powered up successfully.
If the red LED blinks 3 times every 30 seconds the batteries need to be replaced.
5. Attach cover of remote sensor to the sub-base by engaging the hooks at the
top and swinging down to a closed position. Reinstall the small screw to secure
the sensor housing.
4
Replacing a Thermostat or a Sensor
Replacing a Thermostat – If you are replacing a thermostat that is paired with an
existing wireless sensor, you will need to clear the remote sensor and pair it again
with the newly installed thermostat.
1. Install the new thermostat.
2. On the wireless remote sensor you want to clear, press and hold the CONNECT
button for 10 seconds until the red LED turns on solid.
3. Release the CONNECT button and the blue and red LED will each flash once to
indicate the sensor was successfully cleared.
4. Pair the sensor again.
Loading ...
Loading ...
Loading ...