Loading ...
Installer Guide 2
2
Pairing Remote Sensor(s)
See thermostat Installer Guide for additional information on pairing sensors.
1. Enter the wireless setup mode on the thermostat you wish to pair with the
remote sensor. Proceed until you see the word SENS in the display with a
flashing symbol.
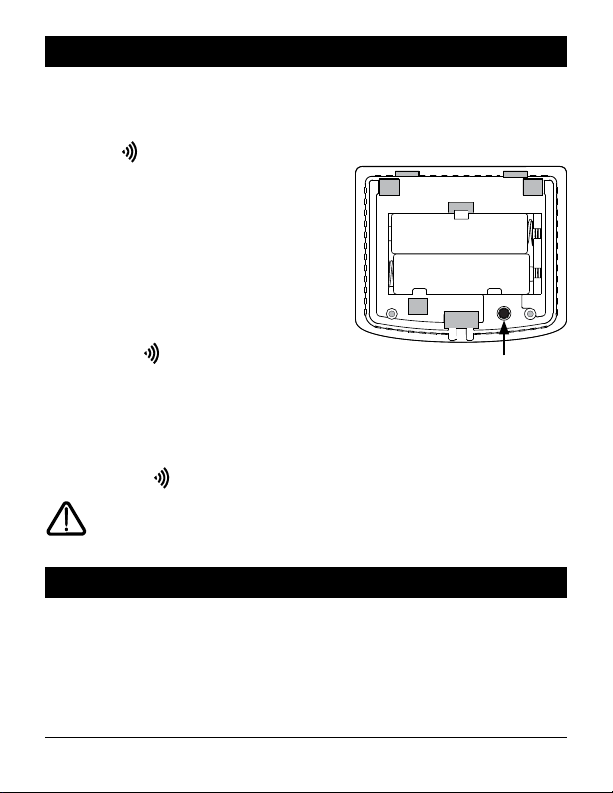
2.
Make sure batteries are properly installed in
the remote sensor and then press and hold
the CONNECT button for 3 seconds.
3. The remote sensor will enter pairing mode
for 60 seconds. During this time the blue
LED will flash once every 2 seconds.
4. The thermostat will display IDS1, IDS2,
IDS3 or IDS4 indicating that wireless remote
indoor sensor 1, 2, 3 or 4 was successfully
paired. The symbol will stop flashing and
the blue LED on the remote sensor will turn
on for 60 seconds.
5. You can repeat this process to pair additional wireless remote sensors or exit
the wireless setup mode on the thermostat.
NOTE: Sensors that have already been paired will appear in the thermostat display
first, with a solid symbol.
A maximum of 4 wireless remote indoor sensors can be connected.
A maximum of 4 wireless remote sensors total can be connected.
3
Installation
Remote sensors should be mounted on an interior wall, approximately 5 feet above
the floor. For a more accurate temperature reading, keep the sensor away from
heating and cooling vents and out of direct sunlight.
NOTE: Test location by pairing your thermostat before mounting (see section 2).
+
+
–
–
Connect
Button
Loading ...
Loading ...
Loading ...