
Loading ...
Loading ...
Loading ...
85PO
SAVE THESE INSTRUCTIONS
(85PO) PRISM FRAME™ OVAL PREMIUM POOL ENGLISH 7.5” X 10.3” PANTONE 295U 05/13/2020
English
Page 10
POOL SETUP
(
continued
)
YoumayhavepurchasedthispoolwiththeIntexKrystalClear™filterpump.Thepumphasits
own separate set of installation instructions. First assemble your pool unit and then set up the
filter pump.
Estimatedassemblytime60~90minutes.(Notetheassemblytimeisonlyapproximateand
individualassemblyexperiencemayvary.)
1
.•Findaflat,levellocationthatisfreeandclearofstones,branchesorothersharpobjectsthatmay
puncture the pool liner or cause injury.
•Openthecartoncontainingtheliner,joints,legs,etc.,verycarefullyasthiscartoncanbeusedtostore
the pool during the winter months or when not in use.
•Removethegroundcloth
(12)
fromcarton.Spread
itoutcompletelywithitsedgesbeingatleast5-6’
(1.5-2.0m)fromanyobstaclesuchaswalls,fences,
trees,etc.Removetheliner
(13)
from carton and
spreaditoutoverthegroundclothwiththedrain
valvetowardsthedrainingarea.Placethedrain
valveawayfromthehouse.Openituptowarmit
in the sun. This warming will make installation easier.
Make sure the liner is centered atop the ground cloth.
Be sure to face the end with the 2 hose connectors towards the electrical power source.
IMPORTANT: Do not drag the liner across the ground as this can cause liner damage and pool
leakage (see drawing 1).
•Duringtheset-upofthispoolliner,pointthehoseconnectionsoropeningsinthedirectionofthe
electric power source. The outer edge of the assembled pool is to be within reach of the electrical
connection for the optional filter pump.
2.
Removeallthepartsfromthecarton(s)andplace
them on the ground in the location where they are to
be assembled. Check the parts listing and be sure
all the pieces to be assembled are accounted for
(see drawings 2.1-2.2)
.
IMPORTANT: Do not start assembly if any pieces
are missing. For replacement pieces call the
Consumer Service telephone number in your area.
Afterallpiecesareaccountedformovethepieces
away from the liner for of installation.
NOTE:
Sprinkle some talcum powder over the
horizontal beams before sliding them into the pool
liner sleeve. This will make removal of the beams
from the liner easier during the disassembly of the
pool.
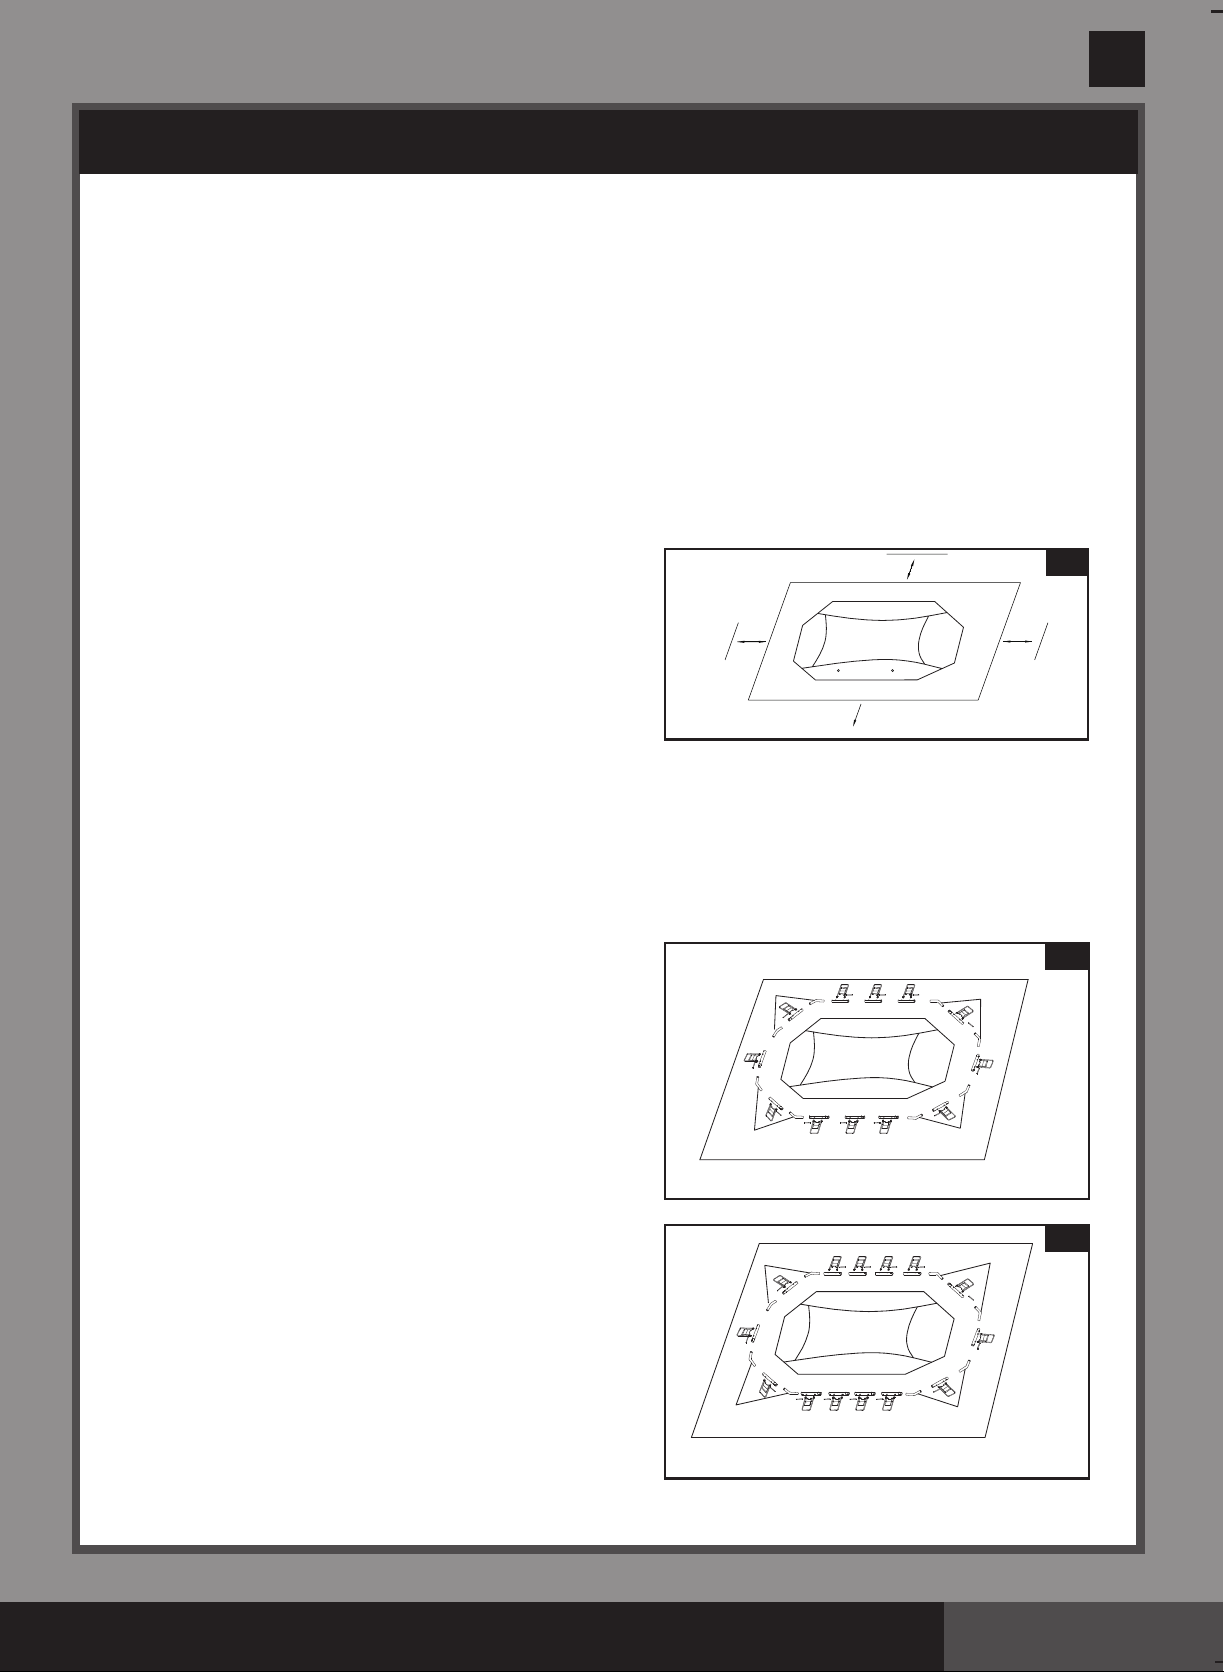
1
ELECTRICAL SOURCE
5 - 6' (1.5 - 2.0 m)
5 - 6'
(1.5 - 2.0 m)
5 - 6'
(1.5 - 2.0 m)
LINER
2.1
(C)
(B)
(A)
(A)
(B) (C)
(D)
(D)
(D)
(D)
(D)
(D)
16.5’ x 9’ x 48”
CORNER JOINT
CORNER JOINT
CORNER JOINT
CORNER JOINT
LINER
2.2
(C)
(B)
(A)
(A)
(B)
(C)
(D)
(D)
(D)
(D)
(D)
(D)
(B)
(B)
20’ x 10’ x 48”
CORNER JOINT
CORNER JOINT
CORNER JOINT
CORNER JOINT
LINER
Loading ...
Loading ...
Loading ...