Loading ...
Loading ...
Loading ...
10
Start cooking
• Plug the appliance into an electrical socket outlet - fig. 16. The appliance will emit 2 beeps
and the screen will flashing.
2 ways of setting the cooking time:
Automatic cooking mode:
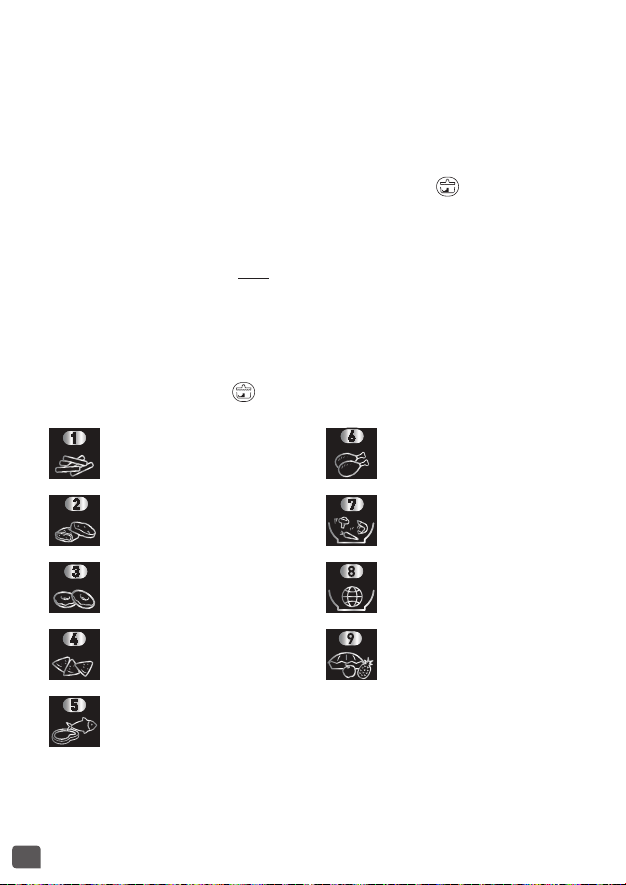
The 9 cooking modes automatically adjust the cooking temperature and whether the paddle
rotates according to the type of food selected.
• Once you have closed the lid and plugged in the appliance the icon flashes on the screen.
• To select the cooking mode press the + button until the required mode 1 to 9 is displayed
- fig.18.
• Press start key - fig.19.
• Adjust cooking time by pressing +/- button.
Note: Adjust the cooking time after starting the appliance.
• When using the automatic cooking mode follow the instructions in the recipe book on where
to position food in the pan.
Note: The paddle does not turn at the beginning of cooking for programs 2, 3, 4, 5, 7,
8 and 9.
• To stop the cooking mode, press the START/STOP key.
• To cancel the cooking mode, continually hold down the START/STOP key for 2 seconds and
the screen will display the icon , ‘1’ for mode and 29 min.
1. Chips and fries e.g potato
chips, vegetable chips, potato
wedges, ...
6 Chicken e.g drumsticks and
wings, ...
2. Breaded recipes e.g chicken
nuggets, breaded king prawns,
...
7
7. Wok* e.g. fried rice with
prawns, sautéed beef, stir fry
vegetables, ...
3. Battered recipes e.g. battered
onion rings, battered calamari
rings, ...
8. World food* e.g lamb
tajine, fried noodles with
vegetables, ...
4. Spring rolls, samosas and filo
pastry snacks
9. Desserts e.g apples and pear
compote, coconut clusters, ...
5. Meat and Fish
* ‘1 meal in 1 go’ programs
Loading ...
Loading ...
Loading ...