PAGE 1 OF 34
User Manual
ITEM # 0849060
MODEL # F16-I-006-089
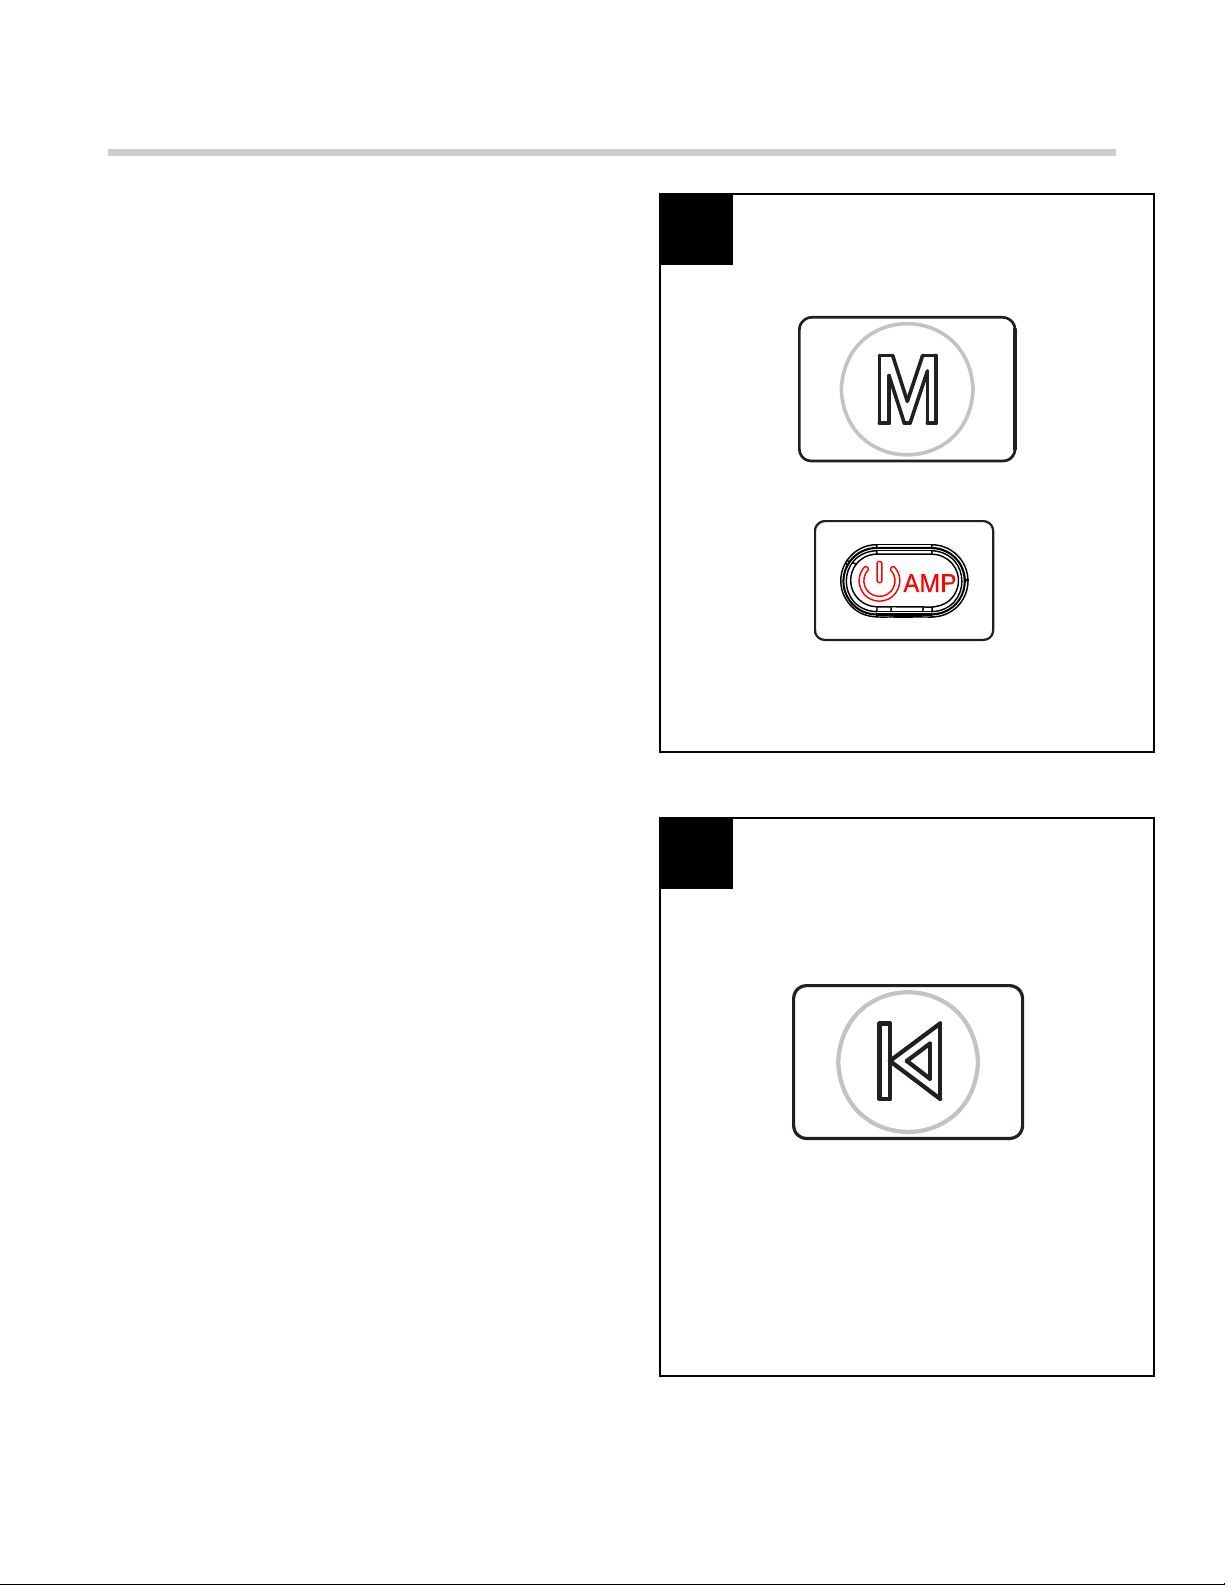
!
!
PLEASE READ THIS MANUAL CAREFULLY FOR ELECTRIC FIREPLACE INSERT BEFORE INSTALL AND USE.
PLEASE DO NOT RETURN ANY PRODUCT TO STORE. IF YOU HAVE ANY MISSING PARTS, HARDWARE OR
ASSEMBLY PROBLEMS, PLEASE CONTACT OUR CUSTOMER SERVICE CENTER.
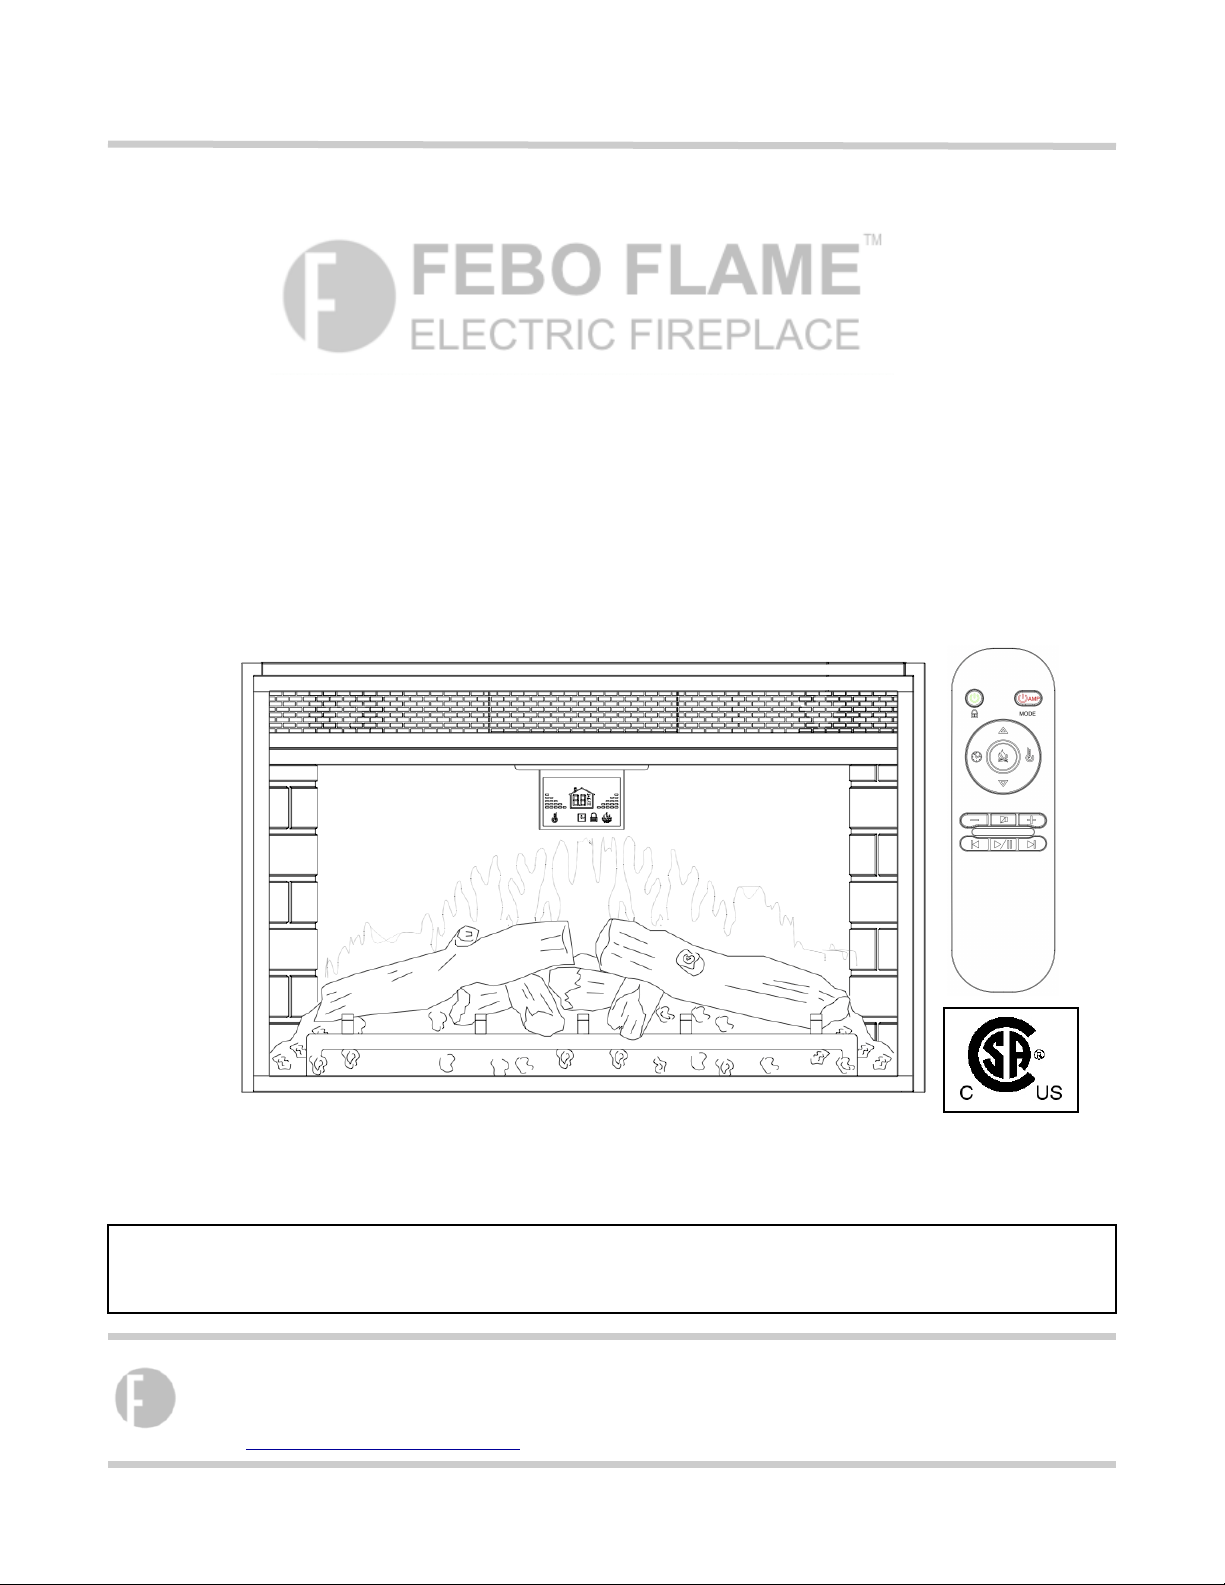
ELECTRIC FIREPLACE INSERT USER MANUAL
FEBO (HK) INTERNATIONAL LIMITED
Phone: 1-877-355-3326 or 1-925-820-8478
Working Hours: Monday - Friday, 9:00AM - 4:00PM (Pacific Standard Time)
Email: [email protected],
PAGE 2 OF 34
WARNING: Any use of this appliance other than that recommended by the manufacturer in this owners manual
may cause fire, burns, electric shock and/or other serious injuries or death.
SAVE THESE INSTRUCTIONS
When using electrical appliance, basic precautions should always be followed to avoid the risk of fire, electric
shock and injury to persons including the following:
1 . Read all instructions before using this appliance.
2. This appliance is hot when in use. To avoid burns, do not let bare skin touch hot surface. If provided, use
handles when moving this appliance. Keep combustible materials, such as furniture, pillows, bedding,
papers, clothes, and curtains, etc. at least 3 feet (0.9 meter) away from the front of the appliance. Keep all
items away from the sides and rear.
3. Extreme caution is necessary when the appliance is used by or near children or invalids and whenever the
appliance is left operating and unattended.
4. Always unplug appliance when not in use. This unit should be operate under supervision and should
not be left on without supervision.
5. Do not operate any appliance with a damaged cord or plug or after the appliance malfunctions, has been
dropped or damaged in any manner. Return appliance to authorized service facility for examination,
electrical or mechanical adjustment or repair.
6. Do not use outdoors.
7. This appliance is not intended for use in bathrooms, laundry areas and similar indoor locations. Never locate
appliance where it may fall into a bathtub or other water container.
8. Do not run cord under carpeting. Do not cover the power cord with throw rugs, runners, or similar floor
coverings. Arrange cord away from traffic area and where it will not be tripped over.
9. To disconnect the appliance, turn all controls “OFF”, then remove the plug from the electrical outlet.
10. Connect to properly grounded outlets only.
11. Do not insert or allow foreign objects to enter any ventilation or exhaust openings as this may cause an
electric shock or fire, or damage the appliance.
12. To prevent a possible fire, do not block air intakes or exhausts in any manner. Do not use on soft surfaces,
like a bed, where openings may become blocked.
13. All electrical appliances have hot and arching or sparking parts inside. Do not use in areas where gasoline,
paint, or flammable liquids are used or stored.
14. Use this appliance only as described in this manual. Any other use which is not recommended by the
manufacturer may cause fire, electric shock, or injury to persons.
1 5 . It is strongly recommended that to use the entire 15 amp outlet for the electric fireplace only. Sharing
the outlet with another electronic item could create overload and damage the outlet and electric items in the
long term.
1 6 . The power line length is 181.8cm, the connect data line length is 100cm. Avoid using an extension cord
because the extension cords may overheat and cause a risk of fire. However, If an extension cord MUST be
used, the cord must be No. 14AWG minimum size and rated not less than 1875 Watts. The extension cord
must be a 3-prong cord with grounding type plug and cord connection and should not exceed 20’ (6m) in
length.
17. When transporting or storing the appliance, keep both the unit and power cord / plug dry, free from excessive
vibration and away from heat sources to avoid causing fire, electric shock, or injury to persons.
18. Do not attempt to burn wood or other materials in this appliance.
19. This appliance, when installed must be electrically grounded in accordance with the current.
Canada: CSA C22.1, Canadian Electrical Code
U.S.A.: ANSI/NFPA NO. 70, National Electrical Code
IMPORTANT SAFETY INSTRUCTION
PAGE 3 OF 34
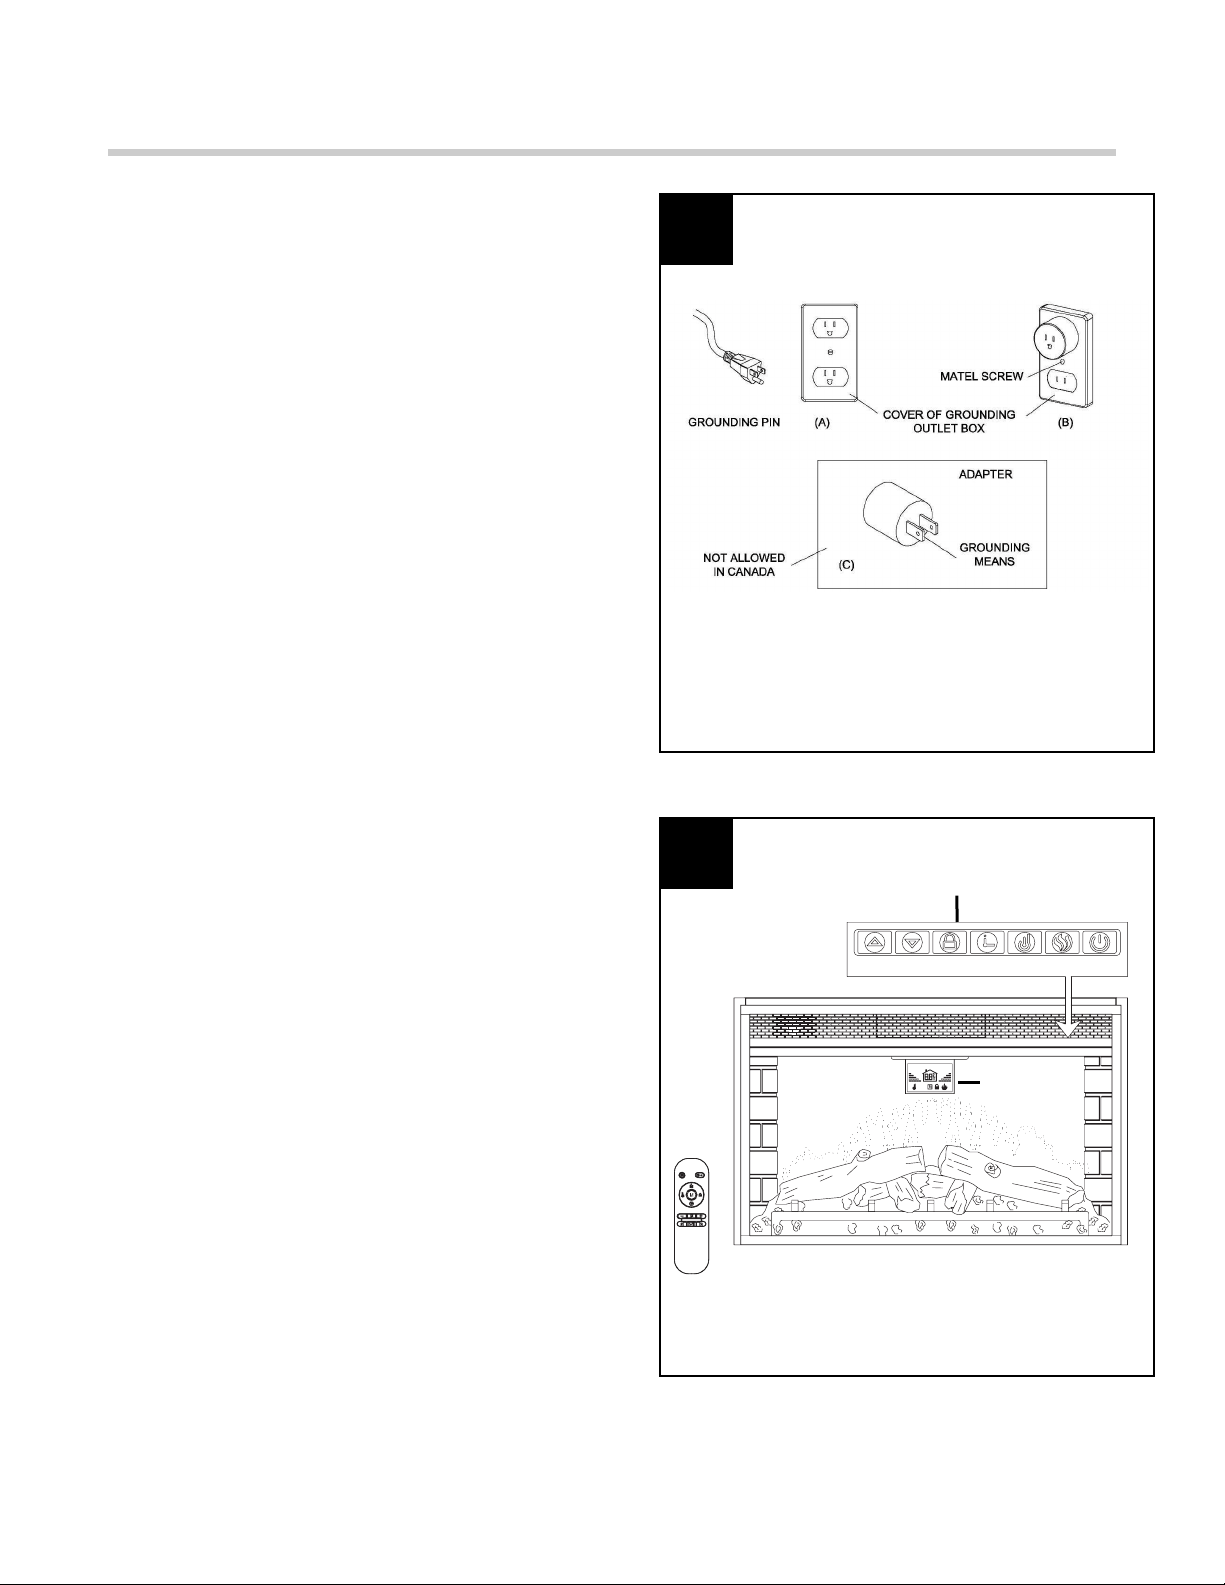
INSERT OPERATING INSTRUCTIONS
Read all instructions and warning prior to
operating the appliance.
1. Ensure that all controls are in the “OFF” status
before plugging the appliance into a properly
grounded electrical outlet.
This appliance is for use on 120 Volts. The
appliance has a 3-prong grounded plug. If your
electrical outlet has only 2 slots, you will have to
use an adapter to convert from the 3-prong power
cord to a 2-slot receptacle. The green grounding
plug extending from the adapter must be securely
connected to a permanent ground such as a
properly grounded outlet box. The adapter should
only be used if a proper 3-slot receptacle is not
available.
NOTE: Adapters are not allowed for use in
Canada.
!
Figure 1
2. A 15 AMP circuit is required to operate this
appliance. If the breaker trips when the appliance
is running, you may need to move the appliance to
another location or unplug other appliances that
are on the same circuit.
The fireplace control functions can be accessed in
two ways:
- Using the button control panel,
located in the upper right-hand
corner of the fireplace
- Using the multifunction remote
control
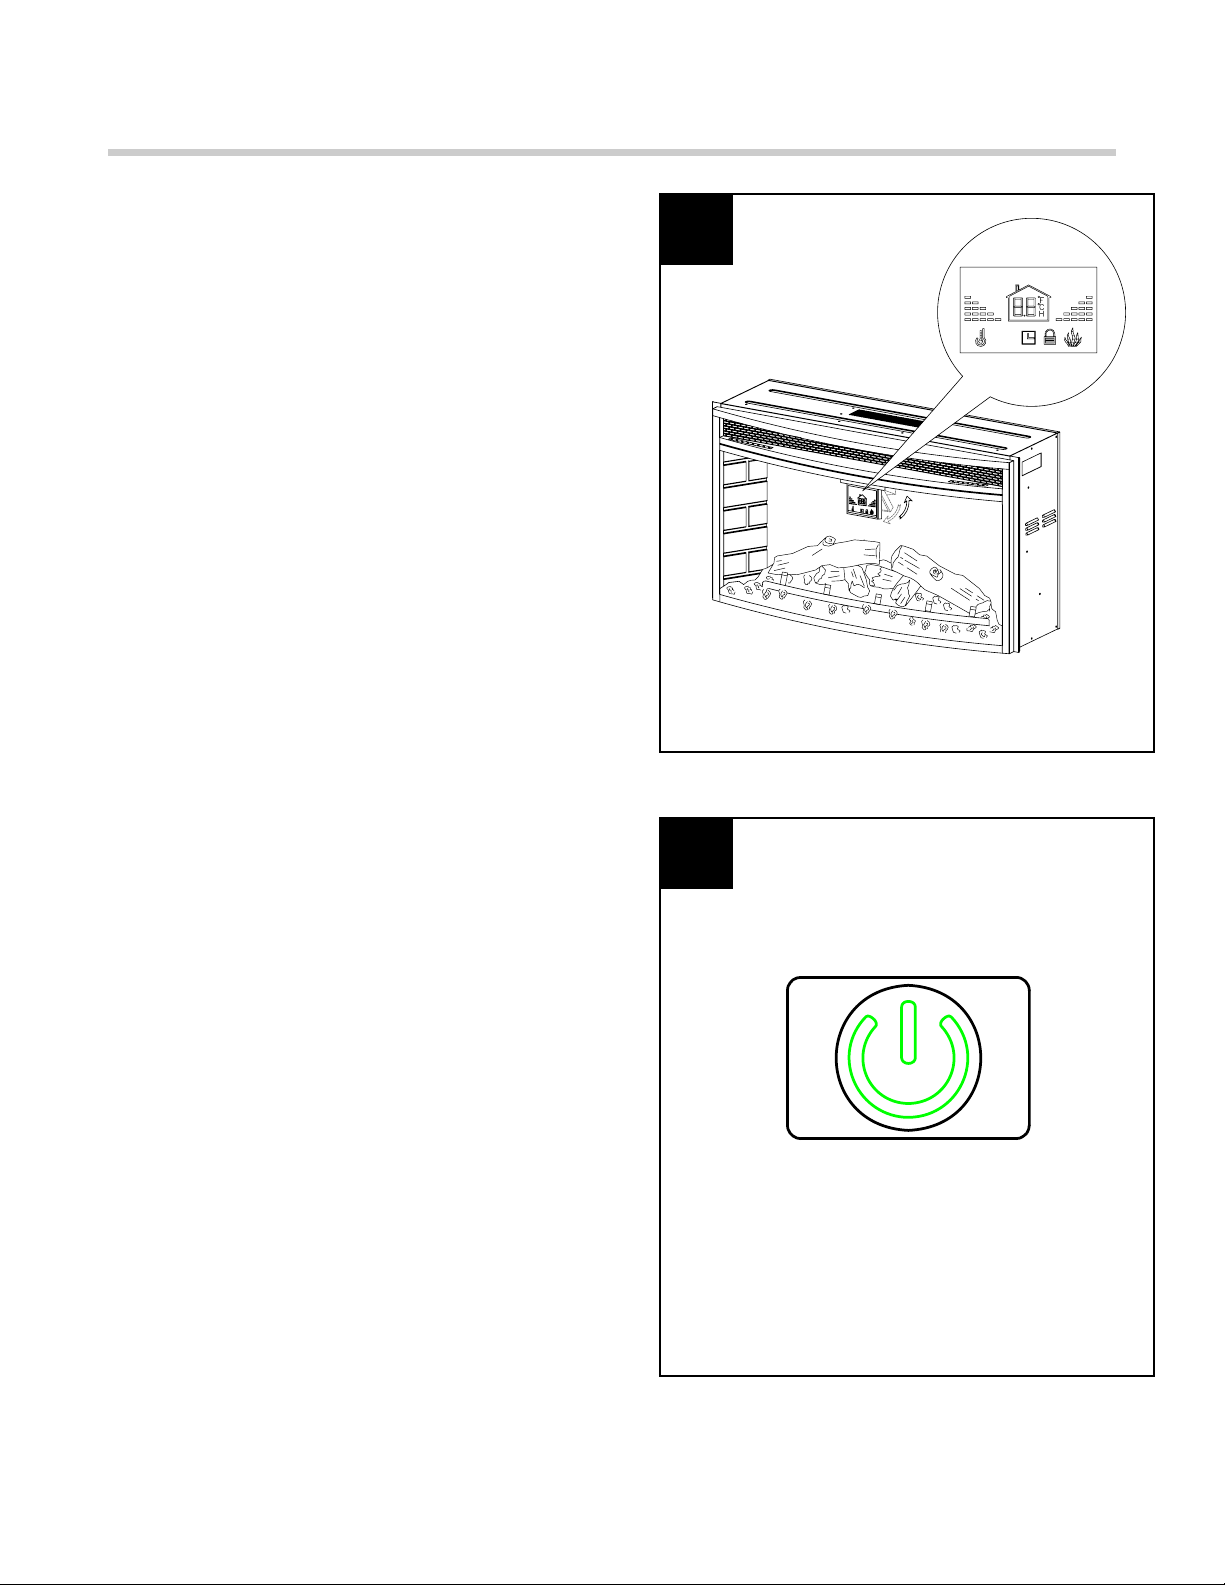
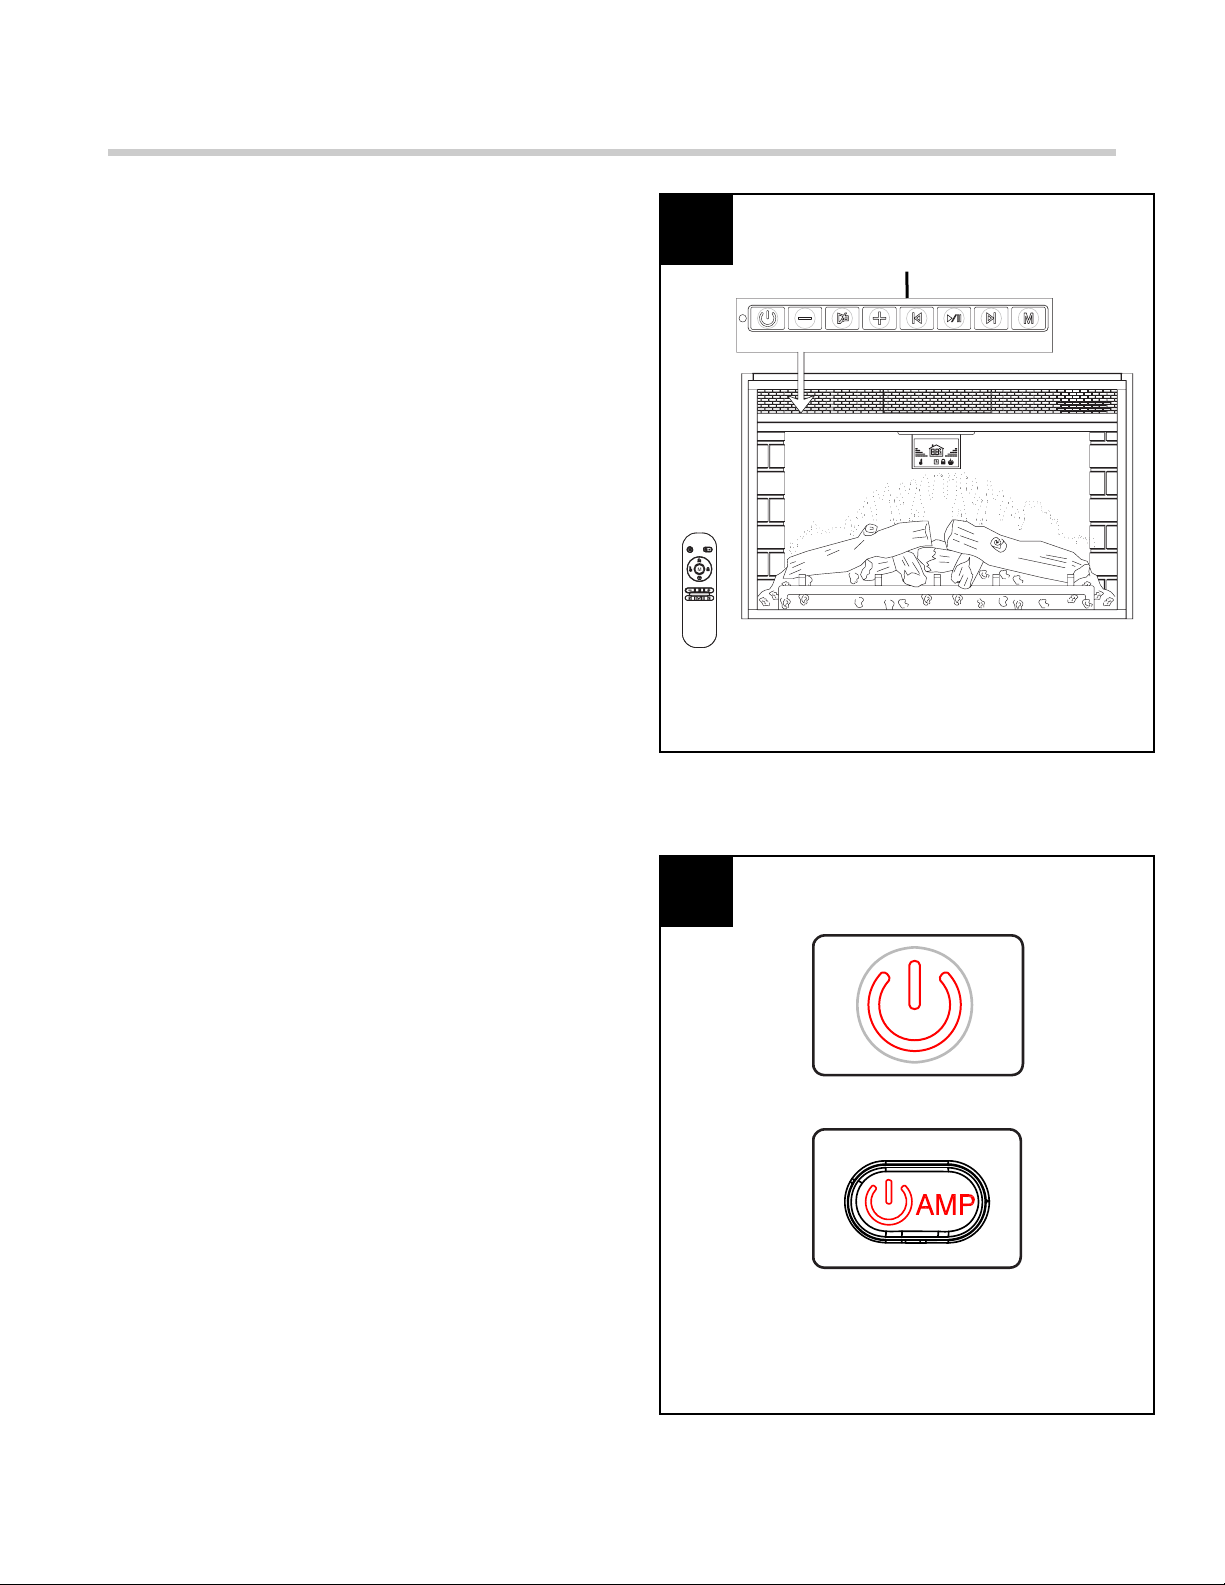
The main control panel is located at the top right
corner on the front (see Figure 2).
Insert Control Panel
Figure 2
1
2
Display
Screen
PAGE 4 OF 34
INSERT OPERATING INSTRUCTIONS
3. When you press the Power on, the display
screen will flip down. Without further operation, the
display screen will automatically flip back up after
20 seconds. Then press any button on the control
panel or on the remote control, the display screen
will flip down again.
Figure 3
Figure 4
3
4
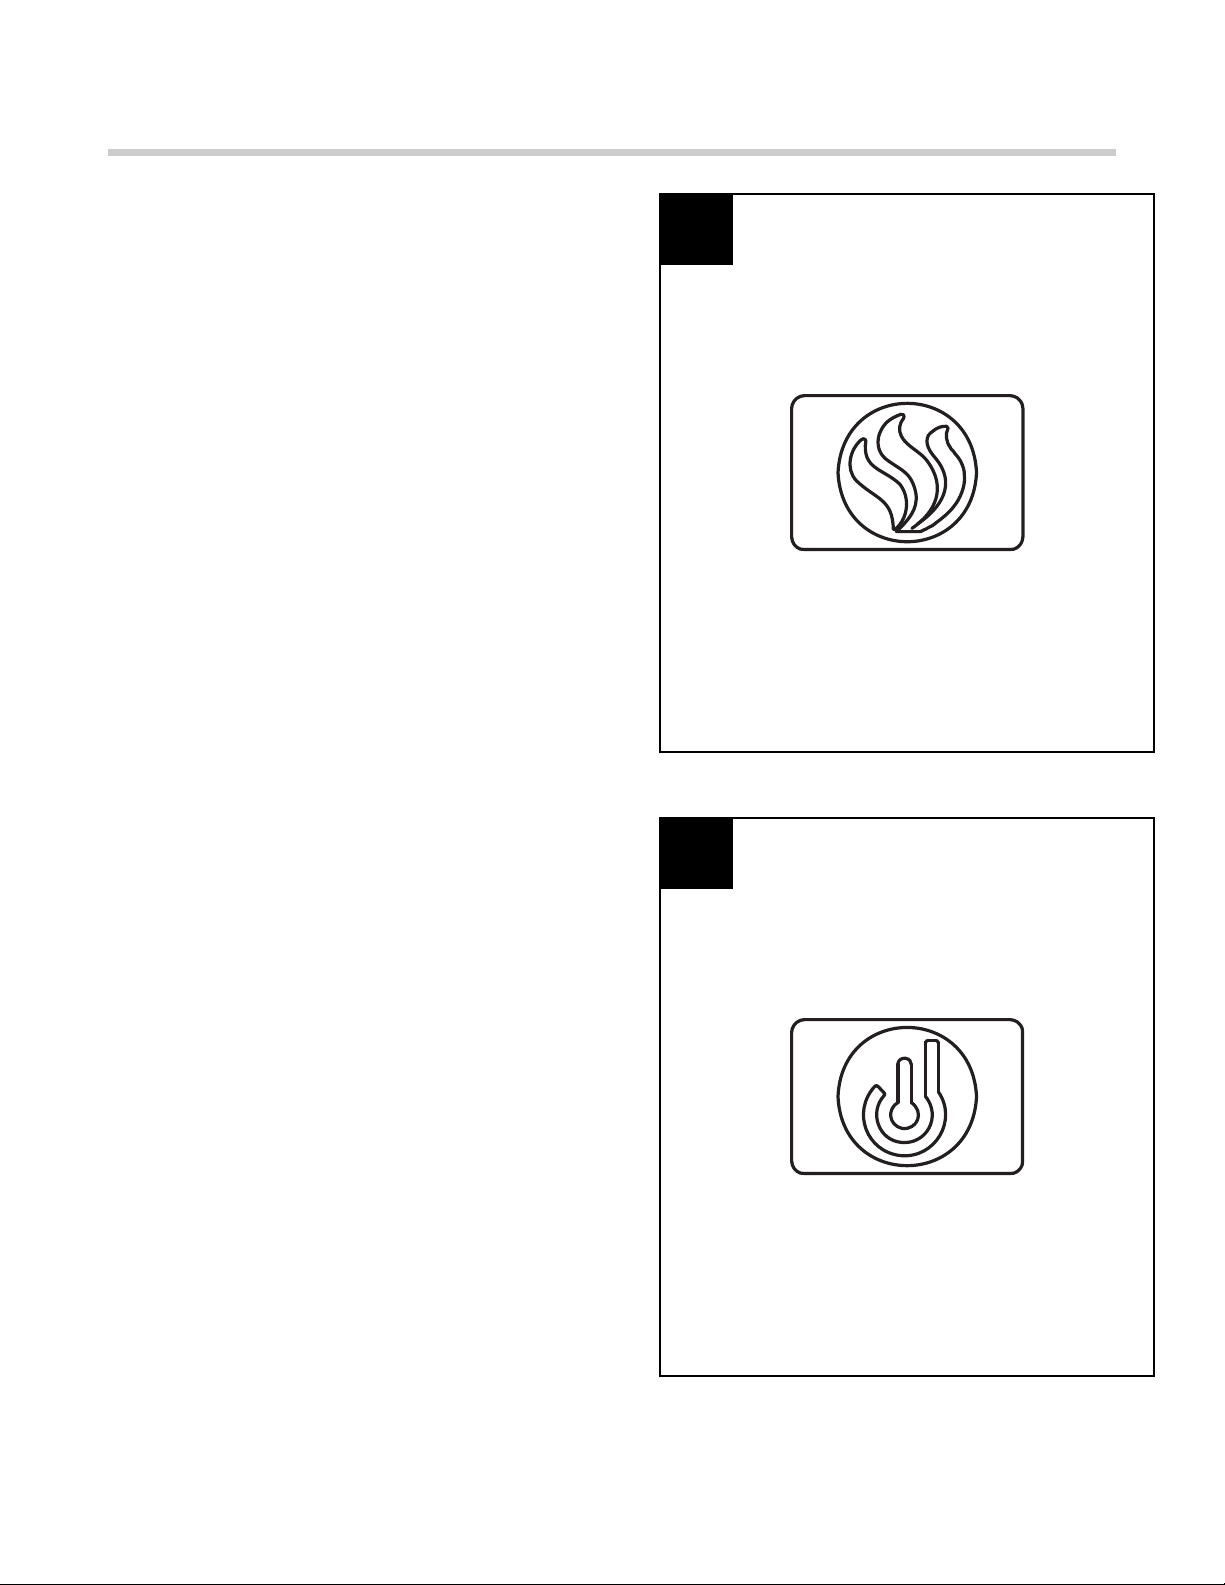
4. Power: Push button to turn Insert on or off. If
OFF, HEATER will be restored at the next power
ON.
Note:
*
All functions will be reset when unplugging
the unit;
*
This button is green color on Control panel
and Remote control;
PAGE 5 OF 34
INSERT OPERATING INSTRUCTIONS
5. Flame: Press to activate the flame function. This
button controls the brightness of flame and ember
effect. When the fireplace is first turned on, the
flame will come in at the highest setting; press
DOWN or UP button to adjust the brightness of
flame. There are 6 levels you can cycle through,
including the OFF setting (the ember remains on.)
When adjusting the flame brightness with UP and
DOWN button, the number of the flam level bars
corresponds to the 5 brightness levels. When this
feature is on, display screen FLAME icon is on
also.
Figure 5
Figure 6
5
6
6. HEATER: Press to activate the heater function.
The system will start the temperature setting at
95ºF. There are 7 adjustable heat levels, ranging
from 65ºF to 95ºF. Press the DOWM or UP button
to adjust the levels, noting each level increases or
decreases the temperature by 5ºF. When this
feature is on, display screen HEATER icon also.
And when this feature is off, the inner blower will
continue to run for additional 30 seconds to cool
down the unit order to protect the heating elements
before the unit completely shuts off.
Note: You can switch the temperature display
from Fahrenheit to Celsius by pressing and
holding the HEATER button control panel for
approximately 6 seconds, the display screen
will show the room temperature.
PAGE 6 OF 34
INSERT OPERATING INSTRUCTIONS
7. Timer: Press once to activate. Press UP and
DOWN button to adjust the timer. The choices are
between 0.5H to 8H interval. Once the timer is on
an the desired setting is reached, the system will
shut down.
Figure 7
Figure 8
7
8
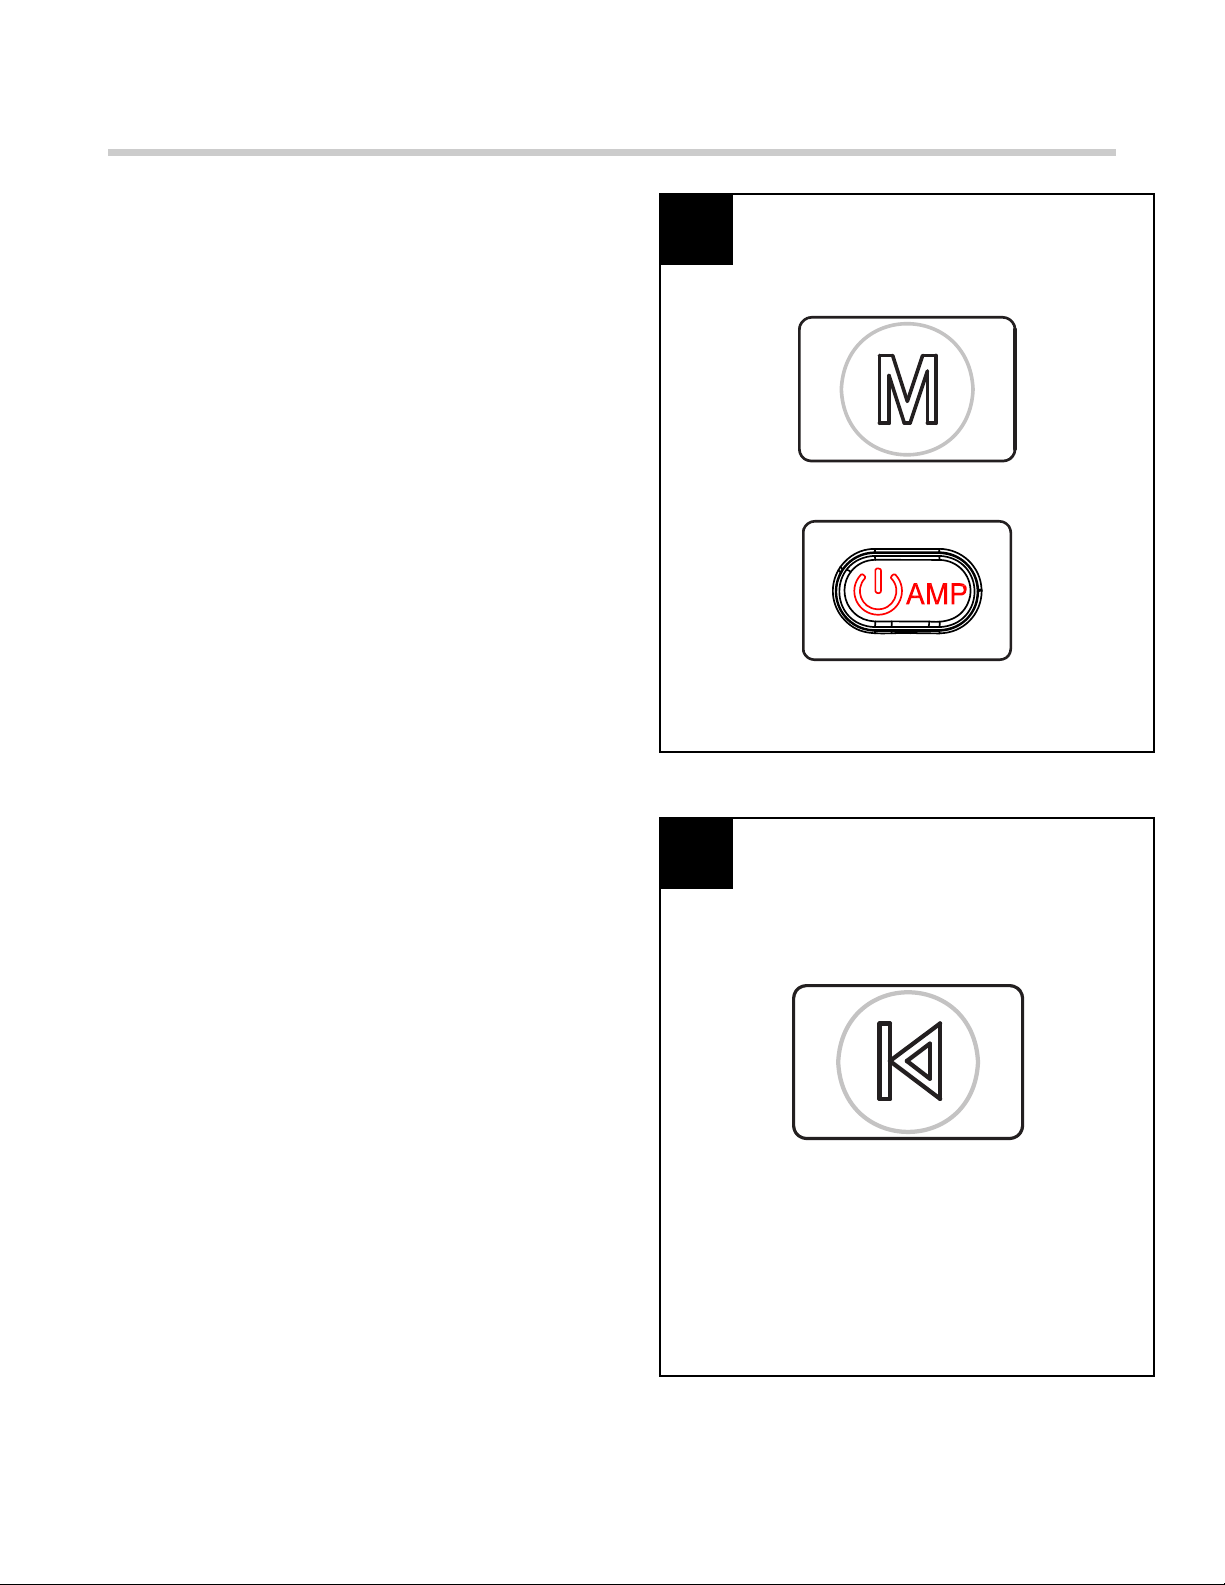
8. Child Lock: Press and hold the button for 6
seconds to activate the function. When the CHILD
LOCK is on, all the other features are disabled.
Press and hold the button again for 6 seconds to
unlock the functions.
Note:
* Child Lock function on remote control -
Different from the same button on the Control
Panel, while operate with the Remote control,
you just need to press the green “POWER”
button for 3 seconds to cycle through the
CHILD LOCK setting.

PAGE 7 OF 34
INSERT OPERATING INSTRUCTIONS
9. Down: Use to turn down the heat, brightness of
flame or timer. When FLAME / HEATER / TIMER is
not activated, this button will not work.
Figure 9
Figure 10
9
8
10. Up: Use to turn up the heat, brightness of flame
or timer. When FLAME / HEATER / TIMER is not
activated, this button will not work.

PAGE 8 OF 34
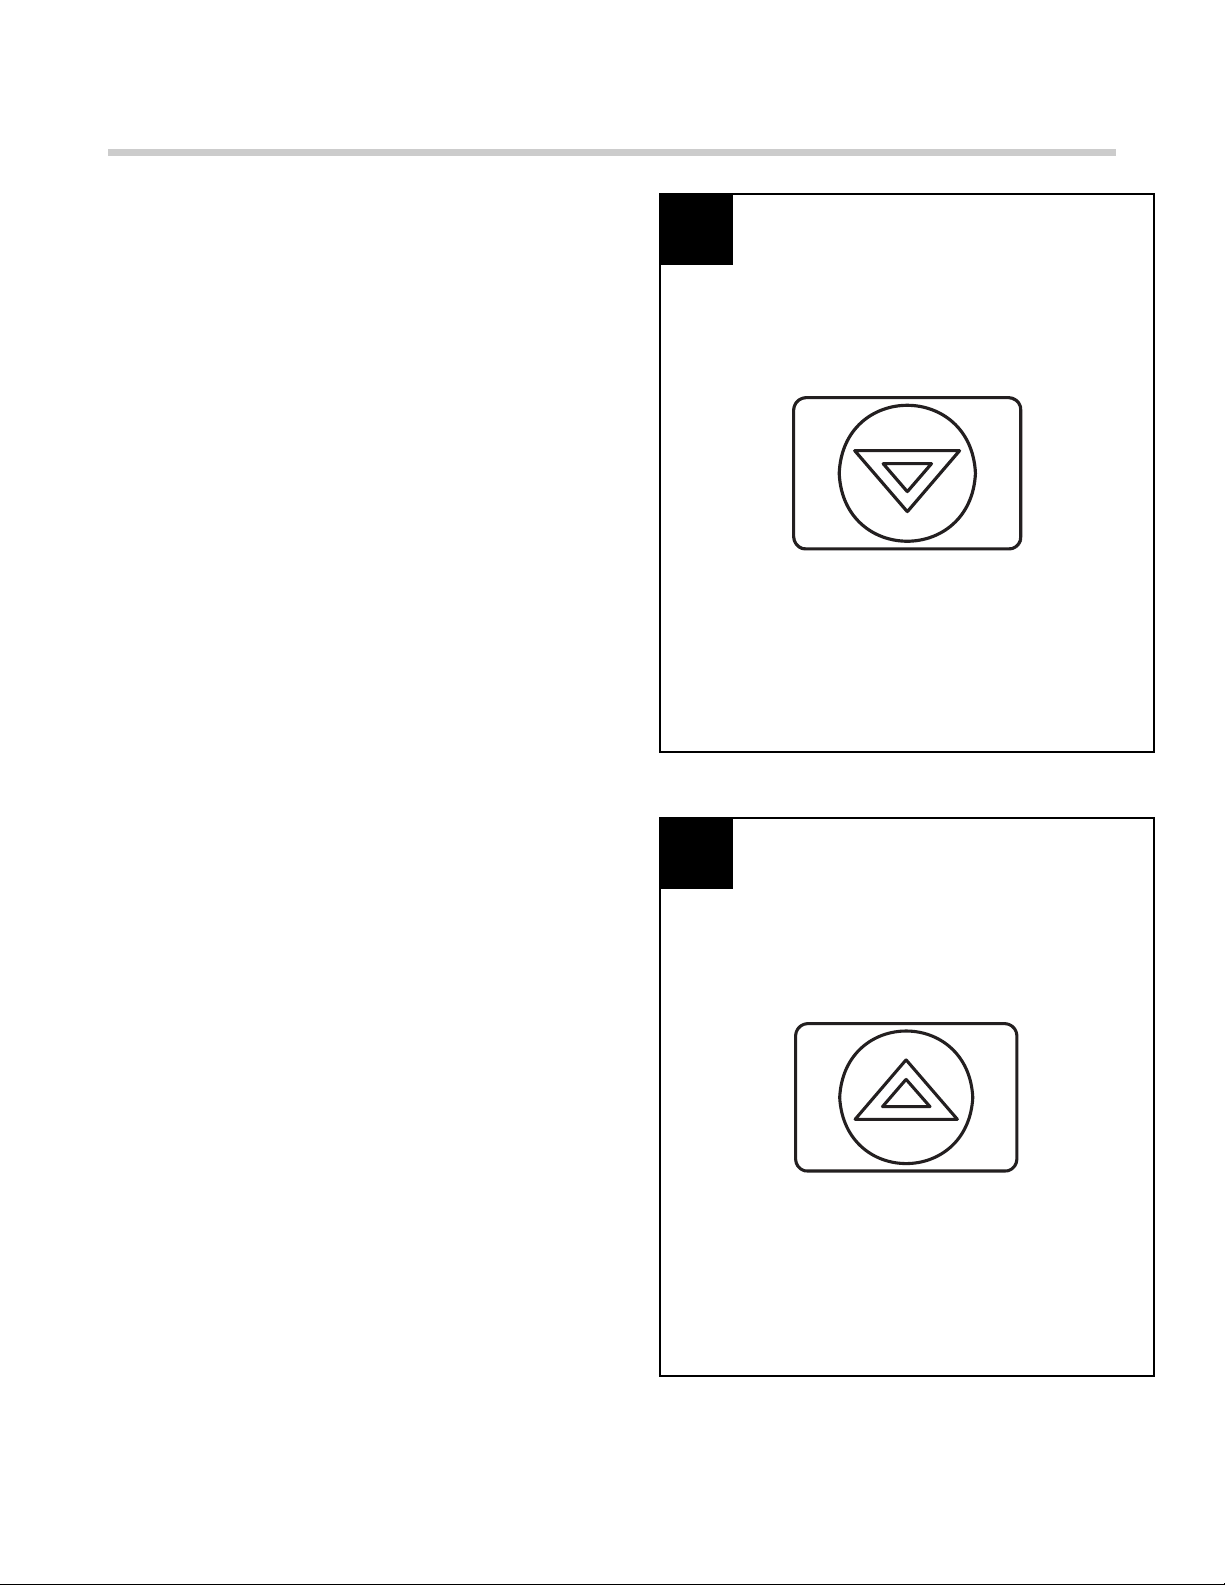
SOUND SYSTEM OPERATING INSTRUCTIONS
11. Connect the electric insert to the sound system
amplifier module with connection cable #1.
Figure 11
11
12
12. Connect the cable #2 and plug into the wall
outlet.
Figure 12

PAGE 9 OF 34
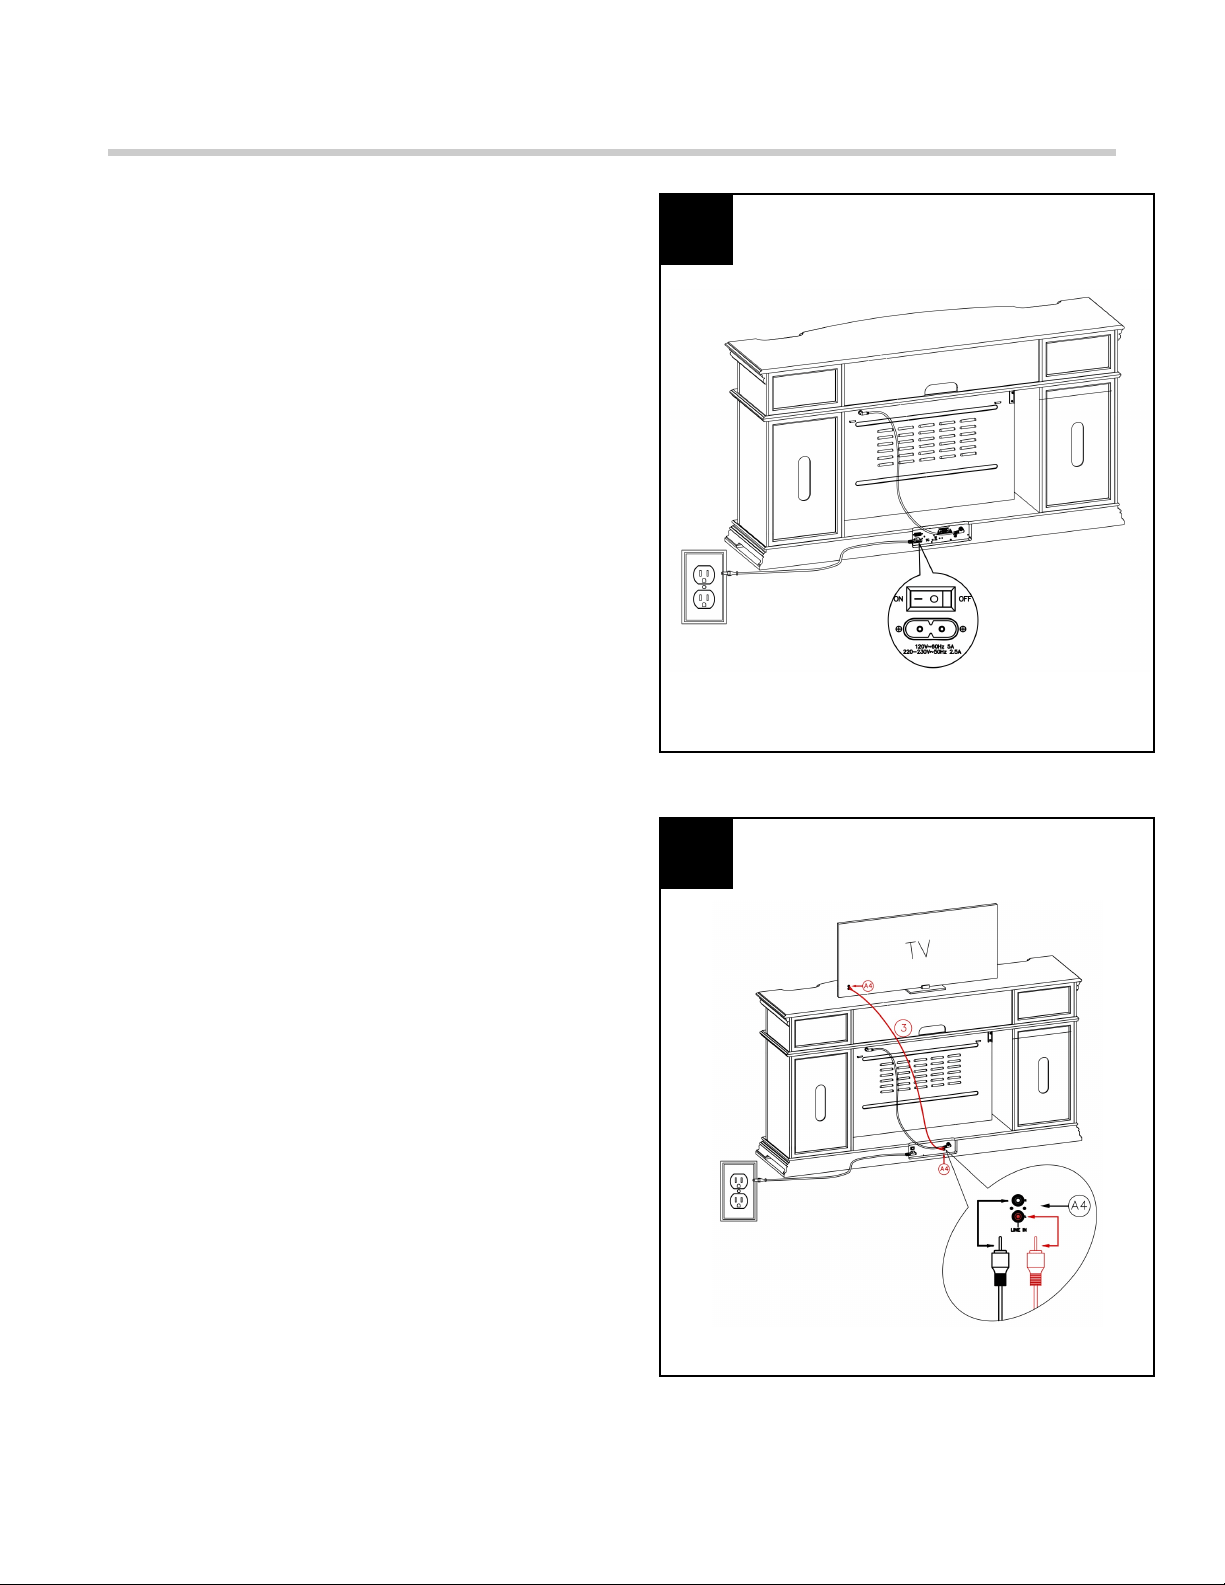
SOUND SYSTEM OPERATING INSTRUCTIONS
13. Turn the sound system amplifier moduleʼs
switch on.
Figure 13
13
14
14. The sound system amplifier module has a RCA
line-in for TV to connect to. The RCA cable is not
included and this is an optional setup.
Figure 14
PAGE 10 OF 34
SOUND SYSTEM OPERATING INSTRUCTIONS
15. A 15 AMP circuit is required to operate this
appliance. If the breaker trips when the appliance
is running, you may need to move the appliance to
another location or unplug other appliances that
are on the same circuit.
The sound system control functions can be
accessed in two ways:
- Using the button control panel,
located in the upper left-hand
corner of the fireplace
- Using the multifunction remote
control
The sound system control panel is located at the
top left corner on the front (see Figure 16).
Plug the electric insert to the outlet before
operating the sound system.
Figure 15
Figure 16
15
16
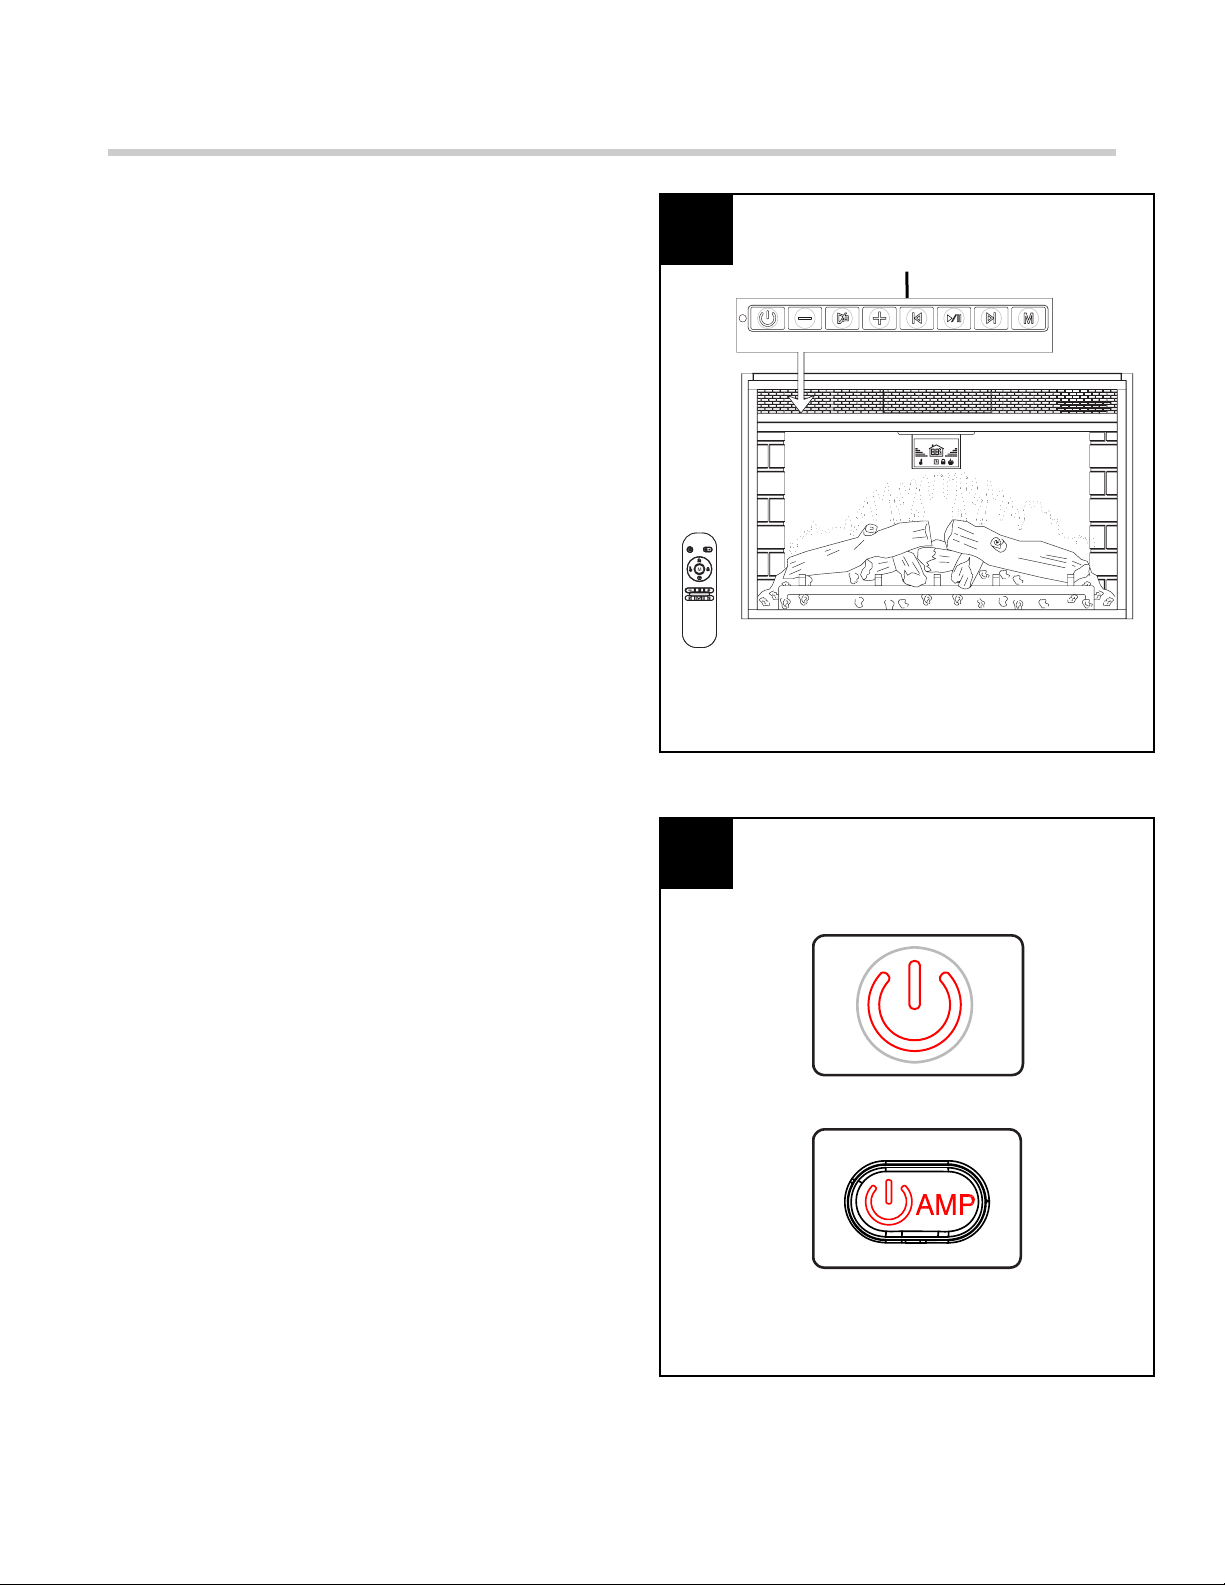
16. Power: Press button to turn Sound system on
or off. When the sound system is first turned on,
the ember is blue.
If OFF, sound system will be restored at the next
power ON.
Note:
*
All functions will be reset when unplugging
the unit;
*
This Power button is red color on Control
panel and Remote control;
*
Power function for sound system on remote
control - Different from same button on the
Control Panel, while operate with the Remote
control, you just need to press the red “AMP”
button to turn Sound system on or off.
Sound System Control Panel
PAGE 11 OF 34
SOUND SYSTEM OPERATING INSTRUCTIONS
17. Mode: Press this button to switch between
Bluetooth and RCA functions. Without any
connection for 5 minutes, the sound system will
automatically turn off.
Note:
* Mode function for sound system on remote
control - Different from same button on the
Control Panel, while operate with the Remote
control, you just need to press the red “AMP
POWER” button for 3 seconds to switch
between Bluetooth and RCA functions.
Figure 17
17
18
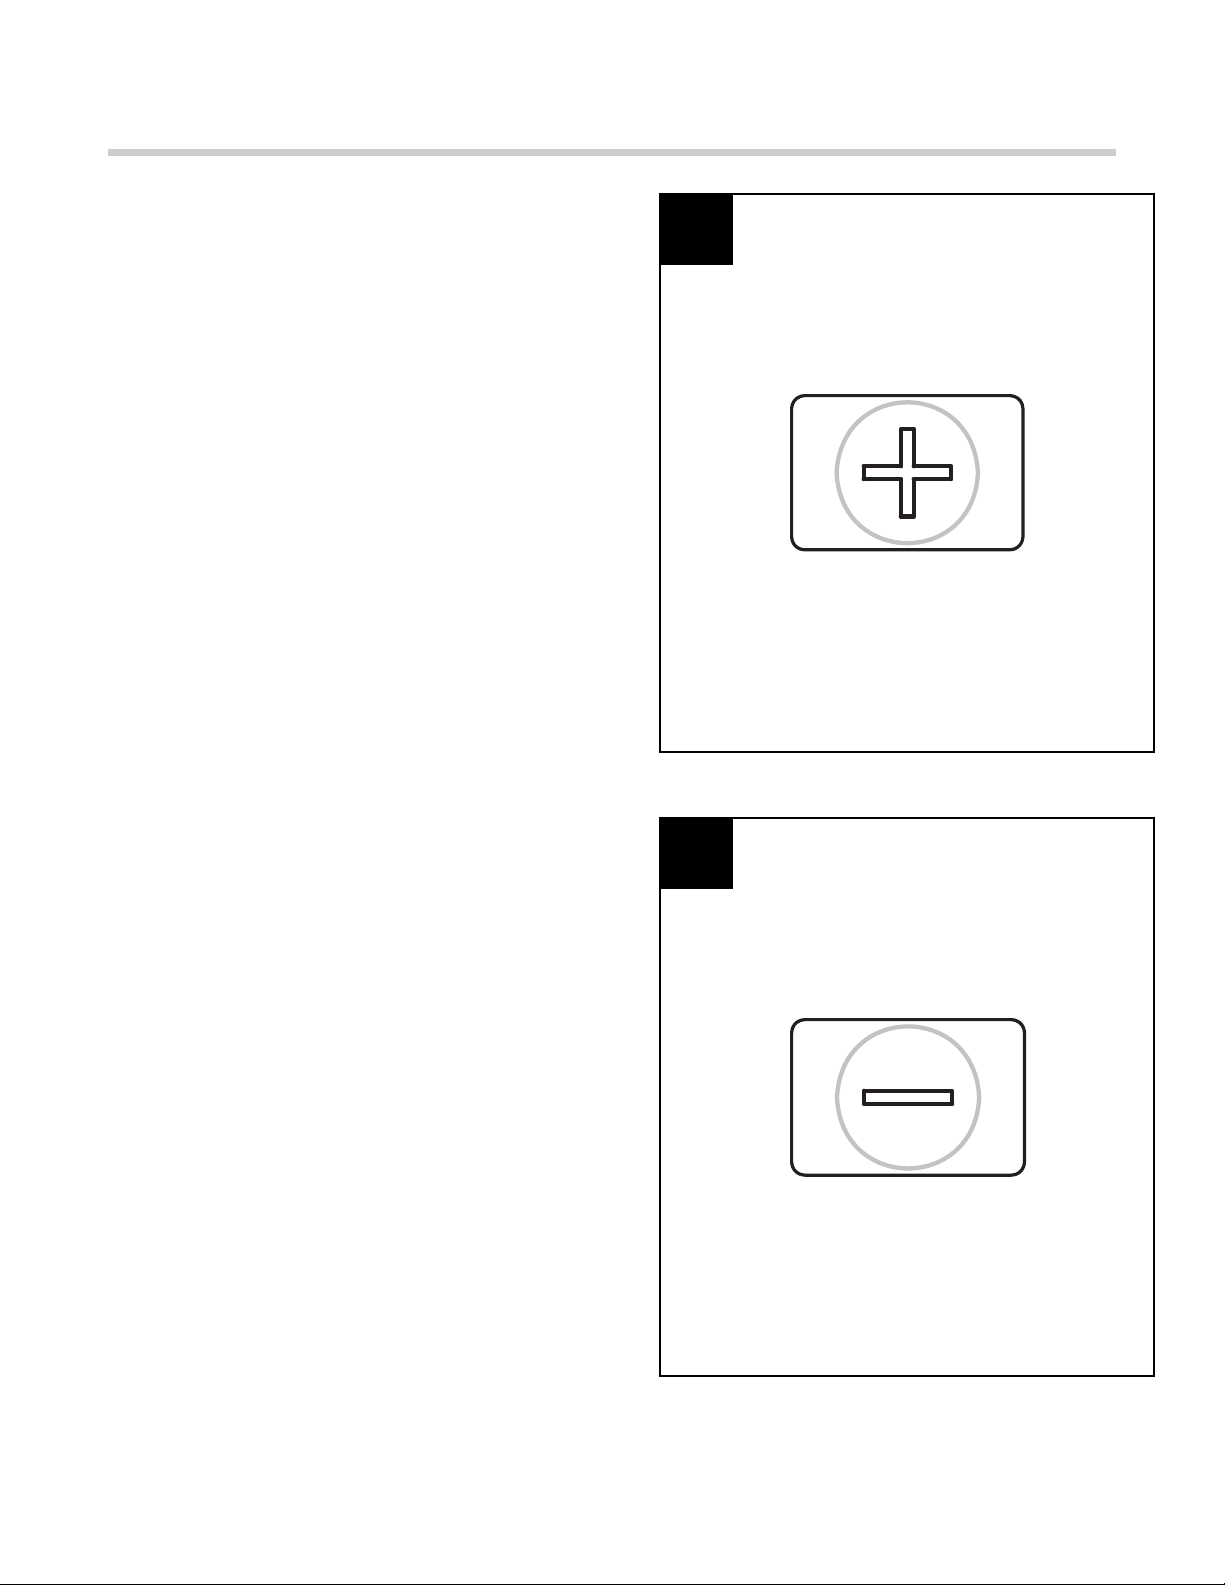
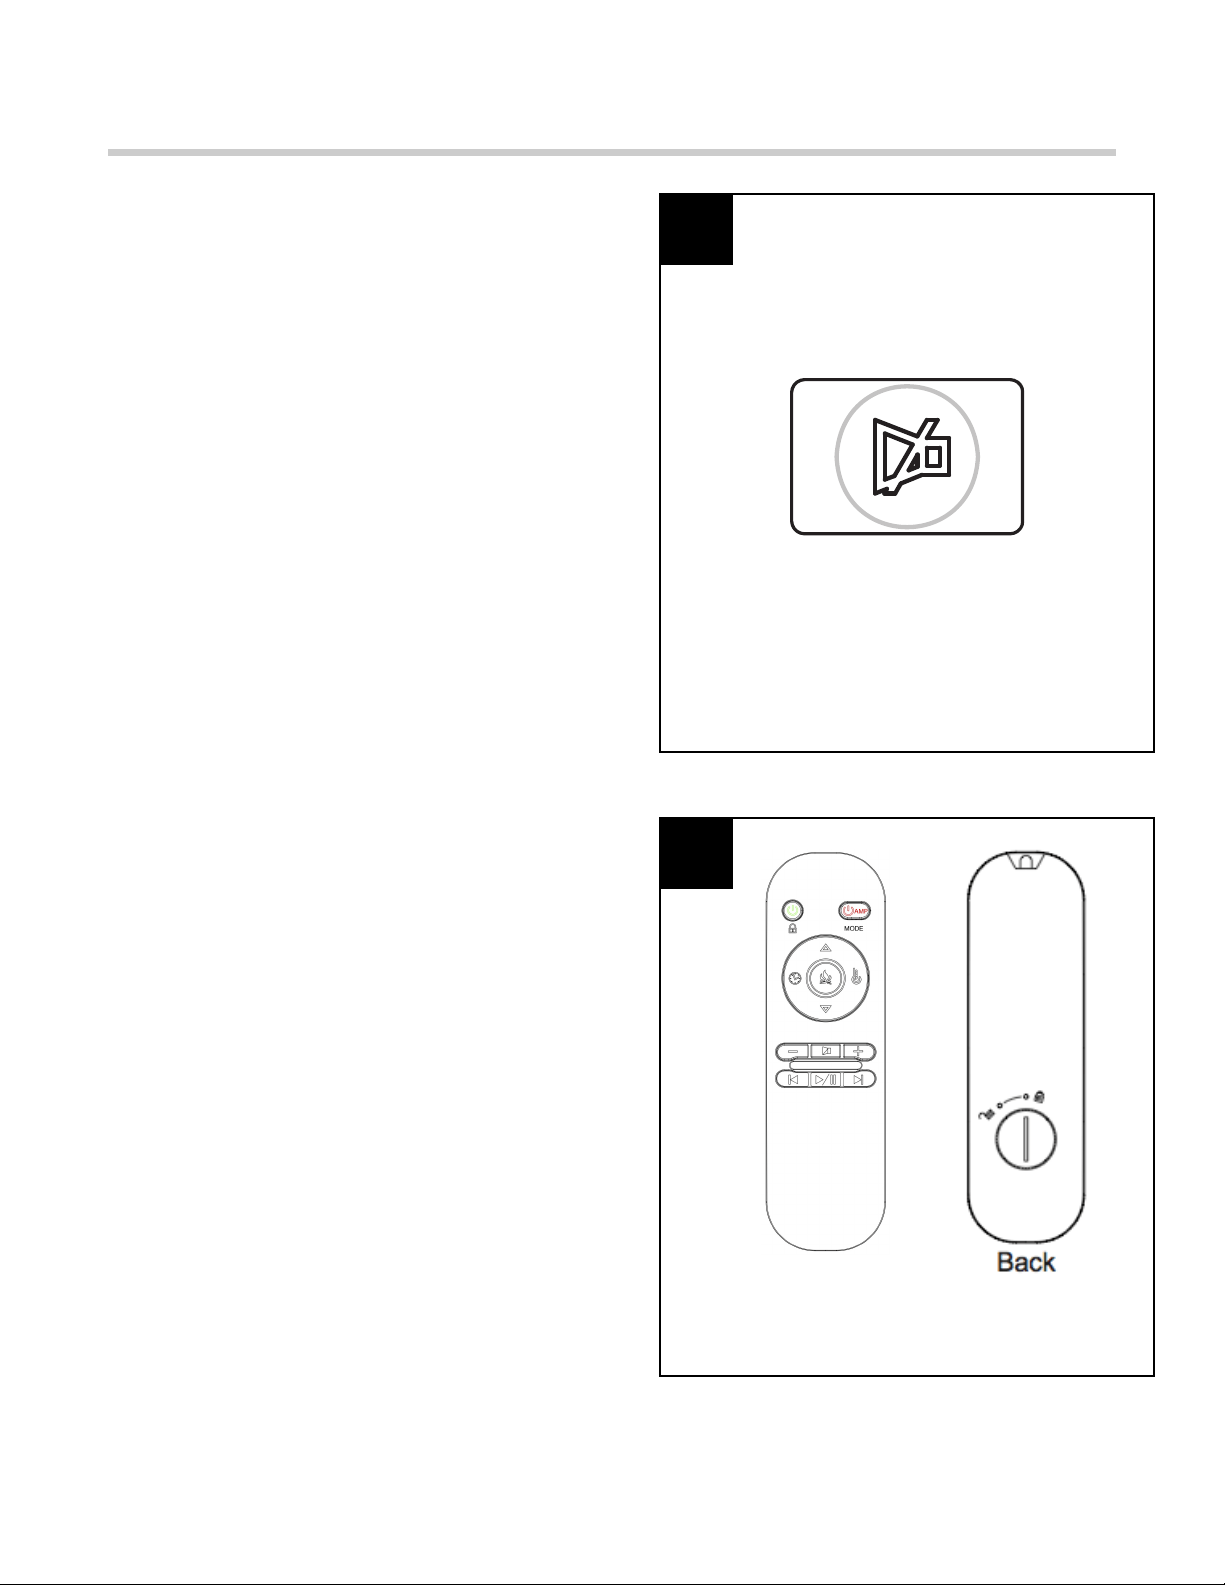
18. Previous track: Press this button to go back
to previous track.
Figure 18

PAGE 12 OF 34
SOUND SYSTEM OPERATING INSTRUCTIONS
19. Next track: Press this button to go to next
track.
Figure 19
19
20
20. Pause: Press this button to pause or restart
music playing.
Figure 20
PAGE 13 OF 34
SOUND SYSTEM OPERATING INSTRUCTIONS
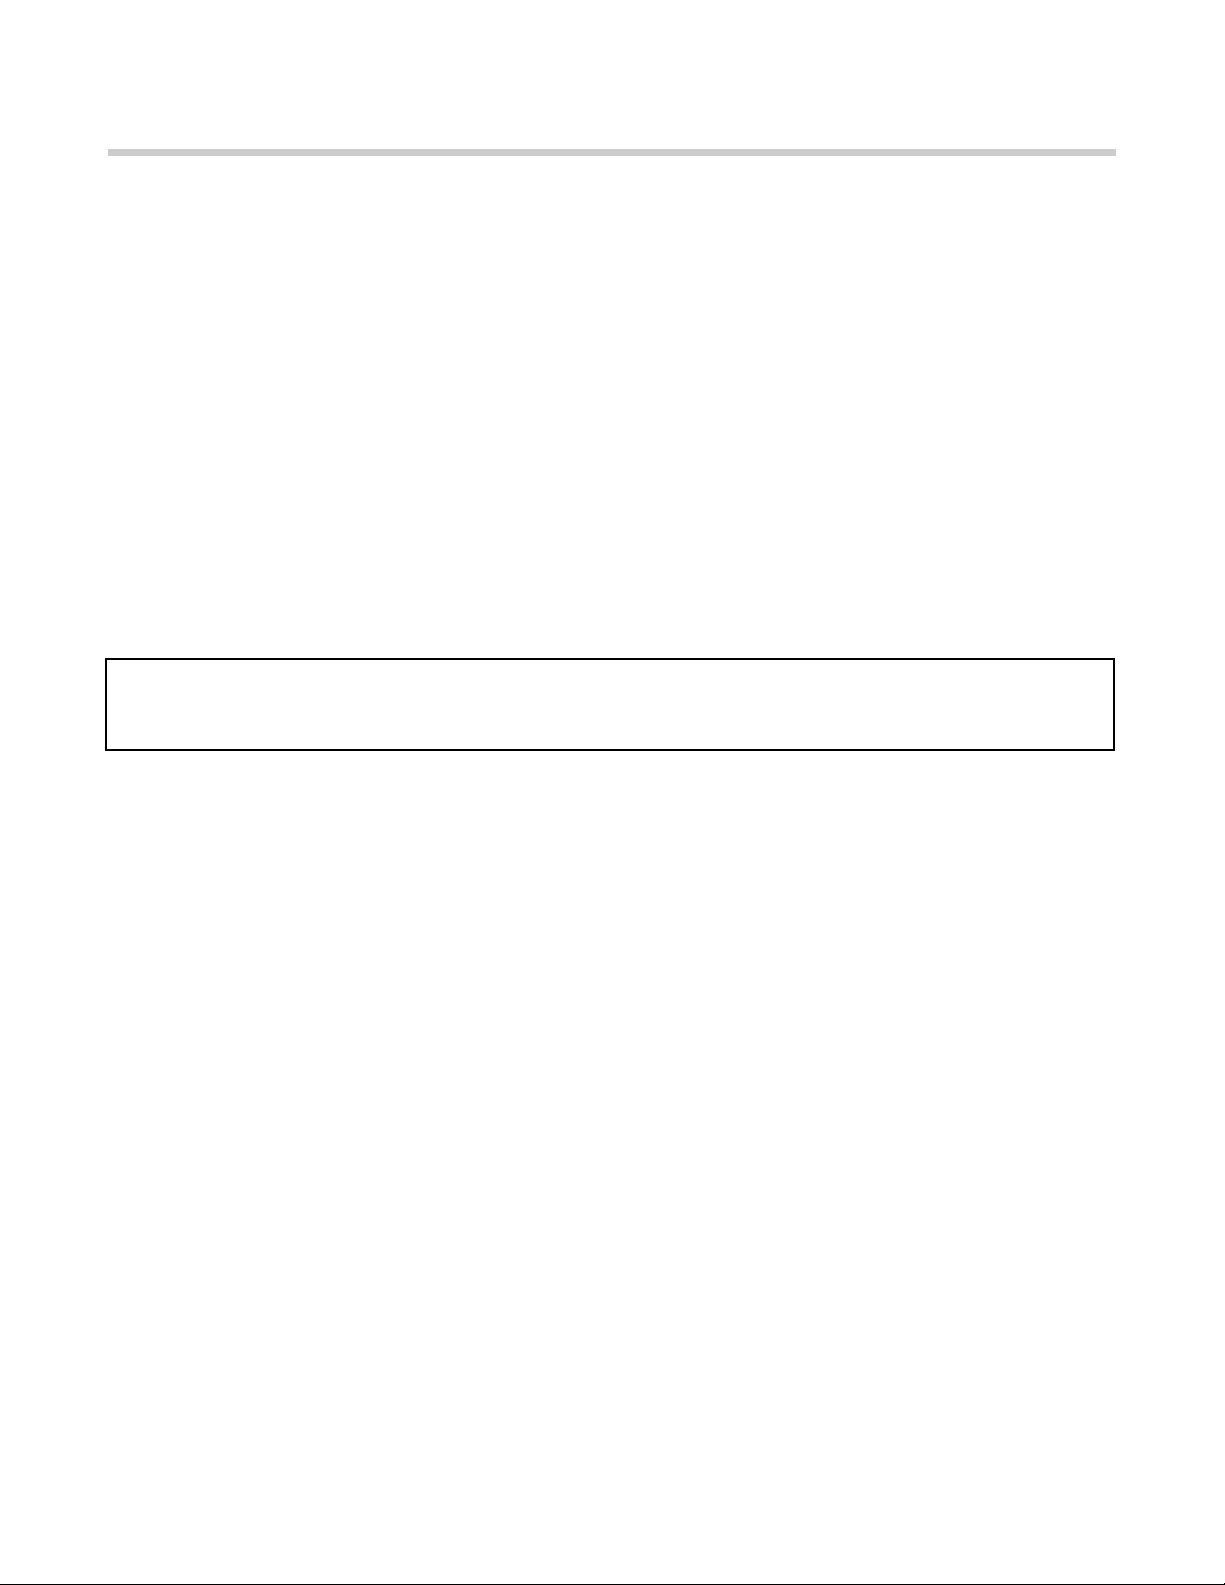
21. Volume Up: Press to turn up the volume of the
sound system.
Figure 22
21
22
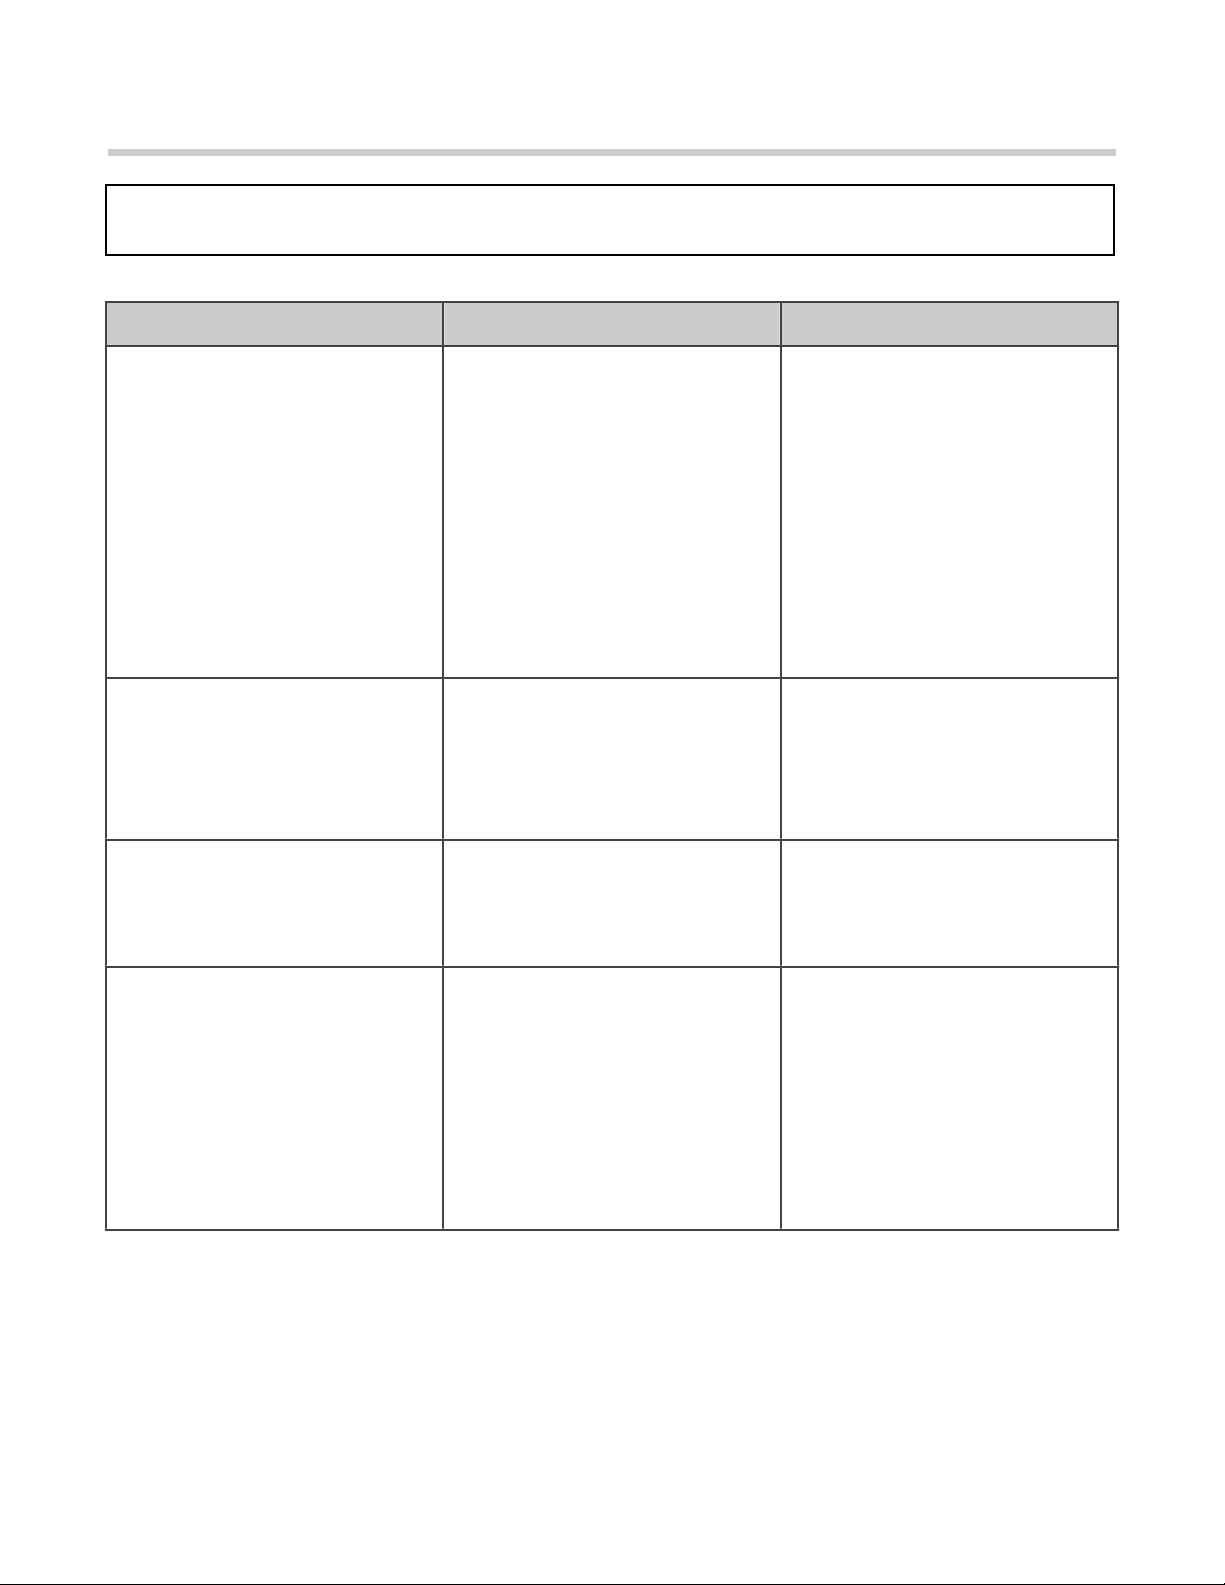
22. Volume Down: Press to turn down the volume
of the sound system.
Figure 21

PAGE 14 OF 34
SOUND SYSTEM OPERATING INSTRUCTIONS
23. Mute: Press this button to eliminate the
volume.
Figure 23
Figure 24
23
24
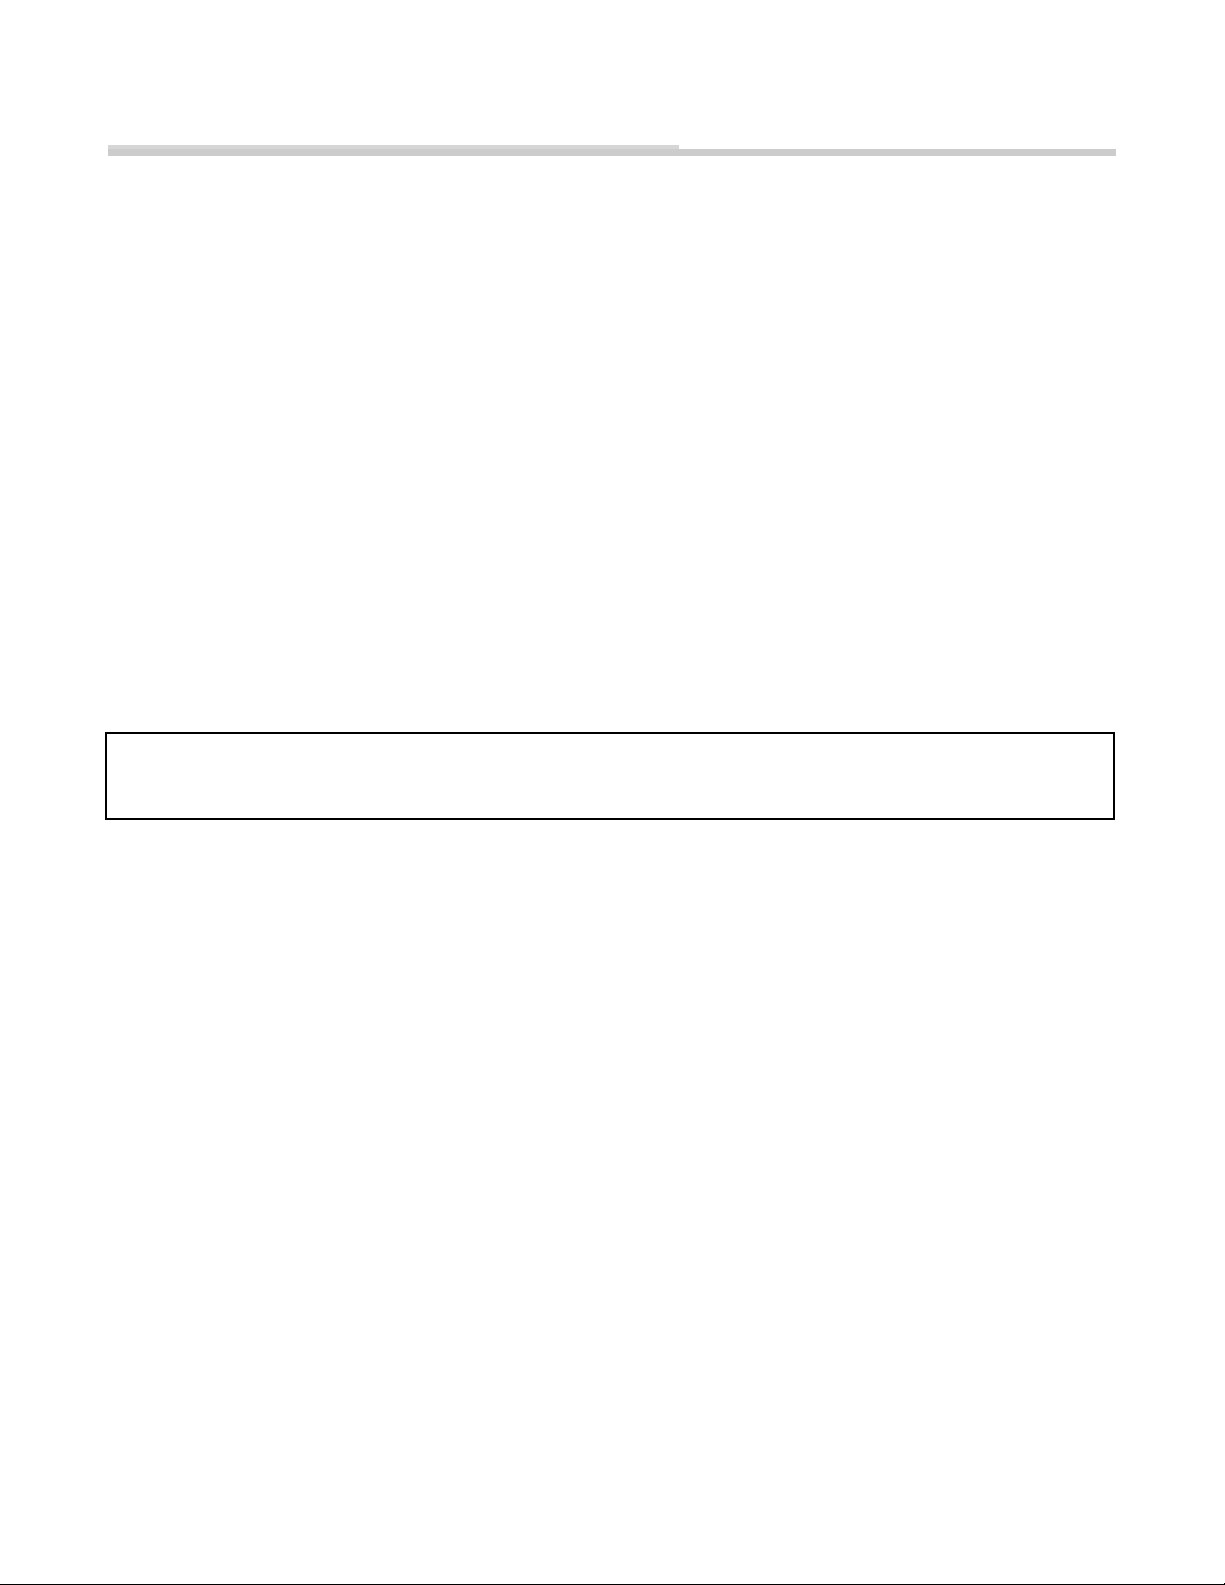
24. Remote Control: Remove the insulation plastic
film from the battery before operation.
Note:
*
Some functions on Remote Control are
different with Control Panel. Please kindly
refer detail NOTE on each button;
*
The green button on the left of Remote
Control is Insert power. You can press the
green power button once time to turn Insert
on or off. Or press 3 seconds to cycle through
the CHILD LOCK setting.
*
The red AMP button on the right of Remote
Control is Sound system power. You can
press the red “AMP POWER” button once time
to turn Sound system on or off. Or press 3
seconds to switch between Bluetooth and
RCA functions.
PAGE 15 OF 34
CARE AND MAINTENANCE
Warning: Changes or modifications to this unit not expressly approved by the party responsible for compliance could
void the user’s authority to operate the equipment.
This device complies with Part 15 of the FCC Rules. Operation is subject to the following two conditions: (1) This device may
not cause harmful interference, and (2) this device must accept any interference received, including interference that may
cause undesired operation.
NOTE: This equipment has been tested and found to comply with the limits for a Class B digital device, pursuant to Part 15 of
the FCC Rules. These limits are designed to provide reasonable protection against harmful interference in a residential
installation. This equipment generates, uses and can radiate radio frequency energy and, if not installed and used in
accordance with the instructions, may cause harmful interference to radio communications.
However, there is no guarantee that interference will not occur in a particular installation. If this equipment does cause harmful
interference to radio or television reception, which can be determined by turning the equipment off and on, the user is
encouraged to try to correct the interference by one or more of the following measures:
•
Reorient or relocate the receiving antenna.
•
Increase the separation between the equipment and receiver.
•
Connect the equipment into an outlet on a circuit different from that to which the receiver is connected.
•
Consult the dealer or an experienced radio/TV technician for help.
•
Battery Replacement: Use one lithium coin cell battery (size CR2025) for the remote control.
WARNING: Before attempting to perform any maintenance on this appliance, turn all controls to the “OFF”
position and then unplug. Allow the appliance to be “OFF” for at least 10 minutes before performing any
maintenance in order to allow all components to cool properly.
1. Use a clean dry cloth to clean the fireplace.
2. To remove fingerprints or other marks from glass window, use clean damp cloth. Do not spray glass cleaner
or other liquids directly onto the window.
3. Clean metal surfaces with a clean damp cloth making sure not to push dust or debris into any air intake or
exhaust vents.
4. Do not use abrasive cleaners or spray liquids on any part of the appliance.
5. Periodic cleaning/vacuuming of the fan/heater unit is strongly recommended to ensure that no dirt or foreign
objects build up.
PAGE 16 OF 34
TROUBLE SHOOTING
NOTE: If you experience difficulties, please do not return this product to store. Any missing parts, hardware or
assembly problems, please call our customer service center at 1-877-355-3326 or 1-925-820-8478.
WARNING: Turn off the appliance, unplug and let cool for at least 10 minutes before attempting to service. Only a
qualified professional should attempt to service or repair the appliance.
PROBLEM
POSSIBLE CAUSE
SOLUTION
Simulated Flame Effect is dim or not
present
1. Dimmer control button is set too
low.
2. LED strip not functioning.
3. “Flame wand” has come loose
from bracket.
4. “Flame wand” motor is not
functioning.
1. Push flame button to increase
light.
2. Contact customer service center
at toll-free no. 1-866-949-3838
3. Remove screws holding back
panel in place and remove back
panel. Secure end of “Flame
wand” back into the support
bracket.
4. Contact customer service center
at toll-free no. 1-866-949-3838
The appliance turns off and will not
turn back on
1. The overheat protection device in
the appliance has been triggered.
2. House circuit breaker has been
tripped.
1. Turn all controls off, unplug the
appliance, allow the insert to cool
down for at least 10 minutes, and
then plug in and restart.
2. Reset house circuit breaker.
The appliance does not turn on when
the button is pushed to “ON”
The overheat protection device in the
appliance has been triggered.
Turn all controls off, unplug the
appliance, allow the insert to cool
down for at least 10 minutes, and then
plug in and restart.
Remote control does not work
1. Low batteries.
1. Replace all batteries in the remote
control.

PAGE 17 OF 34
ONE YEAR LIMITED WARRANTY
The following non-transferable limited warranty applies is extended only to the original consumer-purchaser of this
EASY TOP (HK) Enterprises Limited (EASY TOP) product. This product is only warranted against defects in
material and workmanship subject to the normal and reasonable use and correct installation of the product for a
period of one (1) year from the date of purchase.
This warranty is made to the original owner, provided that the purchase was made through an authorized supplier
of the company. Any unauthorized repair, alteration, misapplication, careless handling, improper installation, willful
abuse, accident, or misuse of the product shall nullify this warranty. This warranty does not apply to the normal
wear and tear. This warranty does not cover light bulbs. The duration of all implied warranties on this particular
purpose are limited to the one (1) year duration of the express warranty period specified above.
In no event will EASY TOP be liable for any incidental or consequential damages (including loss of profits) arising
from the use of this product. Some jurisdictions do not allow limitations on how long an implied warranty lasts / or
do not allow the limitation or exclusion of incidental or consequential damages, so these implied warranty
limitations may not apply to you. This limited warranty gives you specific legal rights. You may also have other
rights which vary from jurisdiction to jurisdiction. Repair or replacement, at EASY TOP’s option, of a defective
product is your sole remedy under this limited warranty. In no event will EASY TOP’s maximum liability exceed the
purchase price of the product paid by the consumer/purchaser.
If replacement parts are needed or to obtain performance of any obligation under this limited warranty, phone
EASY TOP’s Customer Service Center.
Be prepared to provide evidence of purchase date and proof of purchase, model number of your EASY TOP
product, part number and defective part. Register your product within ten days to ensure your warranty. You must
pay all expenses incurred in obtaining performance of any obligation under this limited warranty, including
transportation, postage, and other incidental service costs. If defective part or parts are requested by Customer
Service Center, you must make the product available to us free and clear of all liens and other encumbrances.
EASY TOP reserves the right to change prices, specifications and designs and to discontinue models without
notice and without incurring obligations.
PLEASE DO NOT RETURN ANY PRODUCTS TO STORE, ANY MISSING PARTS OR HARDWARE OR ASSEMBLY
PROBLEMS, PLEASE CONTACT WITH OUR CUSTOMER SERVICE CENTER AT 1866-949-3838.
These limits are designed to provide reasonable protection against harmful interference in a residential
installation. This equipment generates, uses, and can radiate radio frequency energy and ,if not installed
and used in accordance with the instruction manual, might cause harmful interference to radio
communications.
However, there is no guarantee that interference will not occur in a particular installation. If this equipment
does not cause harmful interference to radio or television reception, which can be determined by turning
the equipment off and on, the user is encouraged to try to correct the interference by one or more of the
following measures:
- Reorient or relocate the receiving antenna
- Increase the separation between the equipment and receiver
- Connect the equipment into an outlet on a circuit different from that to which the receiver is
connected.
- Consult the dealer or an experienced radio/TV technician for help.
The Remote Control requires 1 Lithium Coin Cell Battery(size CR2025, which is included.
- DO NOT mix old and new batteries.
- DO NOT use rechargeable silver oxide cell batteries with remote control unit
- DO NOT mix alkaline, standard(Carbon-Zinc), or rechargeable(Nickel-Cadmium) batteries.
- DO NOT dispose of batteries in fire. Improper disposal may cause batteries to leak or
explode.
Página 18 de 34
Manual del usuario
ARTÍCULO # 0849060
MODELO # F16-I-006-089
!
!
Lea este manual decididamente sobre la chimenea eléctrica antes instalarla y usarla. No devuelva este producto a
la tienda. Si hacen falta algunas partes, o tiene problema con el hardware o el ensamble, póngase en contacto con
un centro de servicio al cliente.
MANUAL DEL USUARIO DE LA CHIMENEA ELÉCTRICA
FEBO (HK) INTERNATIONAL LIMITED
Phone: 1-877-355-3326 or 1-925-820-8478
Working Hours: Monday - Friday, 9:00AM - 4:00PM (Pacific Standard Time)
Email: [email protected],
Página 19 de 34
ADVERTENCIA: Cualquier uso de ese aparato diferente al recomendado por el fabricante en este manual del usuario,
puede causar incendios quemaduras, descargas eléctricas, lesiones personales graves o incluso la muerte.
Guarde estas instrucciones
Cuando use aparatos eléctricos, se deben seguir siempre las precauciones básicas para reducir el
riesgo de incendios, descargas eléctricas y lesiones personales como las siguientes:
1. Lea todas las instrucciones antes de usar este aparato.
2 . Este aparato se calienta cuando se usa. Para evitar quemaduras, no deje que la piel toque la superficie
caliente. Si se suministran, usa manijas cuando mueva este aparato. Mantenga los materiales combustibles,
tales como muebles, almohadas, camas, papeles, ropa, cortinas, etc., alejados al menos 3 pies (0,9 metros)
del frente del aparato. Mantenga todos los elementos alejados de las partes laterales y posteriores.
3 . Se debe tener cuidado extremo cuando el aparato se use cerca de los niños o personas discapacitados y
cuando el aparato se dirige funcionando solo.
4 . Siempre desconecte el aparato cuando no lo use. Esta unidad se debe usar bajo supervisión y no se
debe dejar desatendida.
5 . No use ningún aparato con el cable dañado o el enchufe o después de que el aparato esté funcionando mal,
se haya caído o se haya dañado de alguna manera. Devuelva el aparato a un centro de servicio autorizado
para que lo examinen, para que haga ajustes mecánicos o eléctricos o para que lo repare.
6 . No lo use al aire libre.
7 . Ese aparato no se ha concebido para usarlo en paños, áreas de lavanderías y lugares internos similares.
Nunca ponga el aparato donde se pueda caer en una tina o en otro recipiente con agua.
8 . No deje que el cable debajo de una alfombra. No cubra el cable de alimentación eléctrica con alfombras,
tapetes o coberturas de suelos similares. Ponga el cable lejos del área de tráfico y donde no se pise.
9 . Para desconectar el aparato, a partir todos los controles y luego quite el enchufe de la toma eléctrica.
1 0 . Conecte solamente a las tomas a tierra apropiadas.
1 1 . No permita que entren objetos extraños a las aberturas de ventilación o de salida de aire, puesto que esto
puede causar descargas eléctricas o incendios o dañar el aparato.
1 2 . P ara prevenir posibles incendios, no bloquee los conductos de entrada y salida de aire que ninguna forma.
No use en superficies suaves, como una cama, cuando las aberturas se puedan bloquear.
1 3 . Todos los aparatos eléctricos tienen partes calientes o que echen chispas en las partes internas. no use en
áreas donde se utilice o almacene gasolina, pintura, o líquidos inflamables.
1 4 . U se ese aparato solamente como se describe en este manual. Cualquier otro uso no recomendado por el
fabricante puede causar incendios, descargas eléctricas o incluso lesiones personales.
1 5 . Se recomienda de manera especial usar el tomacorriente completo de 15 amperios para la chimenea
eléctrica solamente. Si comparte el tomacorriente con otro dispositivo eléctrico, se puede crear sobrecarga
y dañar el tomacorriente y los dispositivos eléctricos a largo plazo.
1 6 . La longitud de la línea de alimentación es de 181,8 cm y la longitud de la línea de datos de conexión
es de 100 cm. Evite el uso de cables de extensión porque estos pueden sobrecalentarse y causar incendios.
Sin embargo, si un cable de extensión se DEBE usar, el cable debe tener tamaño mínimo número 14AWG y
la potencia no debe ser inferior a 1875 vatios. el cable de extensión debe ser de tres clavijas de tipo
conexión a tierra y no debe tener una longitud superior a 20’ (6m).
1 7 . Cuando transporte o almacene los aparatos, tenga cuidado de mantener tanto la unidad como el cable de
alimentación eléctrica secos, sin vibración excesiva y lejos de fuente de calor. Esto puede causar incendios,
descargas eléctricas o lesiones personales.
1 8 . No intente quemar madera u otros materiales en ese aparato.
1 9 .
Este aparato, cuando se instale debe conectarse a tierra eléctrica, de acuerdo con la corriente.
Canada: CSA C22.1, Canadian Electrical Code
U.S.A.: ANSI/NFPA NO. 70, National Electrical Code
Instrucciones importantes de seguridad

Página 20 de 34
INSTRUCCIONES OPERATIVAS
Lea todas las instrucciones y advertencias
antes
de usar el aparato.
1. Asegúrese de que todos los controles estén en
la posición “OFF” antes de conectar el aparato en
la toma eléctrica conectada a tierra
apropiadamente.
Este aparato se debe usar con 120 V. ese aparato
tiene un enchufe conectado a tierra de tres
clavijas. Si su toma eléctrica tiene solamente dos
ranuras, tendrá que usar un adaptador para
convertir un cable de alimentación eléctrica de tres
clavijas a un receptáculo de 2 ranuras. el enchufe
a tierra verde se extiende desde el adaptador se
debe asegurar bien y conectarse a tierra
permanente tal como una caja de toma conectada
a tierra. Este adaptador solamente se debe usar si
no está disponible un receptáculo de tres ranuras.
NOTA: los adaptadores no se permiten usarse
en Canadá.
!
Figura 1
2.
Se necesita un circuito de 15 amperios para
usar este
aparato.
Si el disyuntor se dispara
cuando el aparato esté funcionando, es posible
que deba mover el aparato a otro lugar o
desconectar otros aparatos que estén en el mismo
circuito.
Las funciones de control de la chimenea se
pueden acceder de dos formas:
- Usando el panel de control,
ubicado en la esquina superior
derecha de la chimenea.
- Usando el control remoto de
múltiples funciones del panel de
control principal está ubicado en
la esquina superior derecha en la
parte frontal (ver Figura 2).
Panel de control
Figura 2
1
2
Display
Screen

Página 21 de 34
INSTRUCCIONES OPERATIVAS
3.
Presione el botón para activar, la pantalla
mostrará. Sin operación adicional, la pantalla
automáticamente se restablecerá después de 20
segundos. Si presiona cualquier botón en el panel
de control o en el control remoto, la pantalla
mostrará.
Figura 3
Figura 4
3
4
4.
Encendido: Presione el botón para activar o
desactivar Si
Está en OFF, el calor se
restablecerá la próxima vez que se encienda.
Nota:
*
Si desconecta la unidad se restablecerán
todas las funciones;
*
Este botón es de color verde en el panel de
control y en el control remoto;

Página 22 de 34
INSTRUCCIONES OPERATIVAS
5.
Llama: Presione para activar la función de
llama. Este
Botón controla el brillo de la llama y el
efecto de brasas. Cuando se encienda la
chimenea por primera vez, la Llama se encenderá
con la mayor capacidad. Presione la tecla BAJAR
o SUBIR para ajustar el brillo de la llama. Hay 6
niveles para escoger, incluyendo el de apagado (el
efecto de brasa permanece activo). Cuando ajuste
el brillo de la llama con las teclas BAJAR y SUBIR,
el número de barras del nivel de la llama
corresponde con los 5 niveles de brillo. Cuando
esta característica esté activa, el icono de LLAMA
en la pantalla también se activará.
Figura 5
Figura 6
5
6
6.
Calentador: Presione para activar la función de
calentador.
El sistema iniciará con temperatura de
95ºF. Hay 7 niveles de calor ajustables, que
oscilan entre 65ºF y 95ºF. Presione la tecla BAJAR
o SUBIR para ajustar los niveles, teniendo en
cuenta que cada nivel aumenta o disminuye la
temperatura en 5ºF. Cuando esta característica
esté activa, el icono de CALENTADOR también se
activará. Y Cuando esta característica esté
desactiva, el ventilador interno continuará
funcionando durante 30 segundos para enfriar la
unidad y proteger los elementos de calefacción
antes de que la unidad se apague completamente.
Nota: Puede cambiar las unidades de
temperatura de Fahrenheit a Celsius al
presionar y sostener el botón CALENTADOR
del panel de control durante aproximadamente
6 segundos. Aparecerá la.

Página 23 de 34
INSTRUCCIONES OPERATIVAS
7. Temporizador:
Presione una vez para activarlo.
Presione las tecla SUBIR y
BAJAR para ajustar el
temporizador.
Las opciones son Entre el intervalo
0,5H y 8H. Una vez que el temporizador esté
activo y se alcance la especificación deseada, el
sistema se apagará.
Figura 7
Figura 8
7
8
8.
Bloqueo para niños: Presione y sostenga el
botón por 6
Segundos para activar la función.
Cuando la función BLOQUEO PARA NIÑOS Esté
activa, todas las demás características se
desactivarán. Presione y sostenga el botón
nuevamente durante 6 segundos para desbloquear
las funciones.
La función de bloqueo para niños del panel de
control: diferente al mismo botón del panel de
control, mientras use el control remoto,
solamente debe presionar el botón verde de
“ENCENDIDO” durante 3 segundos para ver las
diferentes opciones del BLOQUEO PARA
NIÑOS.
Página 24 de 34
INSTRUCCIONES OPERATIVAS
9.
Bajar: Use para reducir el calor, el brillo de
La llama o temporizador.
Cuando
las opciones de
LLAMA / CALENTADOR / TEMPORIZADOR no
Estén activadas, este botón no funcionará.
Figura 9
Figura 10
9
10
10.
Subir: Use para aumentar el calor, el brillo
de la llam o del
temporizador.
Cuando
las
opciones de LLAMA / CALENTADOR /
TEMPORIZADOR no
estén activadas, este
botón no funcionará.

Página 25 de 34
INSTRUCCIONES OPERATIVAS DEL SISTEMA
11.
Conecte el inserto eléctrico en el
Módulo de
amplificador del sistema de sonido con el cable de
conexión #1.
Figura 11
11
12
12.
Conecte el cable #2 en la toma de corriente de
pared.
Figura 12
Página 26 de 34
INSTRUCCIONES OPERATIVAS DEL SISTEMA
13.
Activa el interruptor del módulo del amplificador del
sistema
.
Figura 13
13
14
14.
El módulo del amplificador del sistema de sonio
tiene una entrada de línea RCA
Para conectar un
TV.
El cable
RCA no se
Incluye y es opcional.
Figura 14
Página 27 de 34
INSTRUCCIONES OPERATIVAS DEL SISTEMA
15.
Se necesita un circuito de 15 amperios para
usar este
aparato.
Si el disyuntor se dispara cuando el
aparato esté funcionando, es posible que deba
mover el aparato a Otro lugar o desconectar otros
aparatos que estén en el mismo circuito.
Las funciones de control del sistema de sonido se
pueden acceder de dos formas :
- Usando el panel de control de
botones, ubicado en la esquina
superior izquierda de la
chimenea.
- Usando el control remoto de
múltiples funciones
El panel de control del sistema de sonido está
ubicado en la esquina superior izquierda en la
parte frontal (ver Figura 16).
Conecte el inserto eléctrico en la toma eléctrica
antes de usar el sistema de sonido.
Figura 15
Figura 16
15
16
16.
Encendido: Presione el botón para activar o
desactivar.
Cuando el sistema de sonido se encienda
por primera vez, la Brasa tendrá color azul.
Si está en OFF, el sistema de sonido se
restablecerá la próxima vez que se encienda.
Nota:
*
Si desconecta la unidad se restablecerán
todas las funciones.
*
Este botón es de color rojo en el panel de
control y en el control remoto;
*
Funciones de encendido del sistema de
sonido en el control remoto: diferente al
mismo botón del panel de control, mientras
use el control remoto, solamente debe
presionar el rojo botón “AMP” para activar o
desactivar el sistema de sonido.
Panel de control del sistema de sonido
Página 28 de 34
INSTRUCCIONES OPERATIVAS DEL SISTEMA
17. Modo: Presione y sostenga durante para
cambiar entre las funciones de Bluetooth y RCA.
Sin ninguna conexión Durante 5 minutos, el
sistema de sonido se apagará automáticamente.
Funciones de modo del sistema de sonido en el
control remoto: diferente al mismo botón del
panel de control, mientras use el control
remoto, solamente debe presionar el botón
“ENCENDIDO AMP” durante 3 segundos para
cambiar entre las funciones de Bluetooth y
RCA.
Figura 17
17
18
18.
Pista anterior: presione este botón para
regresar a la
pista anterior.
Figura 18

Página 29 de 34
INSTRUCCIONES OPERATIVAS DEL SISTEMA
19.
Siguiente pista: presione este botón para
avanzar a la siguiente
pista.
Figura 19
19
20
20.
Pausar: presione este botón para pausar o
reiniciar la
reproducción de música.
Figura 20

Página 30 de 34
INSTRUCCIONES OPERATIVAS DEL SISTEMA
21.
Subir volumen: Presione para subir el volumen
del
sistema de sonido.
Figura 22
21
22
22.
Bajar volumen: Presione para bajar el volumen
del
sistema de sonido.
Figura 21
Página 31 de 34
INSTRUCCIONES OPERATIVAS DEL SISTEMA
23.
Silenciar: presione este botón para silenciar el
volumen.
Figura 23
Figura 24
23
24
24.
Control Remoto: Quite la película de plástico
de aislamiento de la
Batería antes de usar.
Nota:
1. Algunas funciones del control remoto son
diferentes de las del panel de control. Consulte las
NOTAS de detalles en cada botón;
2. El botón verde de la izquierda del control remoto
es el de Encendido. Puede presionar el botón verde
de encendido una vez para activar o desactivar o
presione durante 3 segundos para ver las
especificaciones de BLOQUEO INFANTIL.
3. El botón rojo AMP de la derecha del control
remoto es el de activación del sistema de sonido.
Puede presionar el botón rojo “ACTIVACIÓN AMP”
una vez para activar o desactivar el sistema de
sonido o presione durante 3 segundos para cambiar
entre las funciones de Bluetooth y RCA.
Página 32 de 34
CUIDADO Y MANTENIMIENTO
Advertencia: Los cambios o modificaciones de esta unidad que no estén expresamente aprobados por la parte responsable
puede anular la autoridad del usuario para usar el equipo.
Este dispositivo cumple con la parte 15 de las reglas FCC. El funcionamiento está sujeto a las dos condiciones siguientes: (1)
este dispositivo no causa interferencia nociva y (2) este dispositivo debe aceptar cualquier interferencia recibida como la que
cause operación indeseada.
NOTA: este equipo ha sido probado y se ha encontrado que cumple con los límites para los dispositivos digitales de clase
B, de acuerdo con la parte 15 de las reglas de FCC. Estos límites están diseñados para suministrar protección razonable
contra interferencia nociva en una instalación residencial. Este equipo genera, usa y puede emitir energía de frecuencias de
radio y, si no se instala y usa de acuerdo con las instrucciones, puede causar interferencia nociva a las comunicaciones de
radio.
Sin embargo, no se garantiza que las interferencias no se producirán en una instalación en particular. Si este equipo no causa
interferencia nociva a la recepción de radio o televisión, lo cual puede determinarse encendiendo o apagando el equipo, se
recomienda que el usuario trate de corregir la interferencia por medio de una o varias de las siguientes medidas:
•
Reoriente o vuelva a ubicar la antena receptora.
•
Aumente la separación entre el equipo y el receptor
.
•
Conecte el equipo en una toma o un circuito diferente a donde esté conectado el receptor
.
•
Consulte al proveedor o a un técnico especializado de radio o TV para recibir ayuda.
•
Reemplazo de la batería: Use una batería de celda de disco de litio (tamaño CR2025) para el control remoto.
ADVERTENCIA: antes de intentar hacer cualquier clase de mantenimiento a este aparato, desactive todos los
controles y luego desconecte. Deje el aparato apagado al menos durante 10 minutos antes de realizar cualquier clase
de mantenimiento con el fin de dejar que todos los componentes se enfríen apropiadamente.
1. Use un trapo seco limpio para limpiar la chimenea.
2. Para eliminar las huellas u otras marcas del vidrio, use un trapo húmedo. no rocíe limpiador para vidrio de
otros líquidos directamente en la ventana.
3. Limpie la superficie metálicas con un trapo húmedo limpio y asegúrese de no presionar el polvo ni los
residuos en ninguno de los conductos de entrada o salida de aire.
4. No use limpiadores abrasivos ni líquidos de spray en ninguna parte del aparato.
5. Se recomienda de manera especial la limpieza de violinista del ventilador o el calentador para garantizar que
quien no haya mugre ni objetos extraños.
Página 33 de 34
IDENTIFICACIÓN Y SOLUCIÓN DE PROBLEMAS
NNOTA: si tiene dificultades, por favor no devuelva este producto a la tienda. Si hacen falta algunas partes, o tiene
problema con el hardware o el ensamble, póngase en contacto con un centro de servicio al cliente, llamando al
1-877-355-3326 or 1-925-820-8478.
ADVERTENCIA: apague el aparato, desconéctelo y déjelo enfriar durante al -10 minutos antes de hacerle
mantenimiento. solamente profesionales calificados debe dársele mantenimiento o reparar el aparato.
PROBLEMA
CAUSA POSIBLE
SOLUCIÓN
El efecto de llama simulado es tenue o
no existe
1. El botón de control de atenuación
está muy bajo.
2. La cinta del LED no funciona.
3. “La vara llama” se ha soltado del
soporte.
4. El motor de “la vara llama” no
funciona.
1. Presiona el botón de llama para
aumentar la luz.
2. Póngase en contacto con servicio
al cliente llamando a la línea
gratuita número 1-866-949-3838
3. Quite los tornillos que sostienen el
panel posterior y luego quite el
panel posterior. Asegure el
extremo de la barra de llama en el
soporte de apoyo.
4. Póngase en contacto con servicio
al cliente llamando a la línea
gratuita número 1-866-949-3838
El aparato se apaga y no vuelve a
encender
1. El dispositivo de protección de
exceso de calor del aparato se ha
activado.
2. El disyuntor del circuito de la
carcasa se ha disparado.
1. Desactive todos los controles,
desconecte el aparato, desde que el
incierto se enfríe durante el -10 minutos
y luego conecte y vuelva a iniciar.
2. Reinicie el disyuntor del circuito de
la carcasa.
El aparato no enciende al presionar el
botón “ON”
The overheat protection device in the
appliance has been triggered.
Turn all controls off, unplug the
appliance, allow the insert to cool
down for at least 10 minutes, and then
plug in and restart.
Remote control does not work
1. Batería baja.
1. Reemplace todas las baterías del
control remoto.

Página 34 de 34
GARANTÍA LIMITADA DURANTE UN AÑO
La siguiente garantía limitada no es transferible, se aplica y se extiende solamente al comprador-consumidor
original de este producto de EASY TOP (HK) Enterprises Limited (EASY TOP). Este producto solamente tiene
garantía contra defectos de materiales y mano de obra sujeto al uso normal y razonable y a la instalación
correcta del producto durante un período de un año a partir de la fecha de compra.
Esta garantía se hace al dueño original, solamente si la compra se hizo a través de un proveedor autorizado de la
compañía. Cualquiera de las acciones no autorizadas como reparación, alteración, aplicación indebida, manejo
inadecuado, instalación inapropiada, abuso intencional, accidente, un mal uso del producto, anulará esta
garantía. Esta garantía no aplica al rompimiento o desgaste normal. Esta garantía no cubre los bombillos. La
duración de todas las garantías implícitas sobre este propósito particular están limitadas al año de duración del
período de garantía expreso especificado anteriormente.
Bajo ninguna circunstancia EASY TOP será responsable por ningún daño incidental o consecuencial (incluyendo
pérdidas) que se generen del uso de este producto. Algunas jurisdicciones no permiten limitaciones sobre la
duración de la garantía implícita o no permiten limitaciones ni exclusiones de daños incidentales o
consecuenciales, entonces estas limitaciones de la garantía implícita puede que no se apliquen a usted esta
garantía limitada le da usted derechos legales específicos. Usted también puede tener otros derechos los cuales
varían de jurisdicción en jurisdicción. para reparar o reemplazar, según la decisión de EASY TOP, de un producto
defectuoso es el único remedio bajo esta garantía limitada. Bajo ninguna circunstancia la responsabilidad máxima
de EASY TOP puede superar el precio de compra pagado por producto por el consumidor o comprador.
Si se necesitan repuestos o se necesita hacer cumplir cualquier obligación bajo esta garantía limitada, póngase
en contacto con el Centro de servicio eficiente de EASY TOP.
Esté preparado para suministrar evidencia de la fecha de compra, el número del modelo de su producto EASY
TOP, el número de parte y la parte defectuosa. Registre su producto dentro de 10 días para para que su garantía
tenga validez. Usted debe pagar todos los costos incurridos en hacer cumplir cualquier obligación bajo esta
garantía limitada, incluyendo transporte, gastos de correo y otros costos por servicios incidentales. Si el centro de
servicio al cliente solicita alguna parte defectuosa, usted debe dejar disponible el producto para nosotros, de
forma clara y libre de cualquier embargo o cualquier otro impedimento. EASY TOP se reserva el derecho de
cambiar los precios, especificaciones y diseños, y descontinuar los modelos sin previo aviso y sin incurrir en
ninguna obligación.
No devuelva ningún producto a la tienda. Si hacen falta partes o hay problemas de hardware o de ensamble,
póngase en contacto con el centro de servicio al cliente, llamando al 1-866-949-3838.
Estos límites están diseñados para suministrar protección razonable contra interferencia nociva en una
instalación residencial. Este equipo genera, usa y puede emitir energía de frecuencias de radio y, si no se
instala y usa de acuerdo con las instrucciones, puede causar interferencia nociva con las comunicaciones
de radio.
Sin embargo, no hay garantía de que no se presentará interferencia en una instalación particular. si este
equipo no causa interferencia nociva para la recepción de radio o televisión, lo cual se puede determinar
encendiendo y apagando el equipo, se le recomienda al usuario tratar de corregir la interferencia
siguiendo alguno de los siguientes métodos:
- Reoriente o vuelva a ubicar la antena receptora.
- Aumente la separación entre el equipo y el receptor
- Conecte el equipo en una toma o un circuito diferente a donde esté conectado el receptor
- Consulte al proveedor o a un técnico especializado de radio o TV para recibir ayuda
El control remoto necesita una batería de celda de moneda del Litio (tamaño
CR2025, la cual se incluye).
- No mezcle baterías nuevas con usadas.
- NO use baterías de celdas de óxido de plata recargables con el control remoto
- No mezcle baterías alcalinas, estándar (Carbono-Zinc), ni recargables (Níquel-Cadmio).
- NO arroje las baterías al fuego.. El desecho inapropiado puede causar que las baterías
tengan fugas o exploten.