Loading ...
Loading ...
Loading ...

3
RECORDING INSTRUCTIONS
Please use deck B for recording external sources or dubbing tapes. Note
that most cassettes feature a protective plastic strip which, when removed,
will not allow any recording to be made to the cassette.
Note: When the plastic strip has been removed, the unit’s [RECORD]
button will not function when attempting to record to the cassette.
Tip: To record to a cassette which no longer has a plastic strip, use
adhesive tape to cover the strip opening.
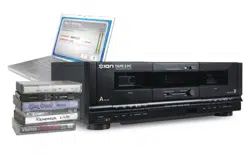
TRANSFERRING TAPES TO COMPUTER:
1. Insert included software CD into your computer and install EZ Vinyl/Tape Converter.
2. Open EZ Vinyl/Tape Converter and follow the simple on-screen instructions to transfer your tape to your computer.
Refer to the manual on the software CD for further information.
RECORDING EXTERNAL SOURCE TO TAPE:
1. Press [STOP/EJECT] on deck B to open the cassette holder.
2. Insert a blank tape and close the cassette holder.
3. If recording to a Cr02 tape, press the [REC Cr02] button.
4. Press the [PAUSE] button and then press [RECORD].
5. Play your external source and check the levels on the display.
Use the REC LEVEL knob to adjust the level of the incoming
audio signal.
6. Press the [PAUSE] button to begin recording when you are
ready.
DUBBING OPERATION:
1. Insert the tape for playback in deck A.
2. Insert the tape you wish to record to in deck B.
3. Press the [DUBBING] button. “Dubbing” will be illuminated on the display.
4. Select the dubbing speed with the [HI SP DUB] button. If the “HI SP DUB” indicator is illuminated on the display, you will
be dubbing in high-speed mode. If the indicator is not lit, then you will be recording in normal-speed mode.
5. Press the [PAUSE] button on deck A, followed by the [PLAY] button to cue the tape.
6. Press the [RECORD] button on deck B.
7. Press the [PAUSE] button on deck A to release pause mode. The unit will automatically start the dubbing operation.
8. To stop dubbing, press the [STOP/EJECT] button of deck B.
Please note: Do not change dubbing speed while dubbing is in progress.
TECHNICAL SPECIFICATIONS
Type Stereo double cassette deck
Track System 4-track 2-channel
Tape speed 4.8 cm/sec
Frequency Response
(-20dB recording)
Chrome tape 40-15000Hz (±3dB)
Normal tape 40-14000Hz (±3dB)
(0dB recording)
Chrome tape 40-8000Hz (±3dB)
Normal tape 40-8000Hz (±3dB)
S/N ratio 58dB
Wow and flutter <0.2% (DIN45500)
Crosstalk 40dB (1kHz)
Harmonic distortion less than 1%
(at 1 kHz, OVU 3
rd
H.D. normal tape)
Channel separation 40dB (1kHz)
Head
Deck A Playback
Deck B Recording/playback,
2-gap ferrite head for erasure
Motor DC servo motor x 2
Fast forward/Rewind time ~100 sec w. C-60 cassette
Input terminals
Line In x 2 Min. input level: 600mV (0dB)
Input impedance: 50kΩ
Output terminals
Line Out x 2 Output level: 600mV (0dB)
Output impedance: 5kΩ
USB Audio Interface USB 1.1 compatible, 16 bit,
44.1kHz (CD quality) or 48kHz
sample rate
Power requirement AC220V-230V ~ 60Hz
For U.K. 240V ~ 60Hz
For U.S.A. & Canada 127V ~ 60Hz
Power Consumption 11.9W Maximum
Dimensions 420mm x 135mm x 215mm
(W x H x D)
Weight 4kg (8.5lbs)
Accessories RCA cable, USB cable,
Software CD, Quickstart
Manual, Safety and Warranty
Information
SIDE 2
PLASTIC
STRIP
SIDE 1
PLASTIC
STRIP
BEFORE RETURNING THE PRODUCT, please contact Ion Audio or your retailer for technical support. Contact information
can be found in the Safety Instruction Booklet included with this product.
MANUAL VERSION 1.5
Tip
:
The REC LEVEL knob can be used to make
adjustments to the loudness of the incoming signal.
If the knob is in the center position, the incoming
signal will be recorded at its original volume.
Ideally, the recording signal should come close but
never hit red in the level indicator on the display. If
the signal is in the red, then turn down the REC
LEVEL knob until it no longer reaches the red. If the
signal is too low and not close to the red, turn up the
REC LEVE
L
knob.
Loading ...
Loading ...
Loading ...