Loading ...
Loading ...
Loading ...
2
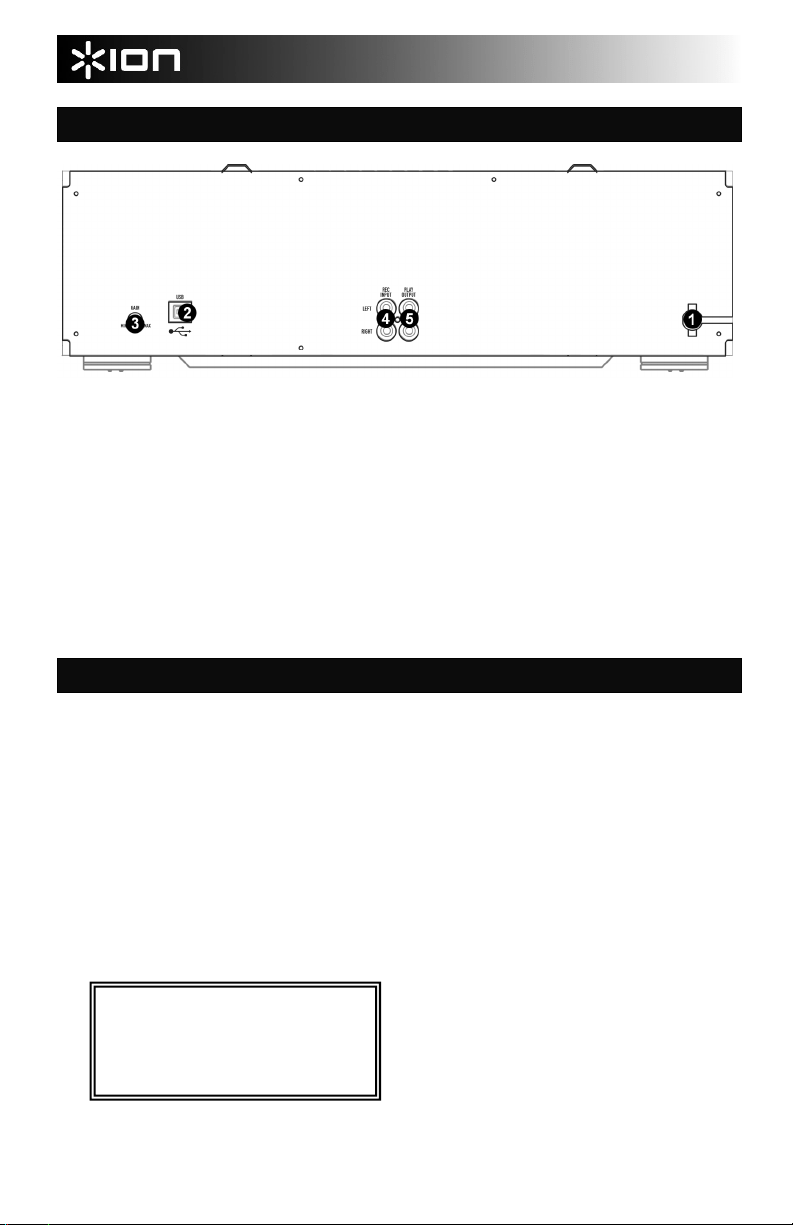
REAR PANEL OVERVIEW
1. POWER CORD – Plug this cord into a power
socket before powering on the unit. If not using
the unit for prolonged periods of time, please
remember to turn it off and remove the cord from
the socket.
2. USB PORT – Use the included USB cable to
connect this port to an available USB port on
your computer when transferring tapes. You can
use the included EZ Vinyl/Tape Converter
software application to transfer and backup your
tapes digitally.
3. GAIN KNOB – This knob can be used to adjust
the audio signal from the unit to your computer.
If you experience distortion and clipping when
recording to your computer, we recommend
turning down the Gain. If the audio level from the
unit is extremely low when recording to your
computer, we recommend turning up the Gain.
4. REC INPUT – Connect a stereo RCA cable from
an external source to this input. Please note that
recording and dubbing only works on deck B.
5. PLAY OUTPUT – This is the combined audio
output from deck A and deck B. Connect a
stereo RCA cable from this output to the Line or
Auxiliary input of a home stereo receiver system.
PLAYBACK INSTRUCTIONS
PLAYING BACK A RECORDED TAPE:
1. Press the [STOP/EJECT] button to open
the cassette holder.
2. Insert the tape and close the holder. If
playing a Cr02 tape, press the Cr02
button.
3. If connected to an amplifier system, make
sure the amplifier is turned on and adjust
its volume to a suitable listening level.
4. Press the [PLAY] button to play the tape.
Please note: If you are transferring tapes to
your computer, it is possible to hear your tapes
through your computer’s soundcard or built-in
speakers while transferring. Please consult the
EZ Vinyl/Tape Converter Quickstart Manual.
FAST FORWARDING AND REWINDING:
1. While the deck is stopped, press the
[FAST FORWARD] or [REWIND] button.
2. When the tape reaches the desired
location, press [STOP/EJECT].
3. Press the [PLAY] button to play the tape
from this location.
PAUSING:
1. Press the [PAUSE] button to pause the
tape.
2. Press [PAUSE] again to release and
resume playback.
STOPPING AND EJECTING:
1. Press the [STOP/EJECT] button while the
tape is playing to stop playback.
2. Press [STOP/EJECT] again to eject the
tape.
IMPORTANT! After extensive usage,
Tape2PC’s tape heads can acquire build-up,
especially if the cassettes you are playing or
recording are old. To ensure Tape2PC’s best
performance, we recommend using a tape
head cleaner periodically.
Loading ...
Loading ...
Loading ...