Loading ...
3
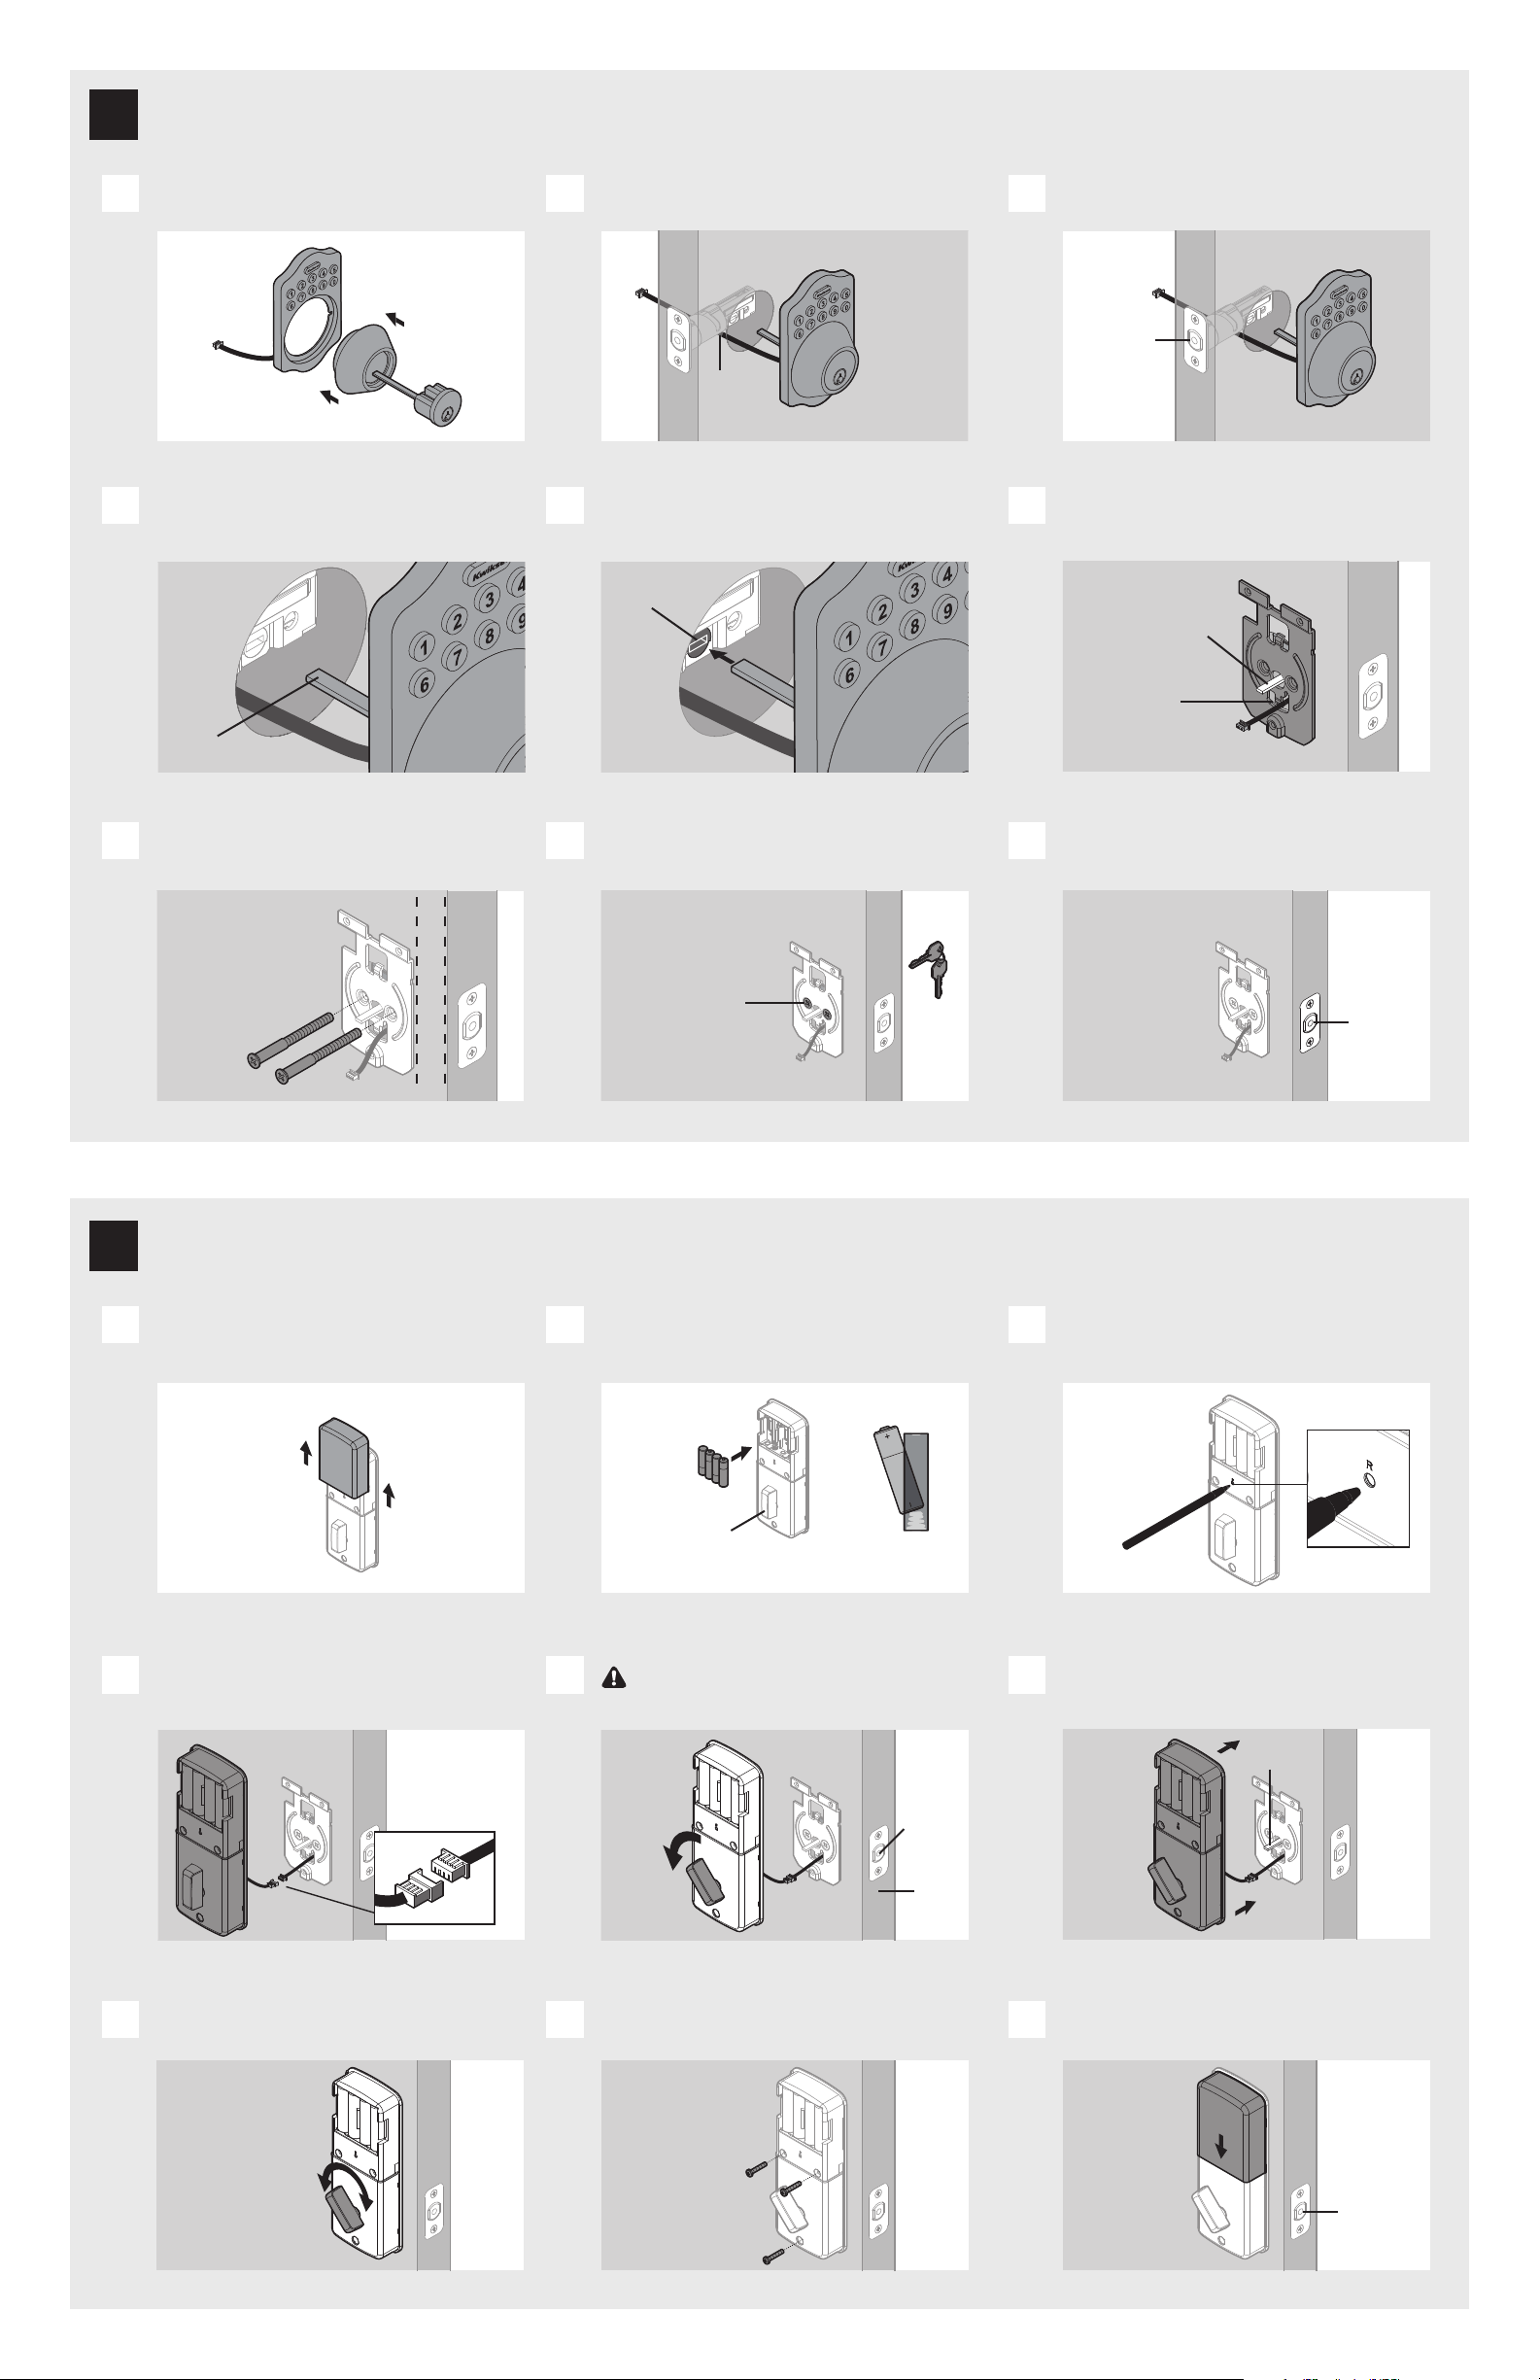
Install exterior assembly
Install the cylinder into the exterior assembly.
A
IMPORTANT: Make sure the torque
blade is in the horizontal position.
D
Secure the mounting plate with the supplied screws.
G
Insert the torque blade through the
horizontal slot in the latch.
E
Insert the key and test the latch for smooth operation.
H
Remove the key and make sure the latch
bolt is still in the unlocked position.
I
Push the torque blade through the center
hole in the mounting plate and send the
cable through the bottom hole.
F
Route the cable below the latch.
B
IMPORTANT: Make sure the latch is fully
retracted (in the unlocked position).
C
cable
exterior side
of door
horizontal
horizontal
slot
unlocked
unlocked
torque blade in
center hole
cable in
bottom hole
interior side of door
Keep
parallel to
door edge.
If latch does
not operate
smoothly,
adjust screws.
G
F
M (2x)
D
E
2 / 4
Install interior assembly
Remove the battery cover.
A
Align the colored edges of the connectors
and ensure a tight cable connection.
D
Test the turnpiece for smooth rotation.
G
E
Secure the interior assembly with
the supplied screws.
H
Reinstall battery cover and make sure the
latch is still in the unlocked position.
I
Make sure the torque blade is still in the horizontal
position and install the interior assembly.
F
Load 4 AA batteries into the interior
assembly. For best results, use new, non-
rechargeable Alkaline batteries only.
B
Press and hold the Reset button on the interior
assembly for 5 seconds, until you hear 3 long beeps.
C
Ensure correct
polarity.
Note: Turnpiece
may move
on its own.
H
H
J
4
unlocked
If turnpiece
doesn’t rotate,
repeat steps 4E
and 4F, making
sure to rotate
the turnpiece
AWAY from the
door edge.
L (3x)
J
horizontal
door
edge
45°
IMPORTANT: Rotate the turnpiece AWAY
from the door edge and make sure the latch
is fully retracted (in the unlocked position).
unlocked
Loading ...
Loading ...